UCSD Musculoskeletal Radiology
bonepit.com
Radiographic MSK Projections
|
|
UCSD Musculoskeletal Radiology bonepit.com Radiographic MSK Projections
|
Head to toe radiographic projections. Click on the hyperlinks for technique. Use the back arrow to return to the images.
Head -> Sternum. Clavicle -> Fingers. Chest -> Toes
Townes AP Lateral
Lat OF OM OM30
OF OM Lat
Looking down Looking Up
Lt lat Rt lat OF
OF Reverse OF Lt Lat Rt Lat
Lateral AP Open Mouth Swimmers
Lateral Extension Lateral Flexion Oblique LPO Oblique RPO Fuchs
PA Obl AP Serendipity
Lat RAO LAO
AP 10 deg cephalad
AP with weight AP without weight
Scapula Lat Scapula AP Ab
External rotation Neutral rotation Internal rotation Grashey Lateral Axial
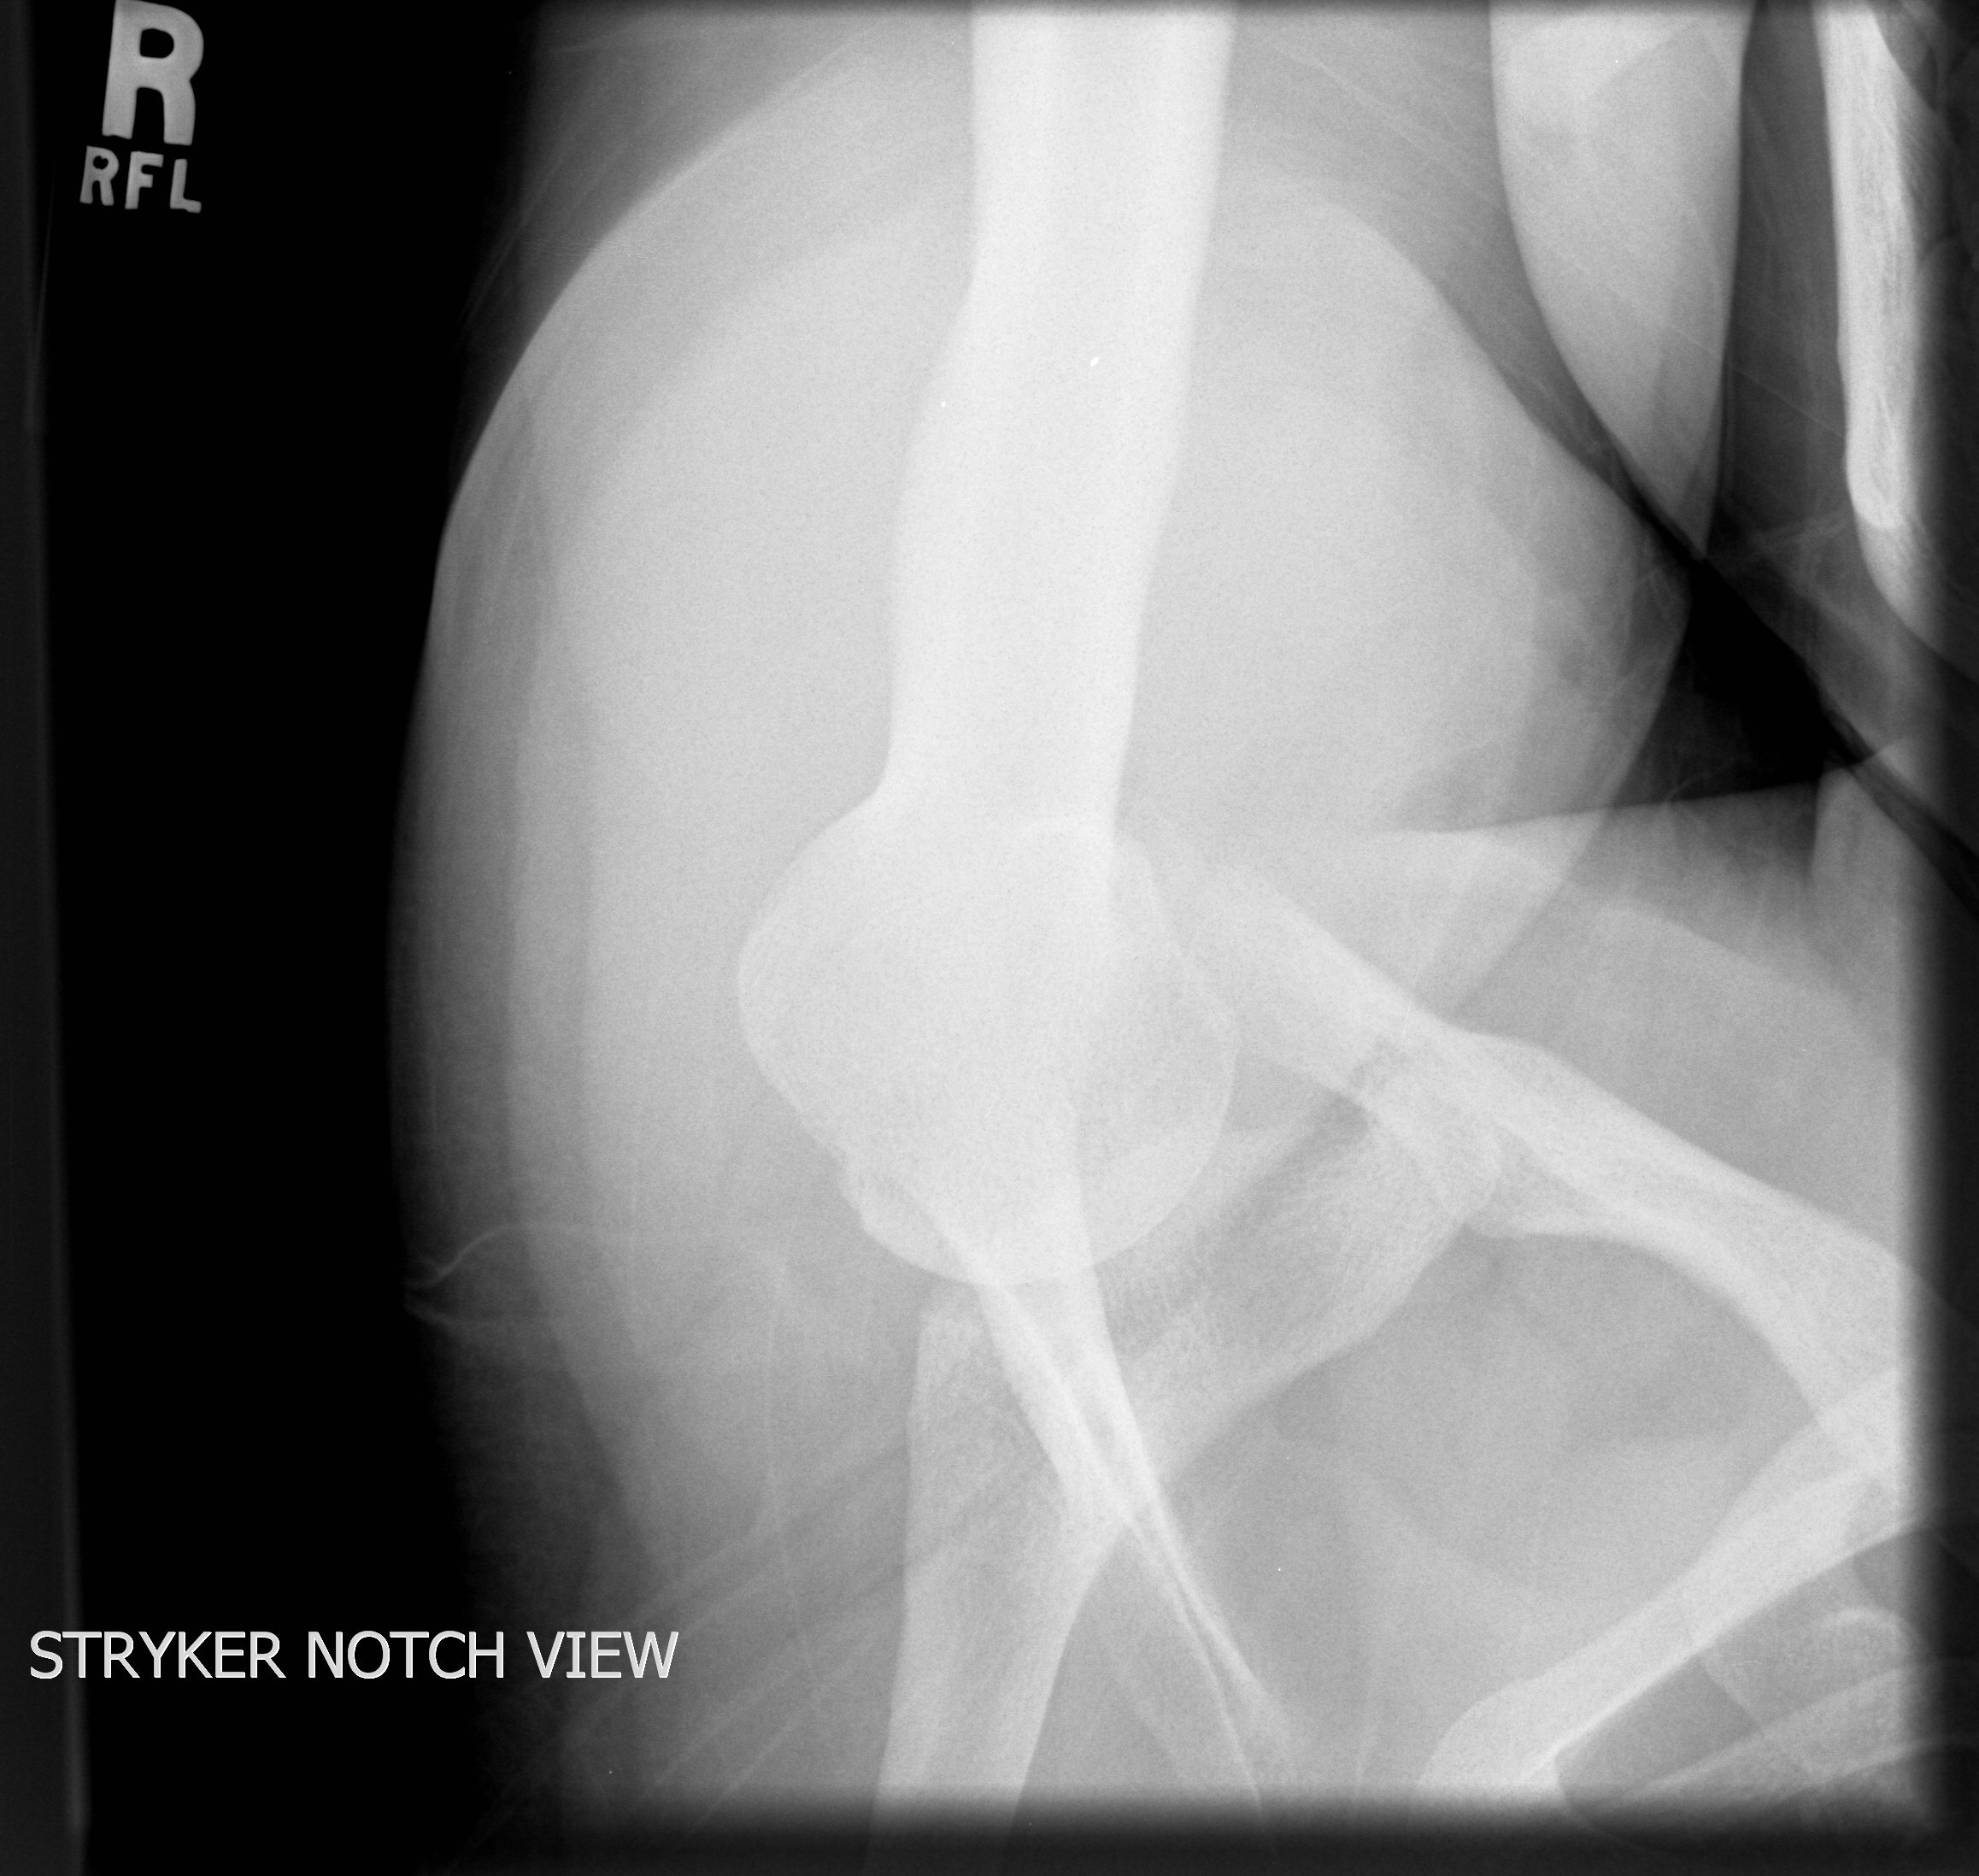
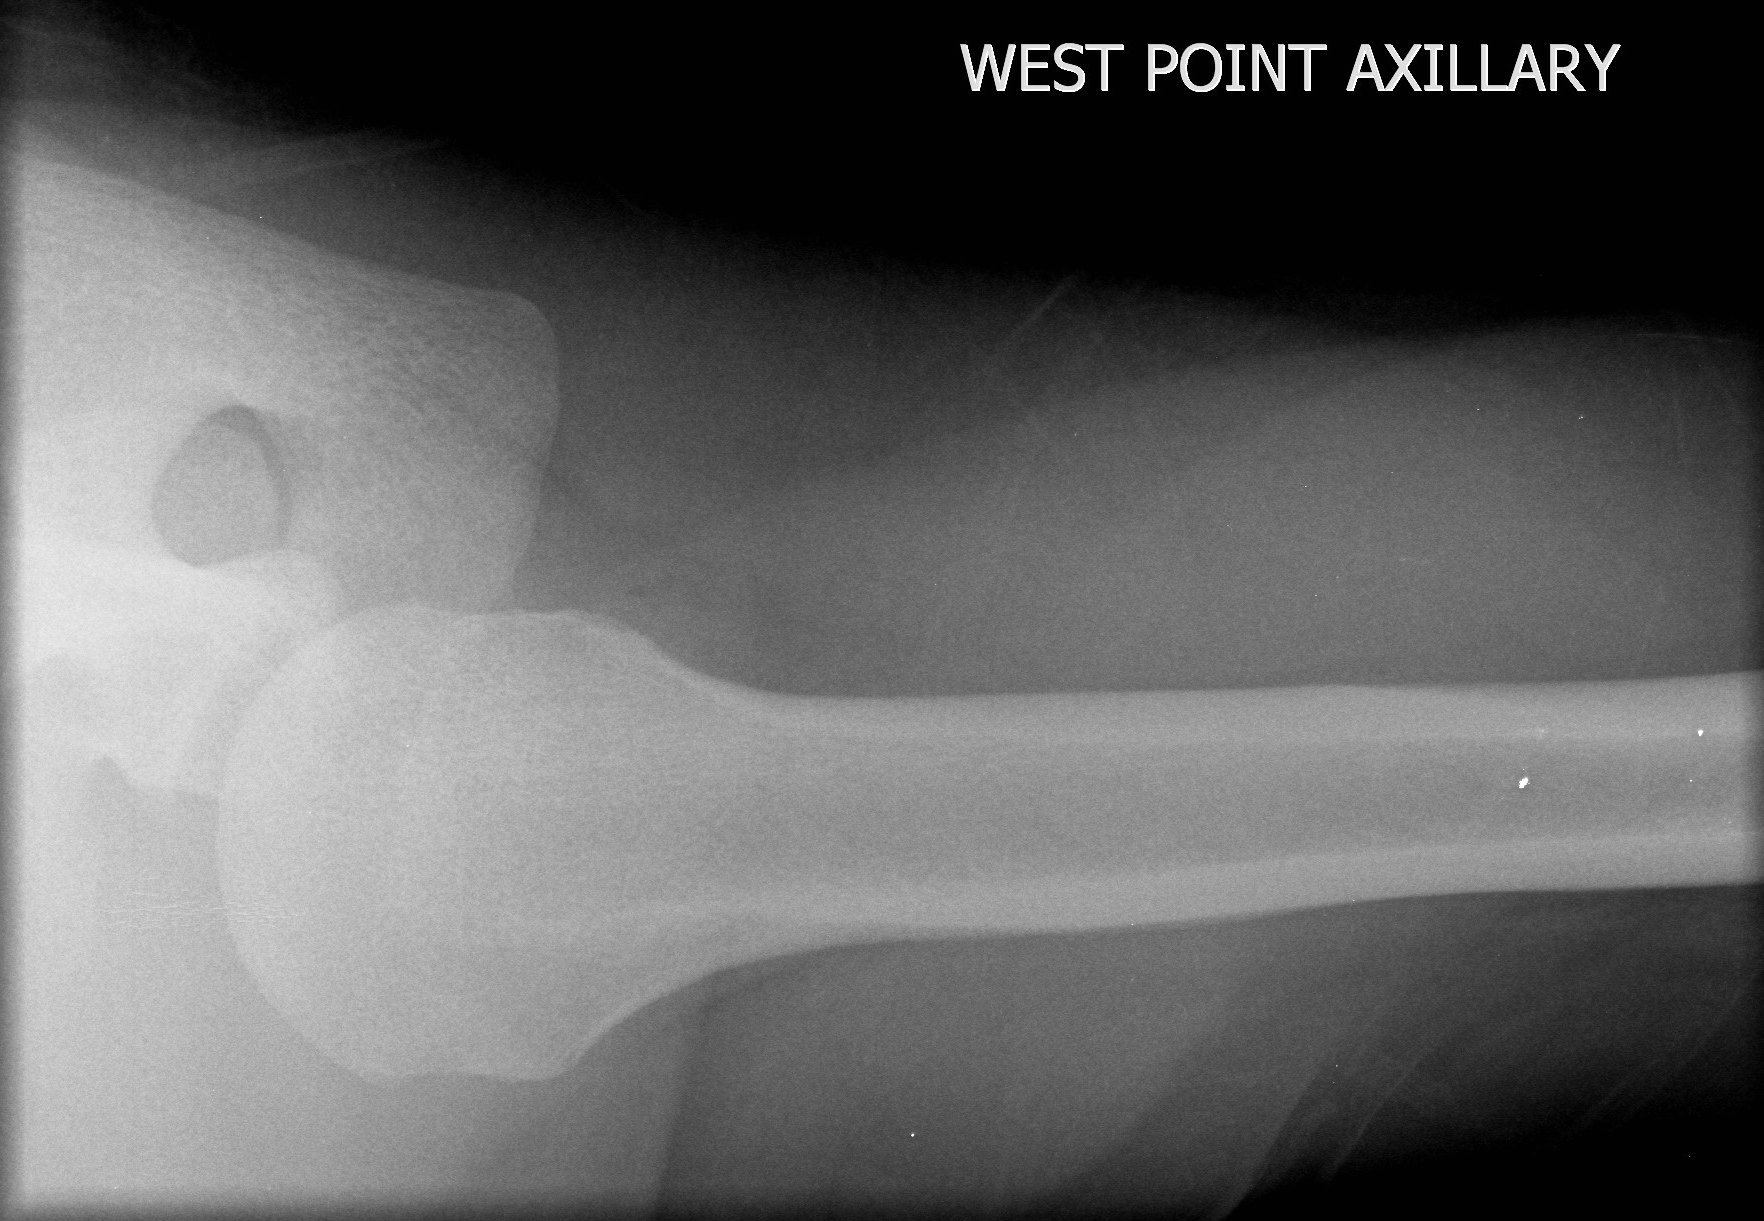
Stryker notch Westpoint Velpeau
Proximal Lat Proximal AP Distal Lat Distal AP
AP Lateral Supinated Obl Pronated Obl Radial head Cubital tunnel
AP Lat
Lat Obl PA
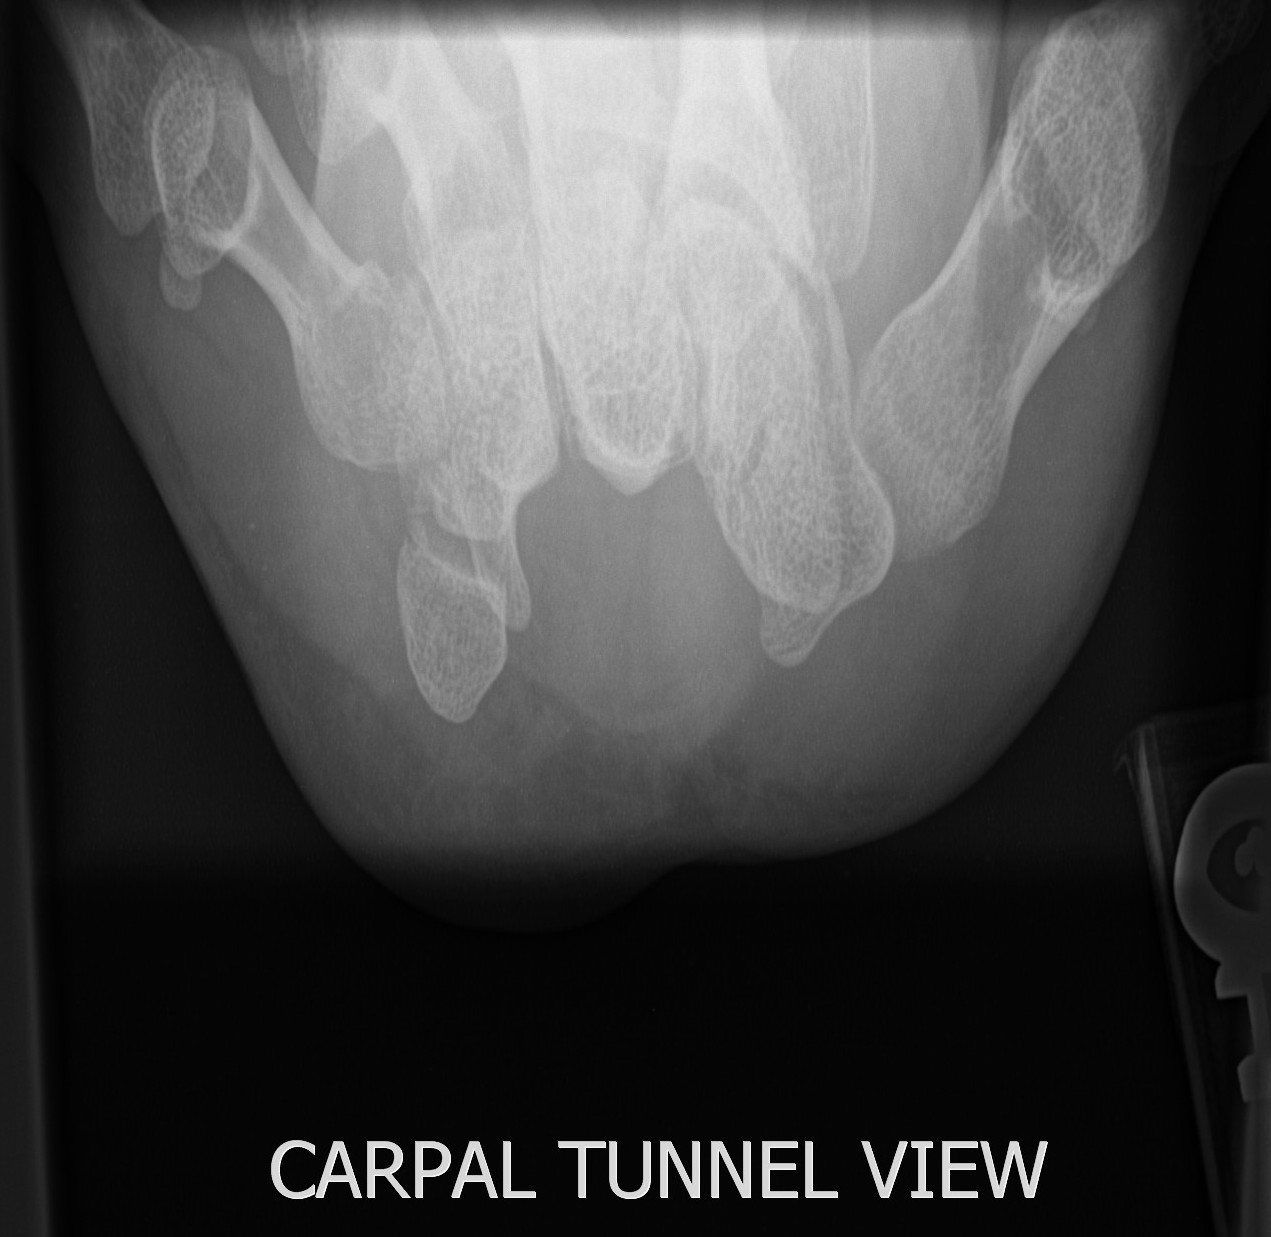
Clenched fist Scaphoid Carpal tunnel
PA Ballcatchers Norgard
Lateral 3 Obl Lateral 4 PA
Lateral PA PA hand
PA Lat RAO Coned bb
AP Lateral RPO LPO
AP Lat
AP Rt flex Lt flex
Lat AP RPO LPO Flex Ext
Lateral Inlet AP
AP RPO LPO
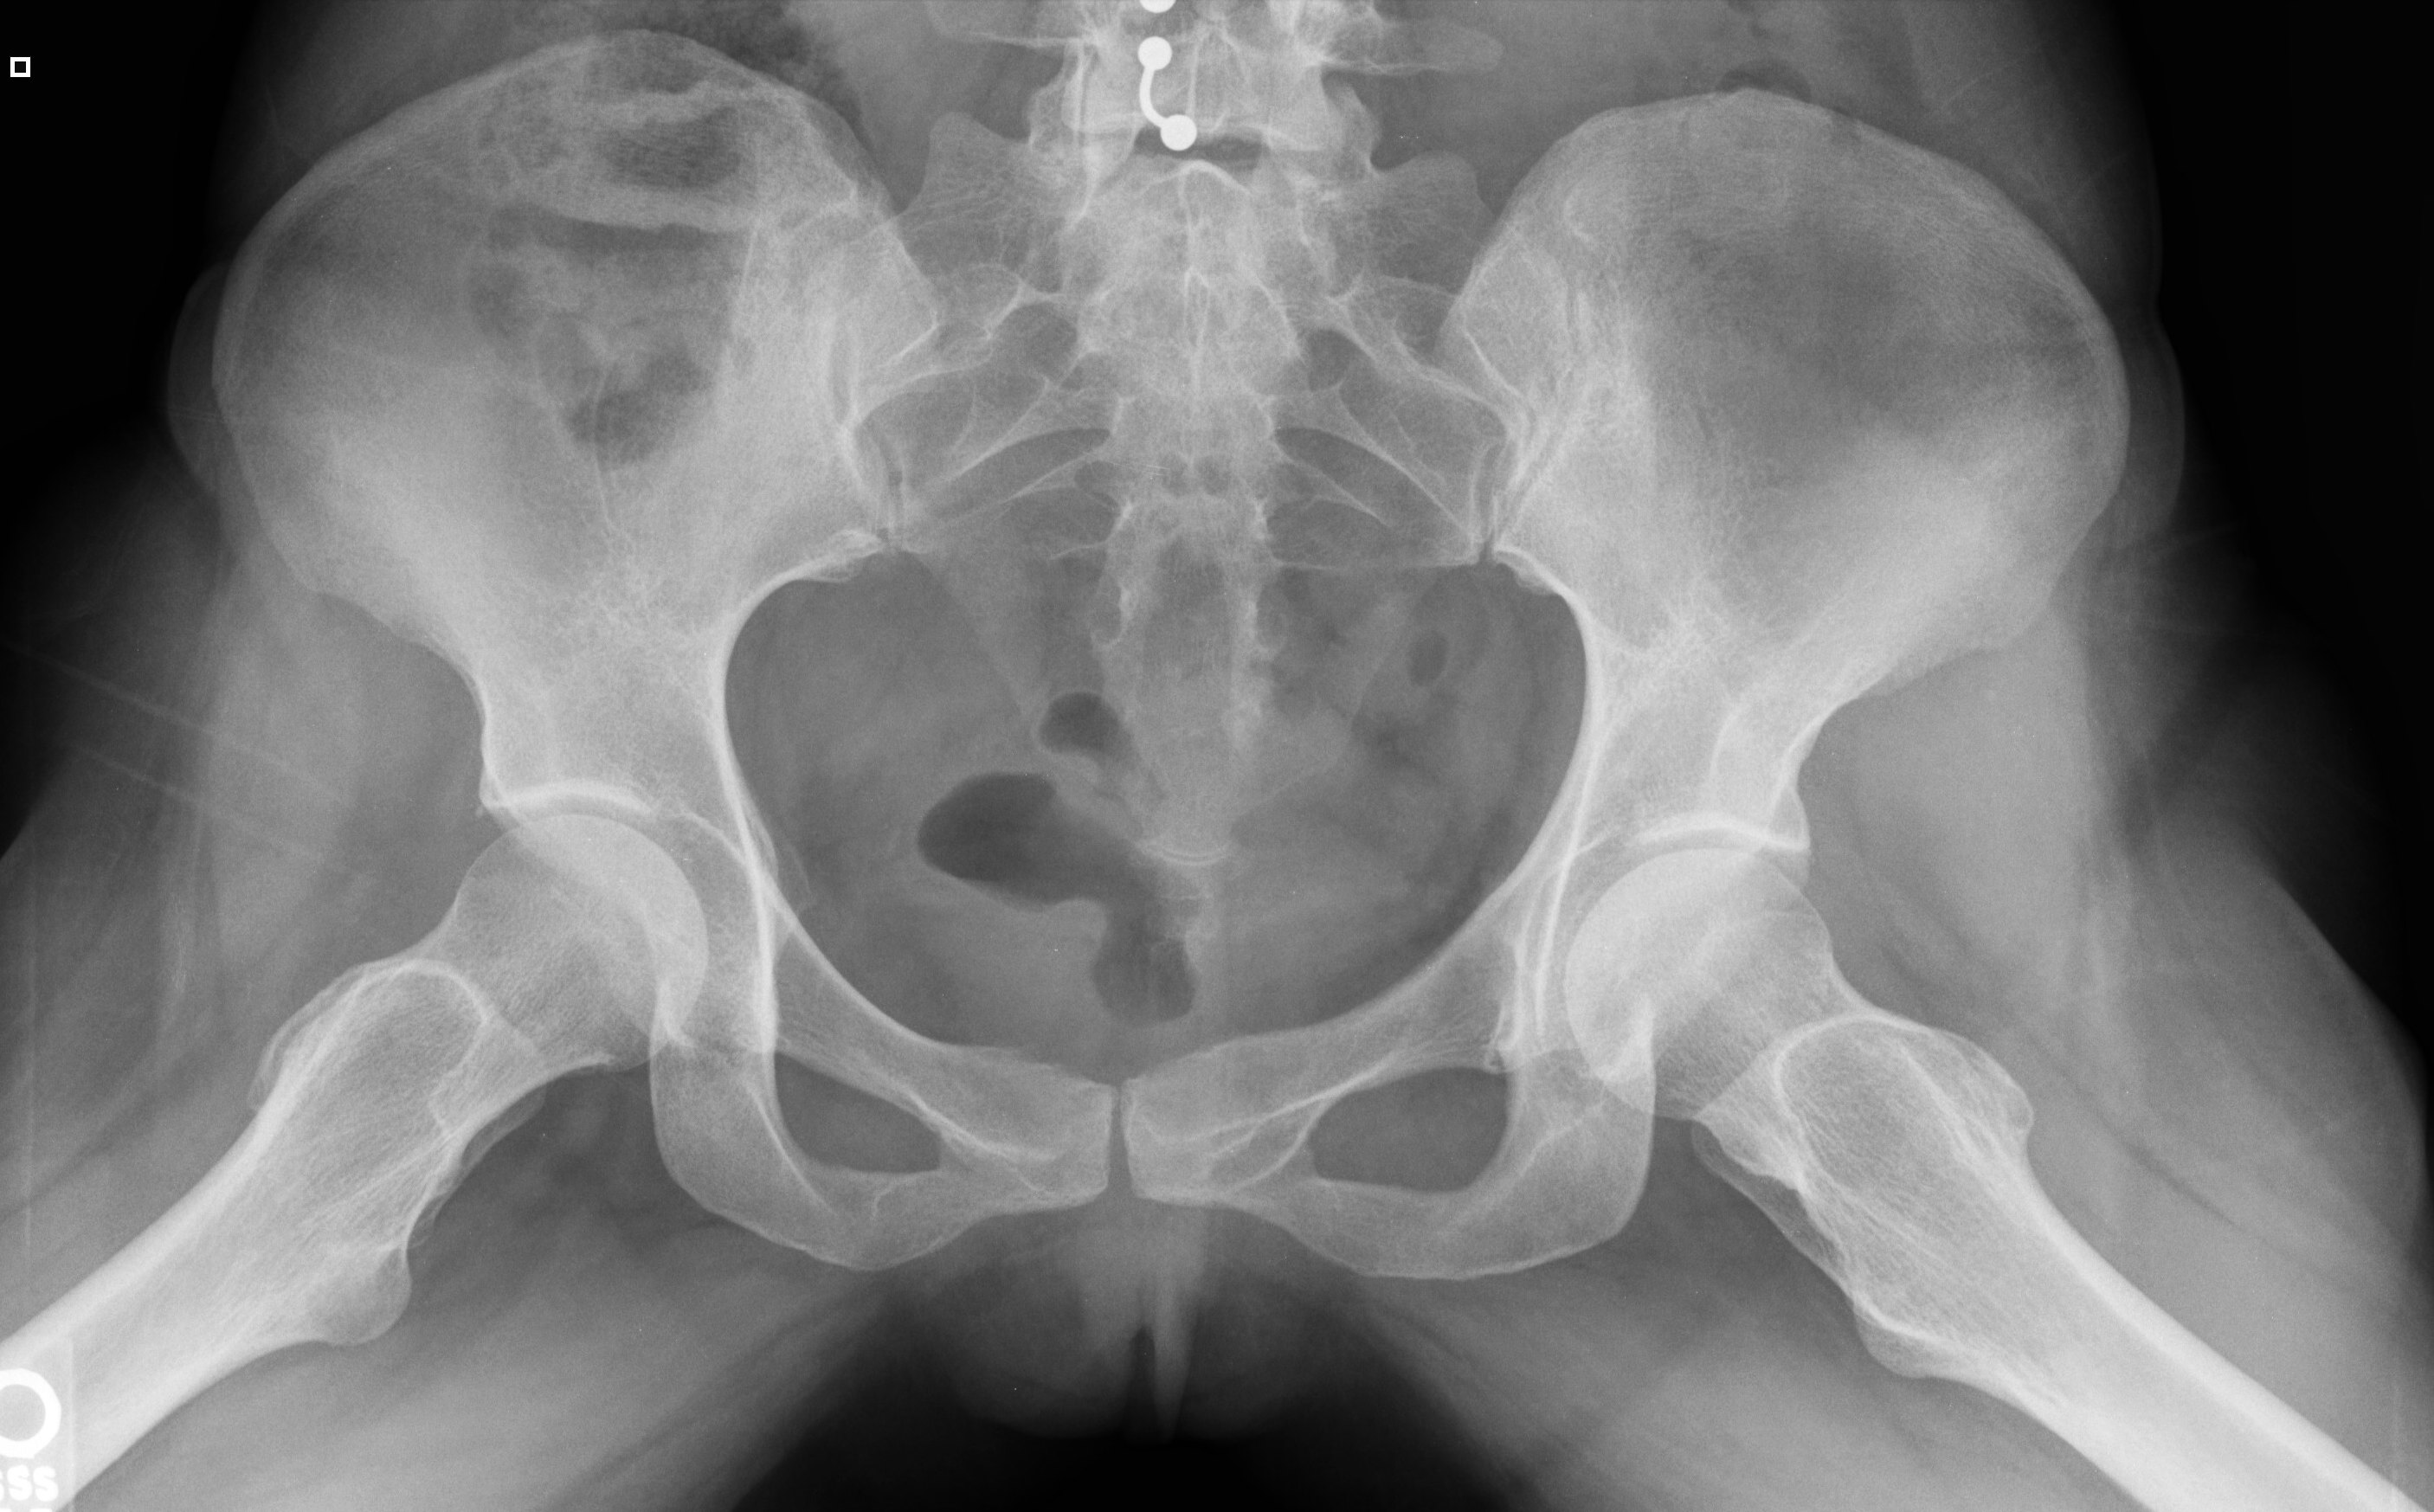
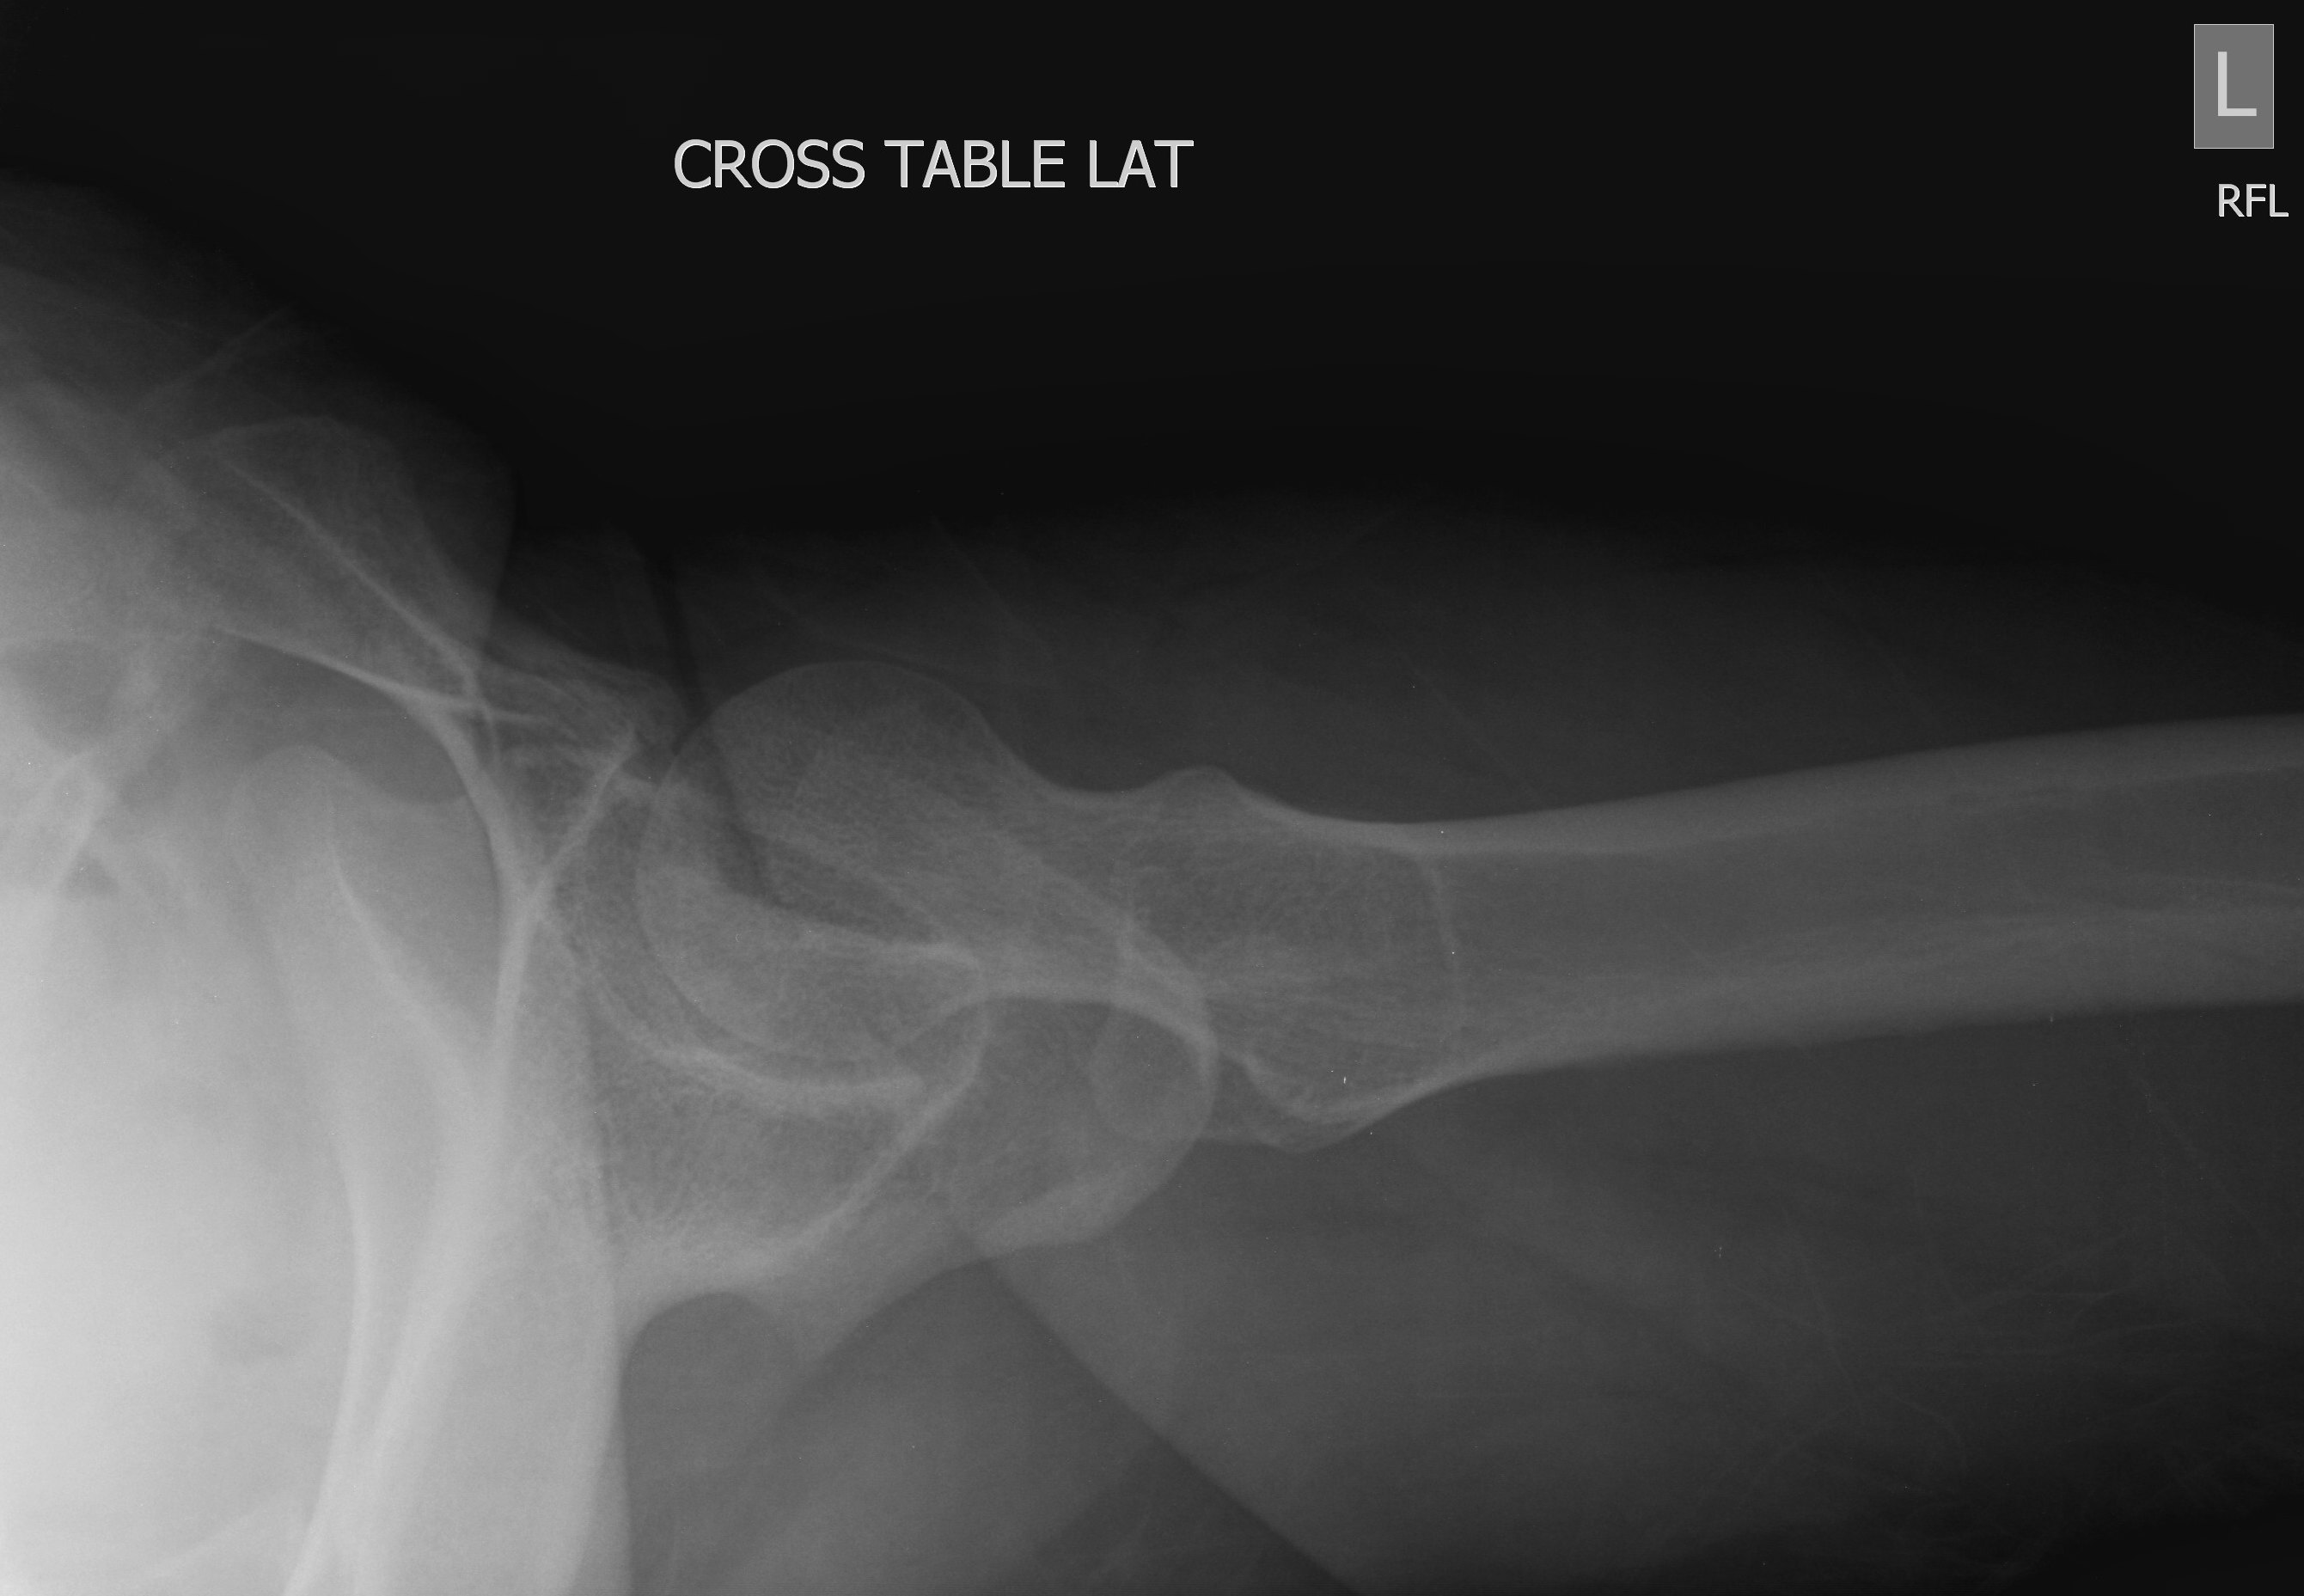
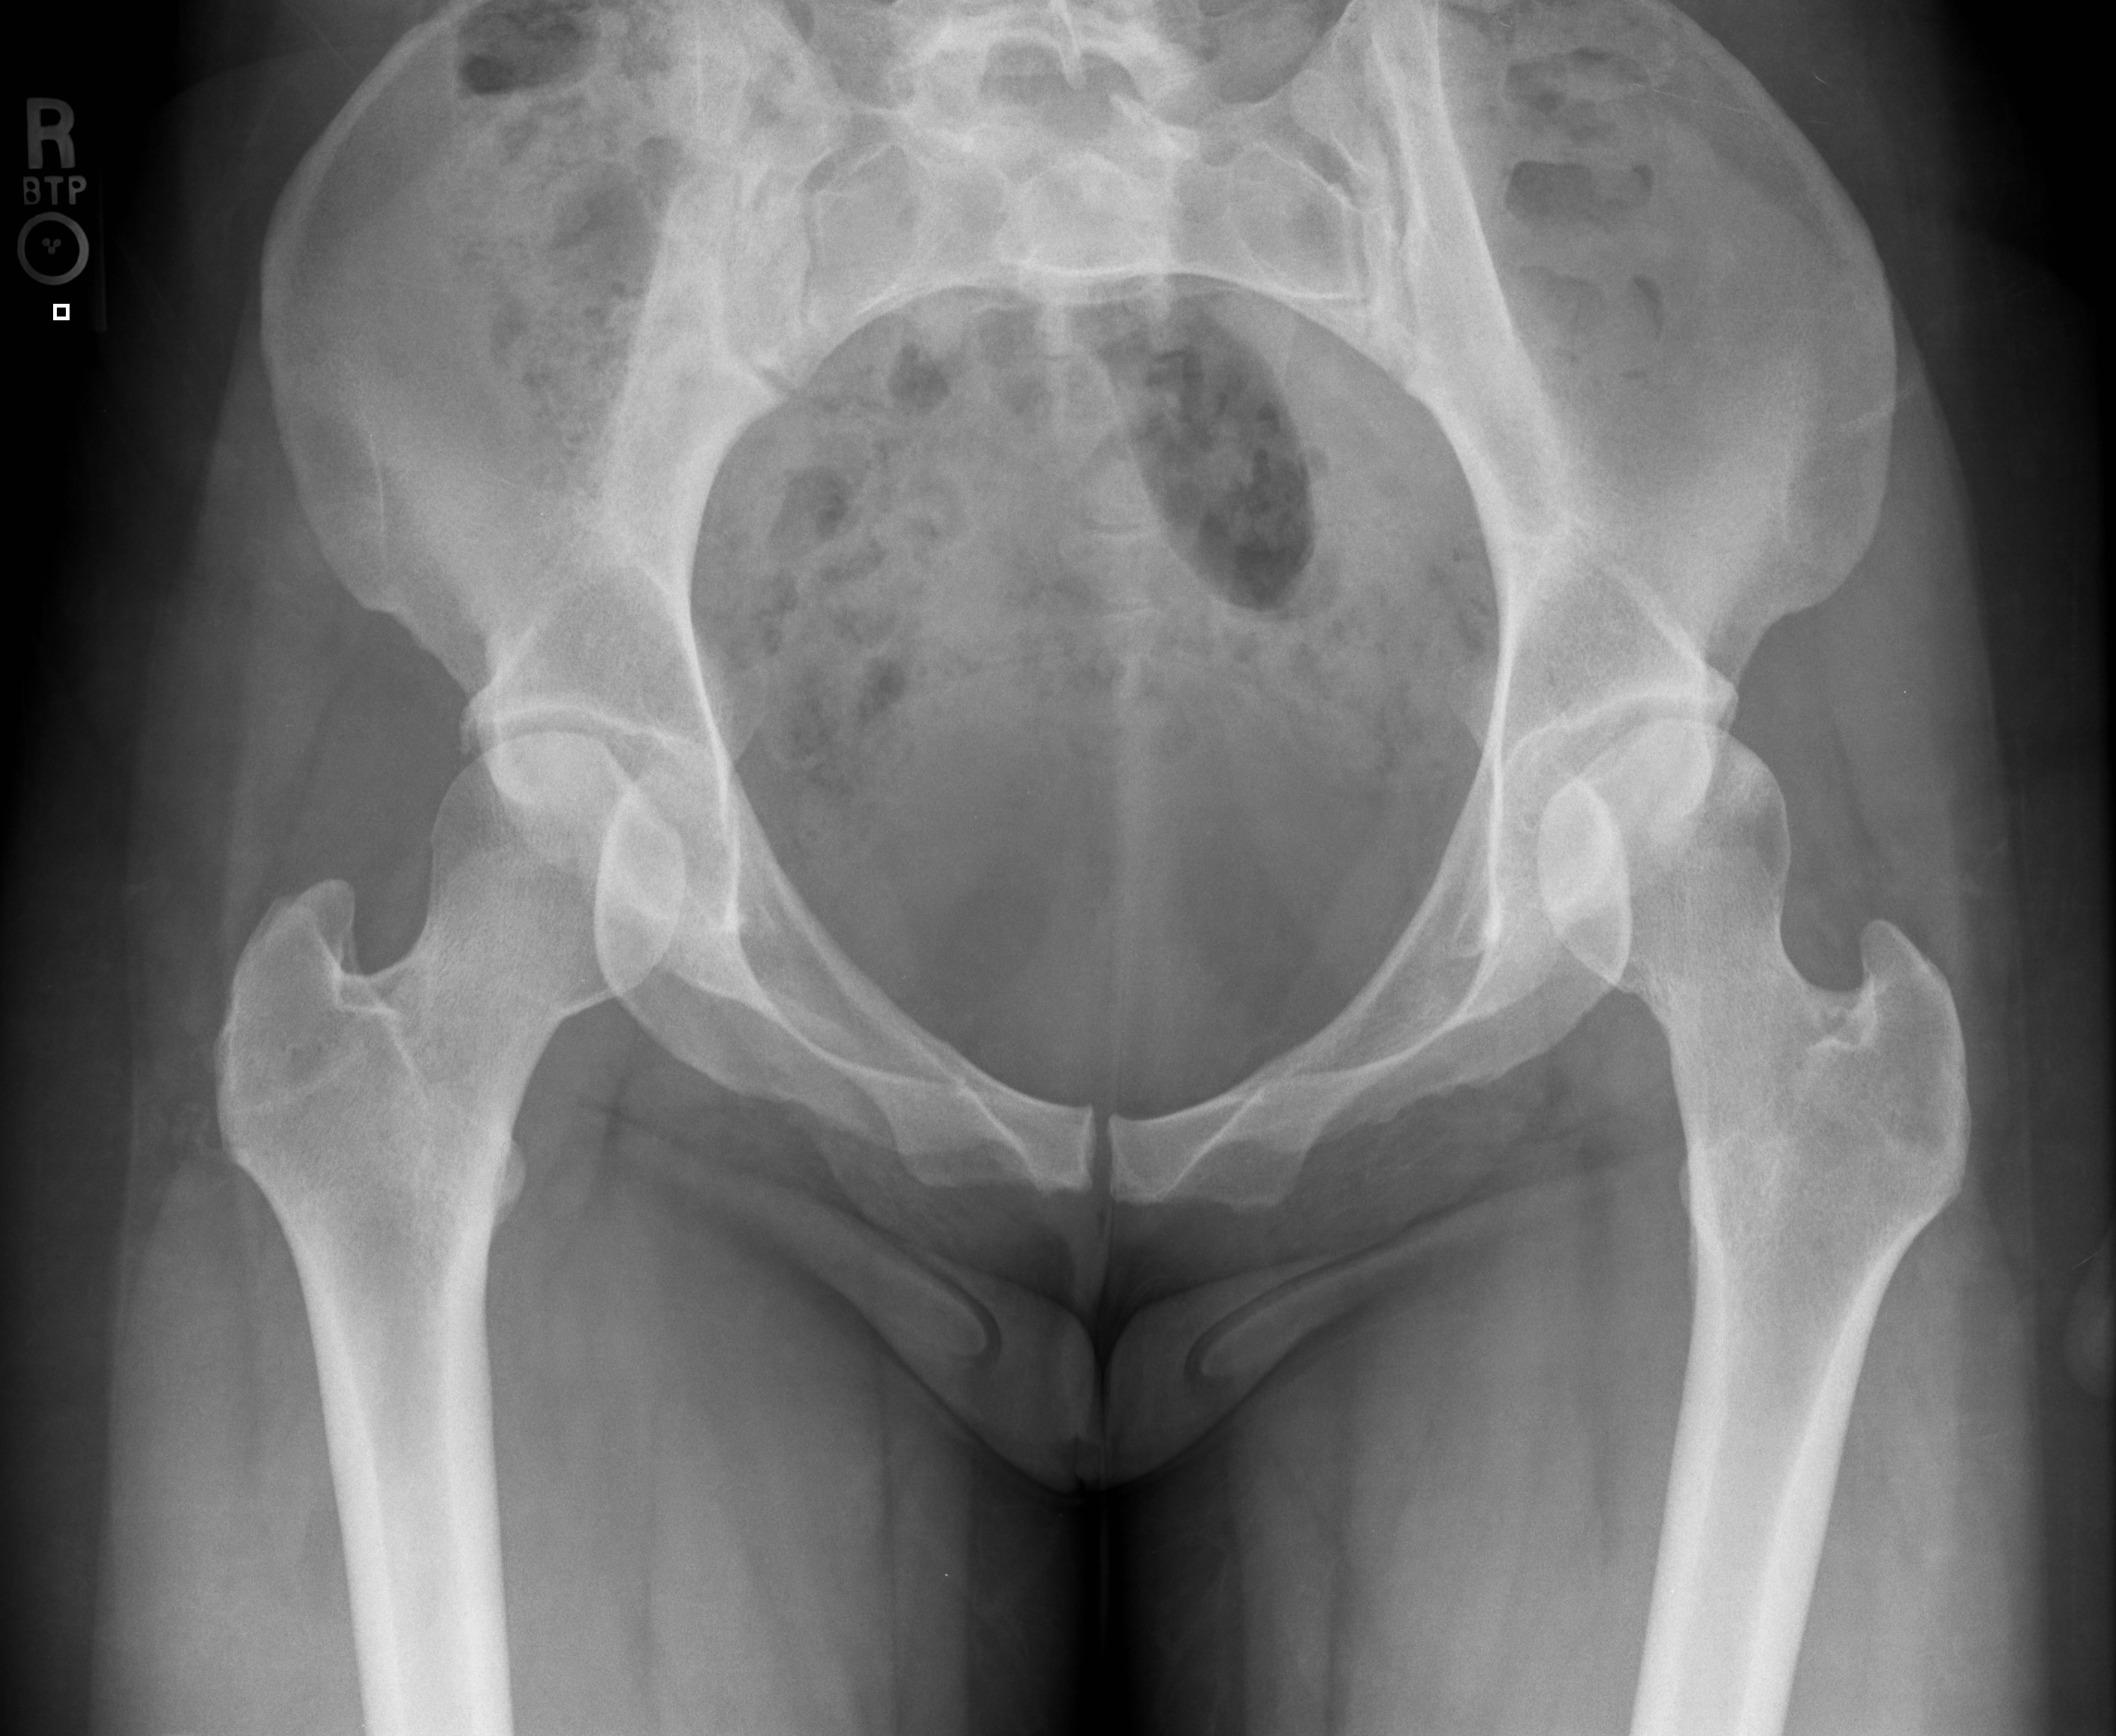
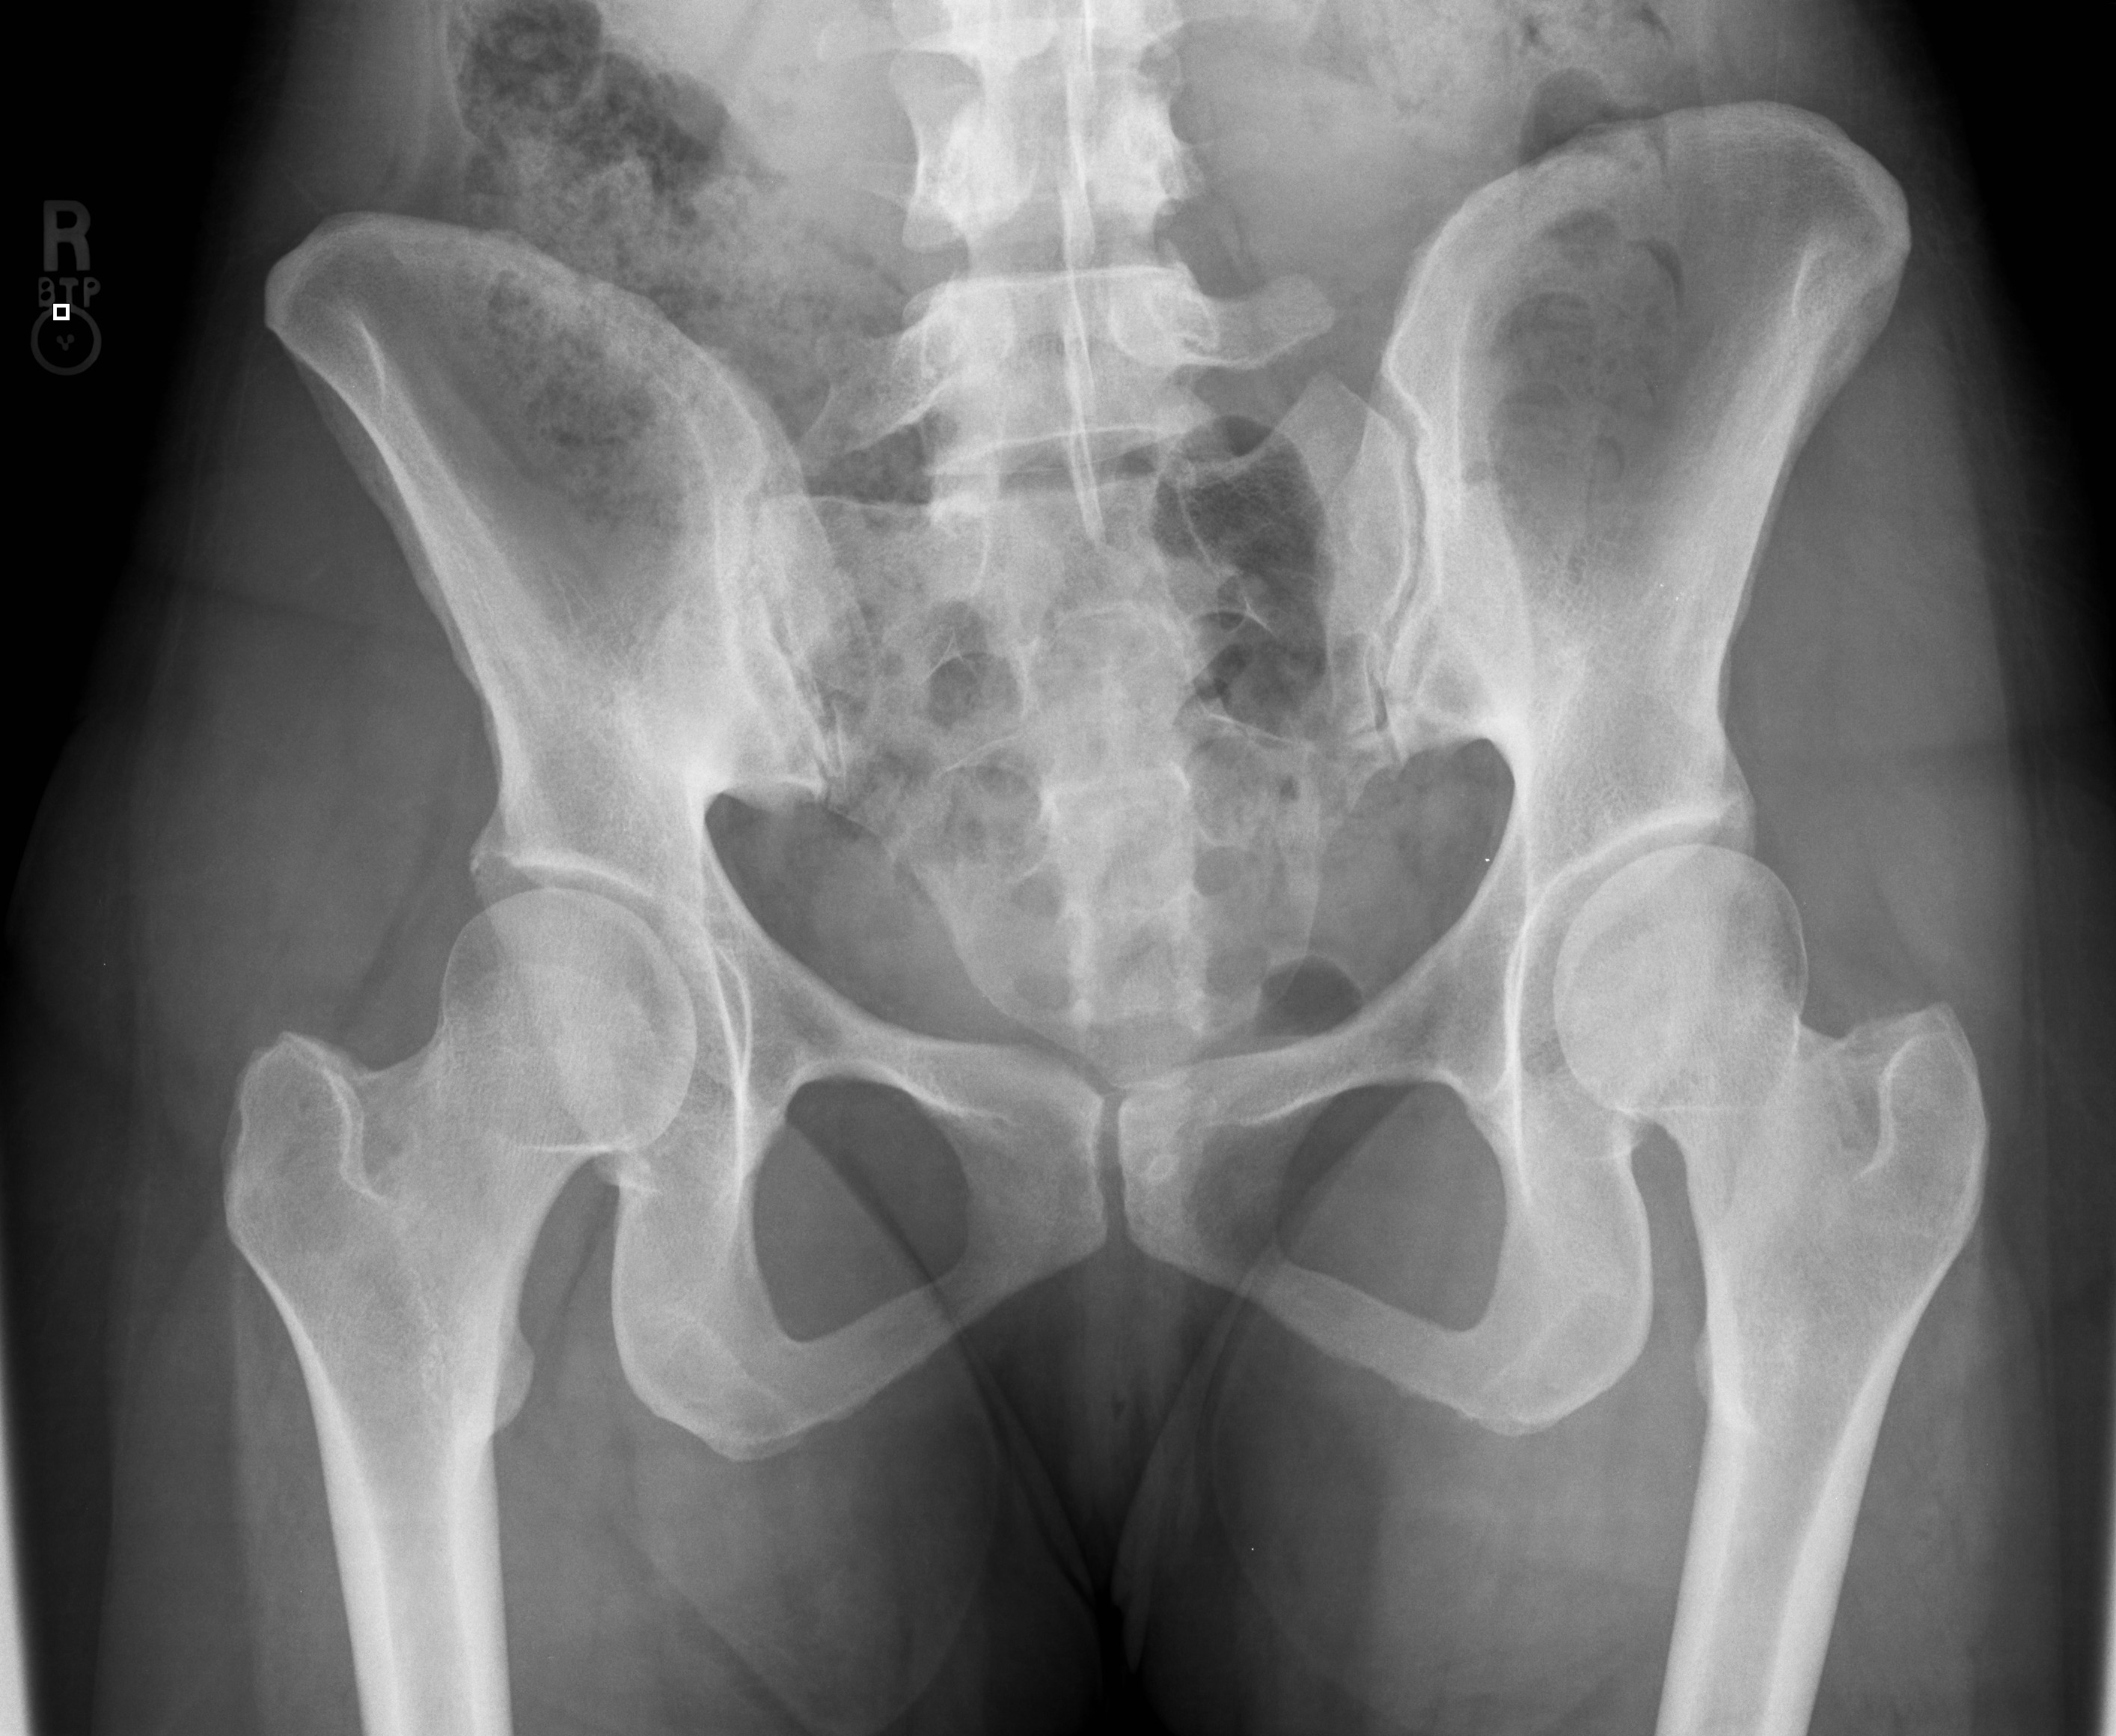
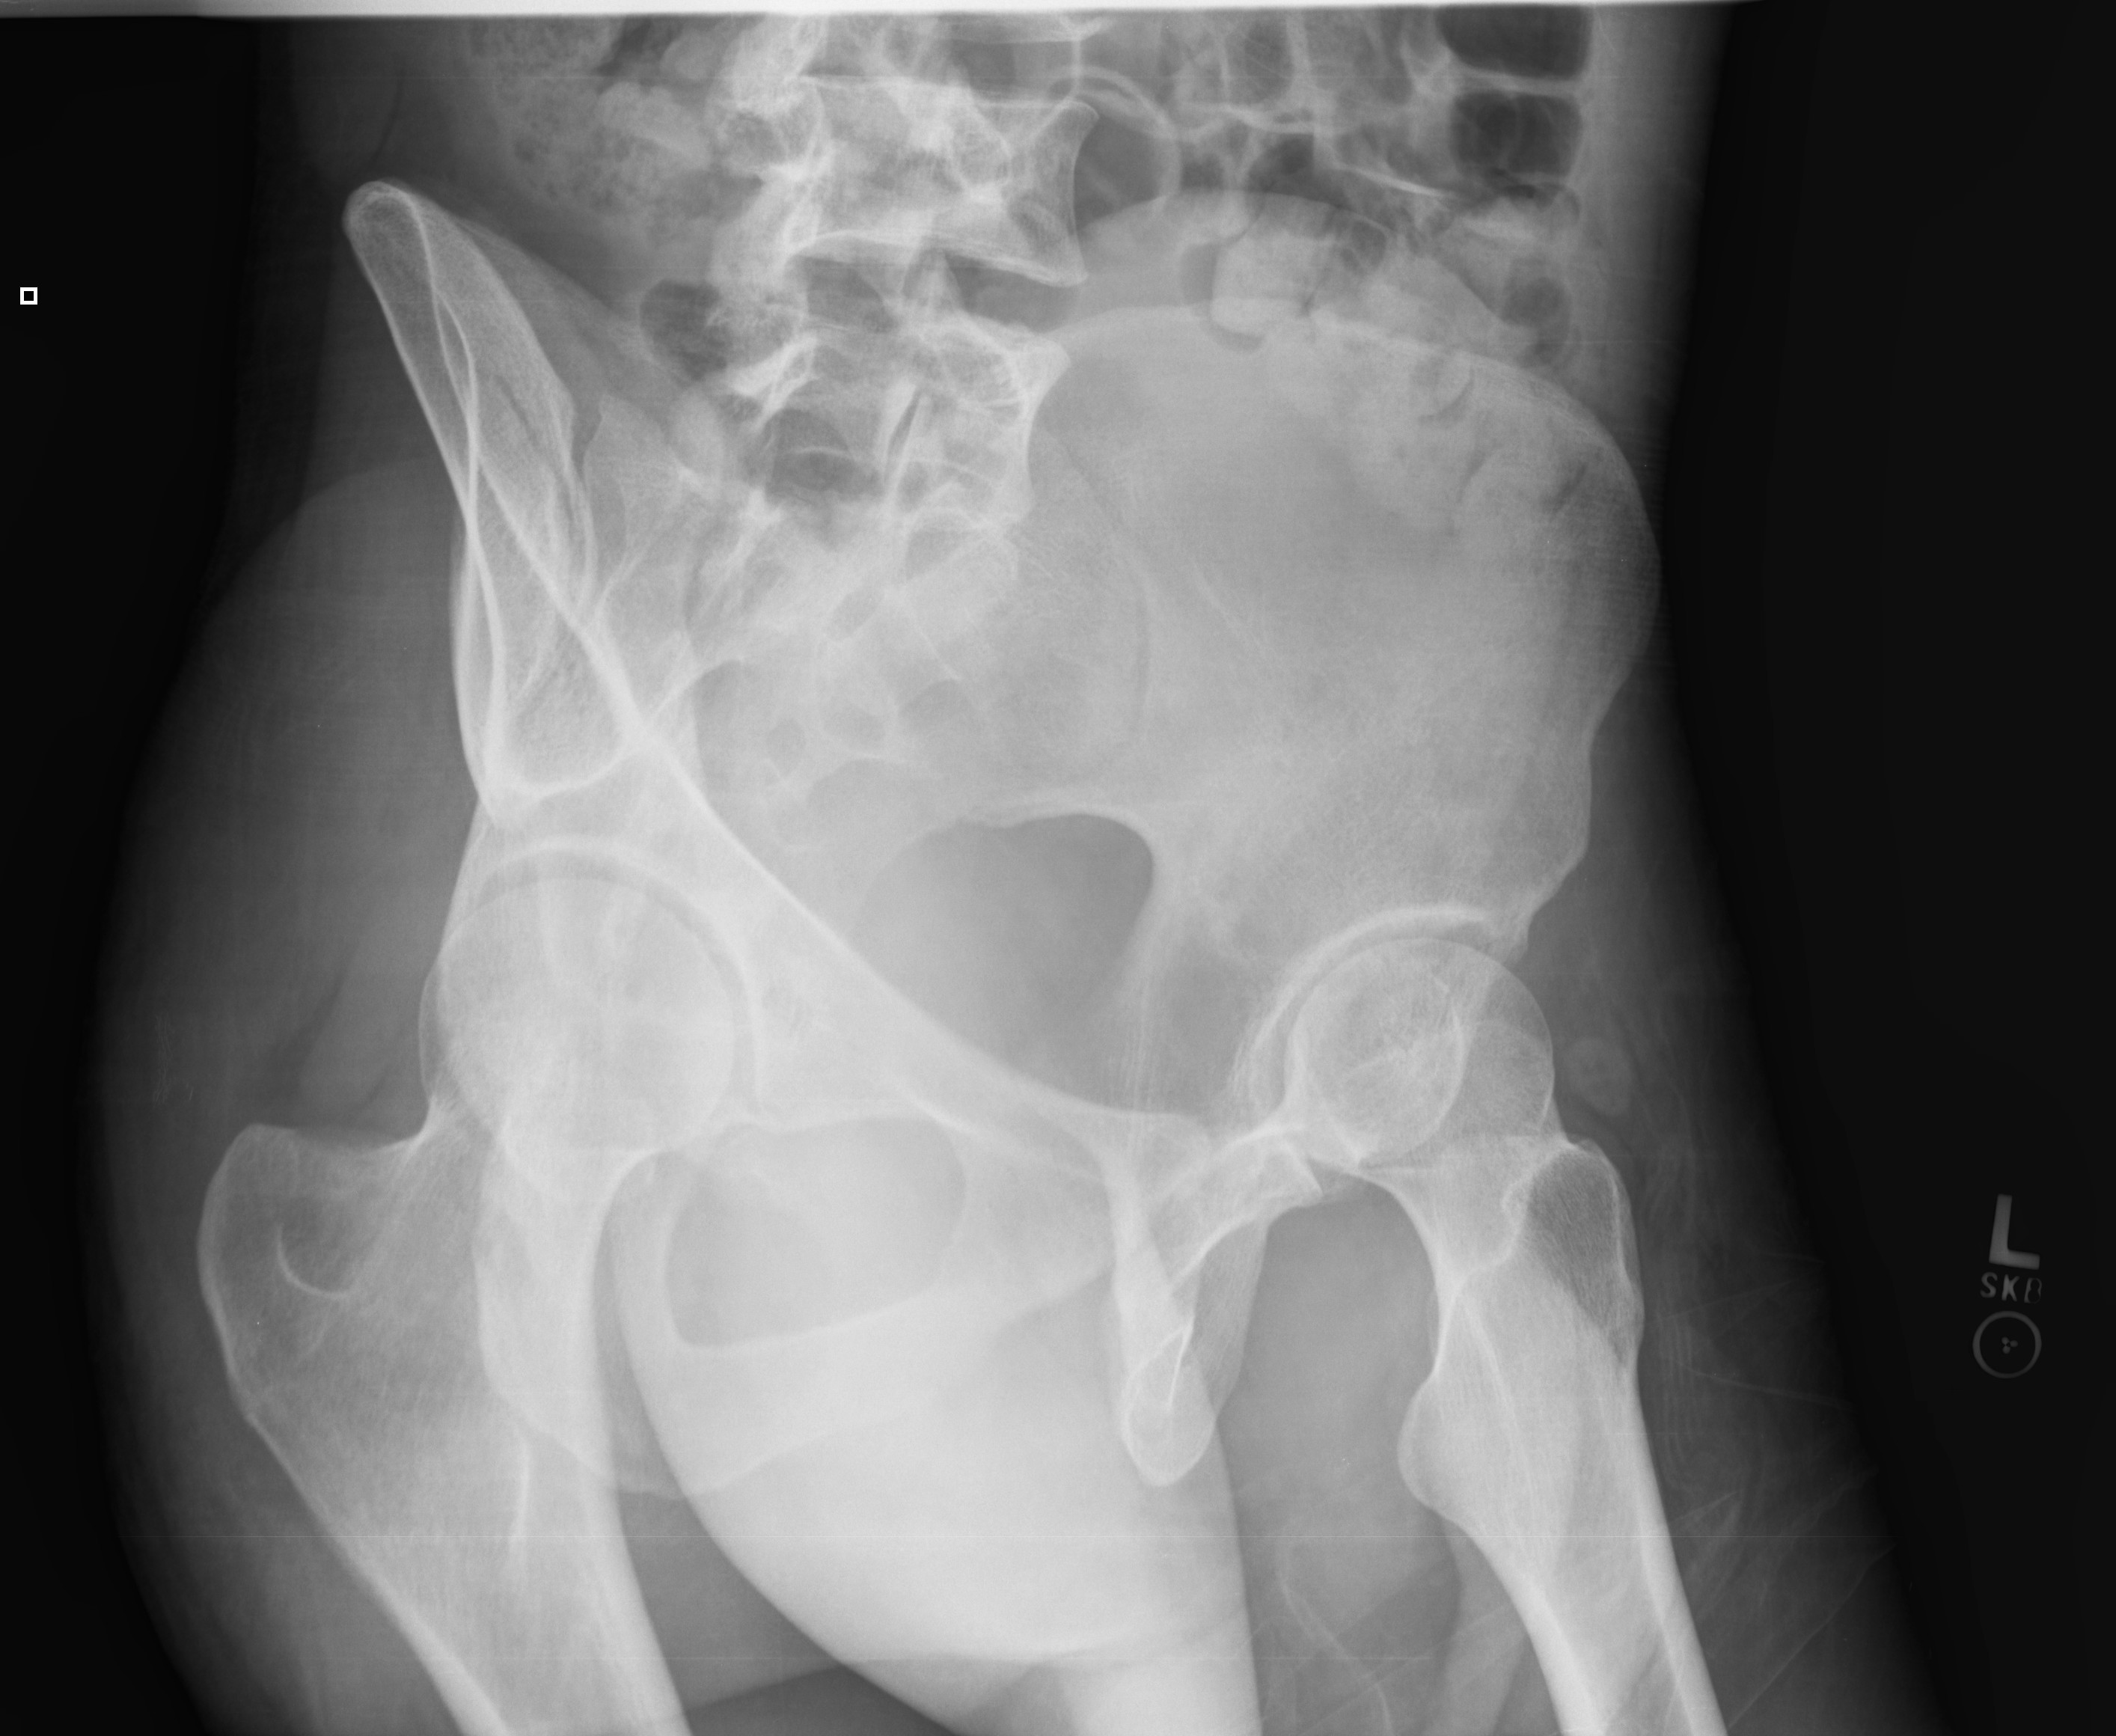
Pelvis AP Pelvis frog leg Shoot through lateral
Inlet/Outlet Inlet Outlet
Obliques RPO oblique LPO oblique
Judet views Lt iliac LPO Rt obturator LPO Lt obturator RPO Rt iliac RPO
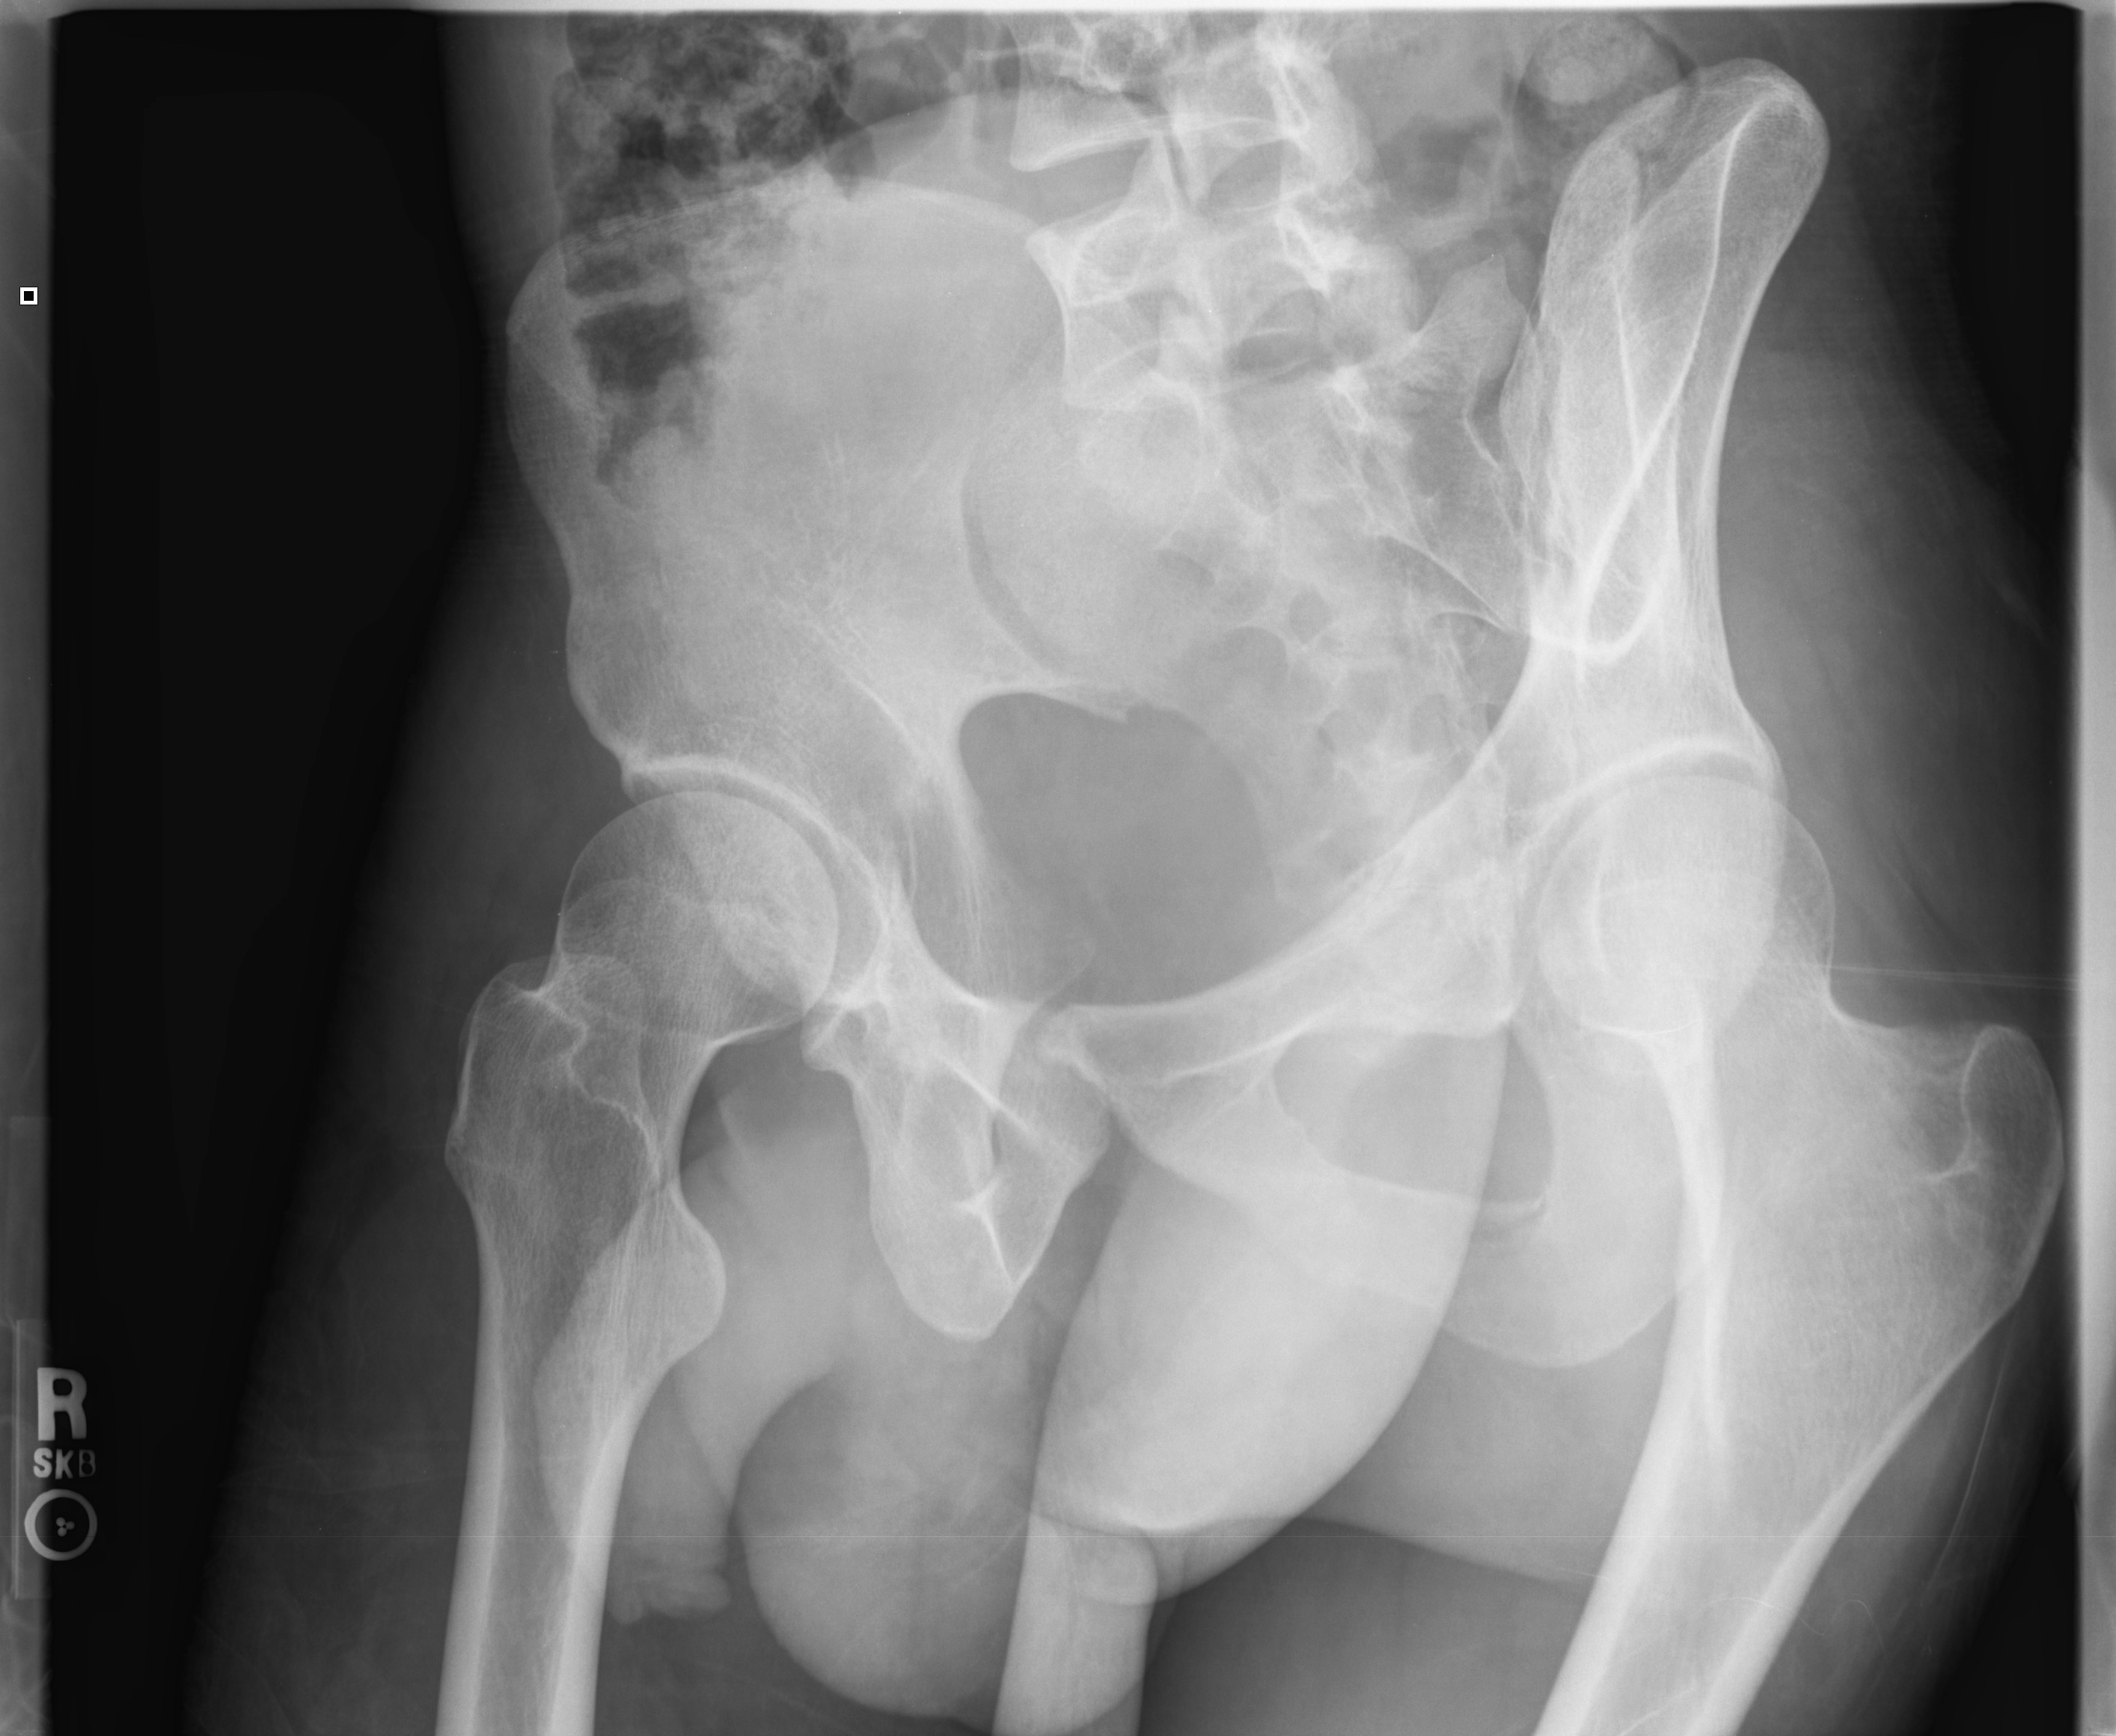
AP Frog lateral
Dunn 90 False profile
Pelvis AP Shoot through lateral
AP upper AP lower Lat upper Lat lower
AP upper AP lower Lat upper Lat lower
With grid
Iliac Hips
AP standing
AP Lat Obl IR Obl ER Shoot X Table Merchant
Rosenberg Sunrise
AP Lat
Lat Lat WB Mortise AP WB
Broden Broden neutral Broden Inversion stress
Axial Lat
PA Obl Lat Sessamoid
Obl PA Lat
CRANIUM RADIOGRAPHY
I. Use 40" SID and small focal spot whenever possible.
II. All requests will need to be evaluated by the Neuroradiologist. Study of choice is usually CT/MRI.
III. For best images, always use the smallest receptor size.
|
CRANIUM |
|||
|
Exams/Views |
Image receptor size and orientation |
Patient position relative to image receptor |
Central ray (CR) direction |
|
|
|||
|
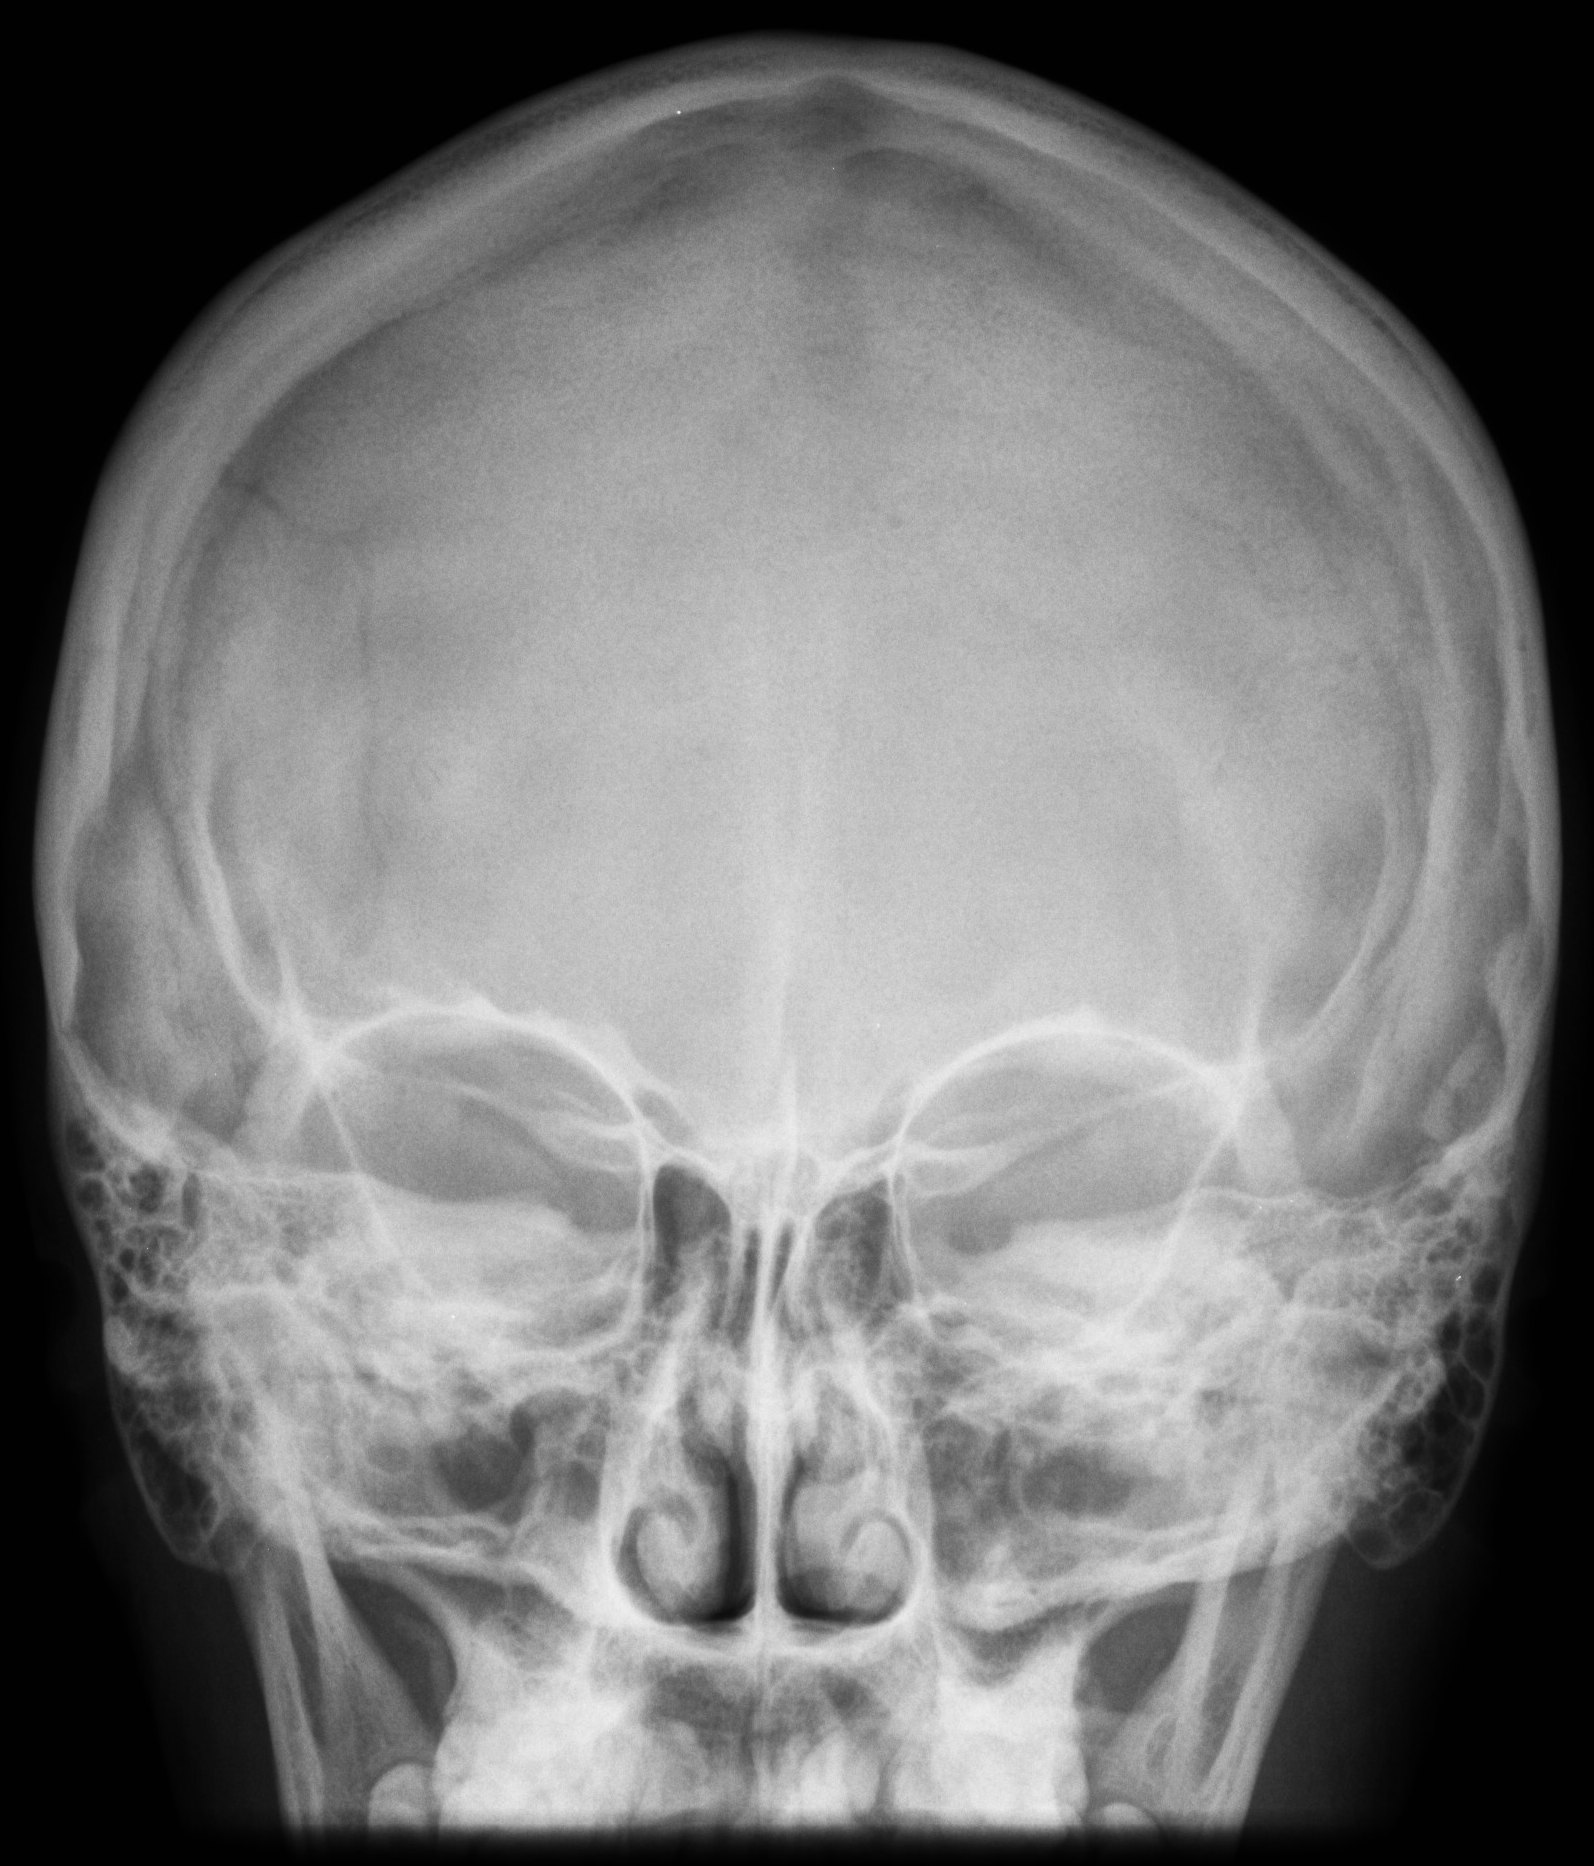
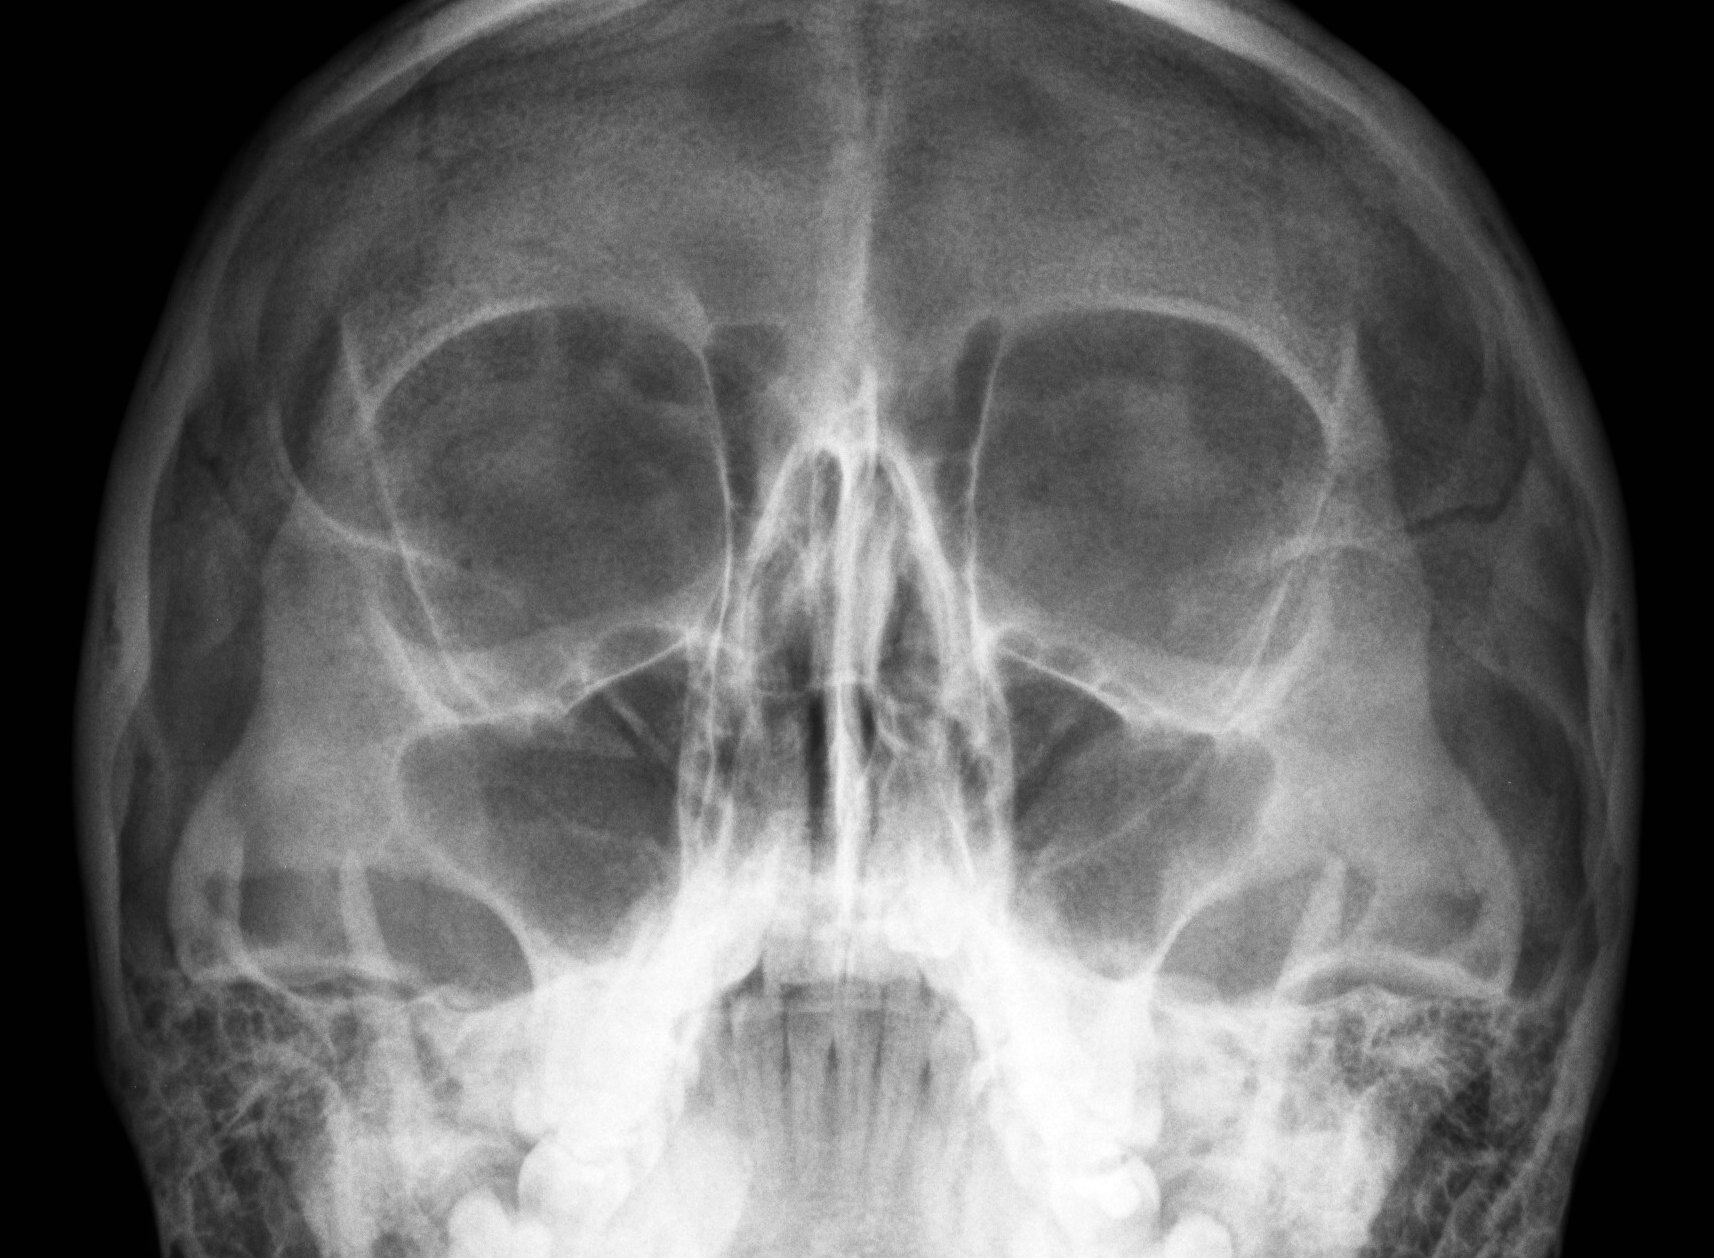
4. PA - zero (0) tube angle |
10x12 LW |
OML perpendicular, MSP perpendicular |
CR perpendicular to image receptor, exits at glabella |
|
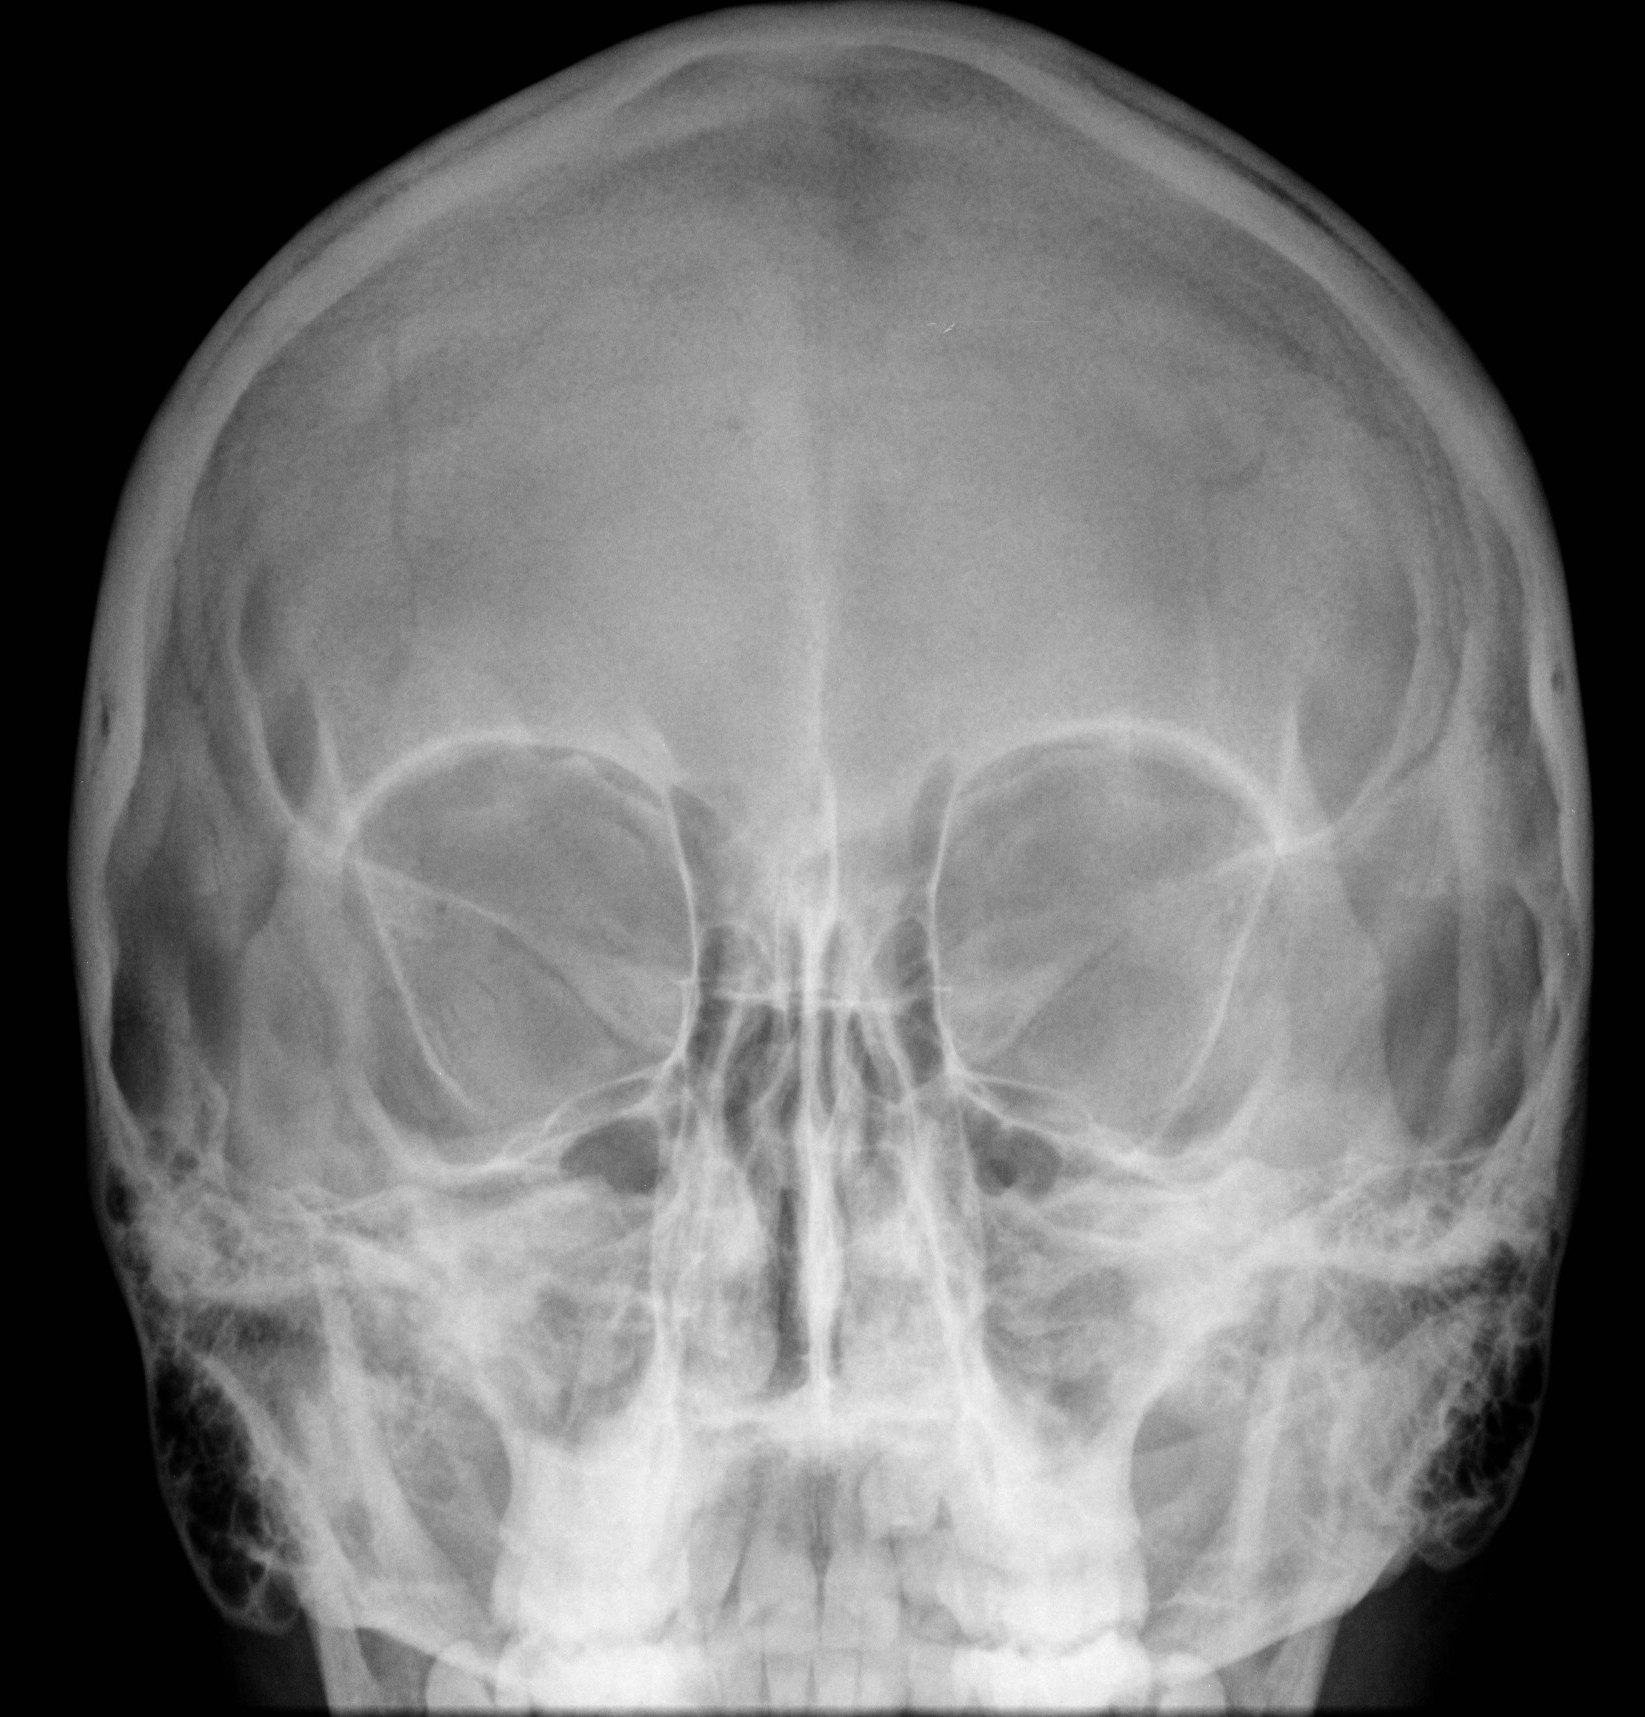
5. PA Caldwell- 23º tube angle |
10x12 LW |
OML perpendicular, MSP perpendicular |
CR 23°caudad, exits at nasion |
|
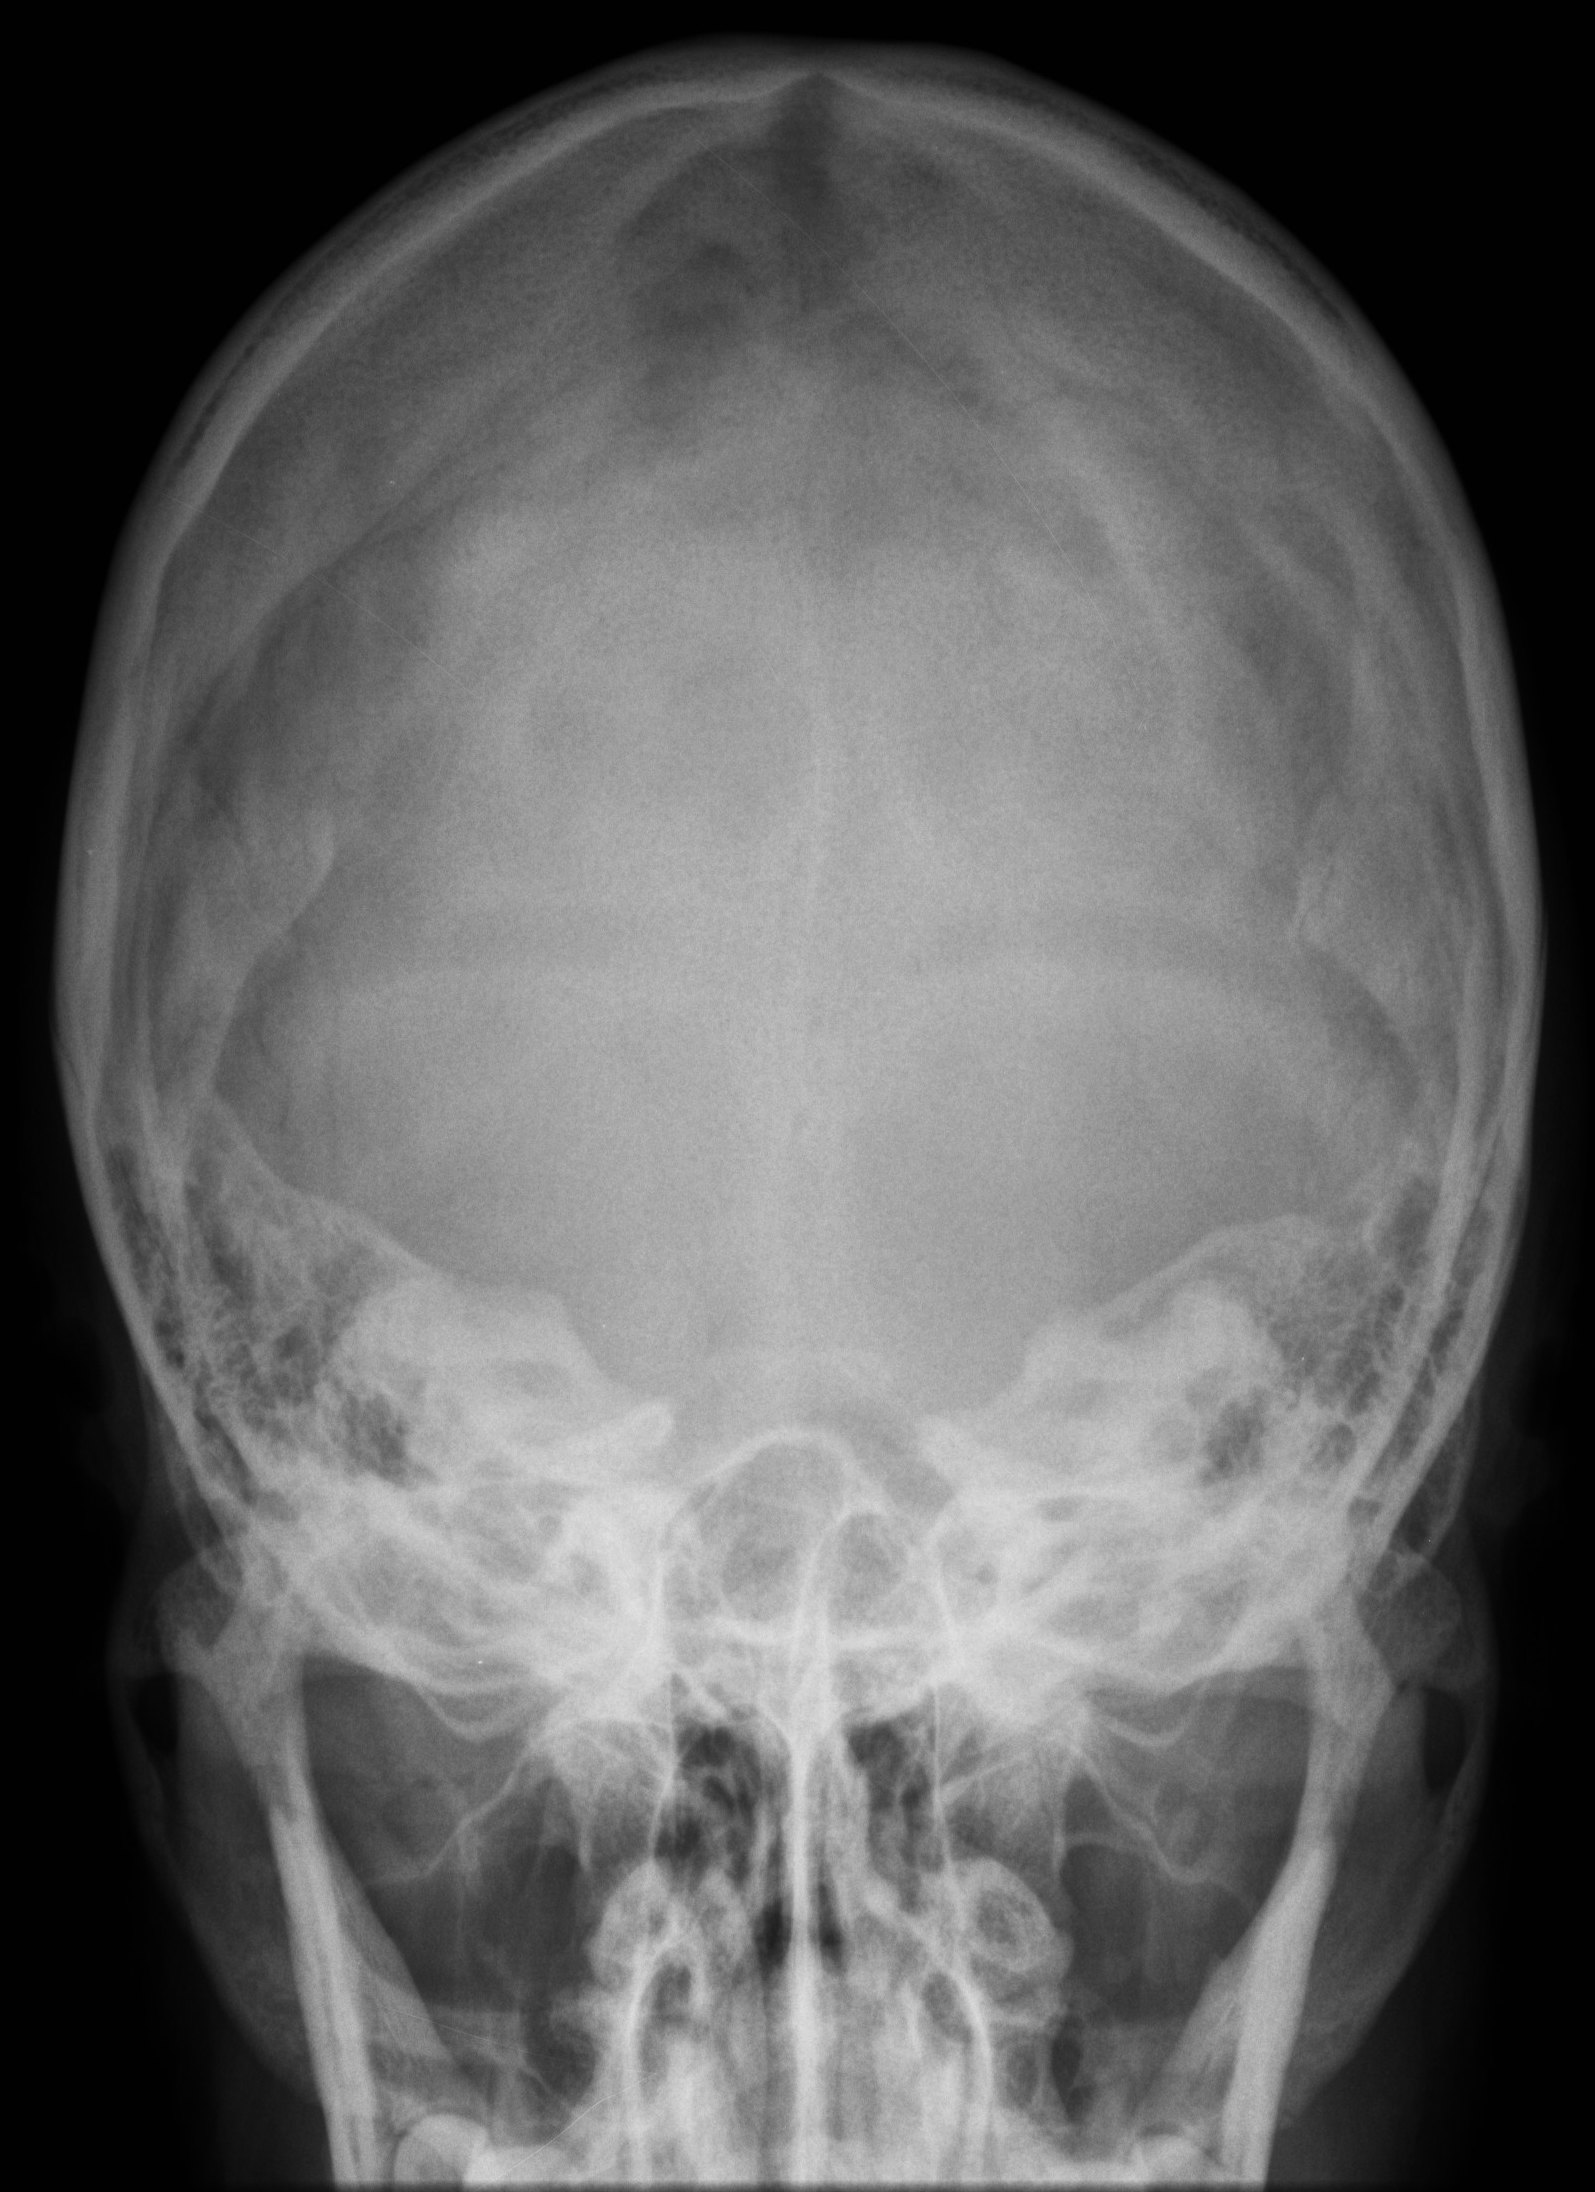
6. AP axial (Townes) |
10x12 LW |
OML perpendicular, MSP perpendicular |
CR 30° caudad, exits inion |
|
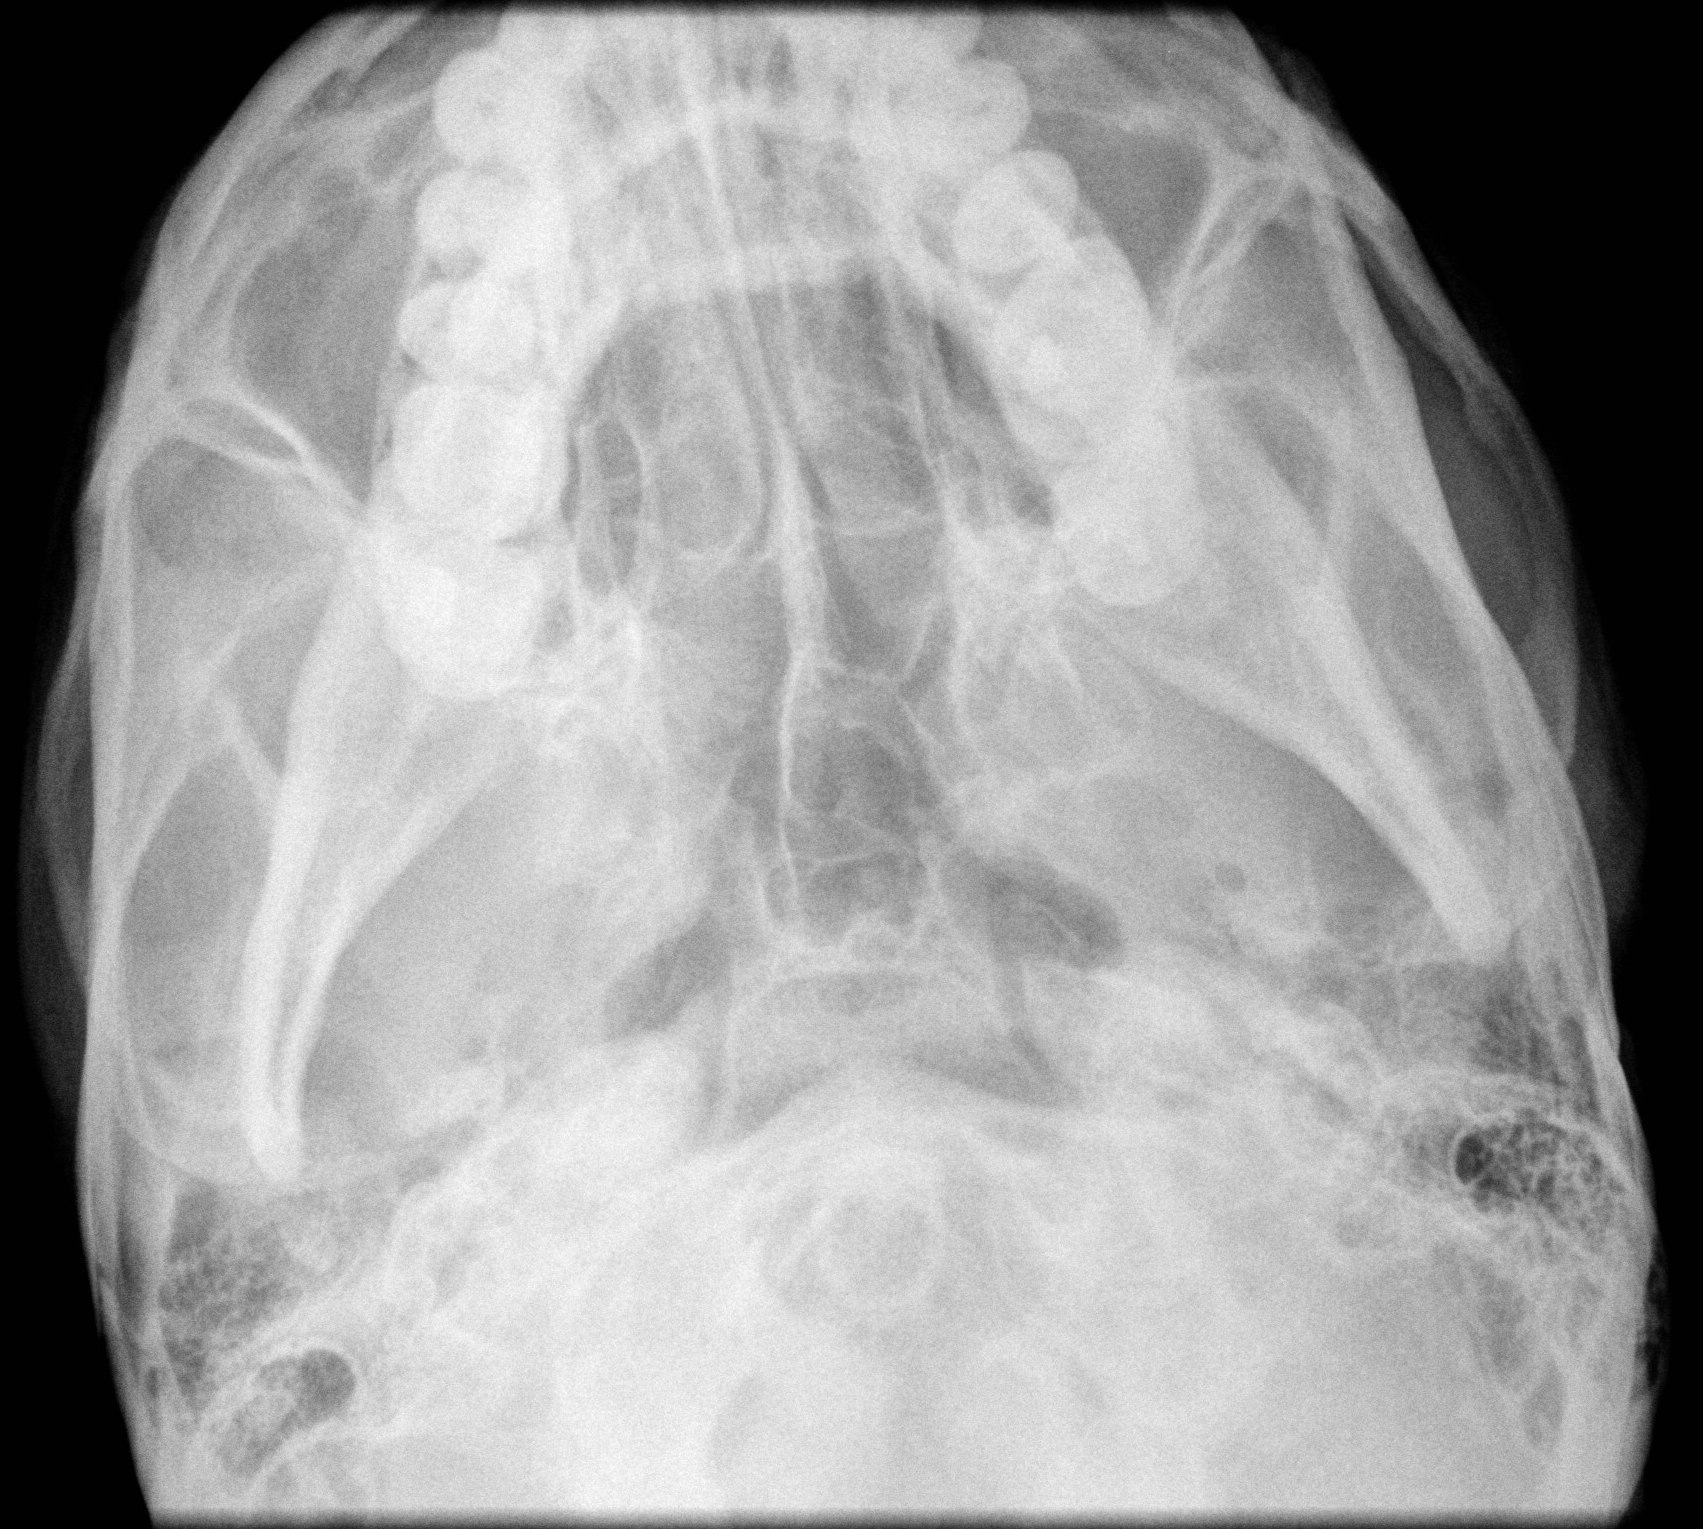
7. Submentovertex (SMV) |
10x12 LW |
IOML parallel, MSP perpendicular. Project mandible beyond the nasal septum and ethmoid air cells. |
CR perpendicular to IOML, enters midway between gonion |
|
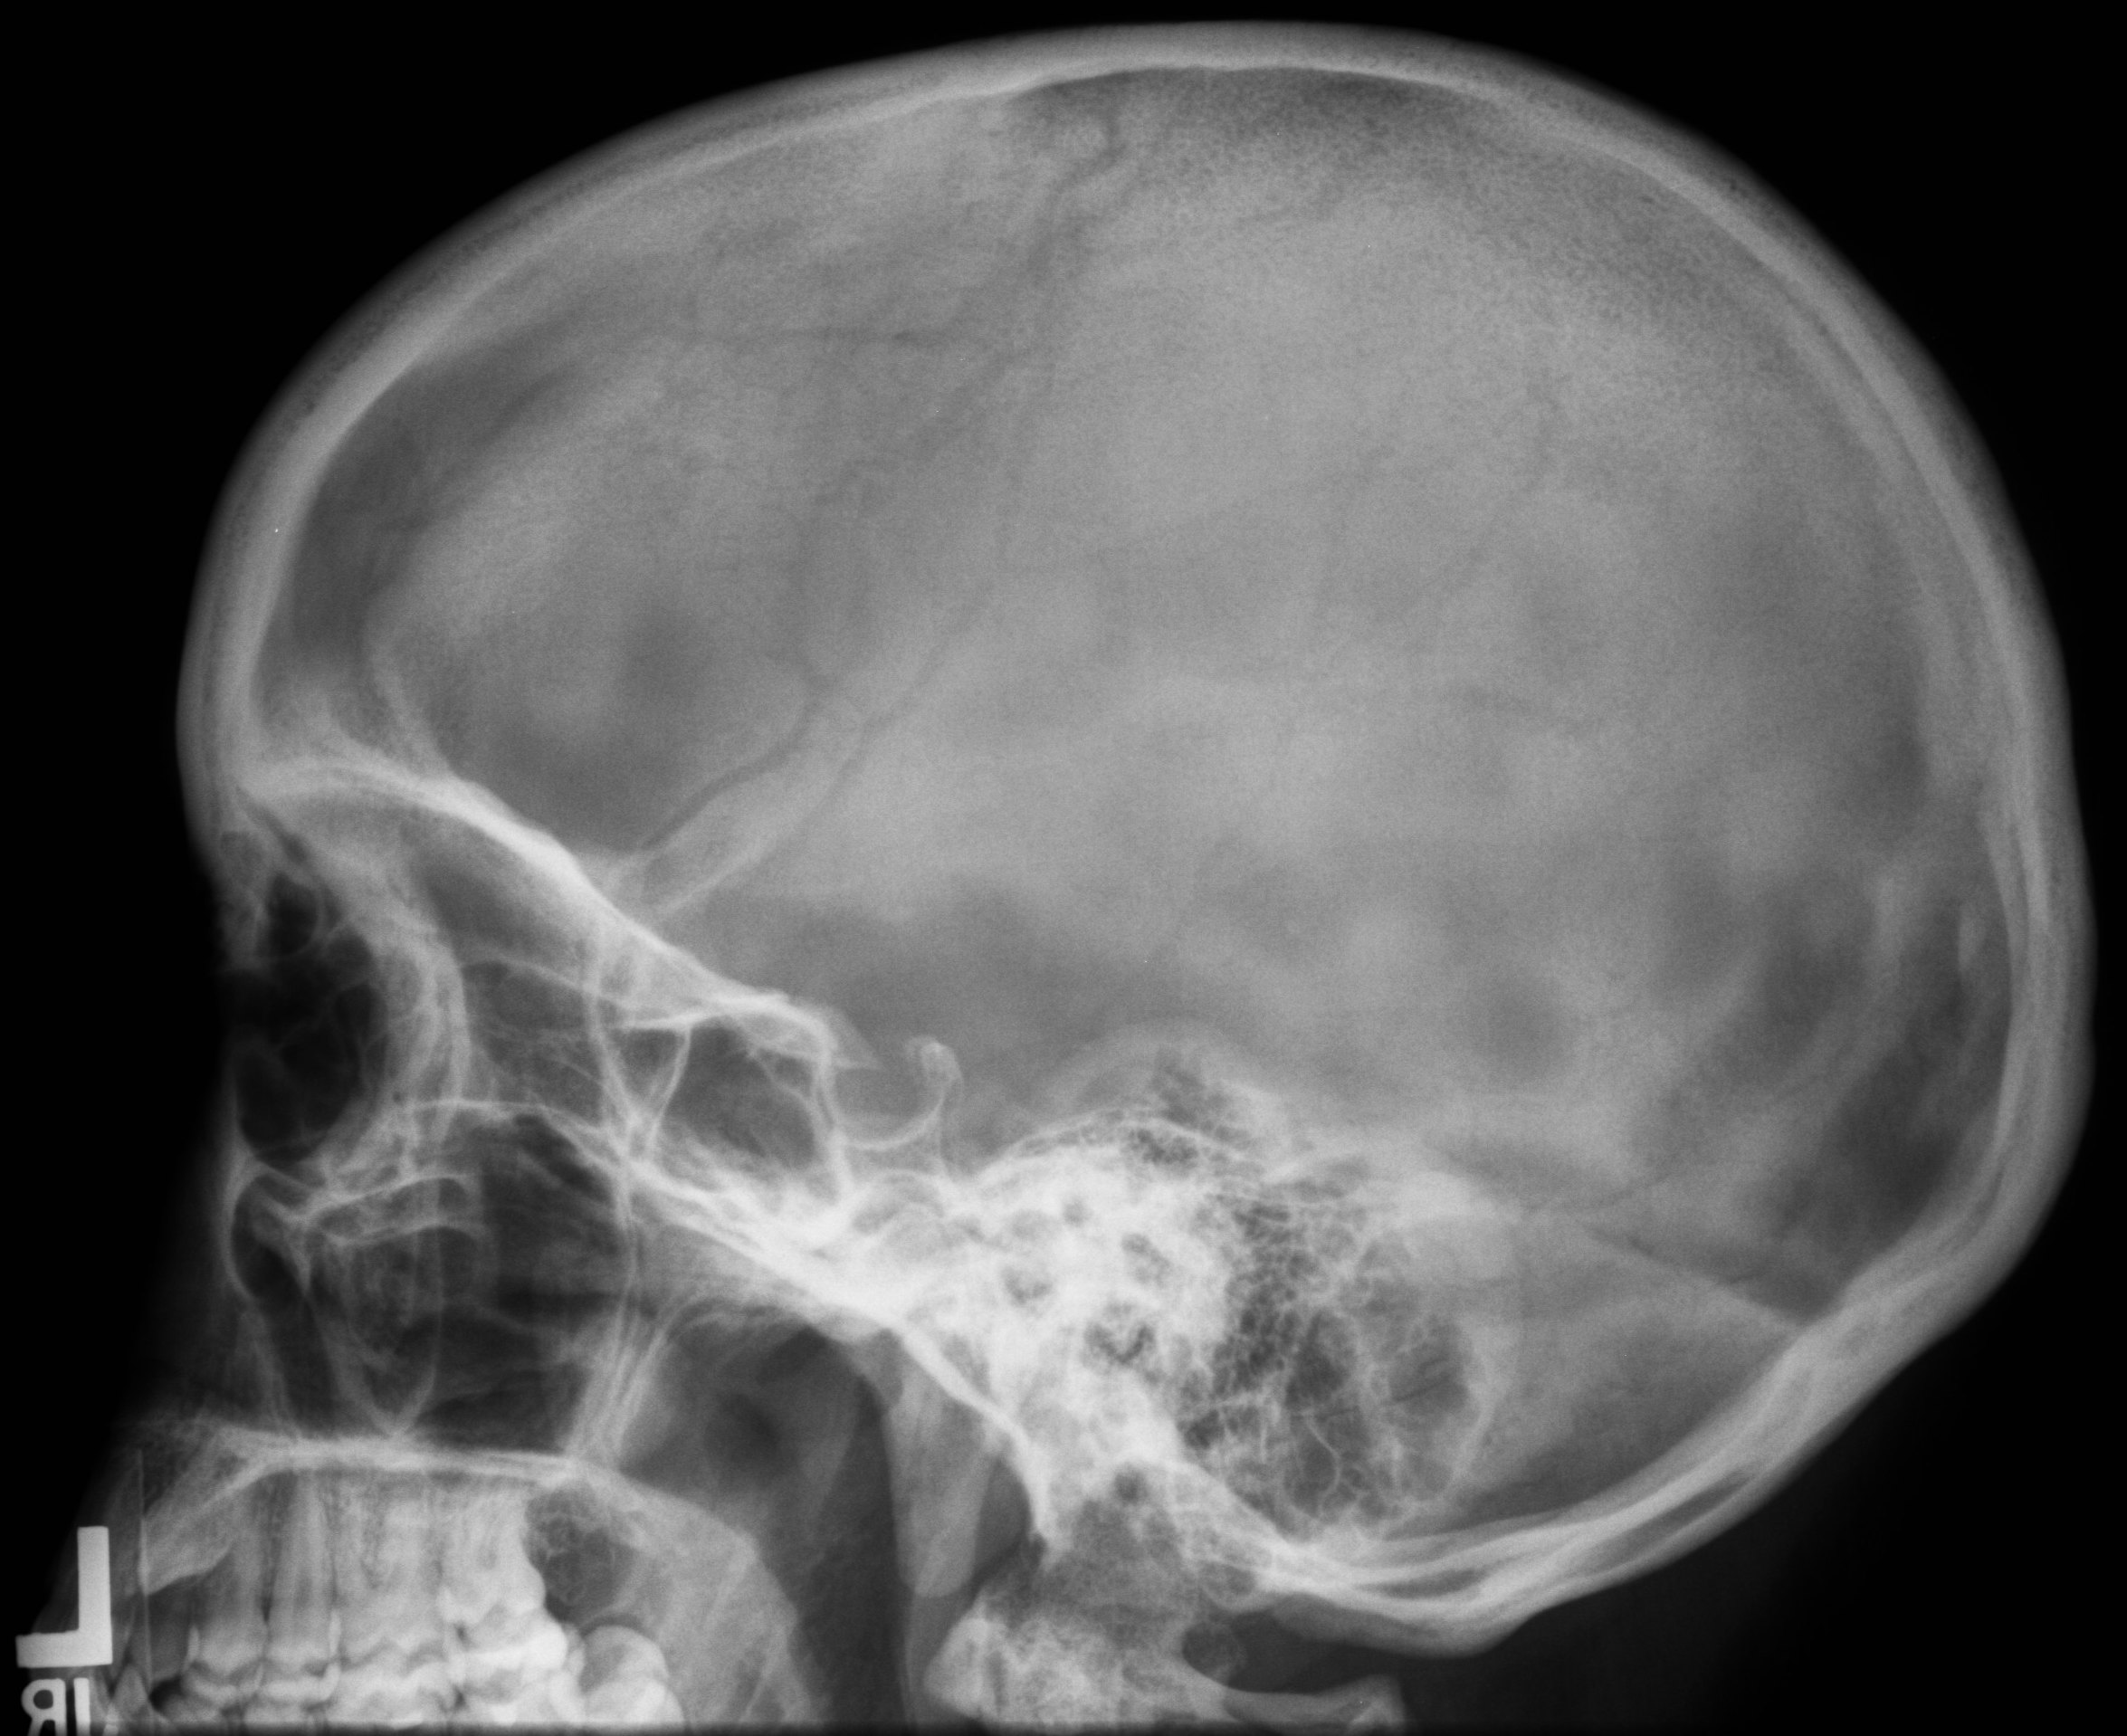
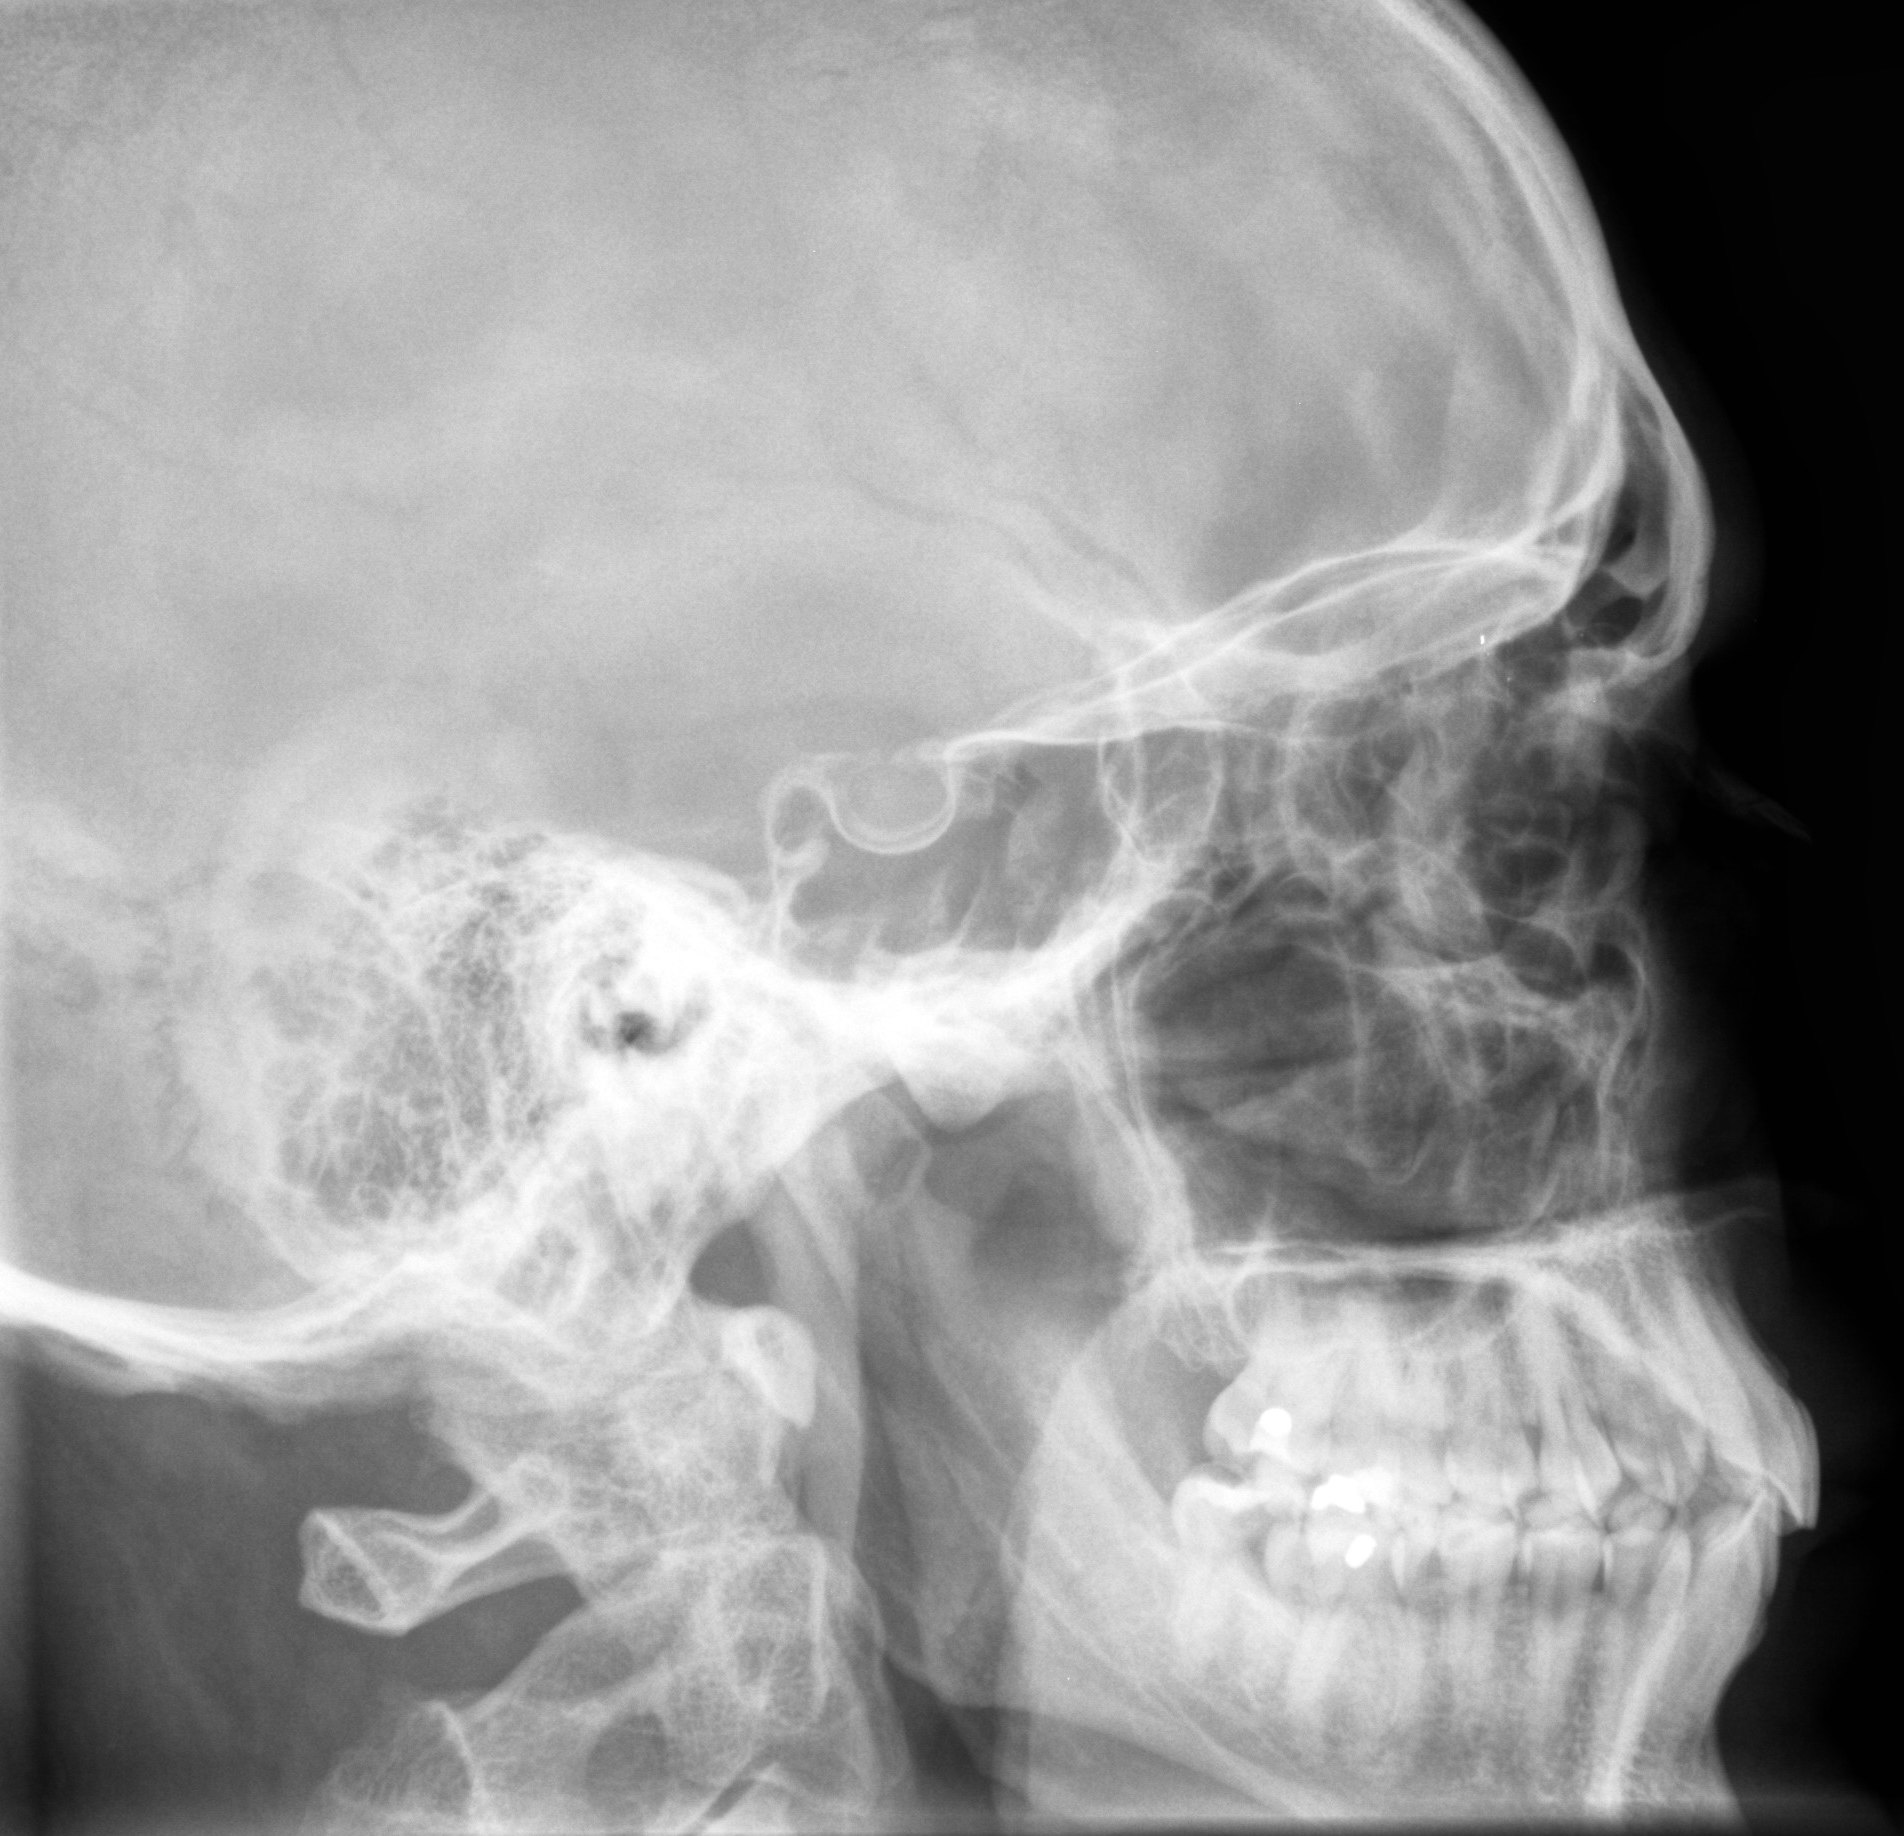
8. Lateral - affected side |
10x12 CW |
IOML perpendicular to front edge of image receptor, MSP parallel, IPL perpendicular |
CR perpendicular to 2" (5cm) superior to EAM |
|
|
|||
|
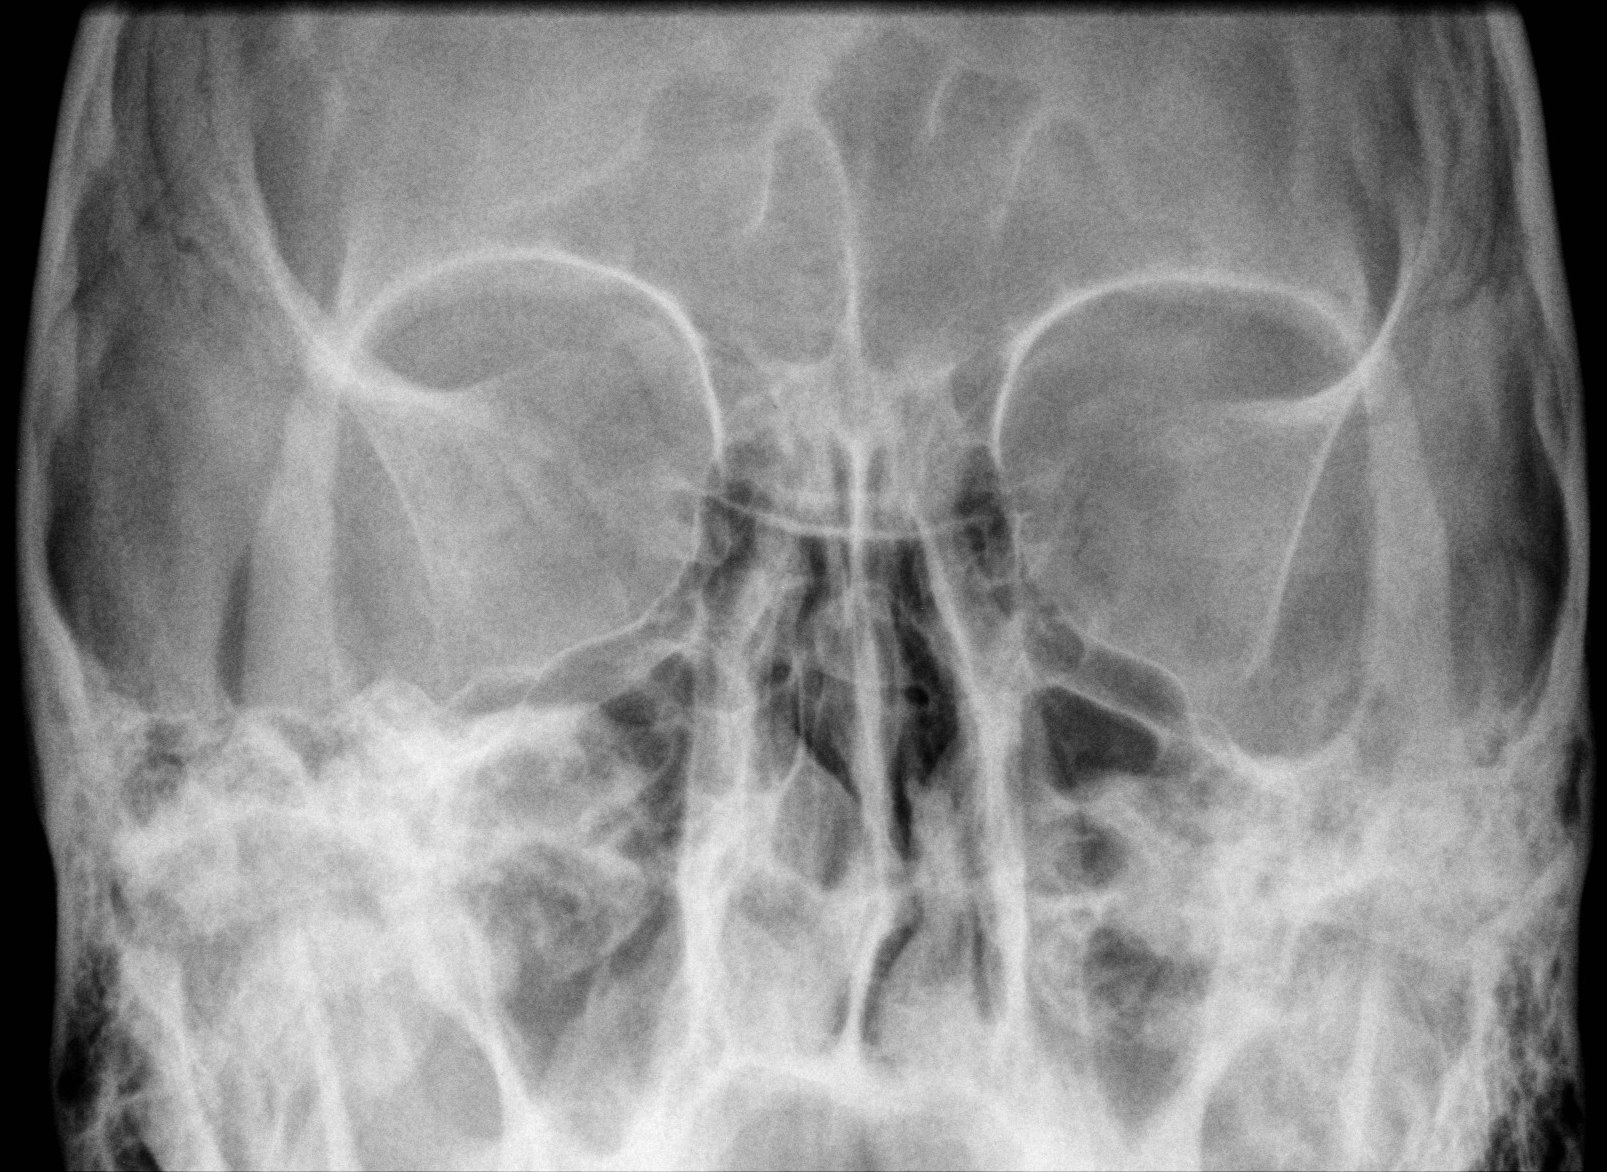
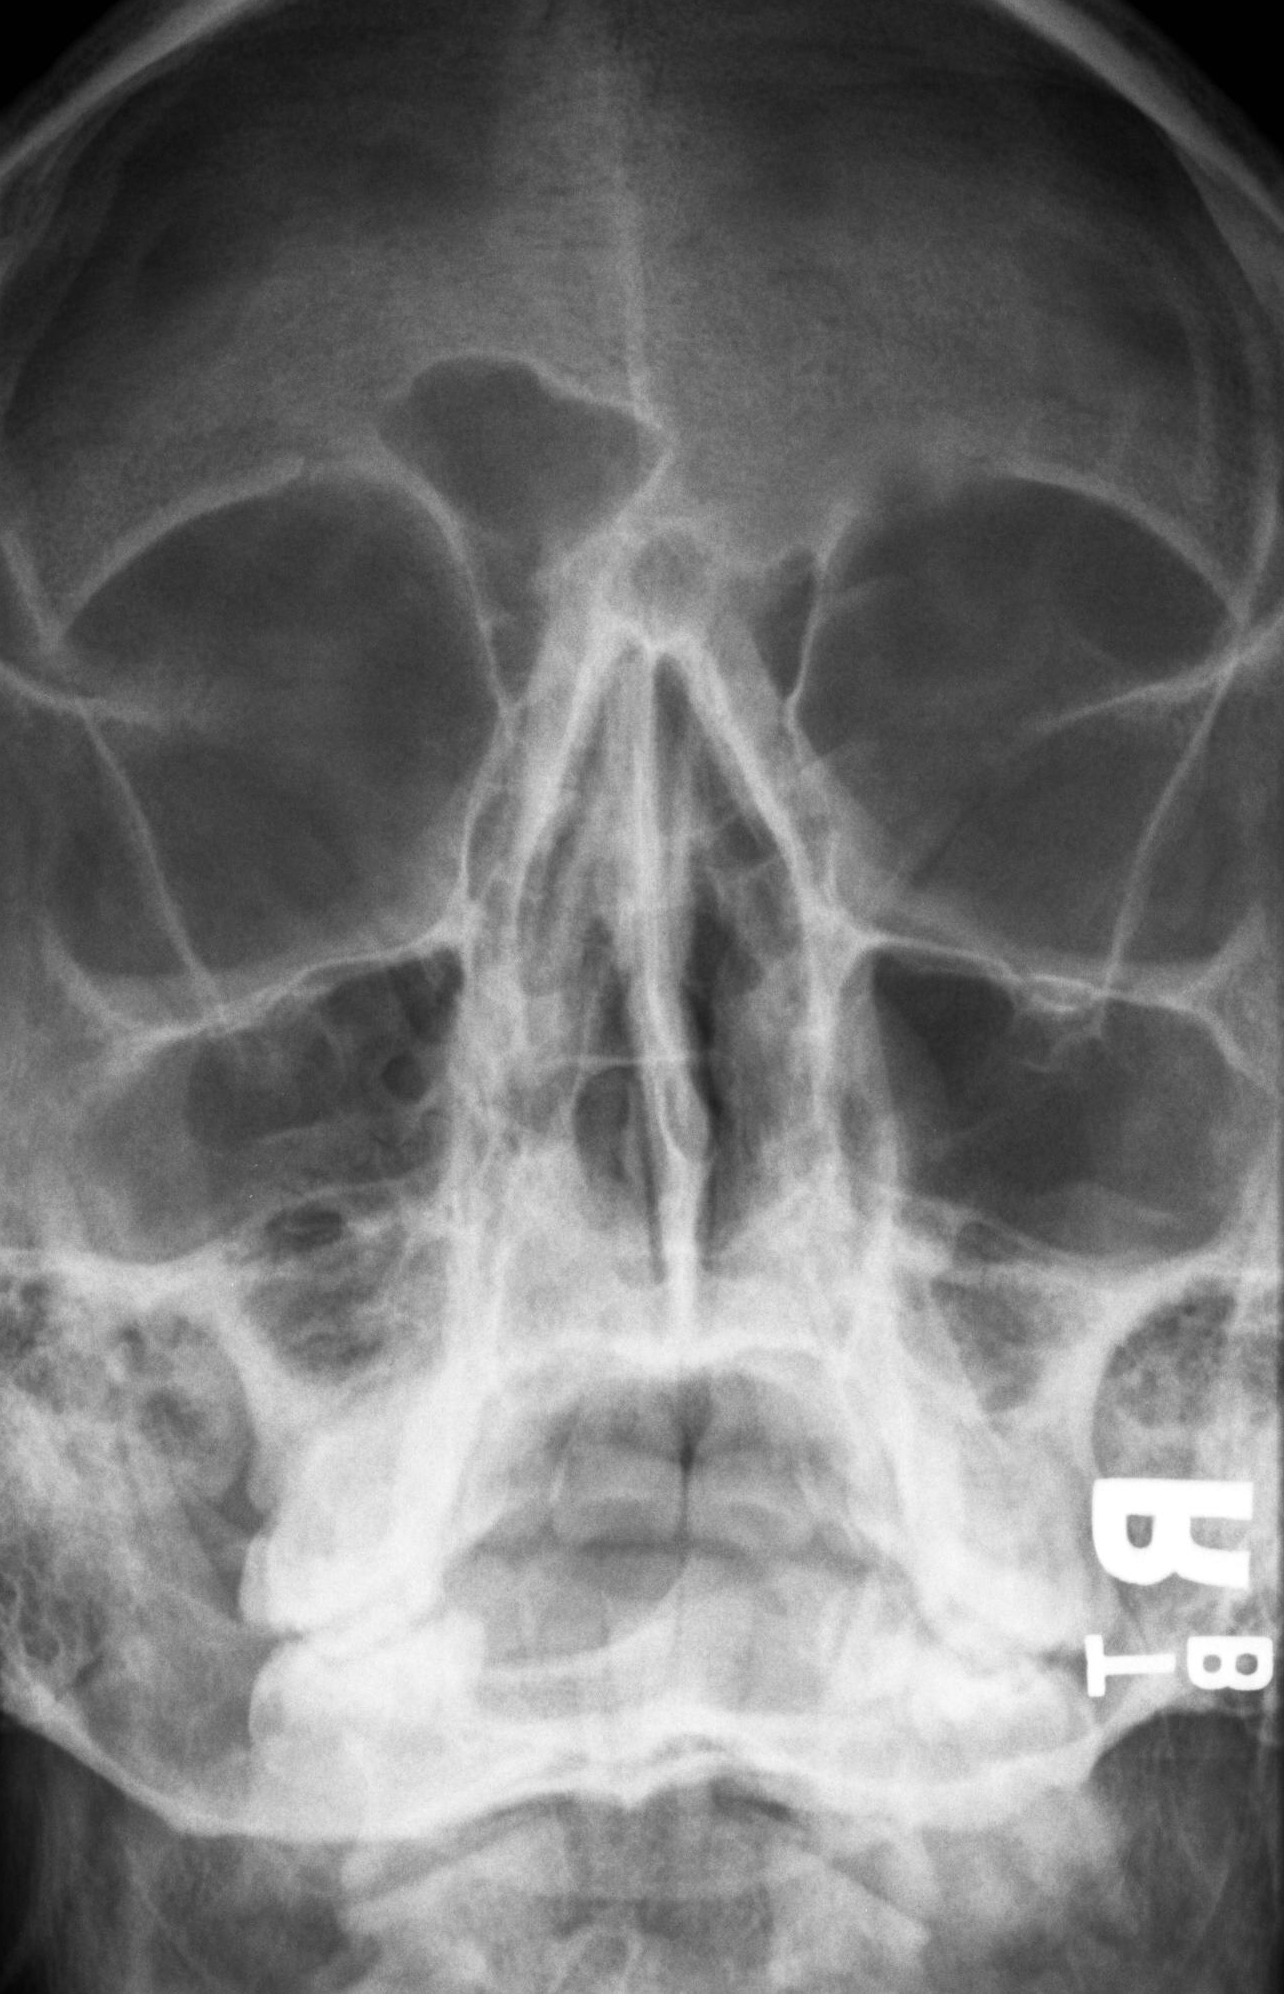
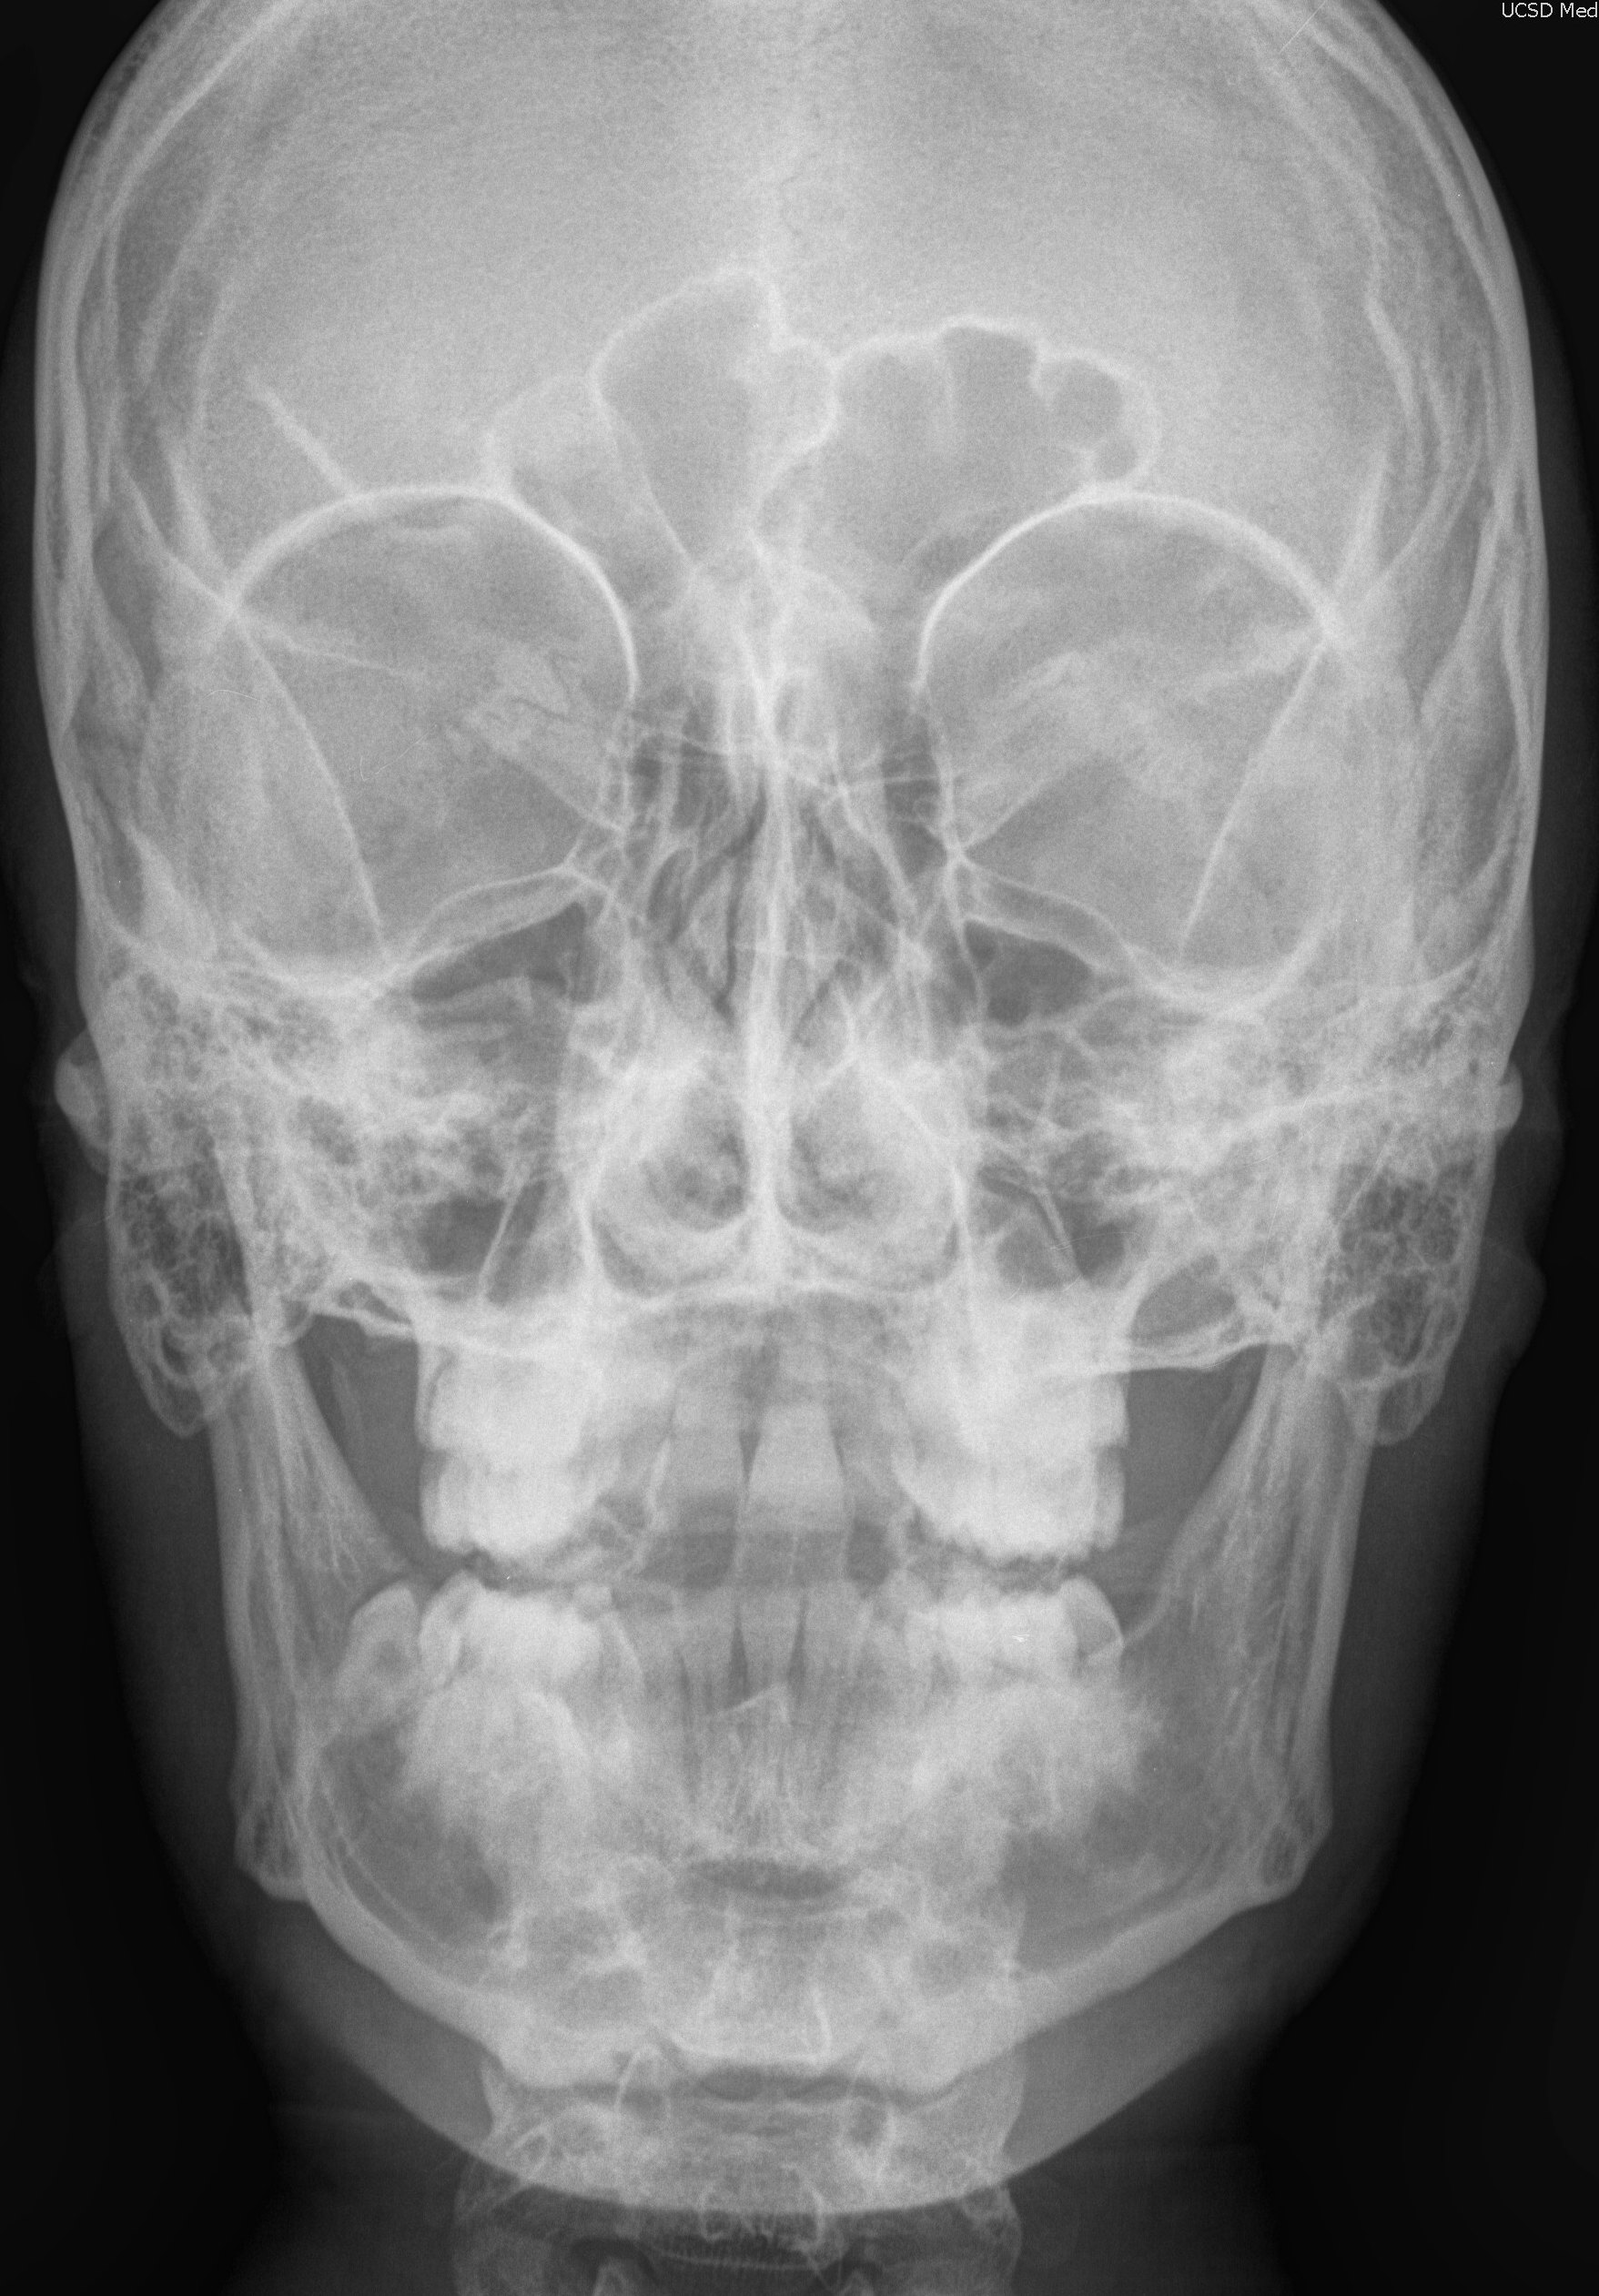
1. Parietoacanthial projection (Waters) |
10x12 LW |
OML forms an angle of 37º to image receptor, MSP perpendicular |
CR perpendicular, exits at the acanthion |
|
2. PA Caldwell |
10x12 LW |
OML perpendicular, MSP perpendicular |
CR 23° caudal, exits at nasion |
|
3. Lateral |
10x12 LW |
IOML perpendicular to front edge of image receptor, MSP parallel, IPL perpendicular, affected side to image receptor |
CR perpendicular to outer canthus |
|
4. Submentovertex (SMV) |
10x12 LW |
IOML parallel to image receptor (neck hyperextended), MSP perpendicular |
CR perpendicular to IOML, enter midway between gonion |
|
|
|||
|
1. PA mandible |
8x10 CW |
OML perpendicular, MSP perpendicular |
CR perpendicular, enters at the level of the gonion to exit at lips |
|
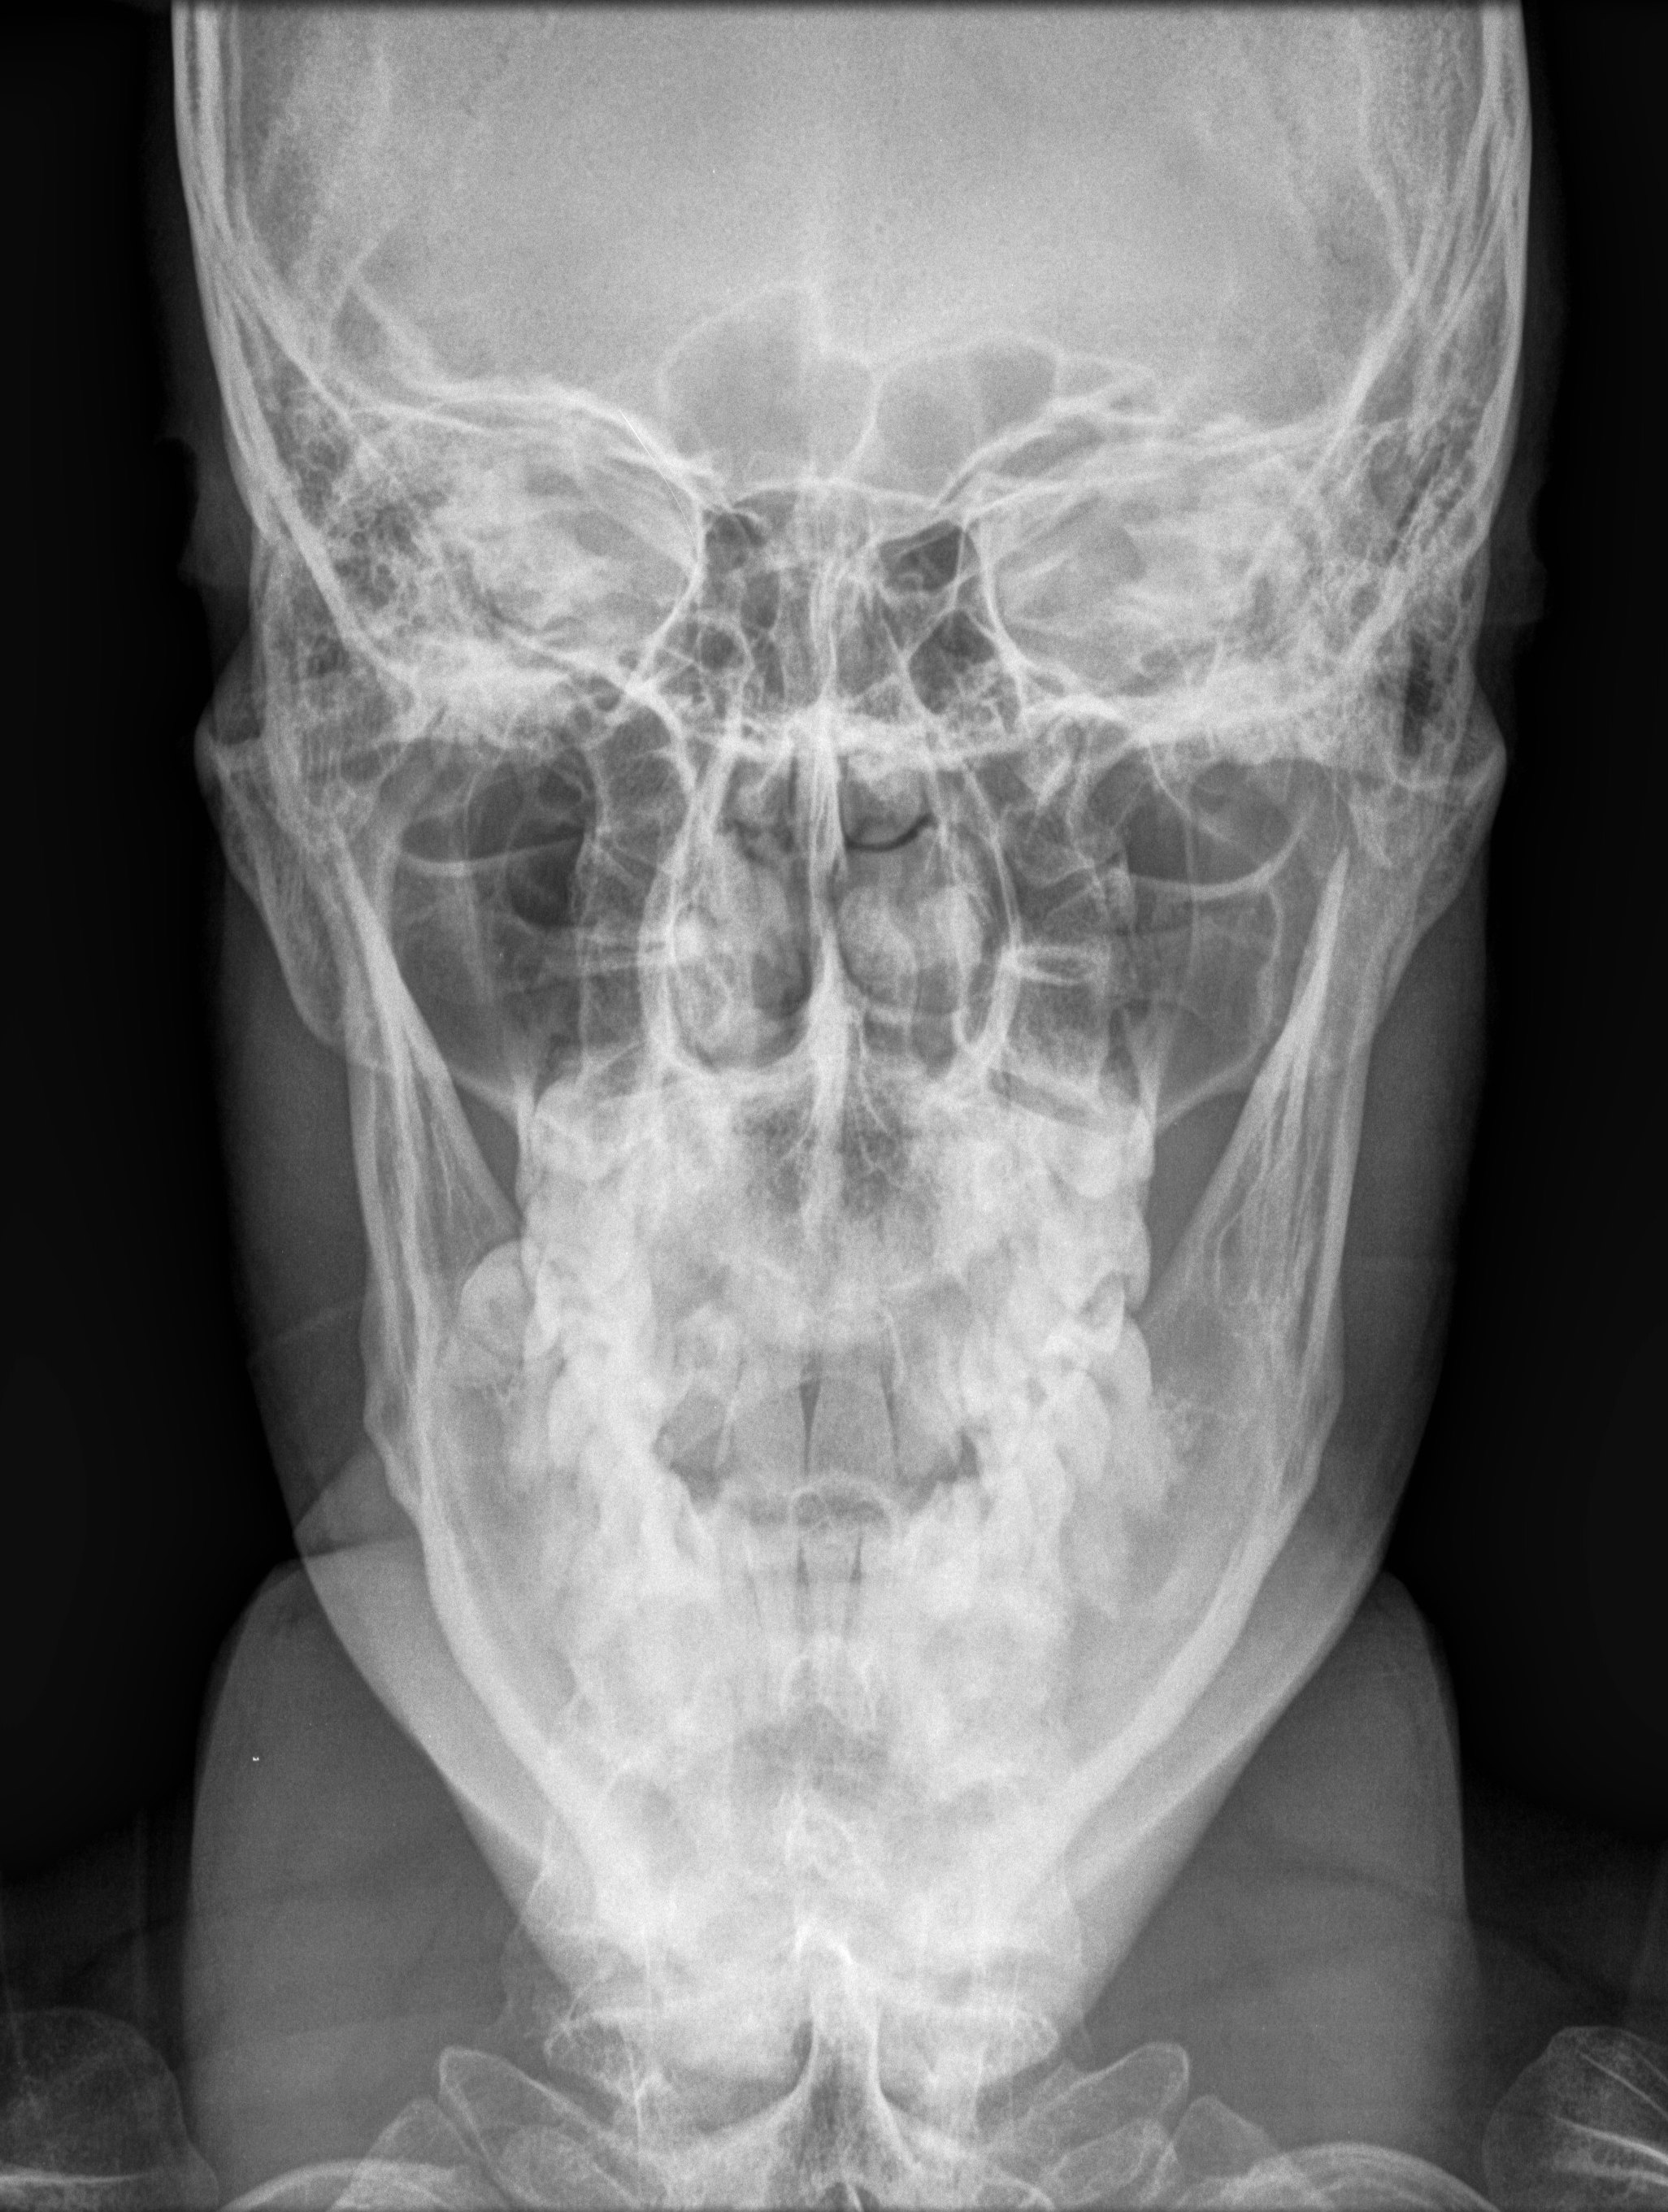
2. AP axial (Townes) open mouth |
8x10 LW |
OML perpendicular, MSP perpendicular, patient to have mouth open, if possible |
CR 35° caudad, enters 3" above nasion, passes through TMJ's. |
|
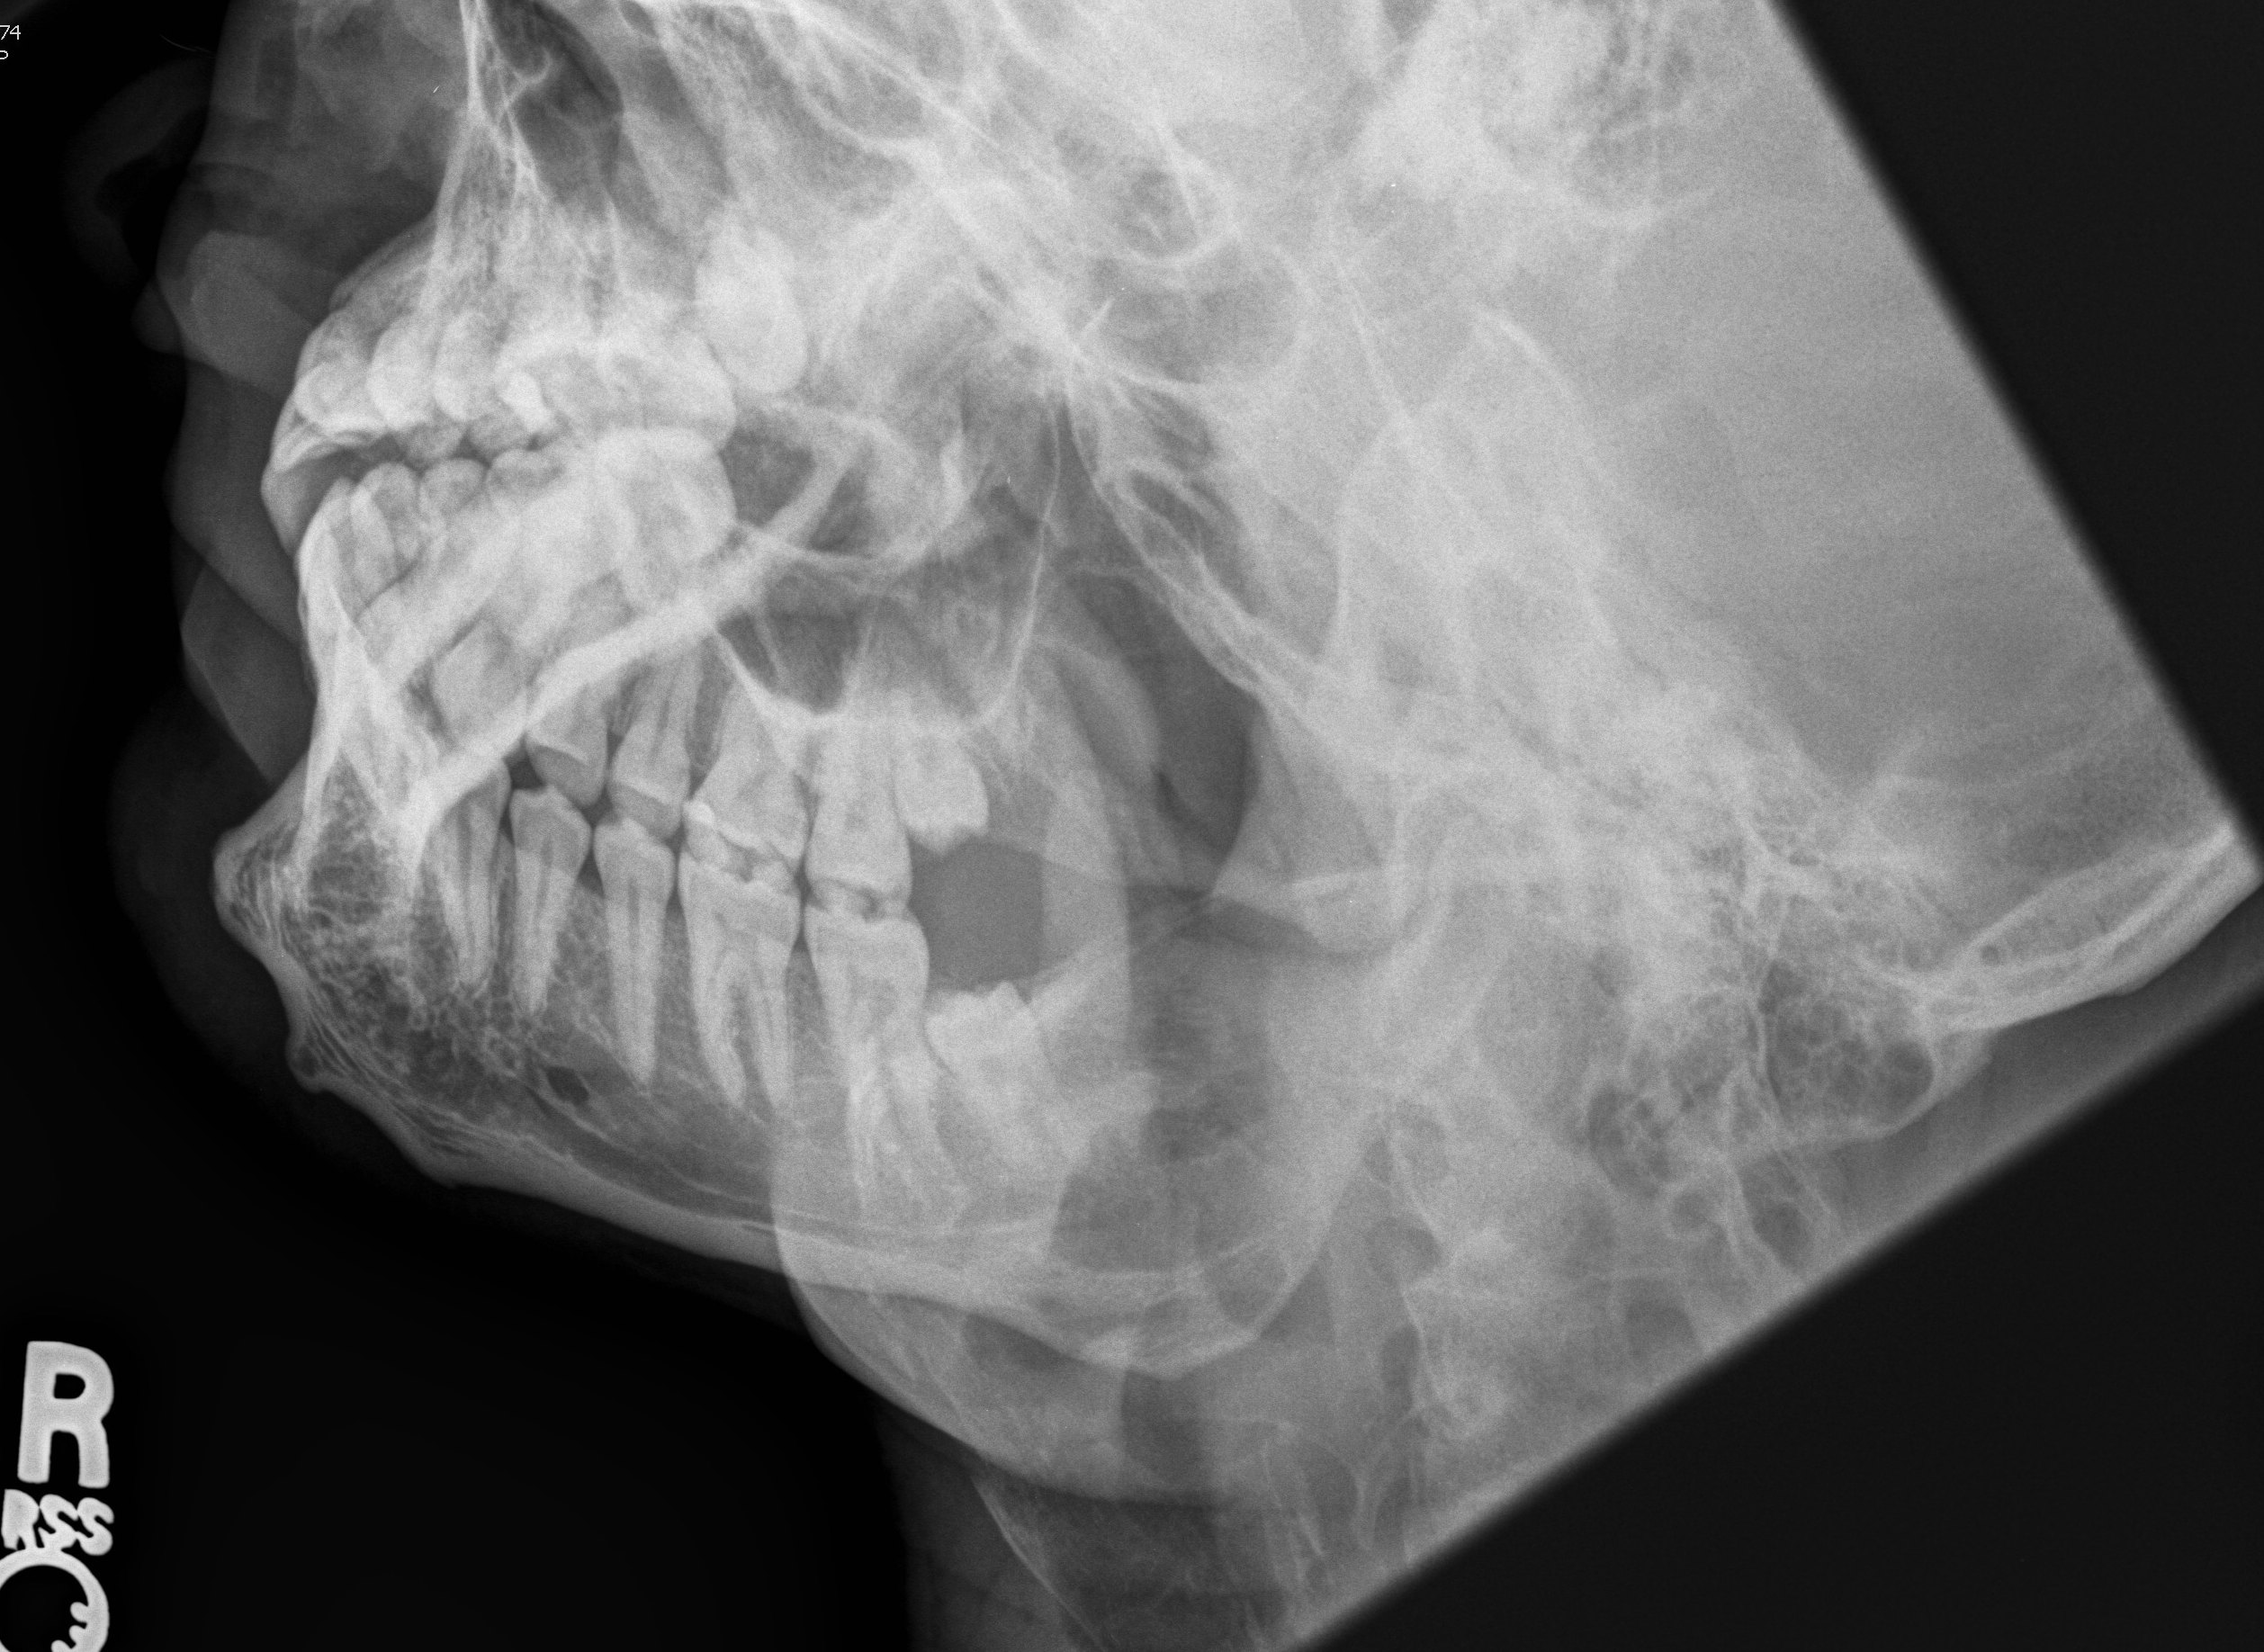
3. Right lateral oblique
|
8x10 CW |
MSP forms 15° angle to image receptor, chin extended anterior to cervical spine. (Total angle of tube + patient = 35.) |
CR 20° cephalic, enters midway between gonion |
|
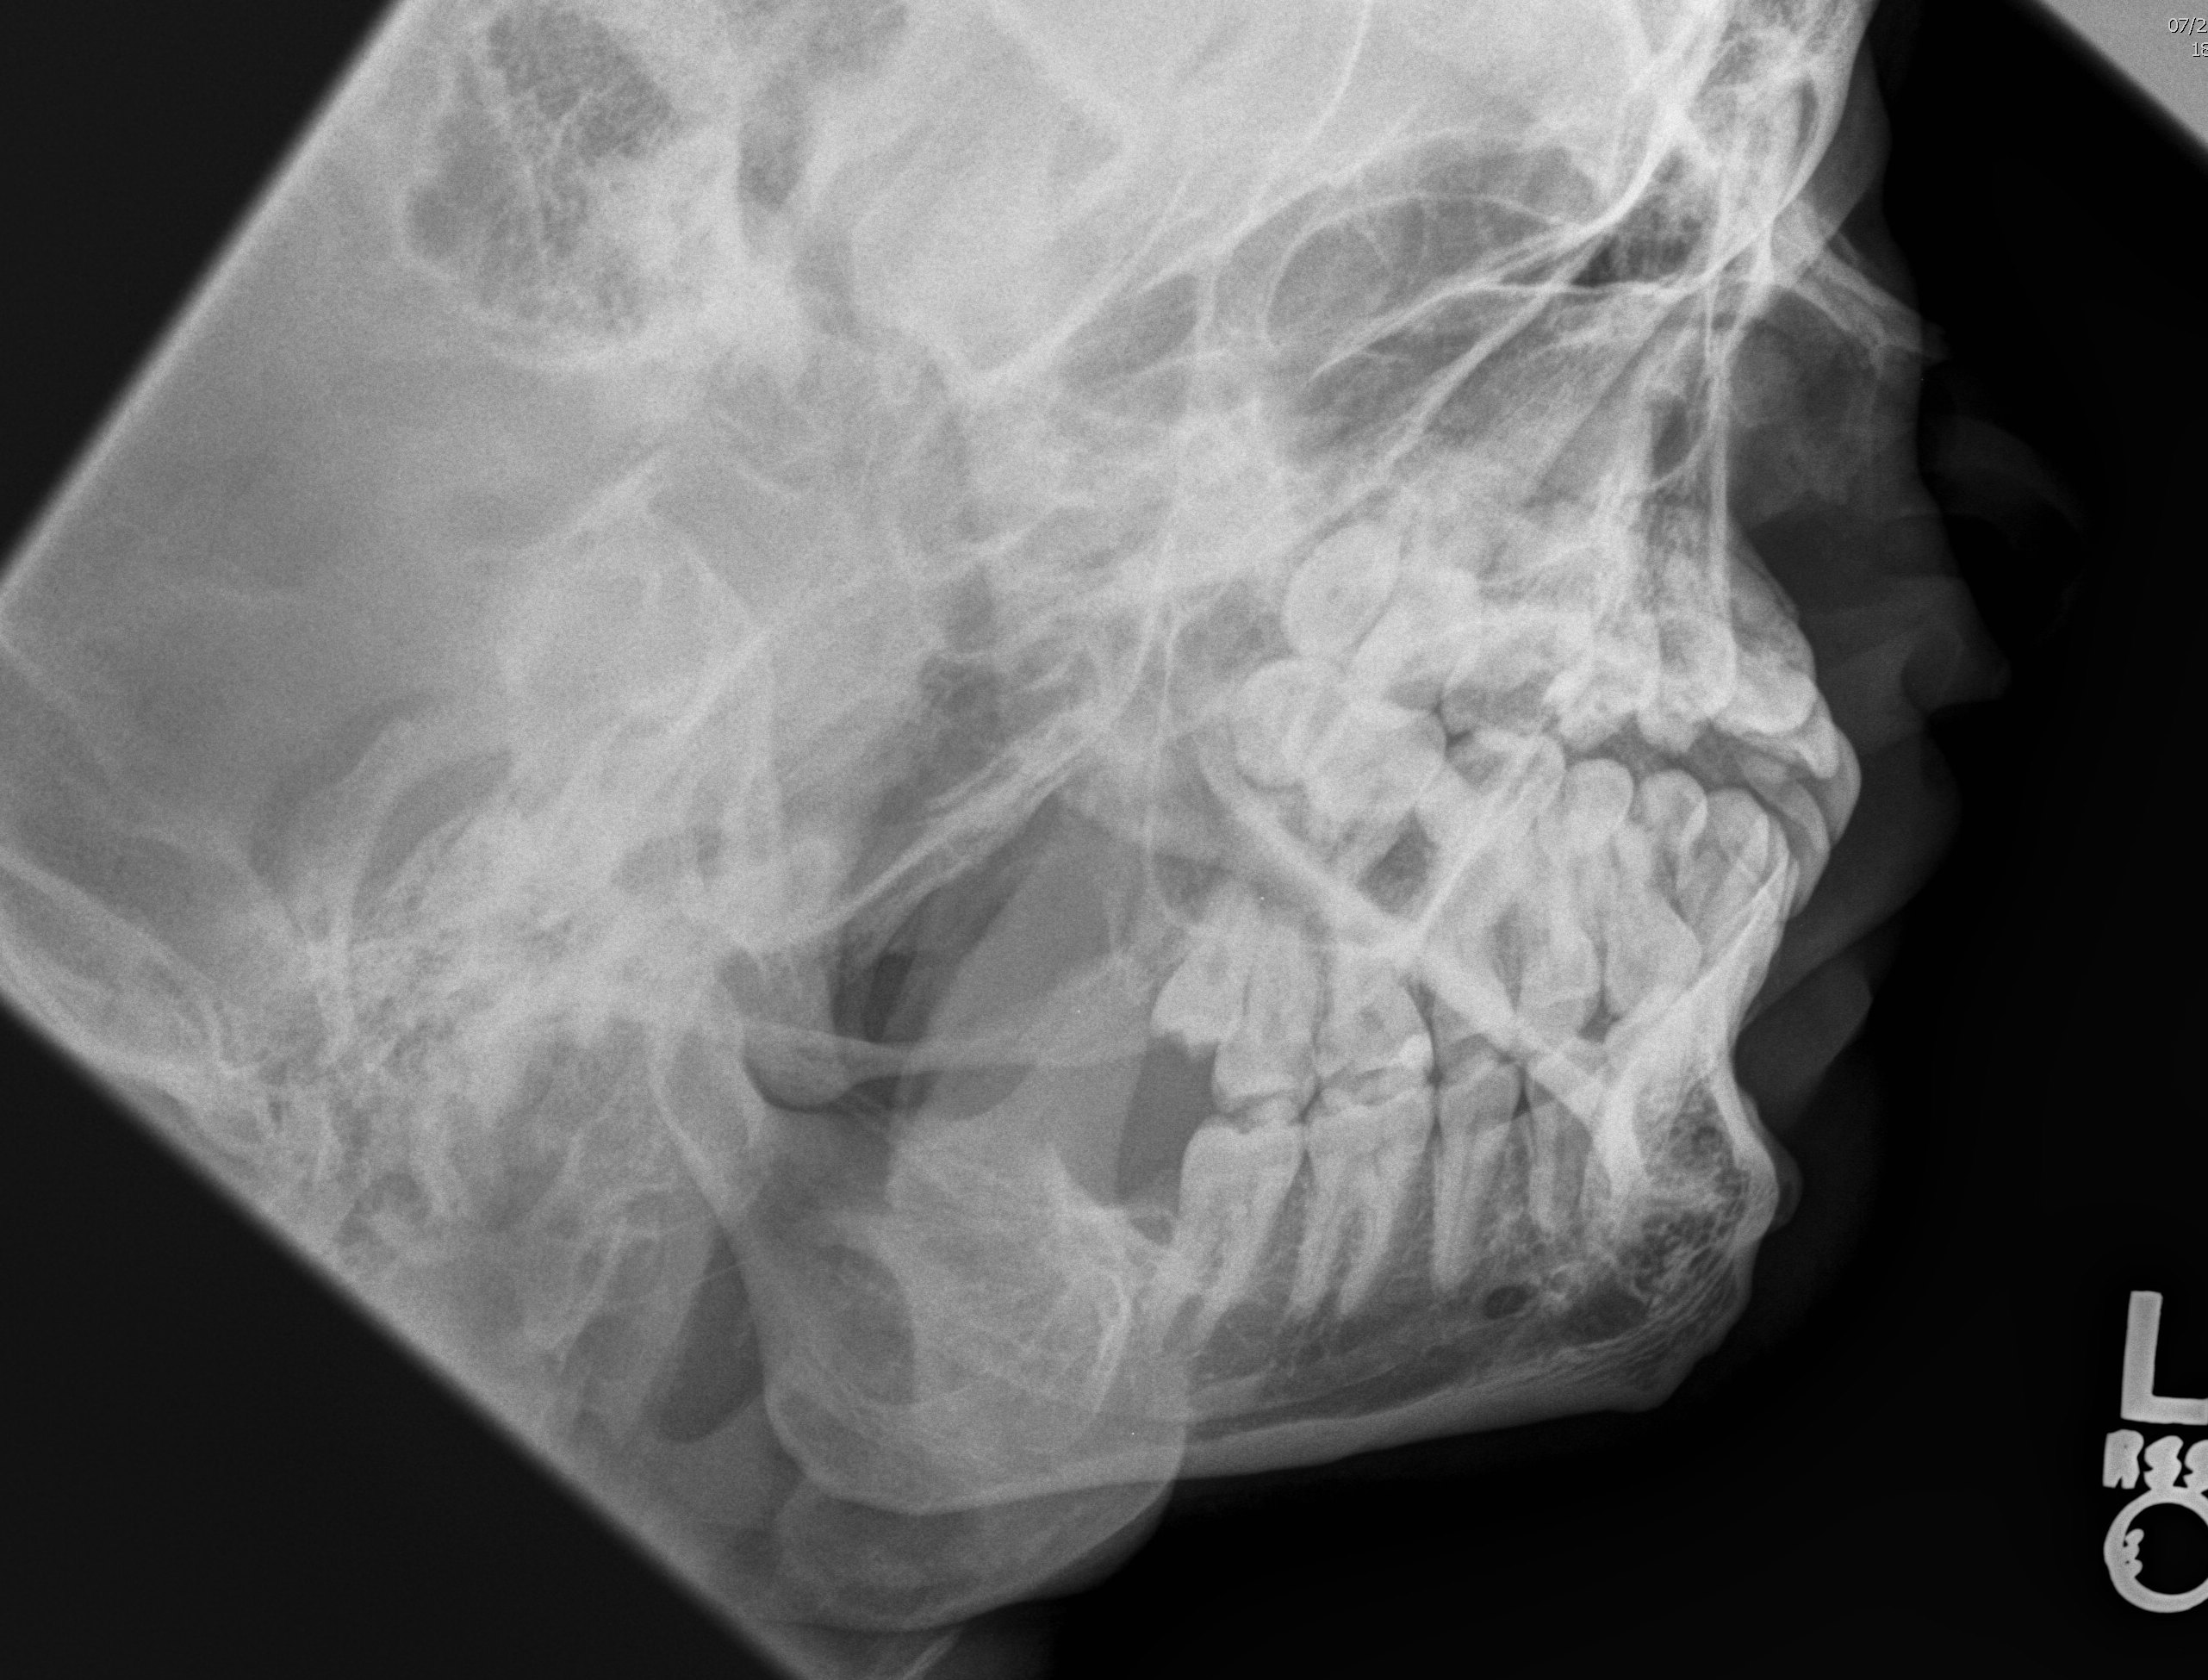
4. Left lateral oblique
|
8x10 CW |
MSP forms 15° angle to image receptor, chin extended anterior to cervical spine. (Total angle of tube + patient = 35.) |
CR 20° cephalic, enters midway between gonion |
|
|
|||
|
1. Parietoacanthial projection (Waters) |
8x10 LW |
OML forms an angle of 37°, MSP perpendicular. Collimate to 5" by 5". |
CR perpendicular, exits at acanthion |
|
2. Right lateral |
8x10LW |
IOML perpendicular to front edge of image receptor, MSP parallel, IPL perpendicular |
CR perpendicular, 1" (2cm) above nasion |
|
3. Left lateral |
8x10LW |
IOML perpendicular to front edge of image receptor, MSP parallel, IPL perpendicular |
CR perpendicular, 1" (2cm) above nasion |
|
ORBITS (Study of choice is CT. Refer all requests to Neuroradiologist for protocol.) |
|||
|
1. PA Caldwell |
8x10 LW |
OML perpendicular, MSP perpendicular |
CR angled 23° caudad, exits at nasion |
|
2. Lateral |
8x10 LW |
IOML perpendicular to front edge of image receptor, MSP parallel, IPL perpendicular |
CR perpendicular to outer canthus |
|
|
|||
|
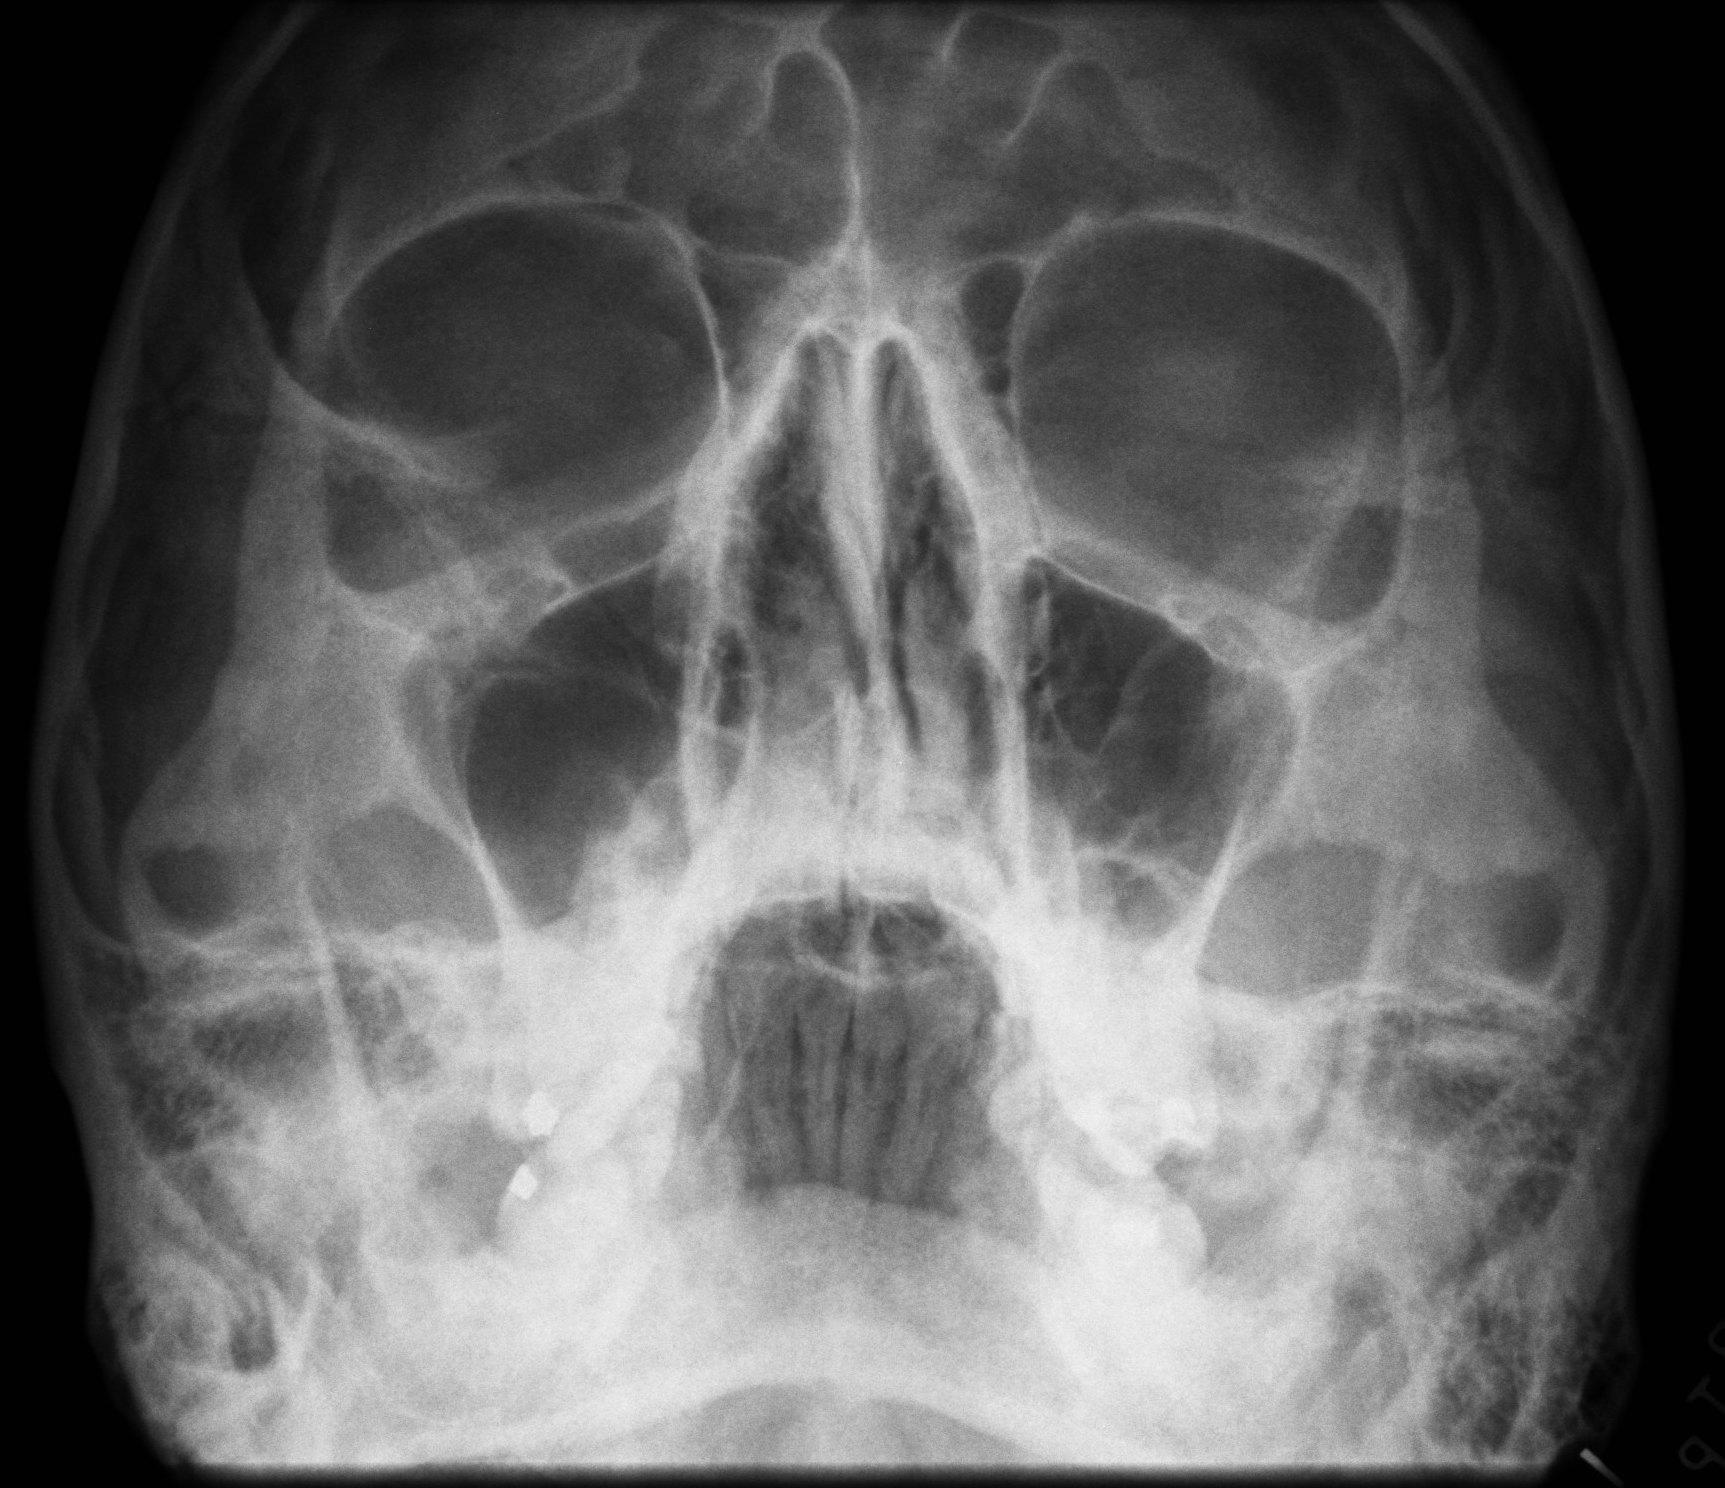
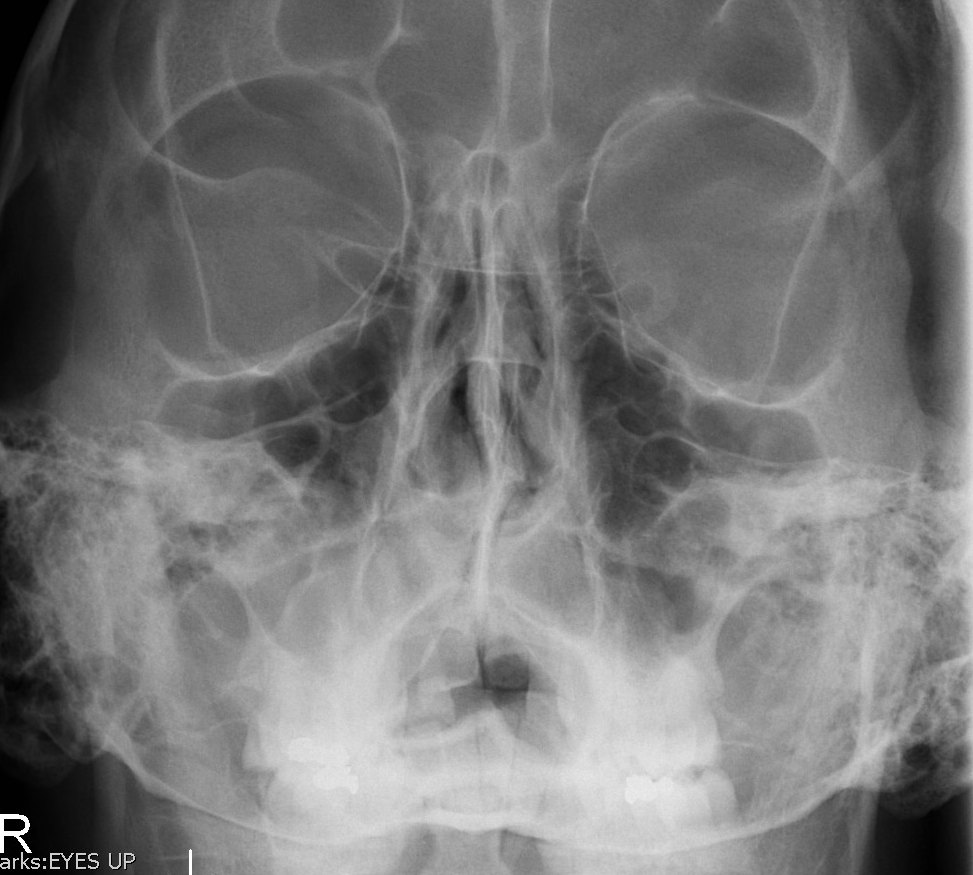
1. Modified Parieto- acanthial (Waters) EYES LOOKING UP |
8x10 LW
|
OML forms angle of 55° with image receptor, MSP perpendicular
|
CR perpendicular, exits at acanthion |
|
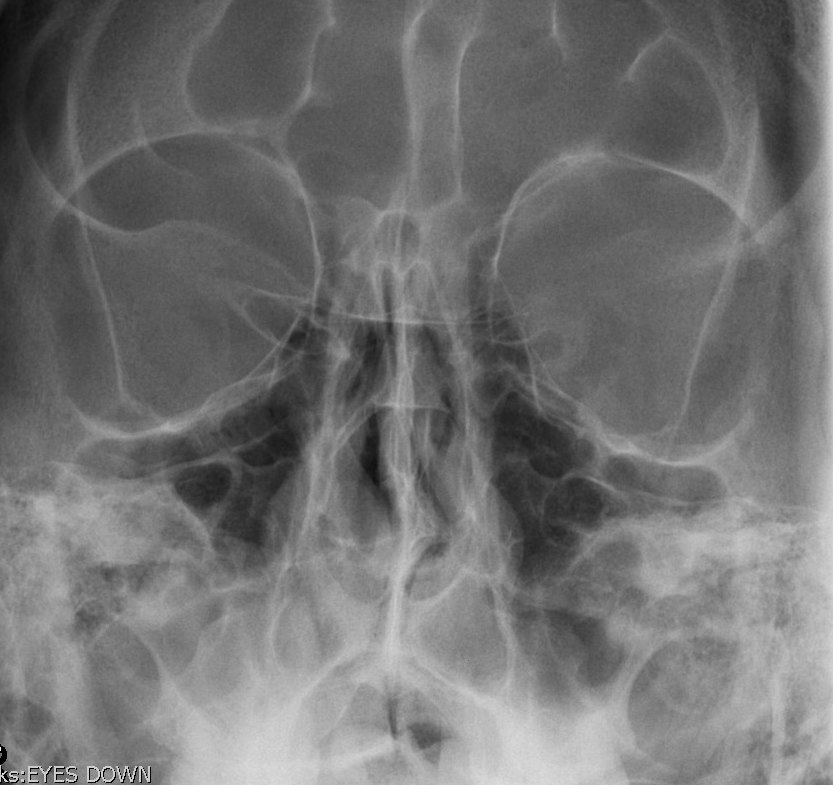
2. Modified Parieto- acanthial (Waters) EYES LOOKING DOWN |
8x10 LW
|
OML forms angle of 55° with image receptor, MSP perpendicular
|
CR perpendicular, exits at acanthion
|
MUSCULOSKELETAL
Write time of exam on all bone films. Films taken in surgery, portables, trauma, E.D. often have multiple studies; times are needed to sort films. For acute injuries, follow trauma protocol or other methods as directed by Radiologist.
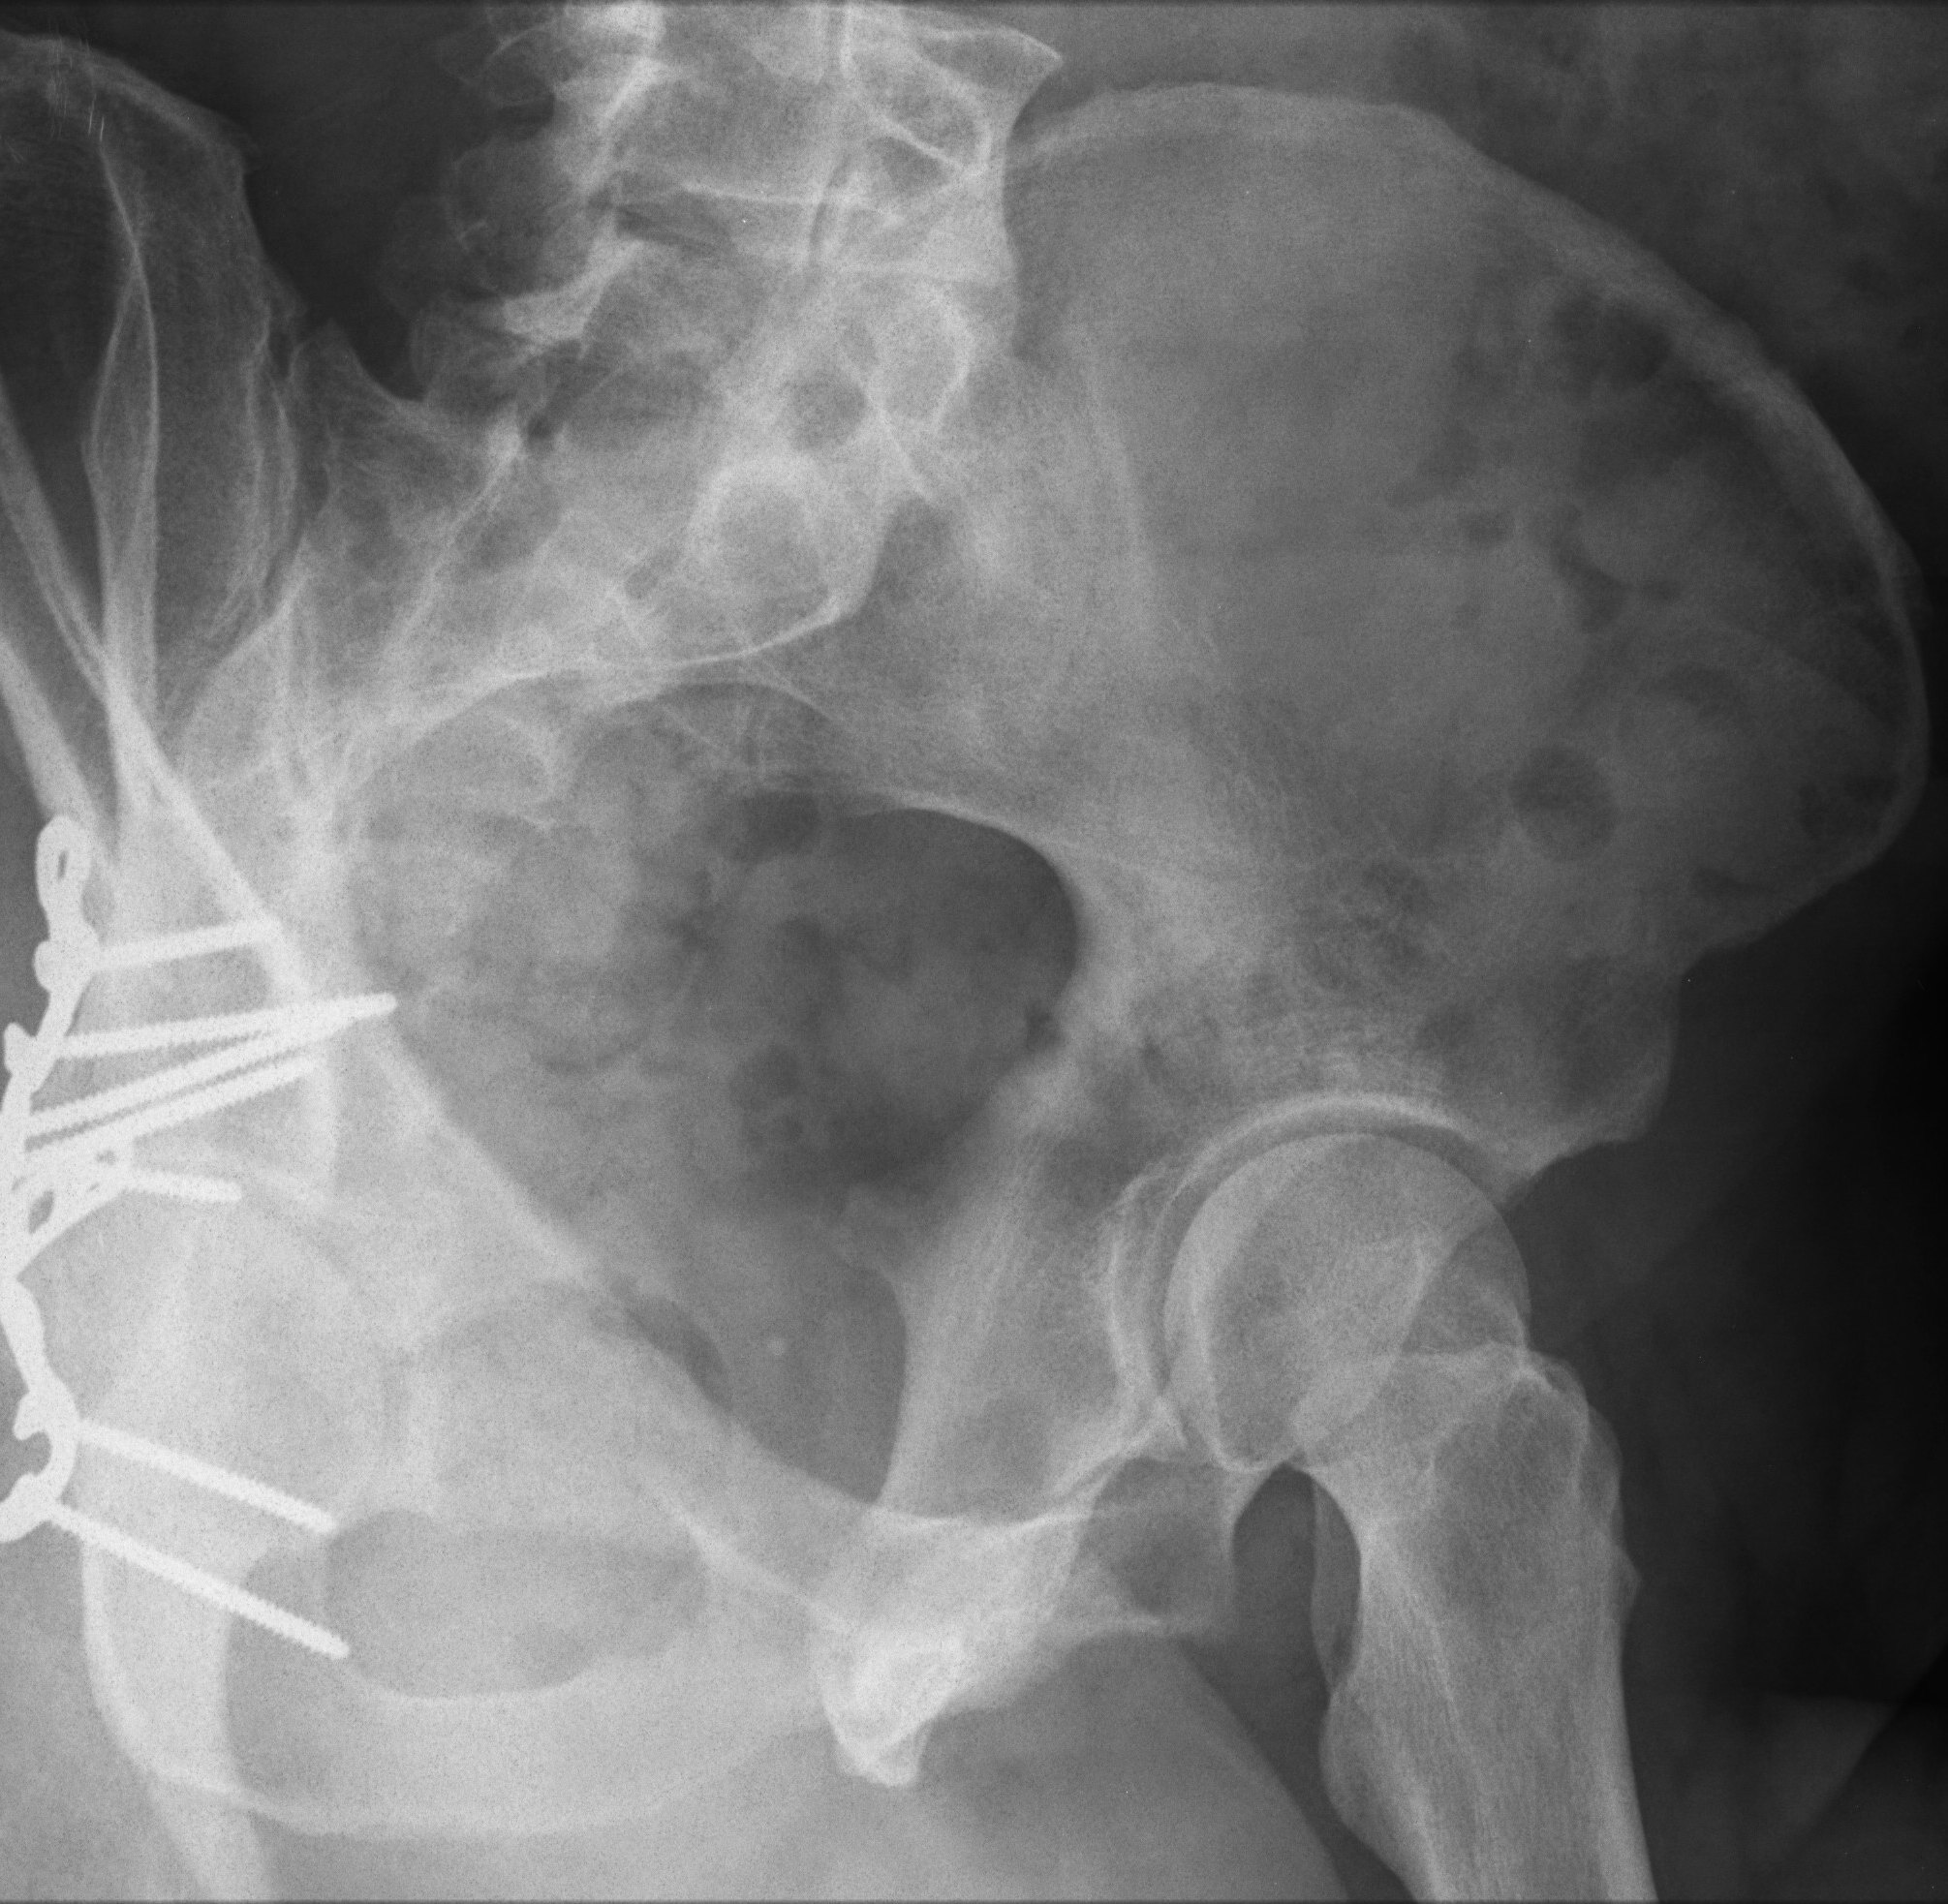
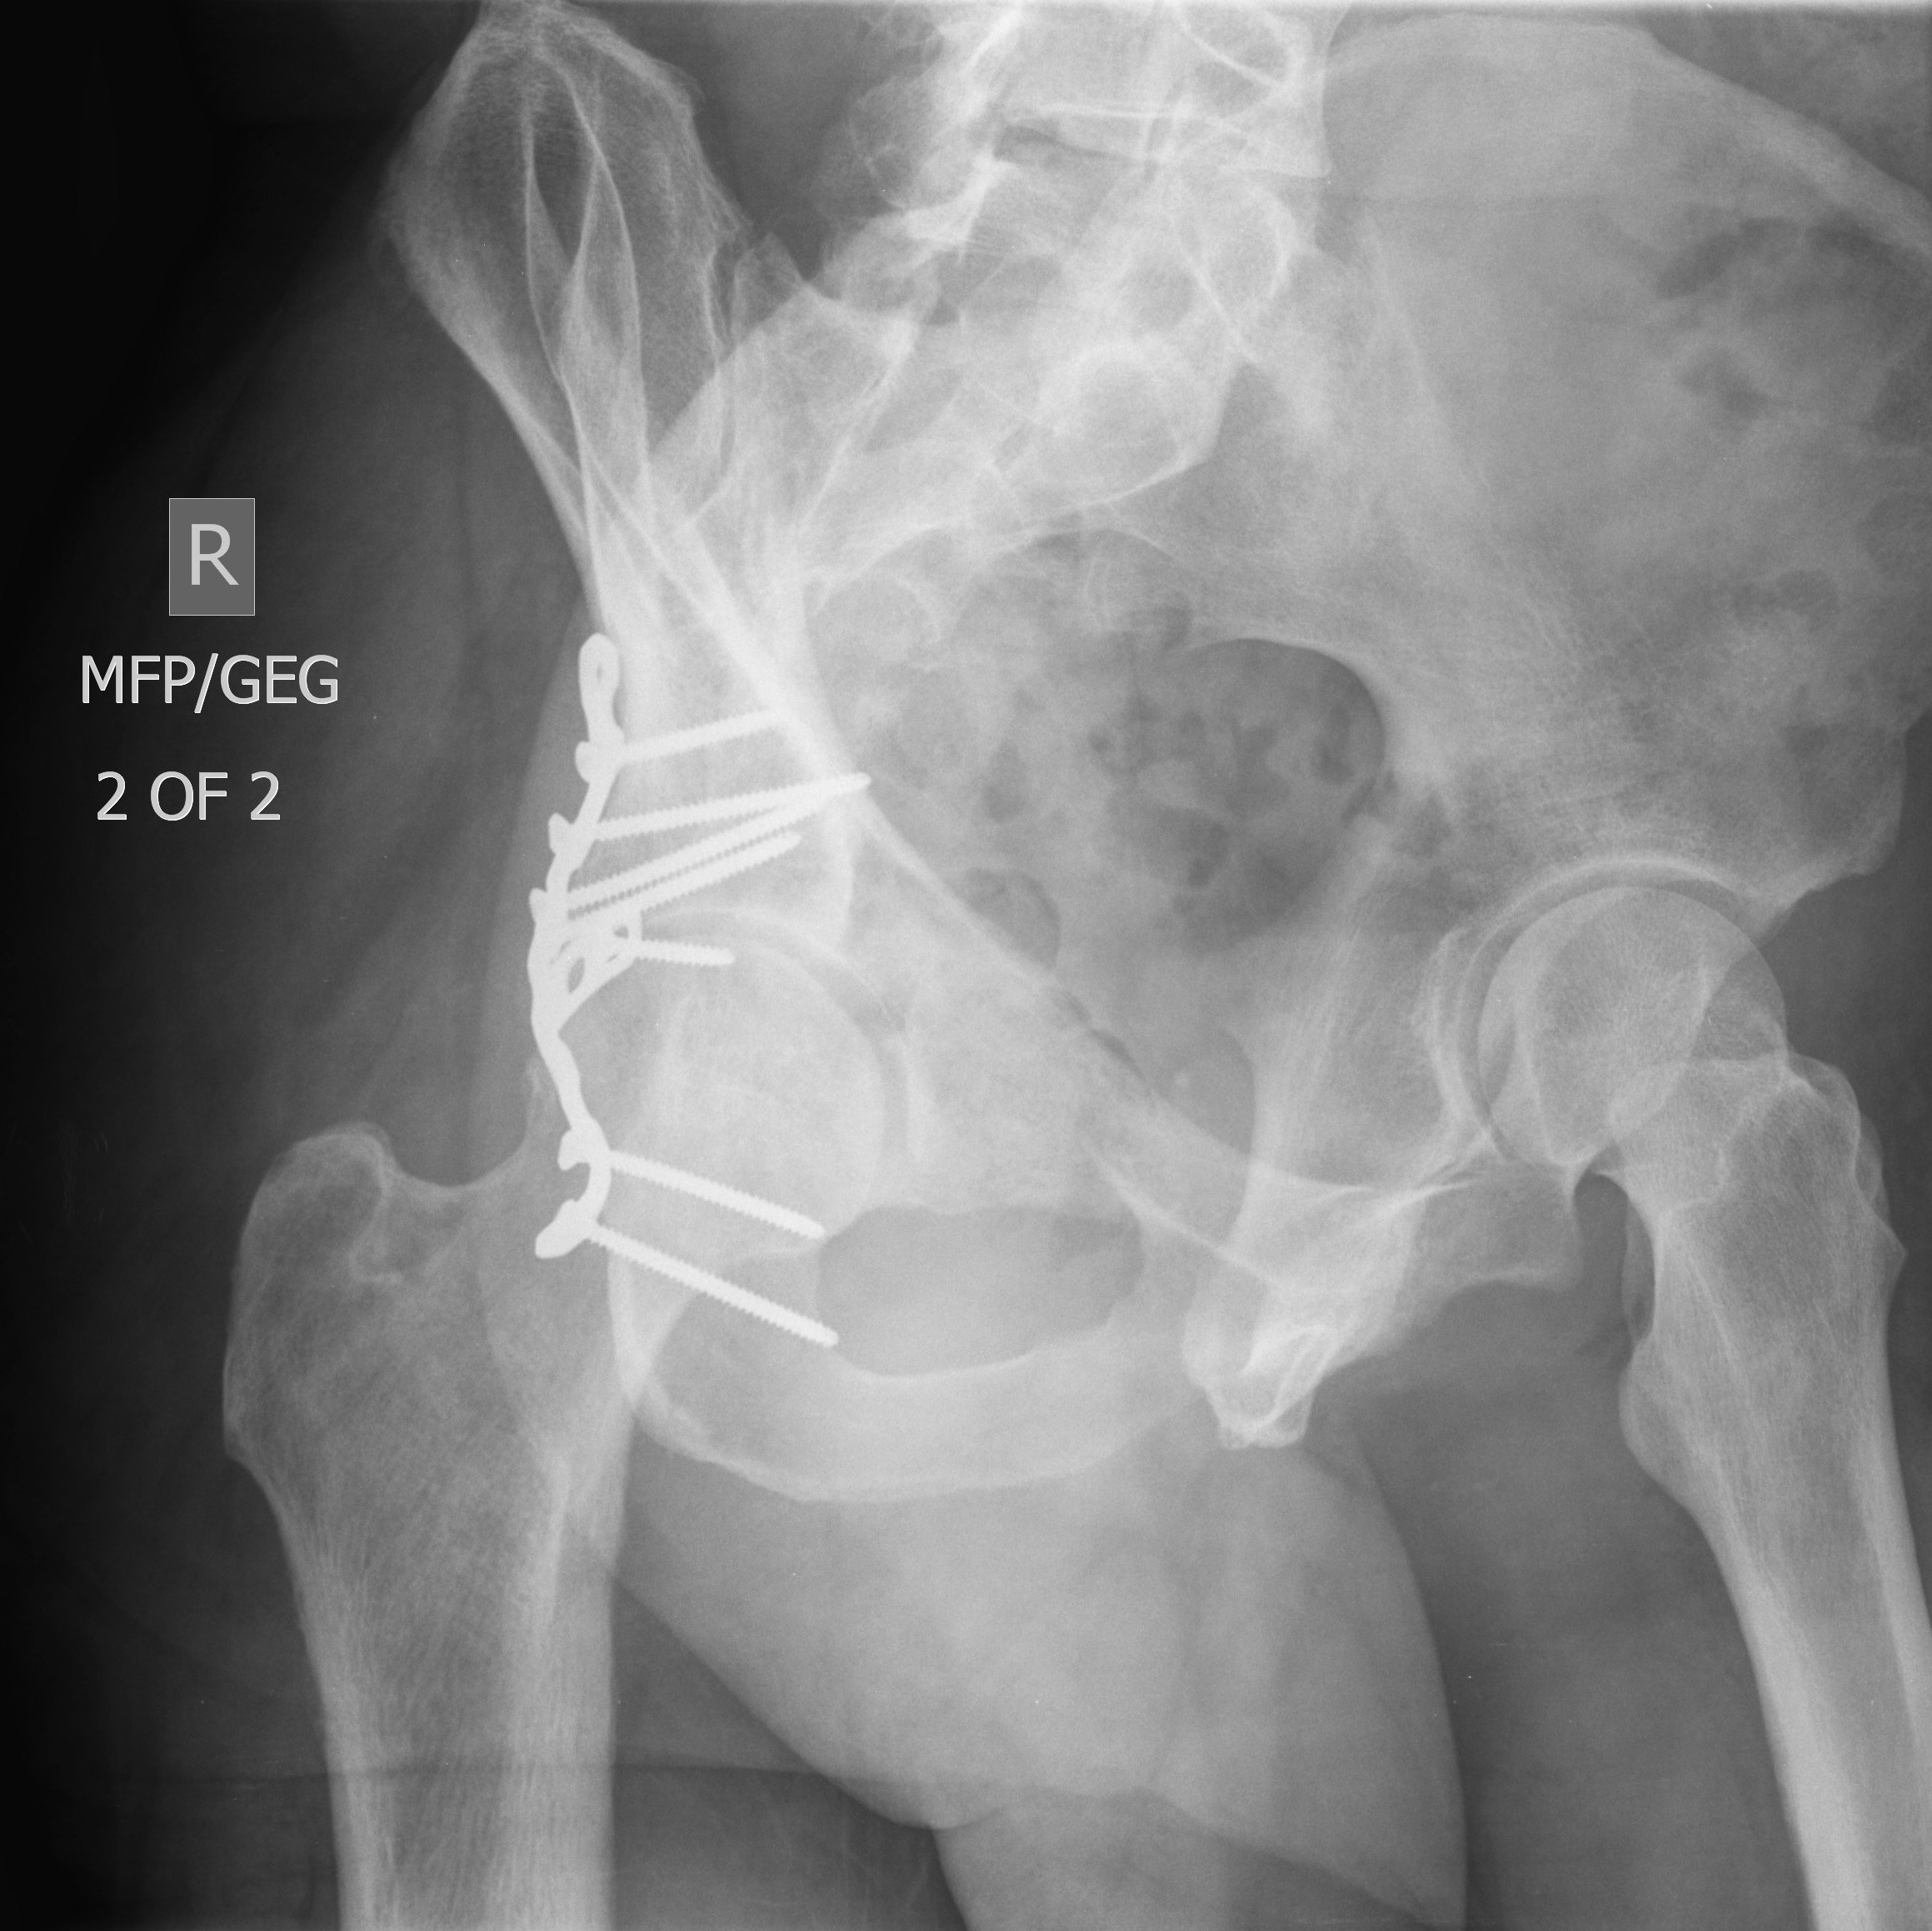
If patient has internal fixators/prosthesis, always include the entire length of the fixator/prosthesis.
USE GONADAL SHIELDING WHENEVER PRIMARY BEAM IS WITHIN 5 CM OF GONADS.
|
UPPER EXTREMITIES |
|||
|
Exams/Views to be done |
Cassette size, type and orientation |
Patient position relative to film |
Central ray (CR) direction |
|
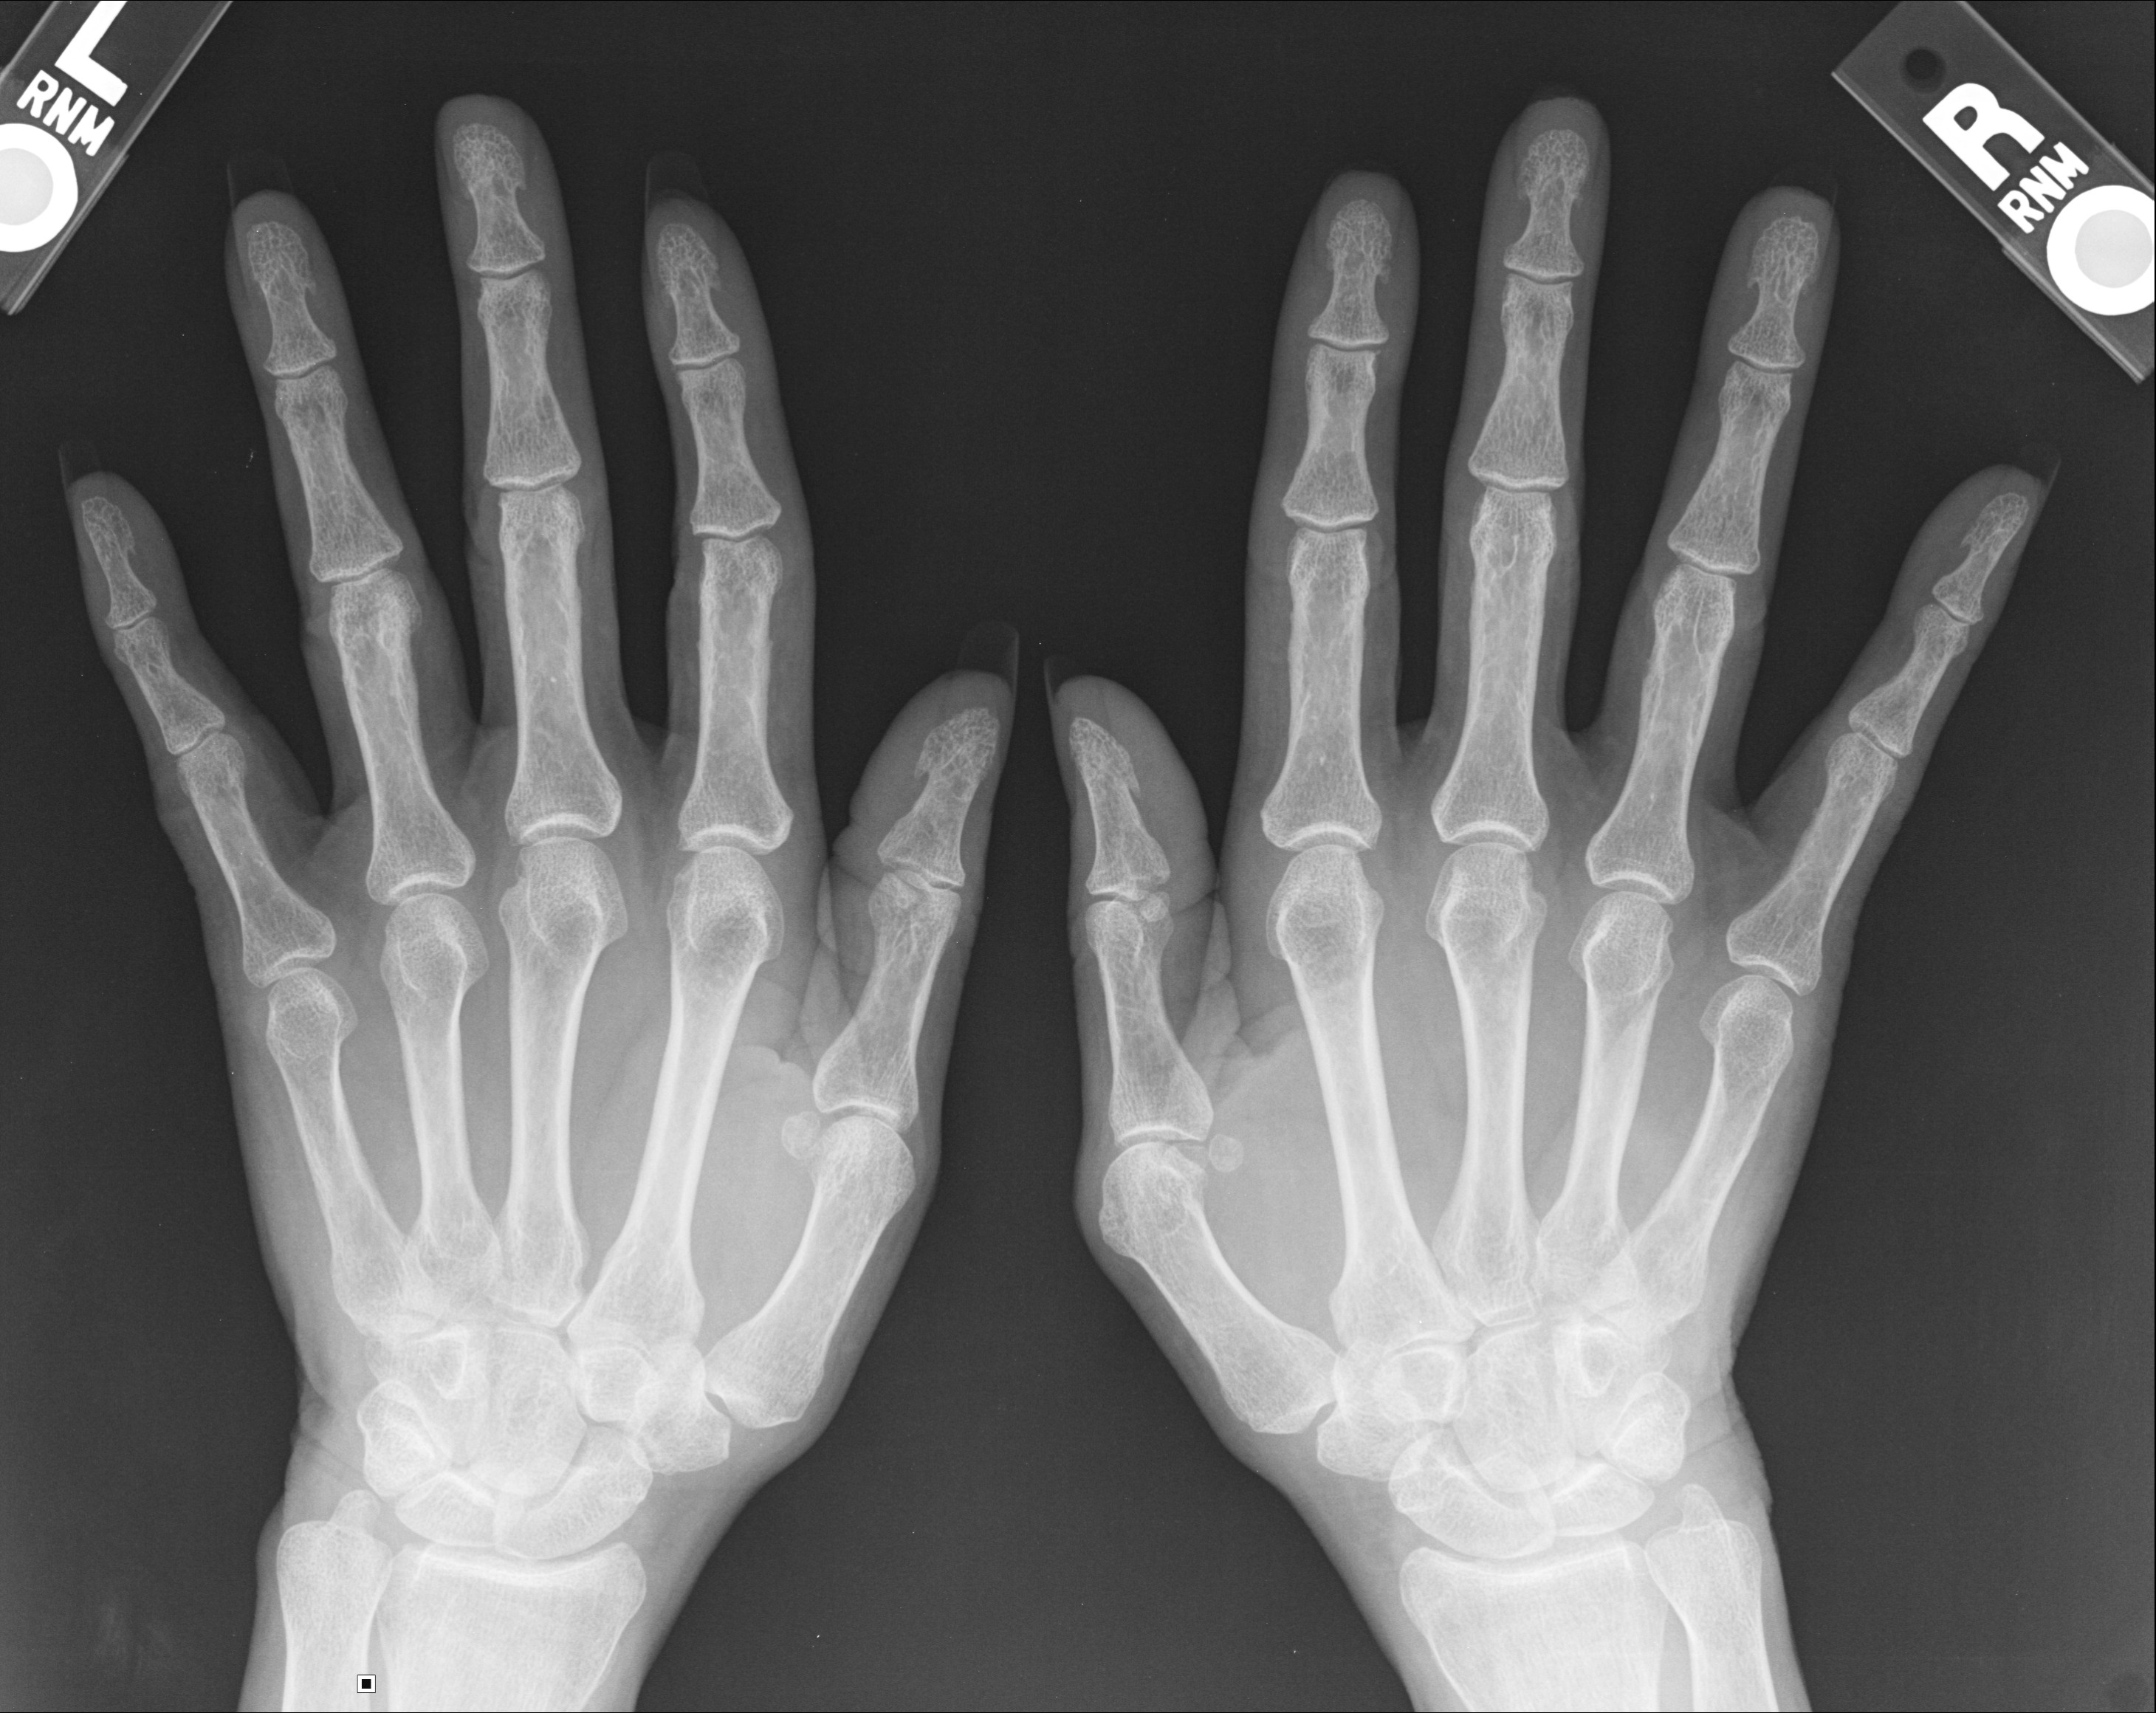
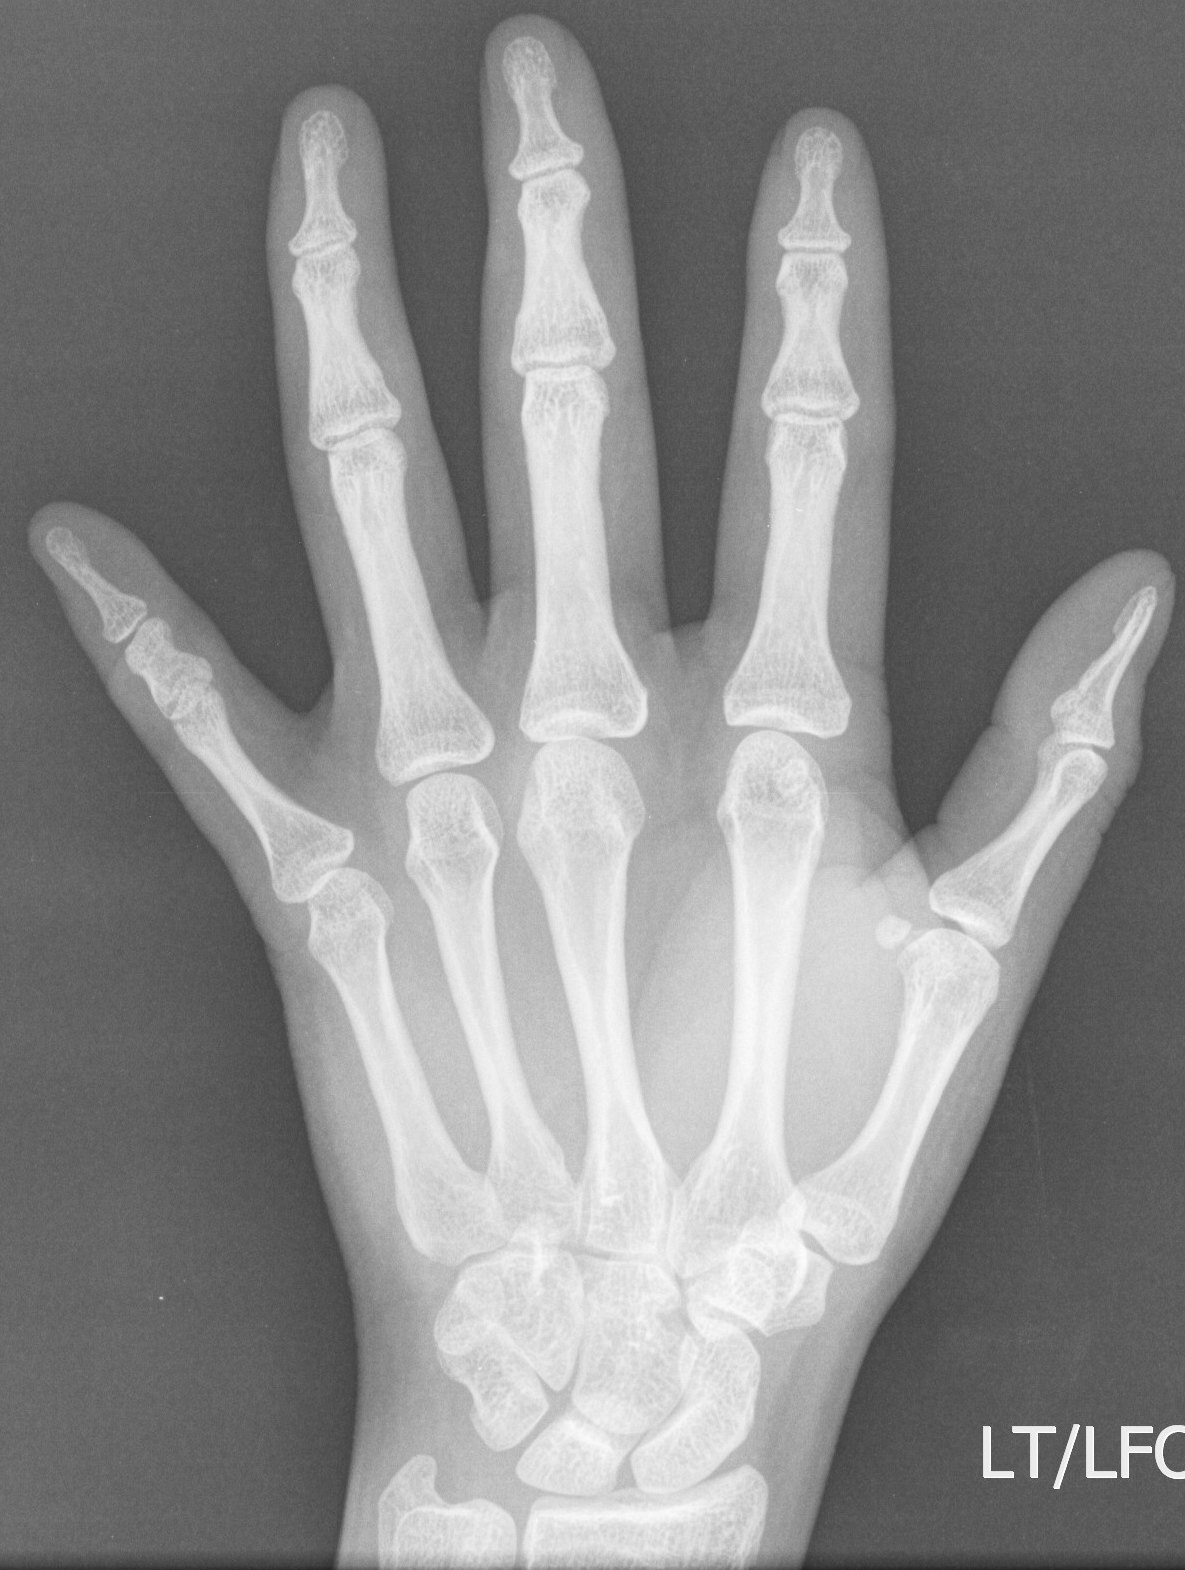
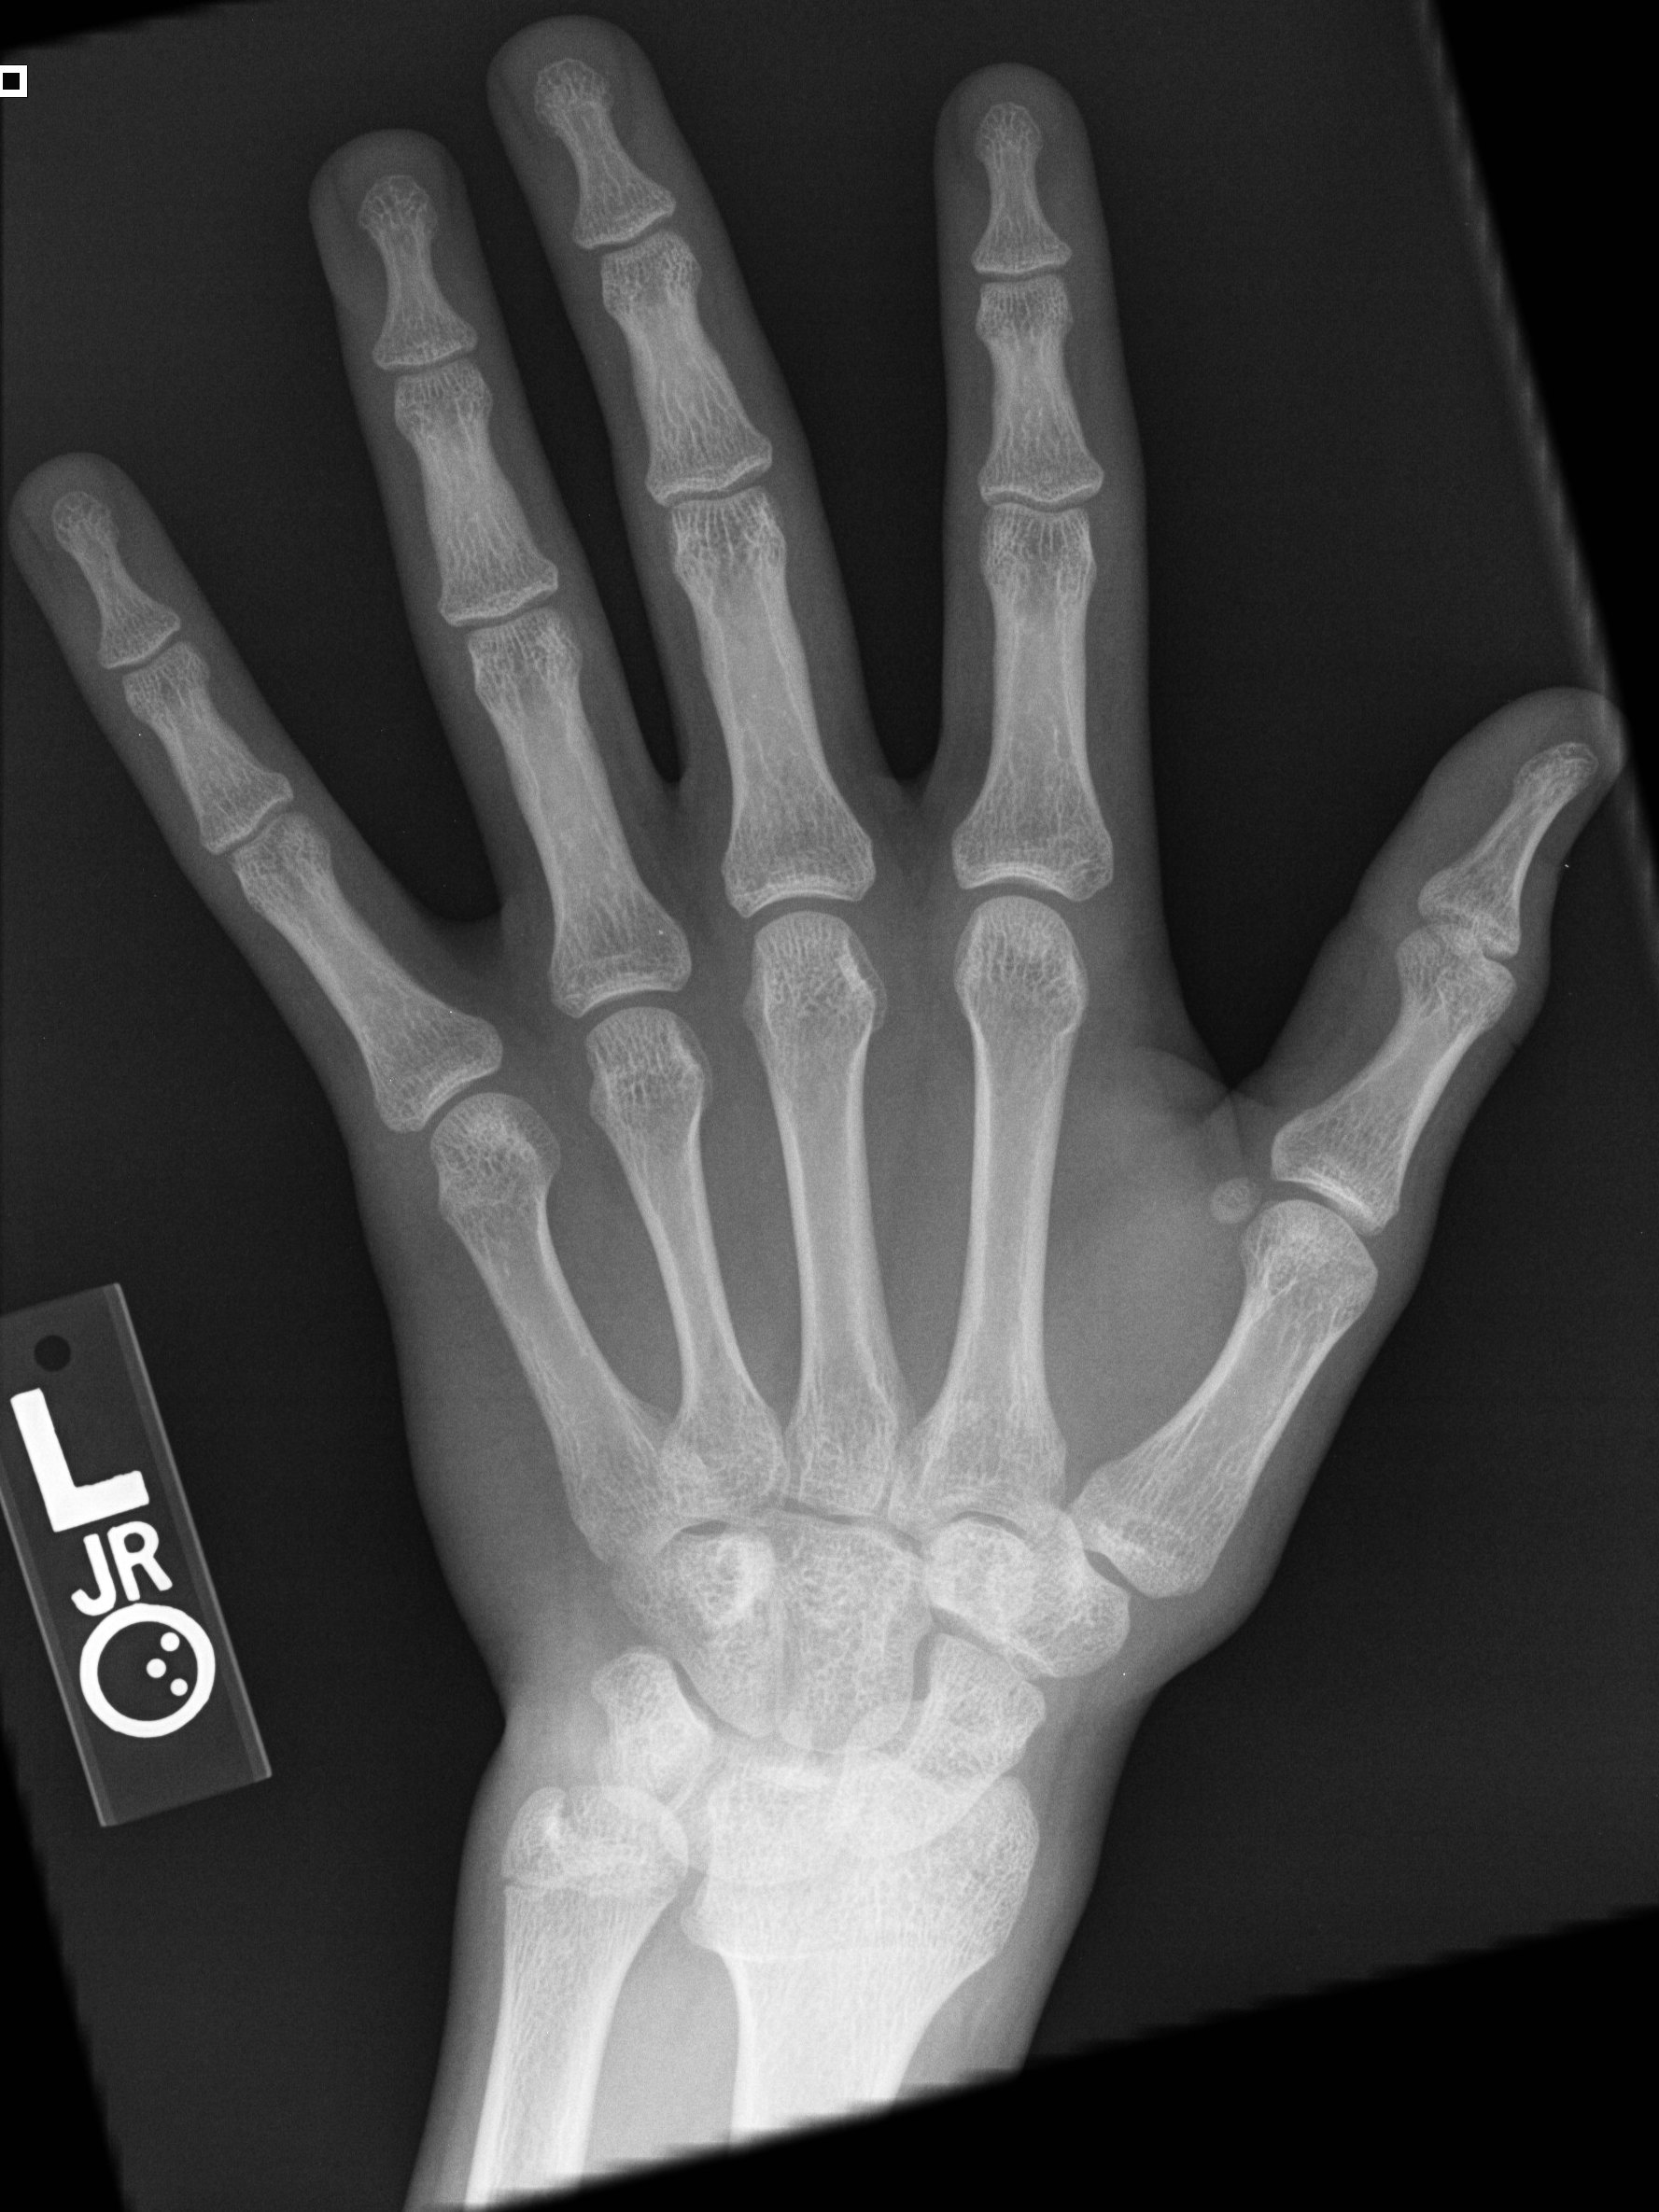
1. PA Hand |
½ of 10x12 LW, LFC, tabletop |
Pronate hand onto extremity cassette, include all digits on radiograph. Flatten hand in cassette whenever possible. |
CR perpendicular to base of third (3rd) metacarpal |
|
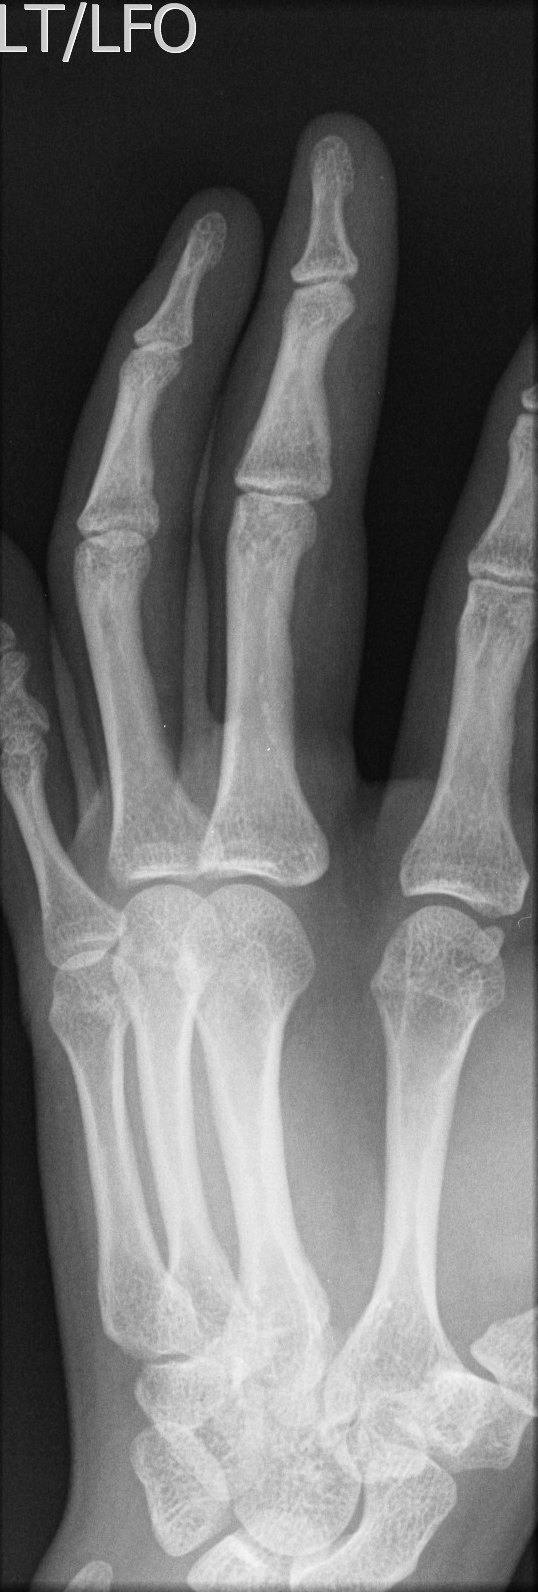
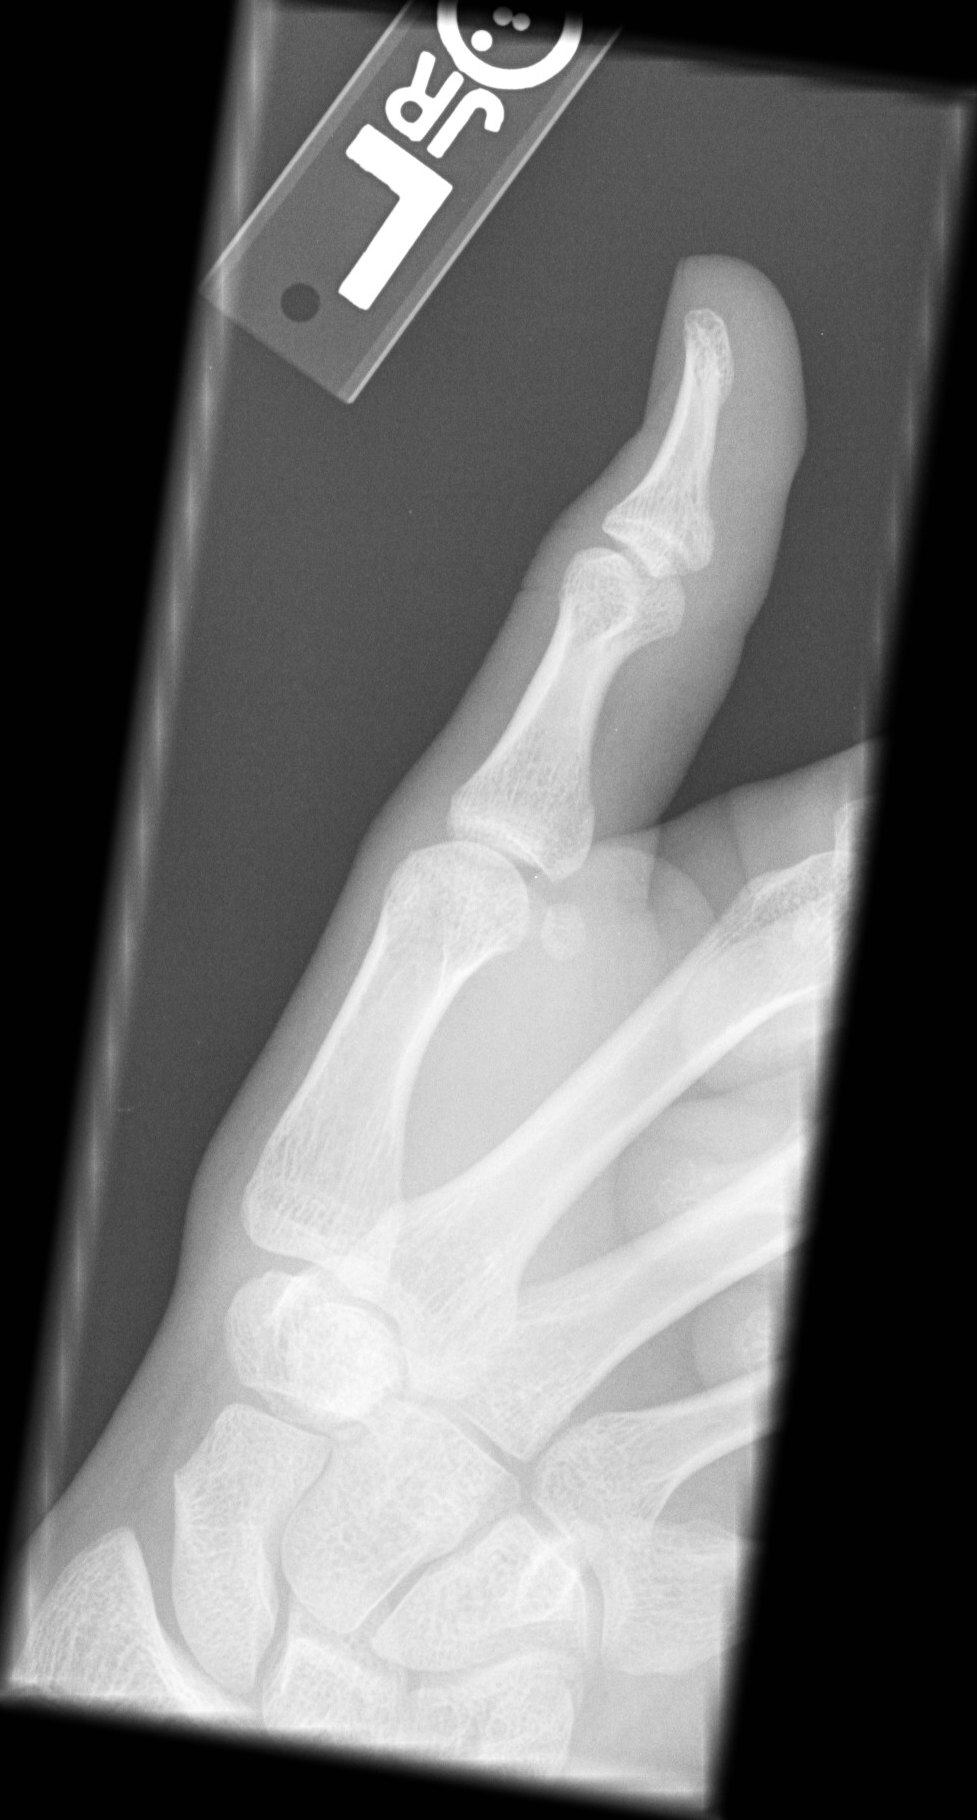
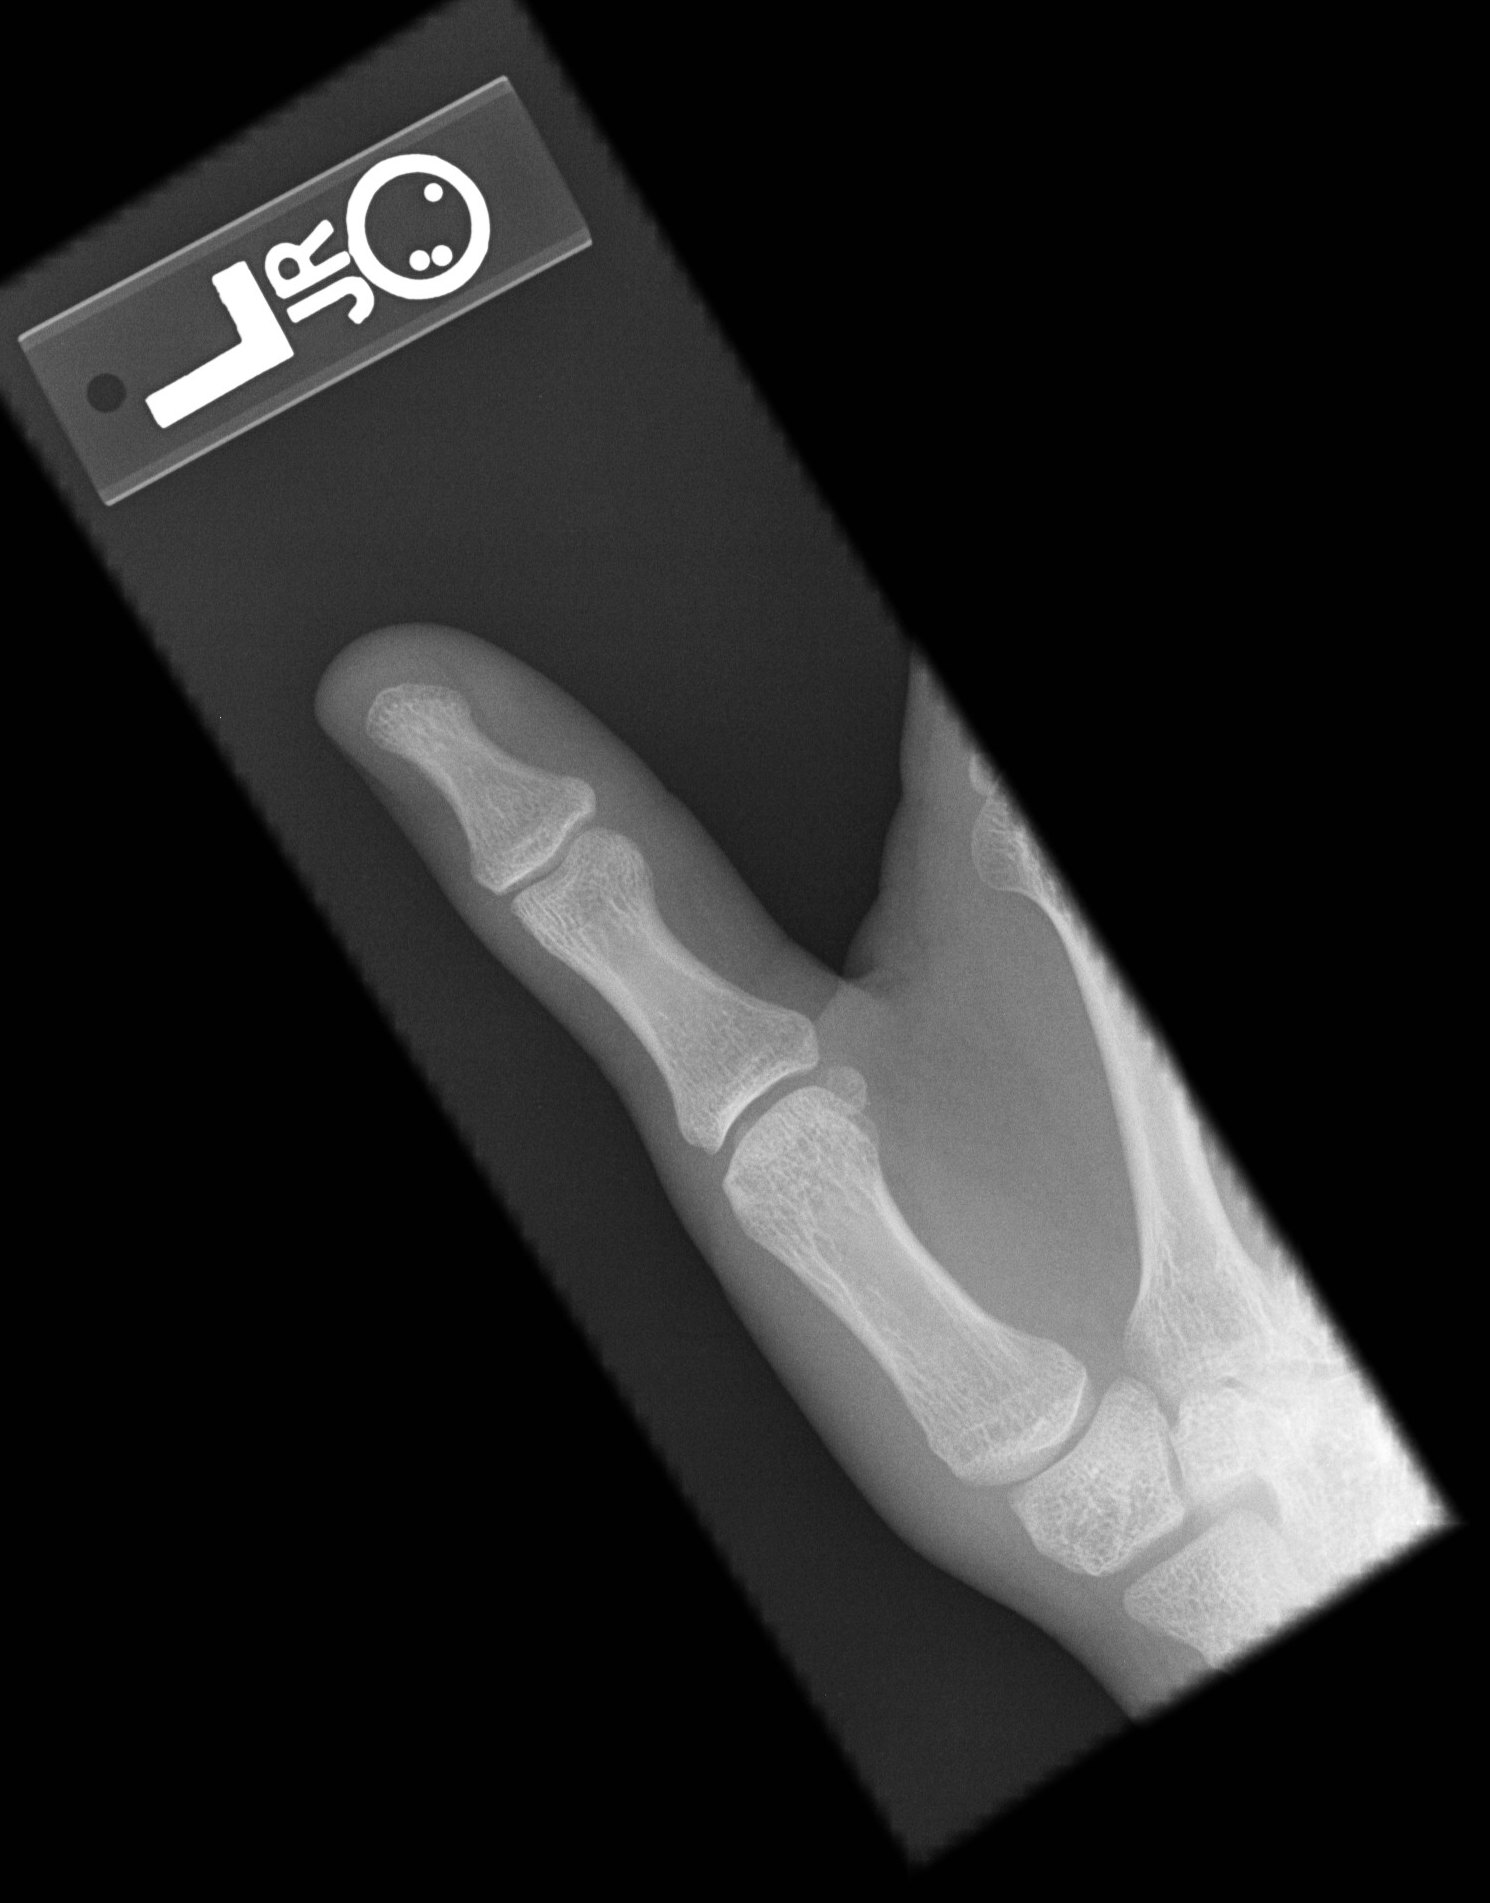
2. Oblique of digit |
1/4 of 10x12 LW |
Rotate hand laterally 45E, separate fingers |
CR perpendicular to proximal PIP |
|
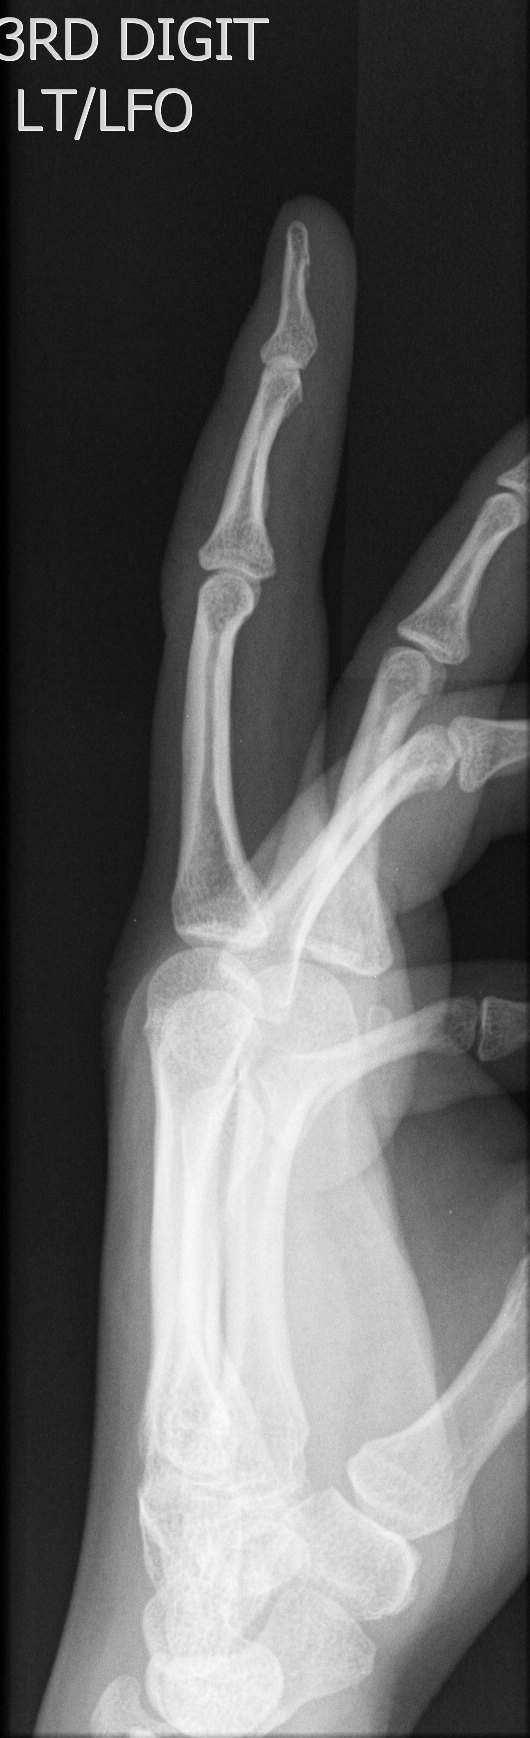
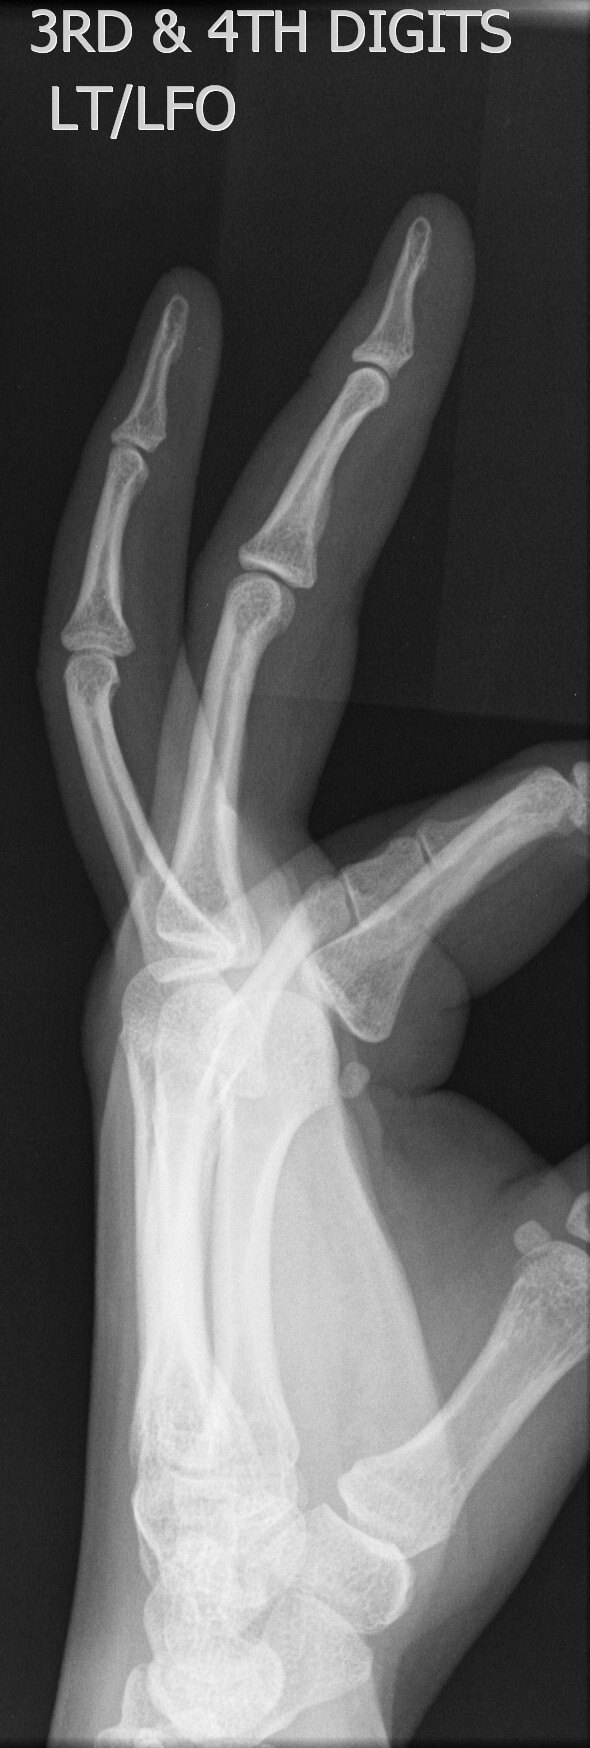
3. Lateral of digit |
1/4 of 10x12 LW |
Rotate hand into lateral position, separate affected finger and place closest to film |
CR perpendicular to proximal PIP |
|
Follow protocol above. PA hand position shows the thumb in oblique position. Series will include: 1. PA hand 2. Lateral Thumb 3. AP thumb |
|||
|
HAND (Include the wrist on hand films.) |
|||
|
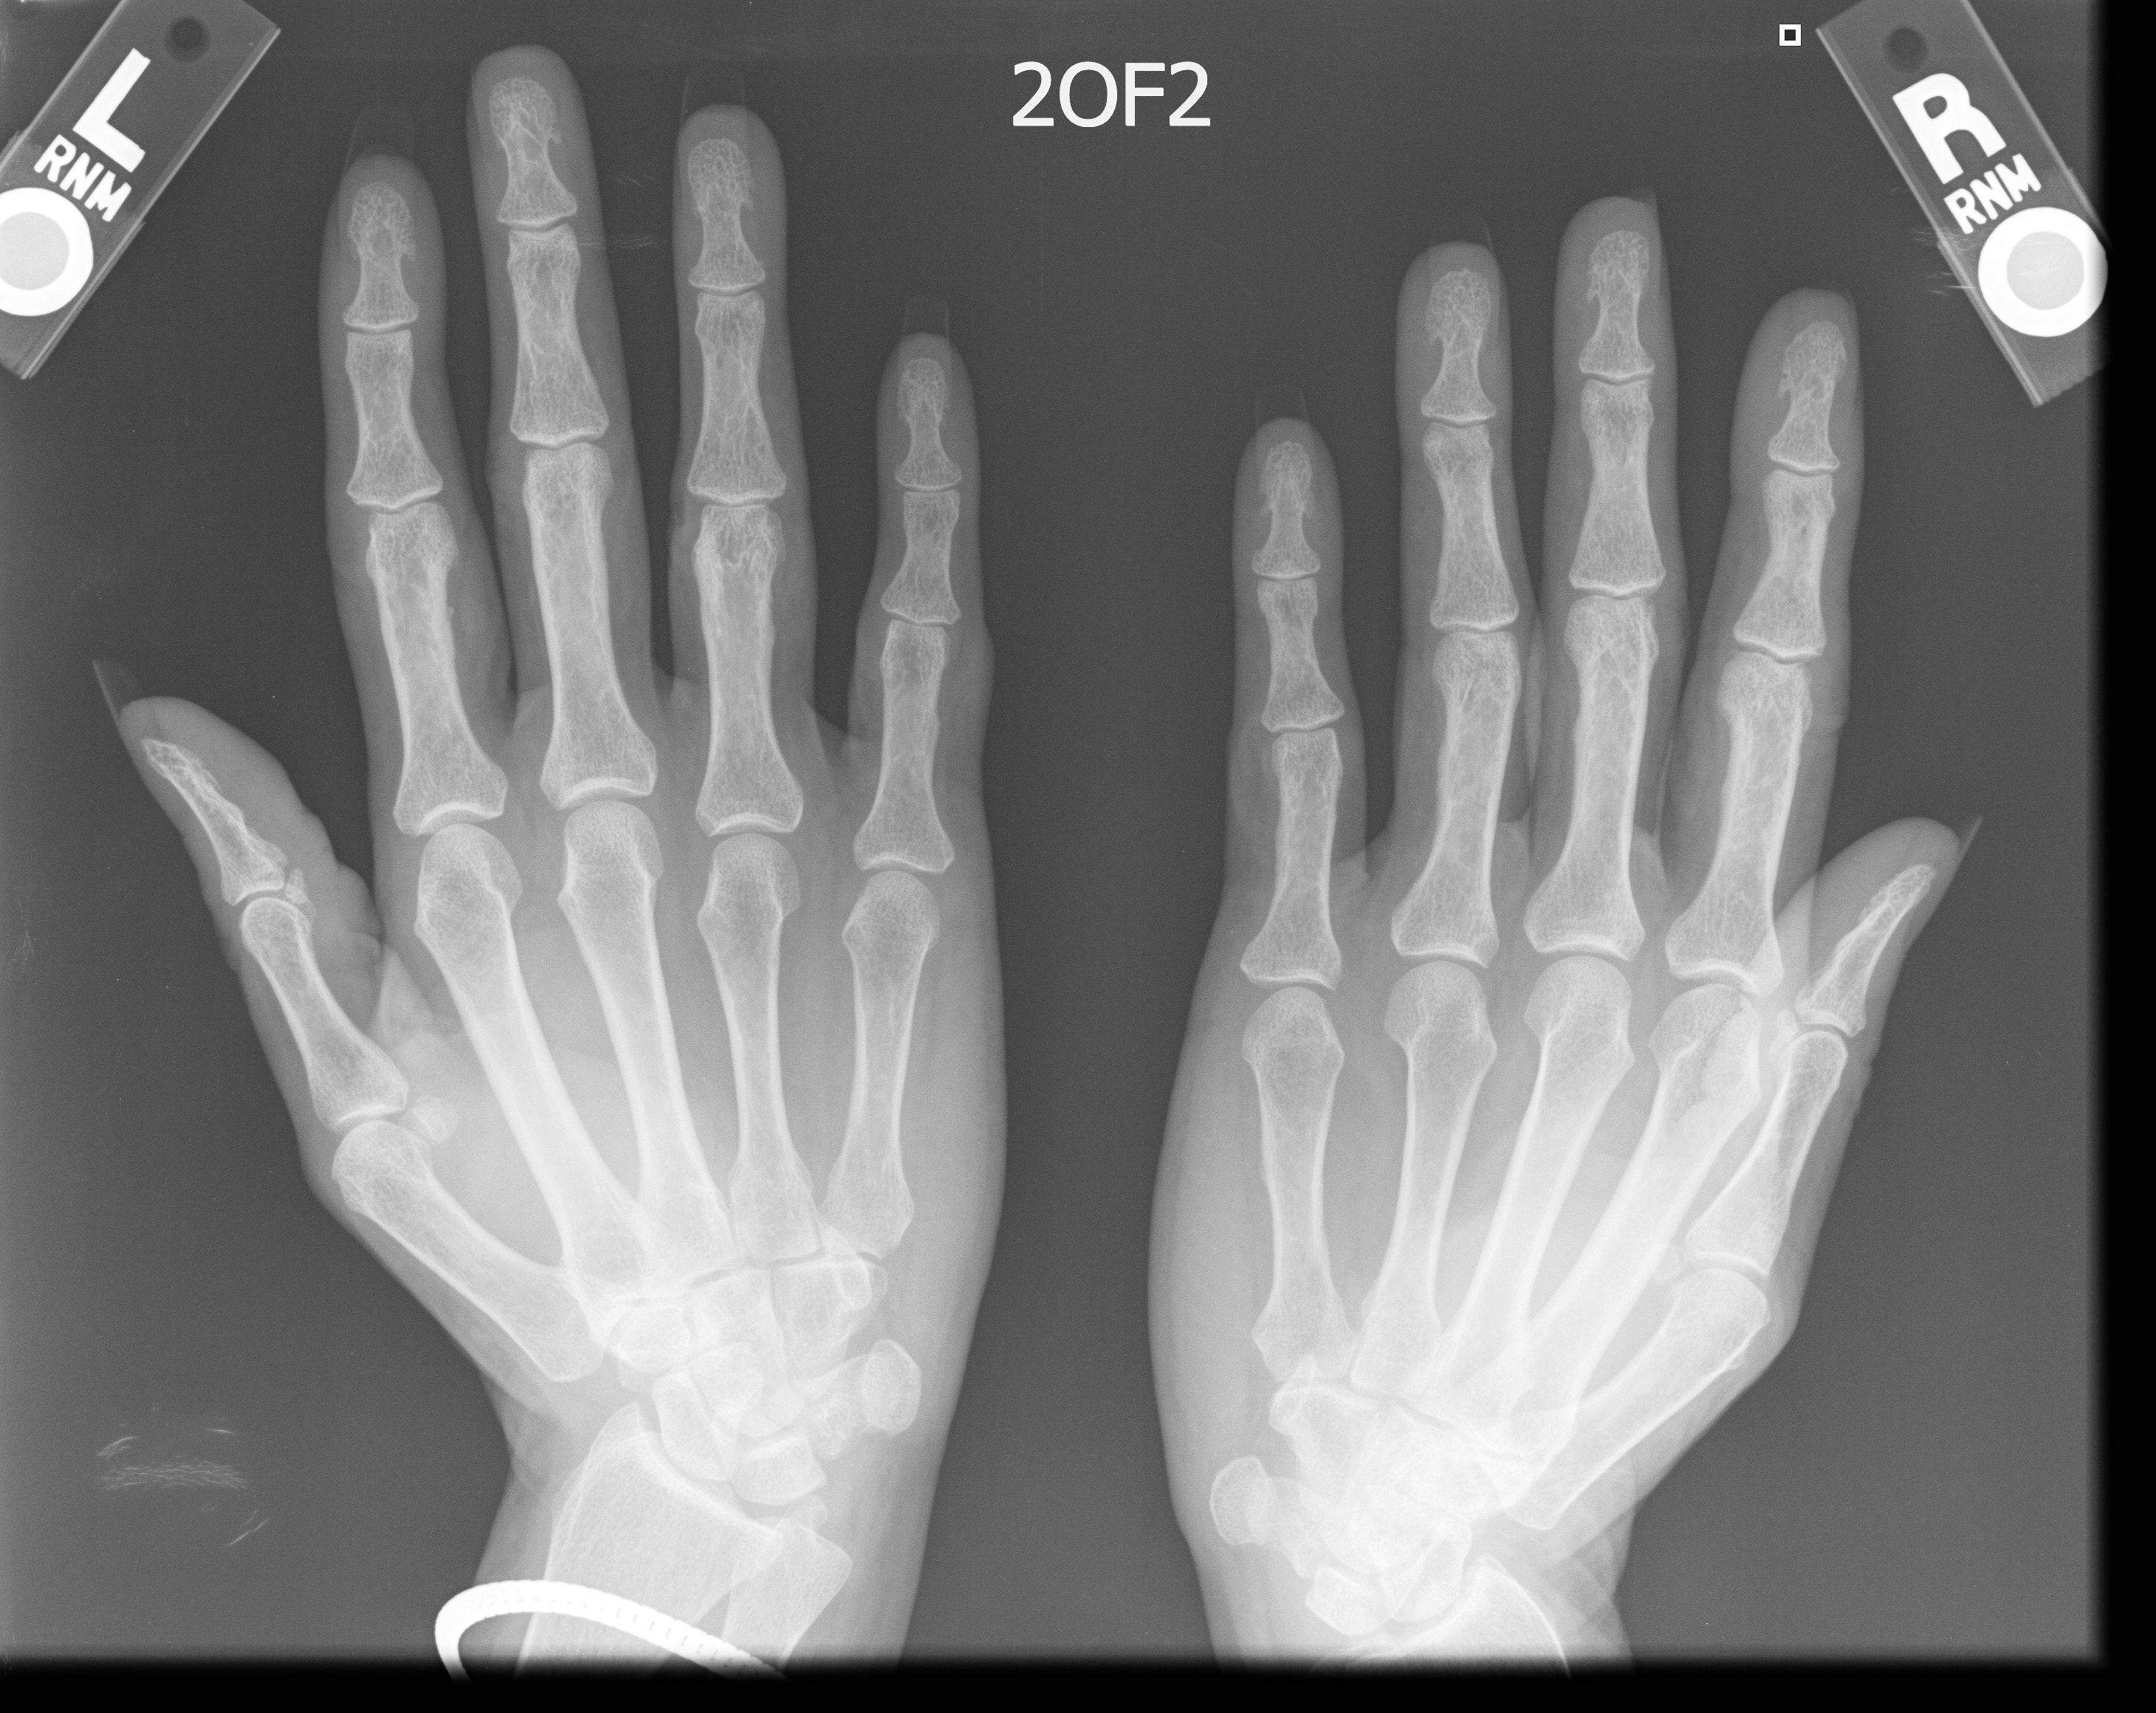
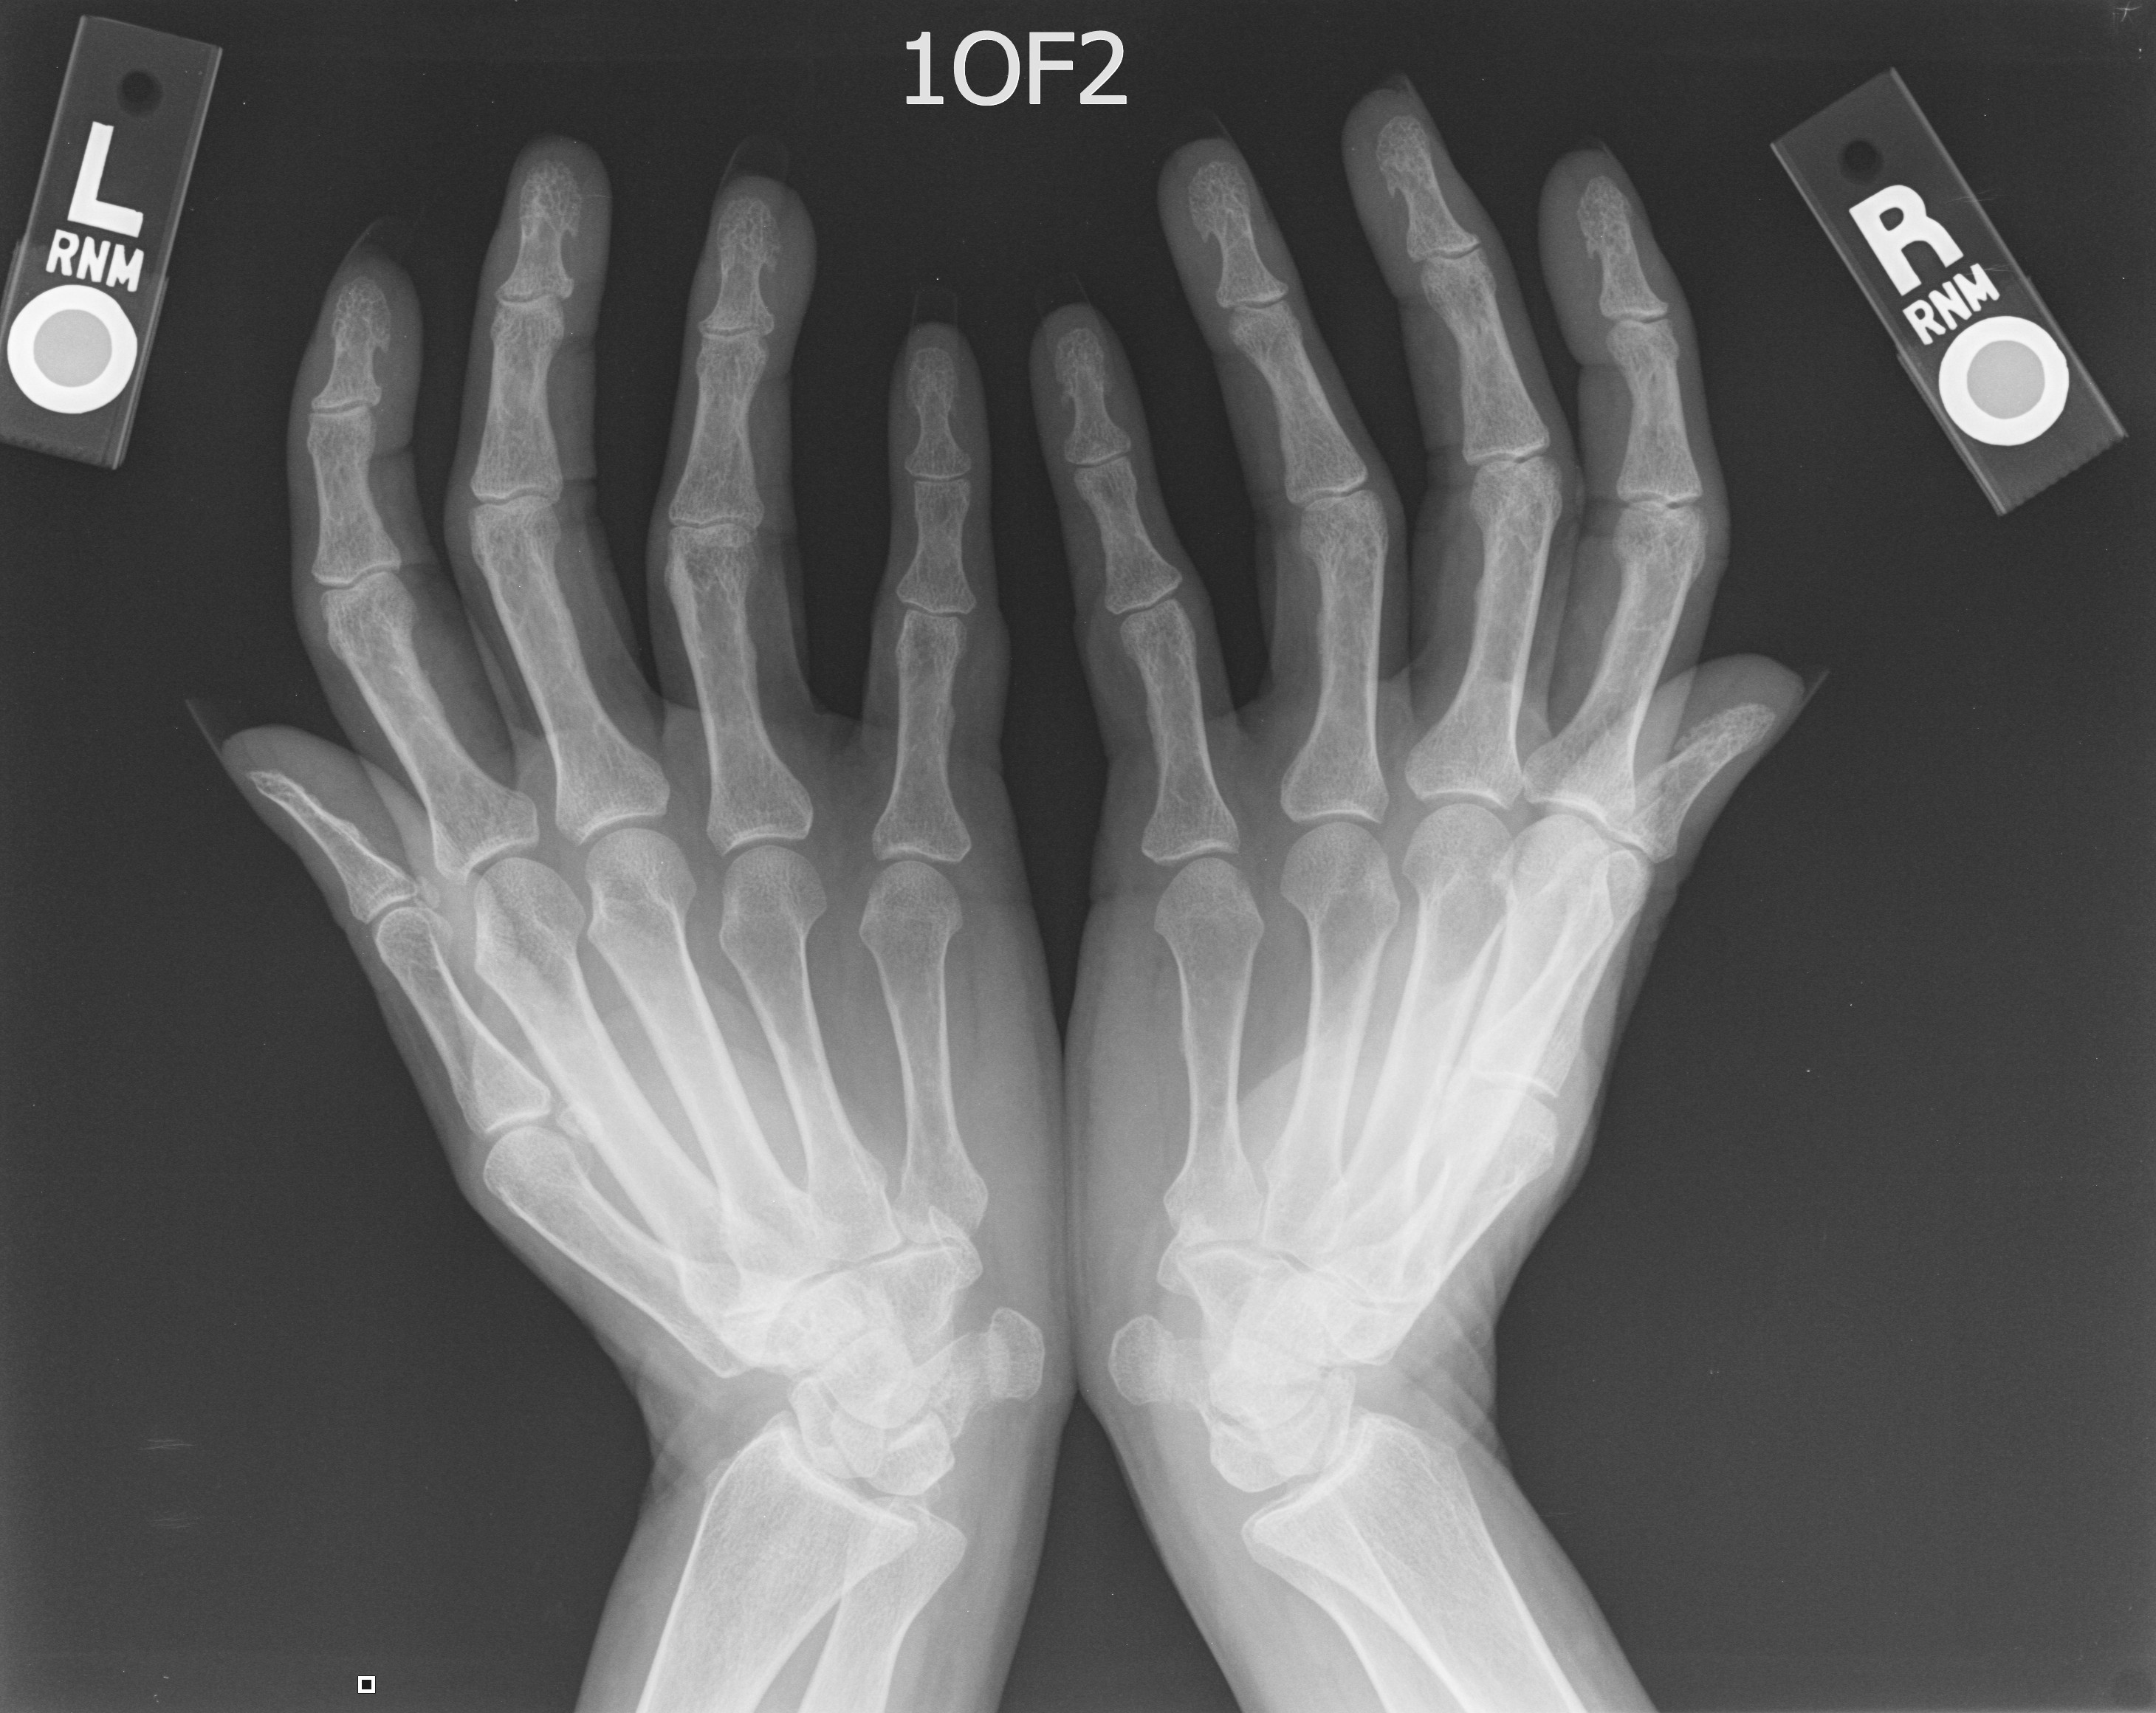
1. PA hand |
½ of 10x12 CW |
Pronate hand onto extremity cassette. Flatten hand whenever possible and include wrist in collimation. |
CR perpendicular to the base of third (3rd) metacarpal |
|
2. Oblique hand |
½ of 10x12 CW |
Rotate hand laterally 45E, separate fingers |
CR perpendicular to third metacarpal |
|
3. Lateral hand |
8x10 LW |
Rotate hand 90E, thumb parallel to film, fingers "fanned" to avoid superimposition |
CR perpendicular to second metacarpal |
|
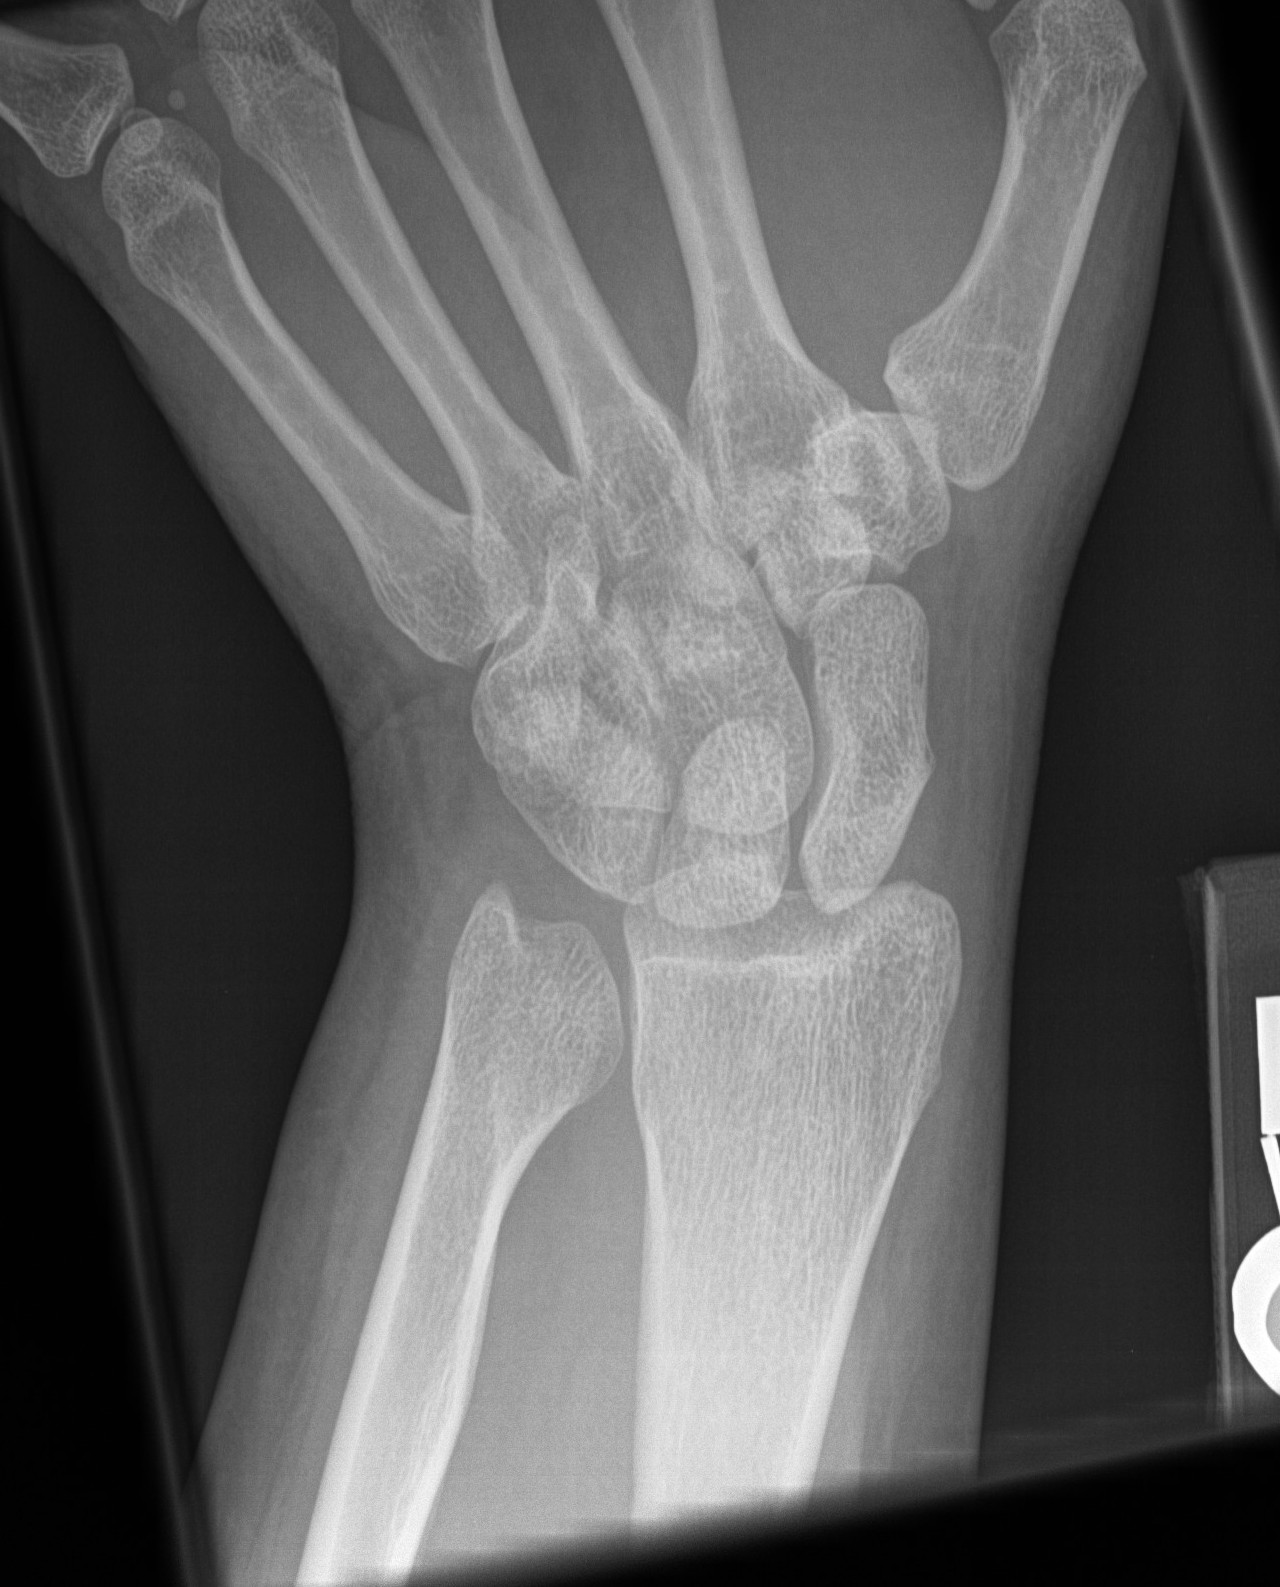
WRIST (Non-trauma) |
|||
|
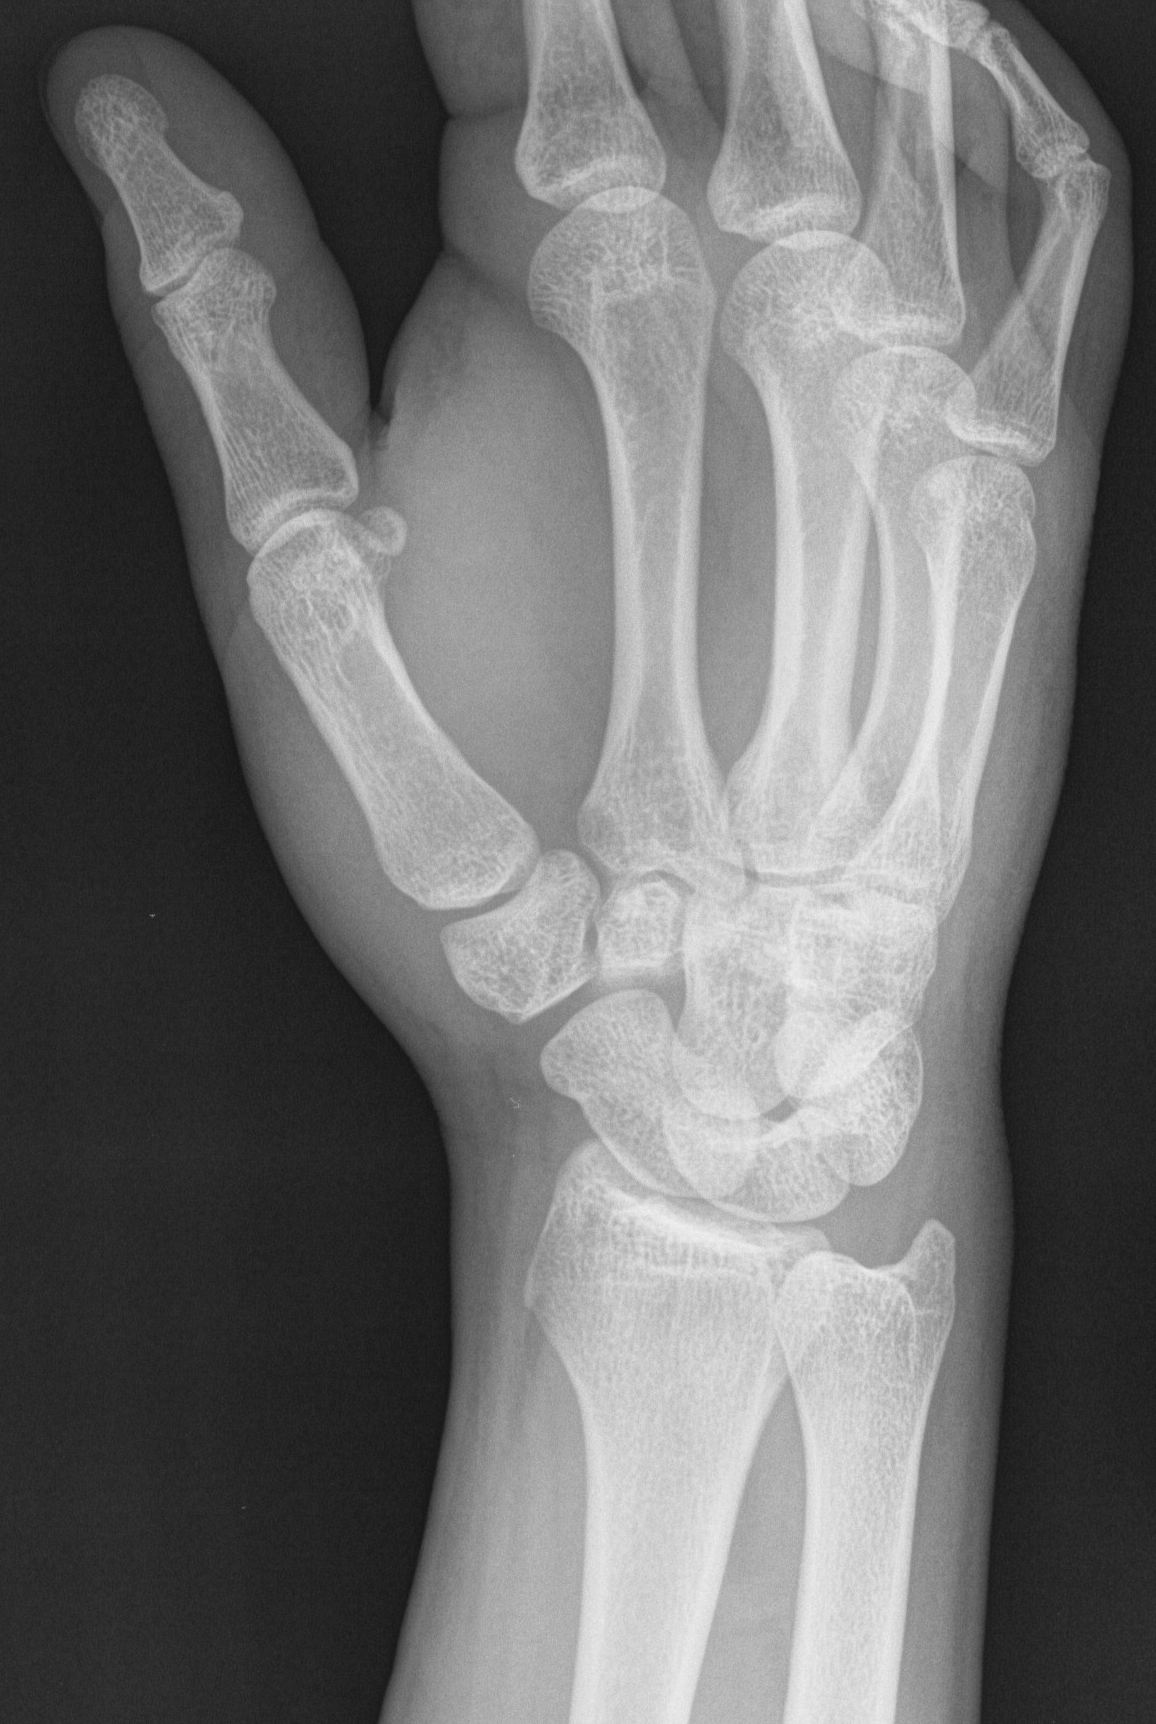
1. PA |
½ of 8x10 CW |
Pronate hand, flex fingers to position wrist closer to film. |
CR perpendicular to midcarpal |
|
2. Lateral |
½ of 8x10 CW |
Rotate hand and wrist 90E, elbow flexed 90E |
CR perpendicular to midcarpal |
|
WRIST - (Acute injuries) |
|||
|
1. PA |
½ of 8x10 CW |
Same as described above for chronic conditions. |
Same as described above. |
|
2. Lateral |
½ of 8x10 CW |
Same as described above for chronic conditions. |
Same as described above. |
|
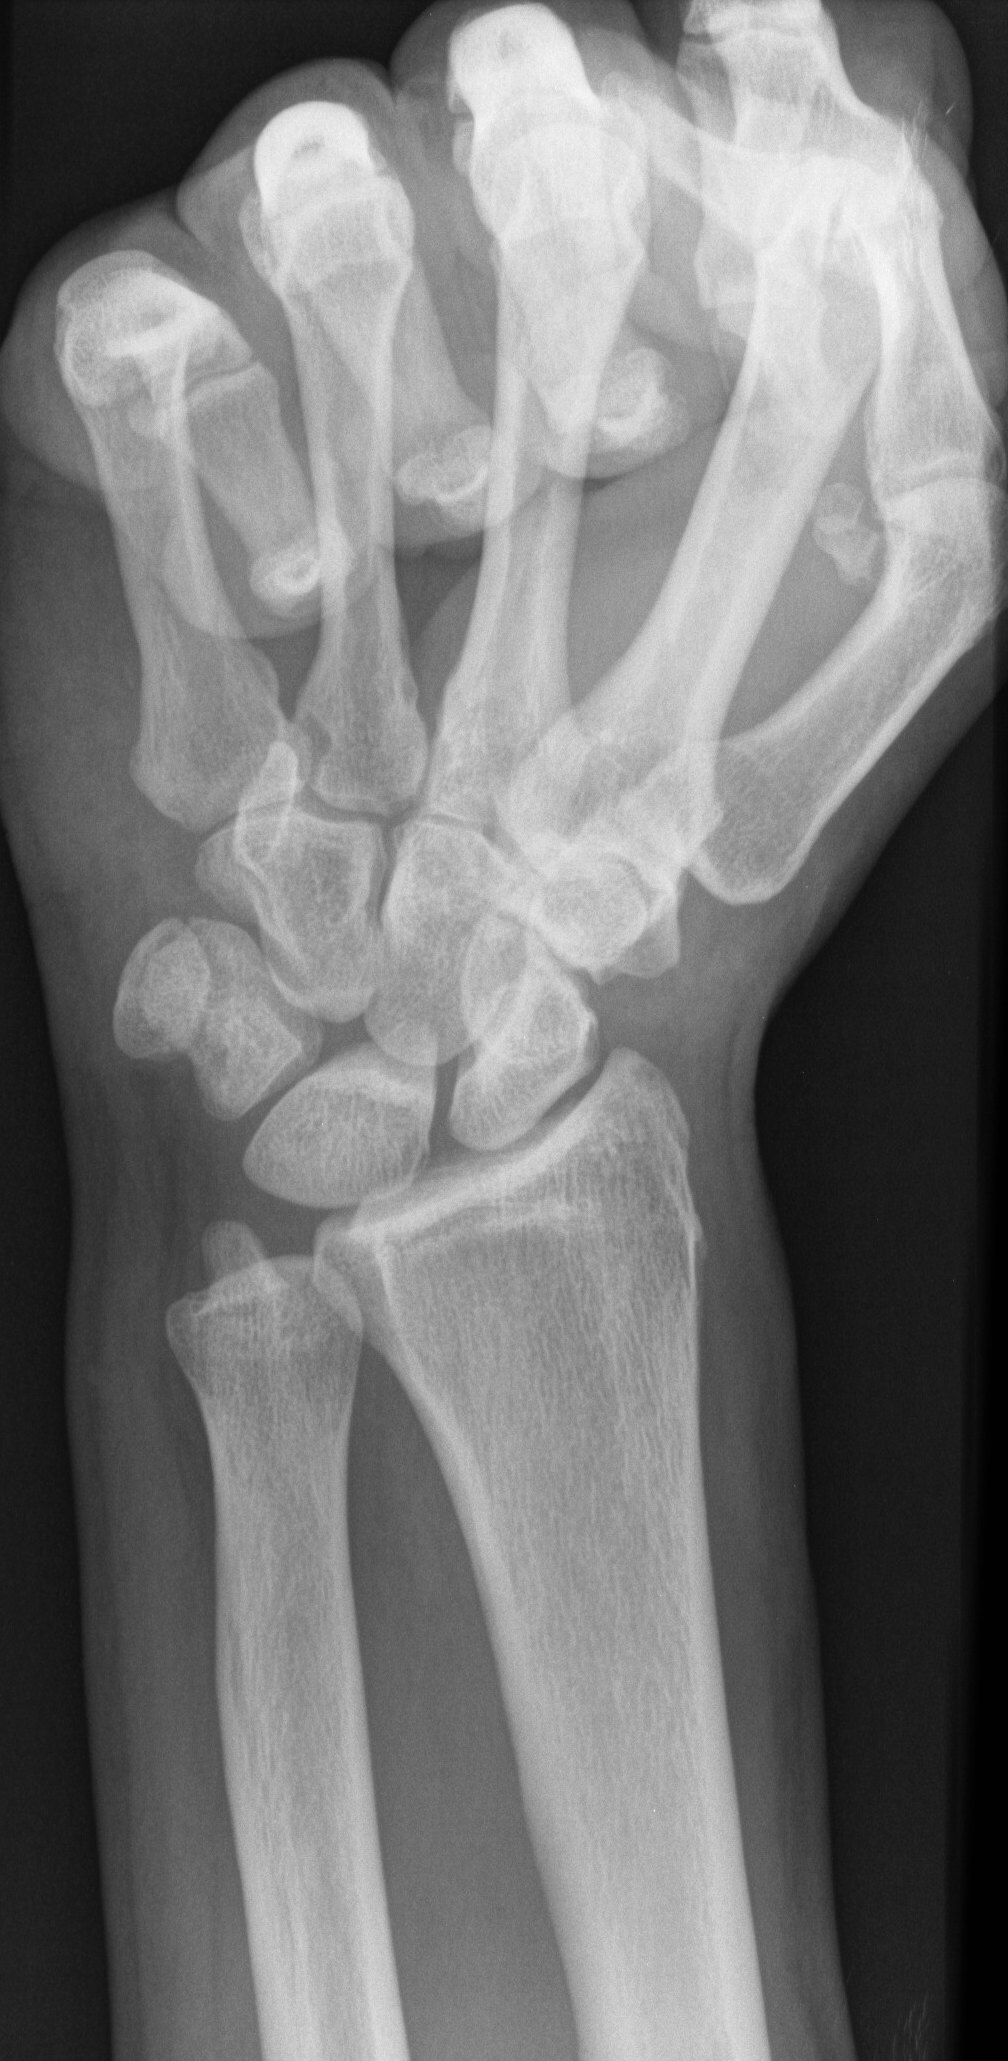
3. Ulnar oblique |
½ of 8x10 CW |
Rotate hand and wrist laterally 45E, elbow flexed 90E |
CR perpendicular to midcarpal |
|
WRIST - (Acute injuries) |
|||
|
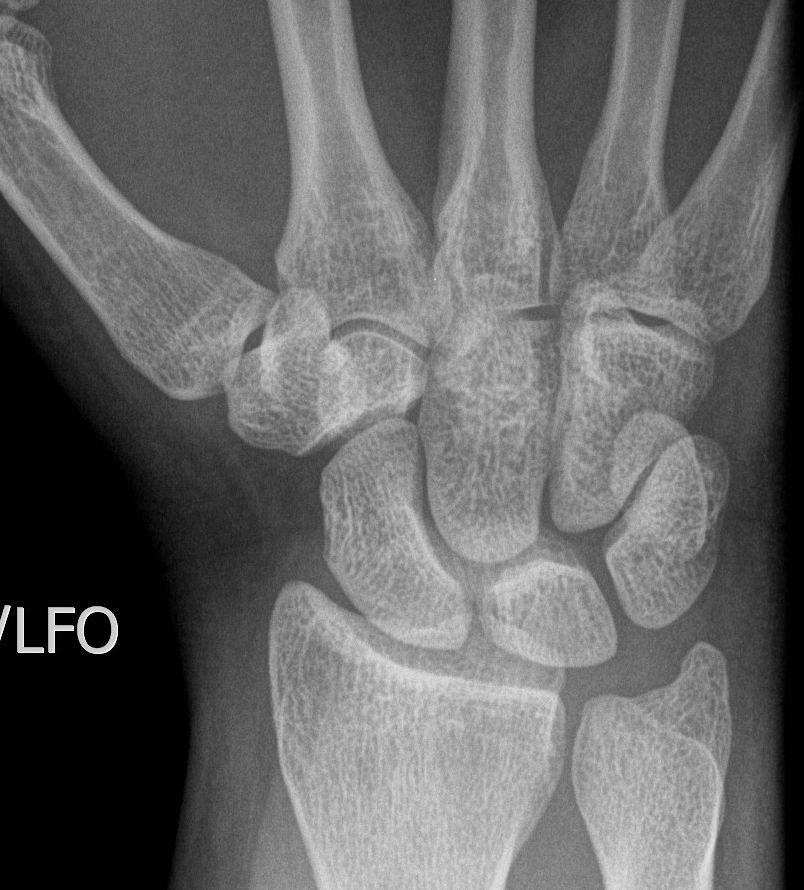
4. Radial oblique |
½ of 8x10 CW |
Pronate hand, have patient move hand laterally as much as possible without lifting or rotating forearm |
CR angled 20E toward elbow, centered to scaphoid |
|
5. Navicular view |
|
|
|
|
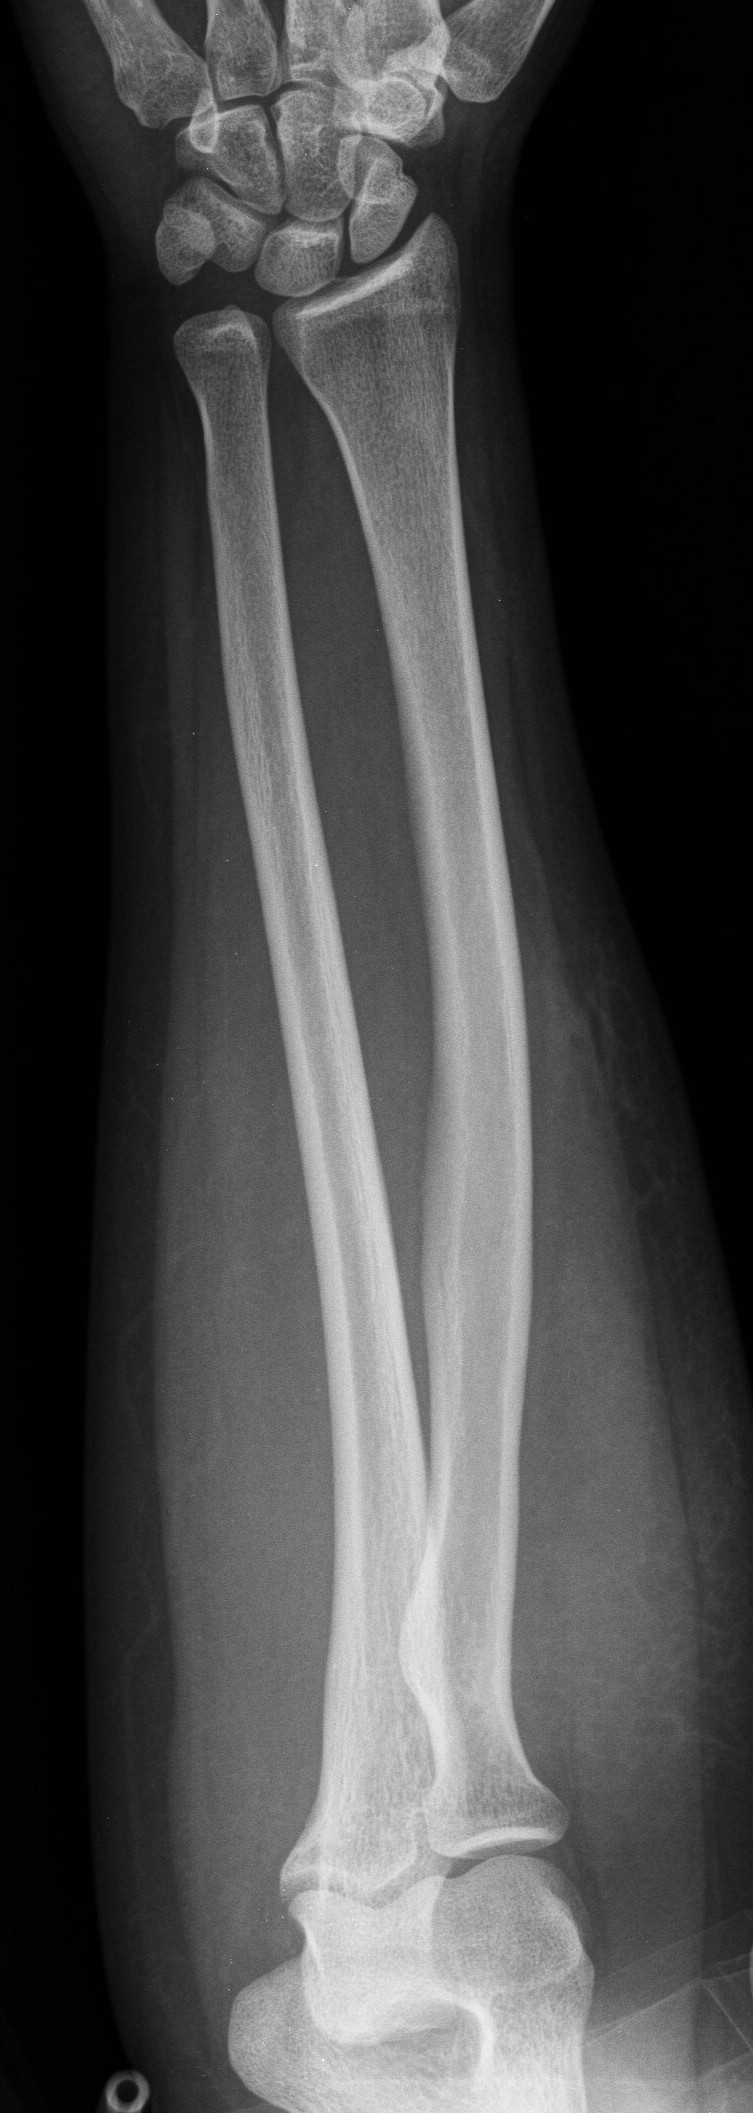
1. AP (Include BOTH joints on each film.) |
½ of 11x14 LW |
Supinate hand and forearm. |
CR perpendicular to mid-forearm |
|
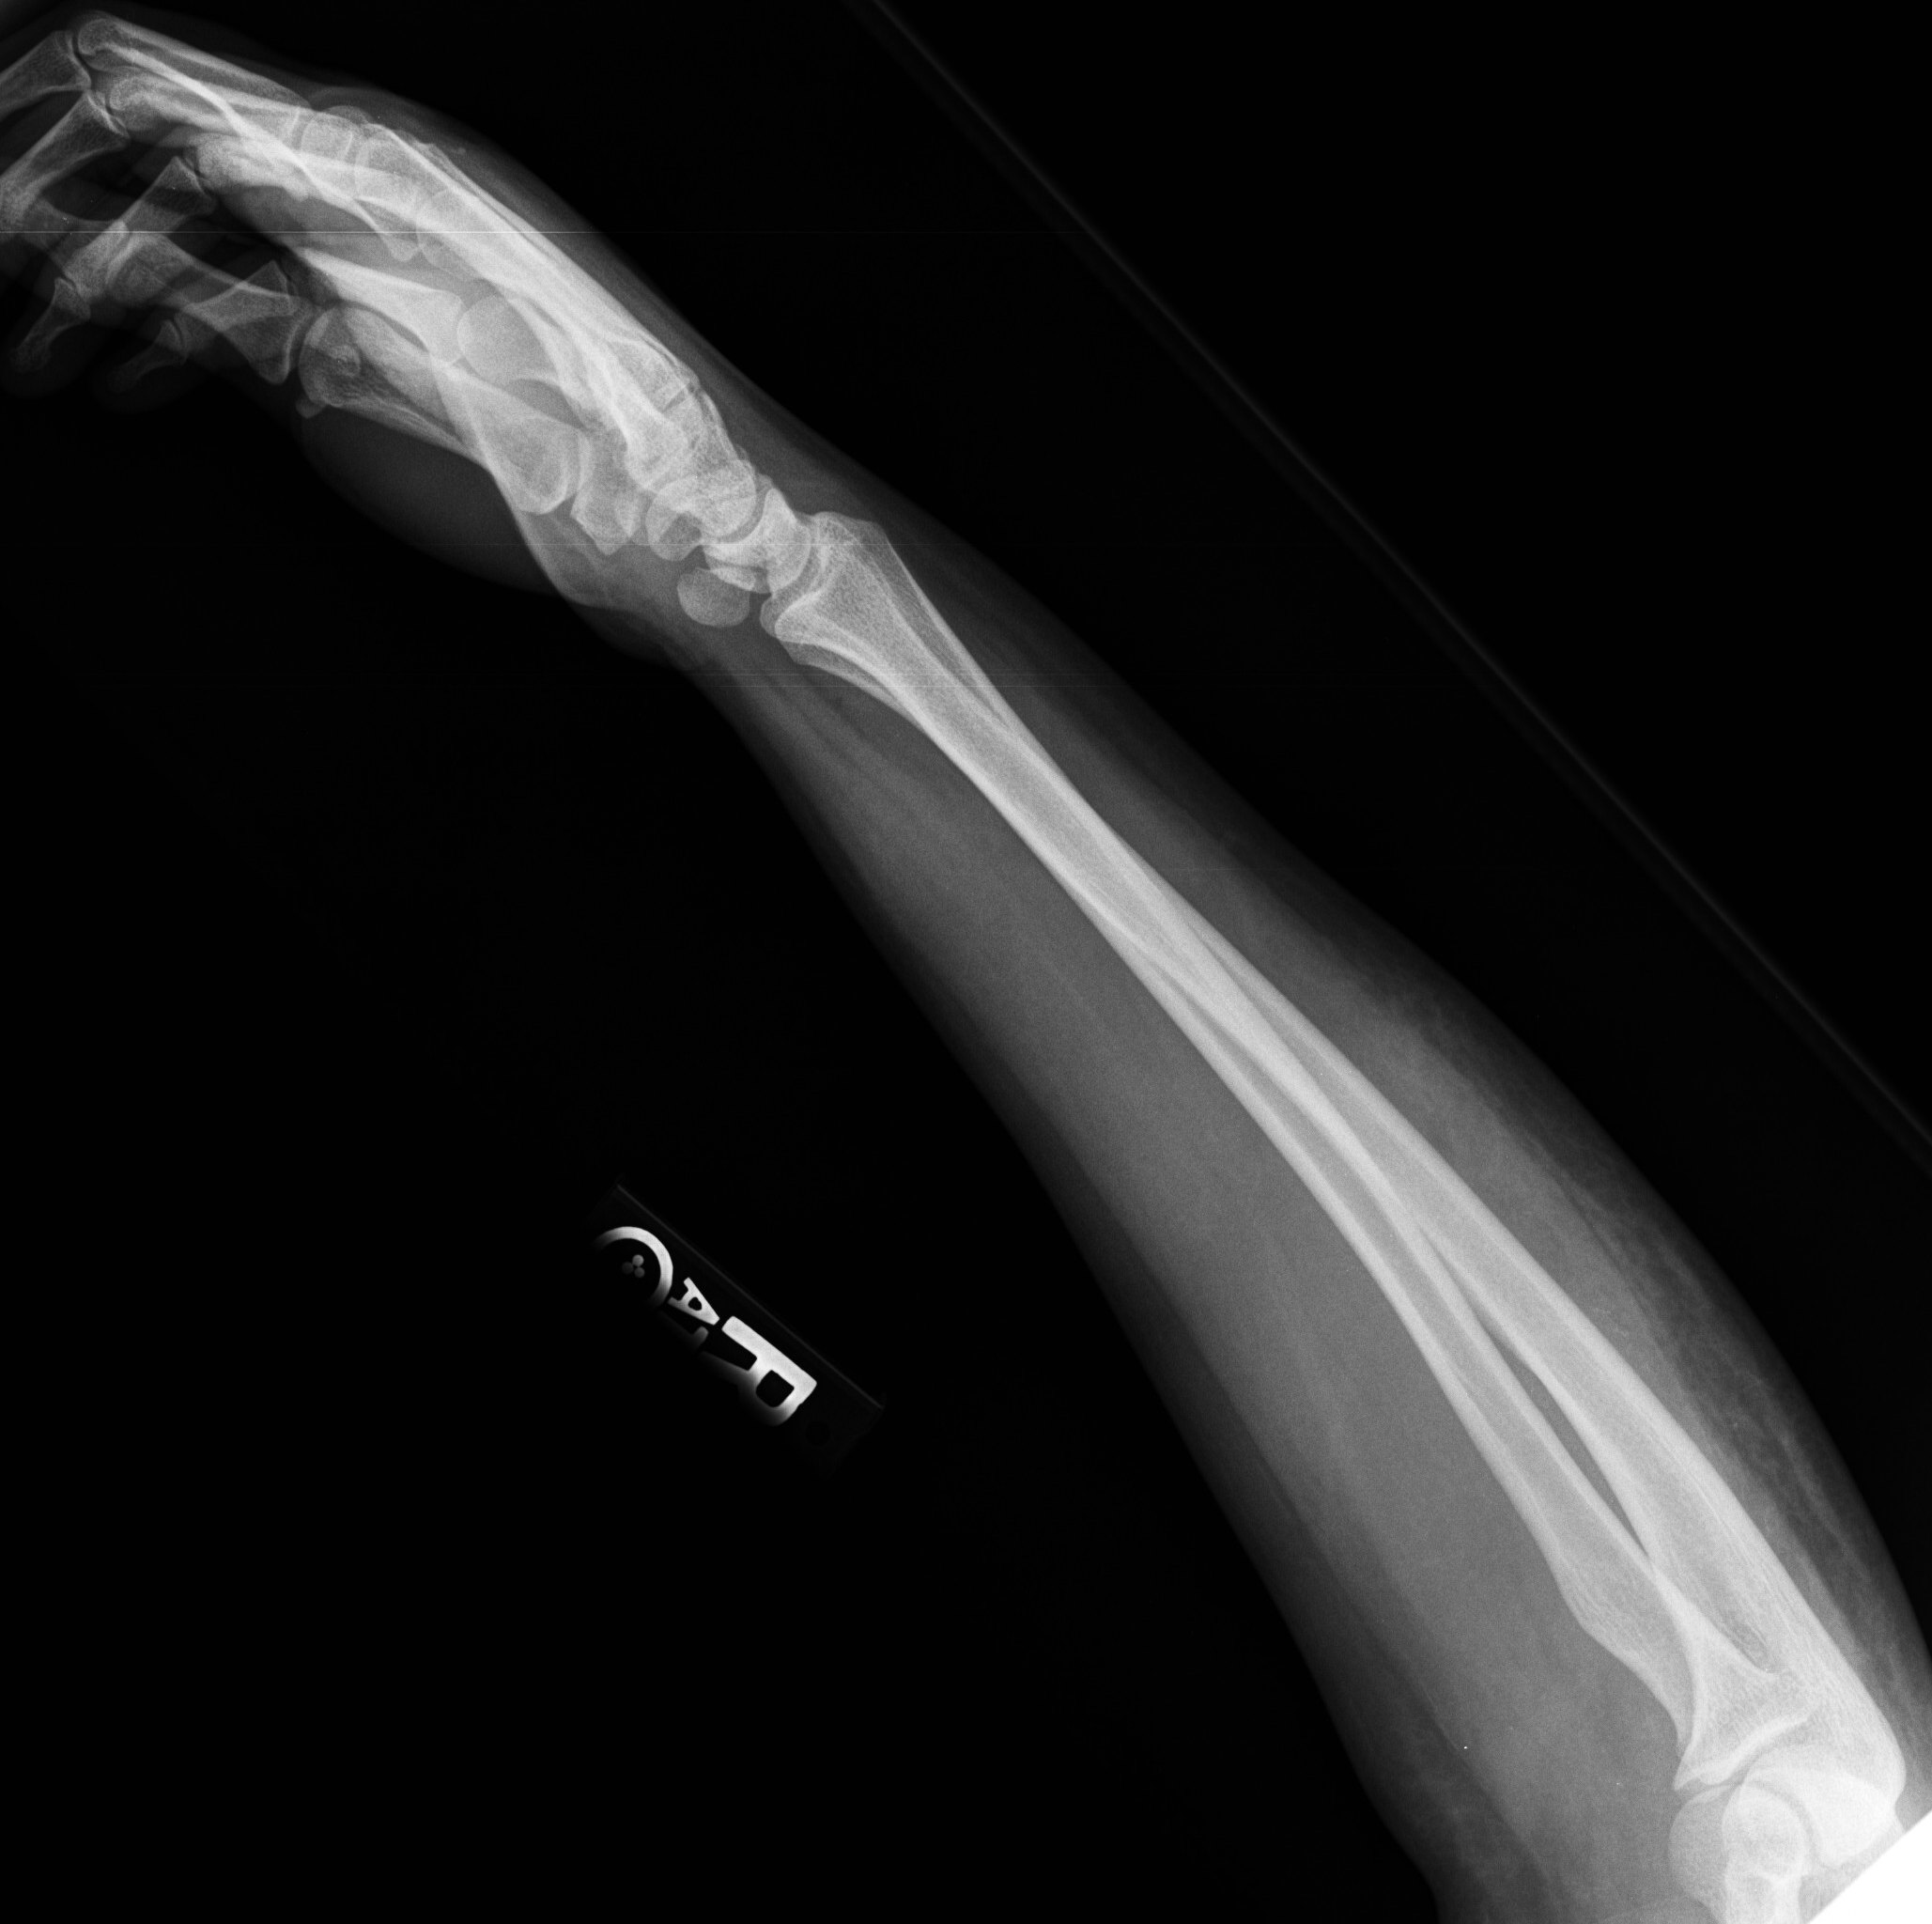
2. Lateral - flex elbow 90E |
½ of 11x14 LW |
Flex elbow 90E, rotate hand and wrist to lateral position; have hand, elbow and humerus in the same plane. |
CR perpendicular to mid-forearm |
|
ELBOW (Non-trauma, chronic injuries) |
|||
|
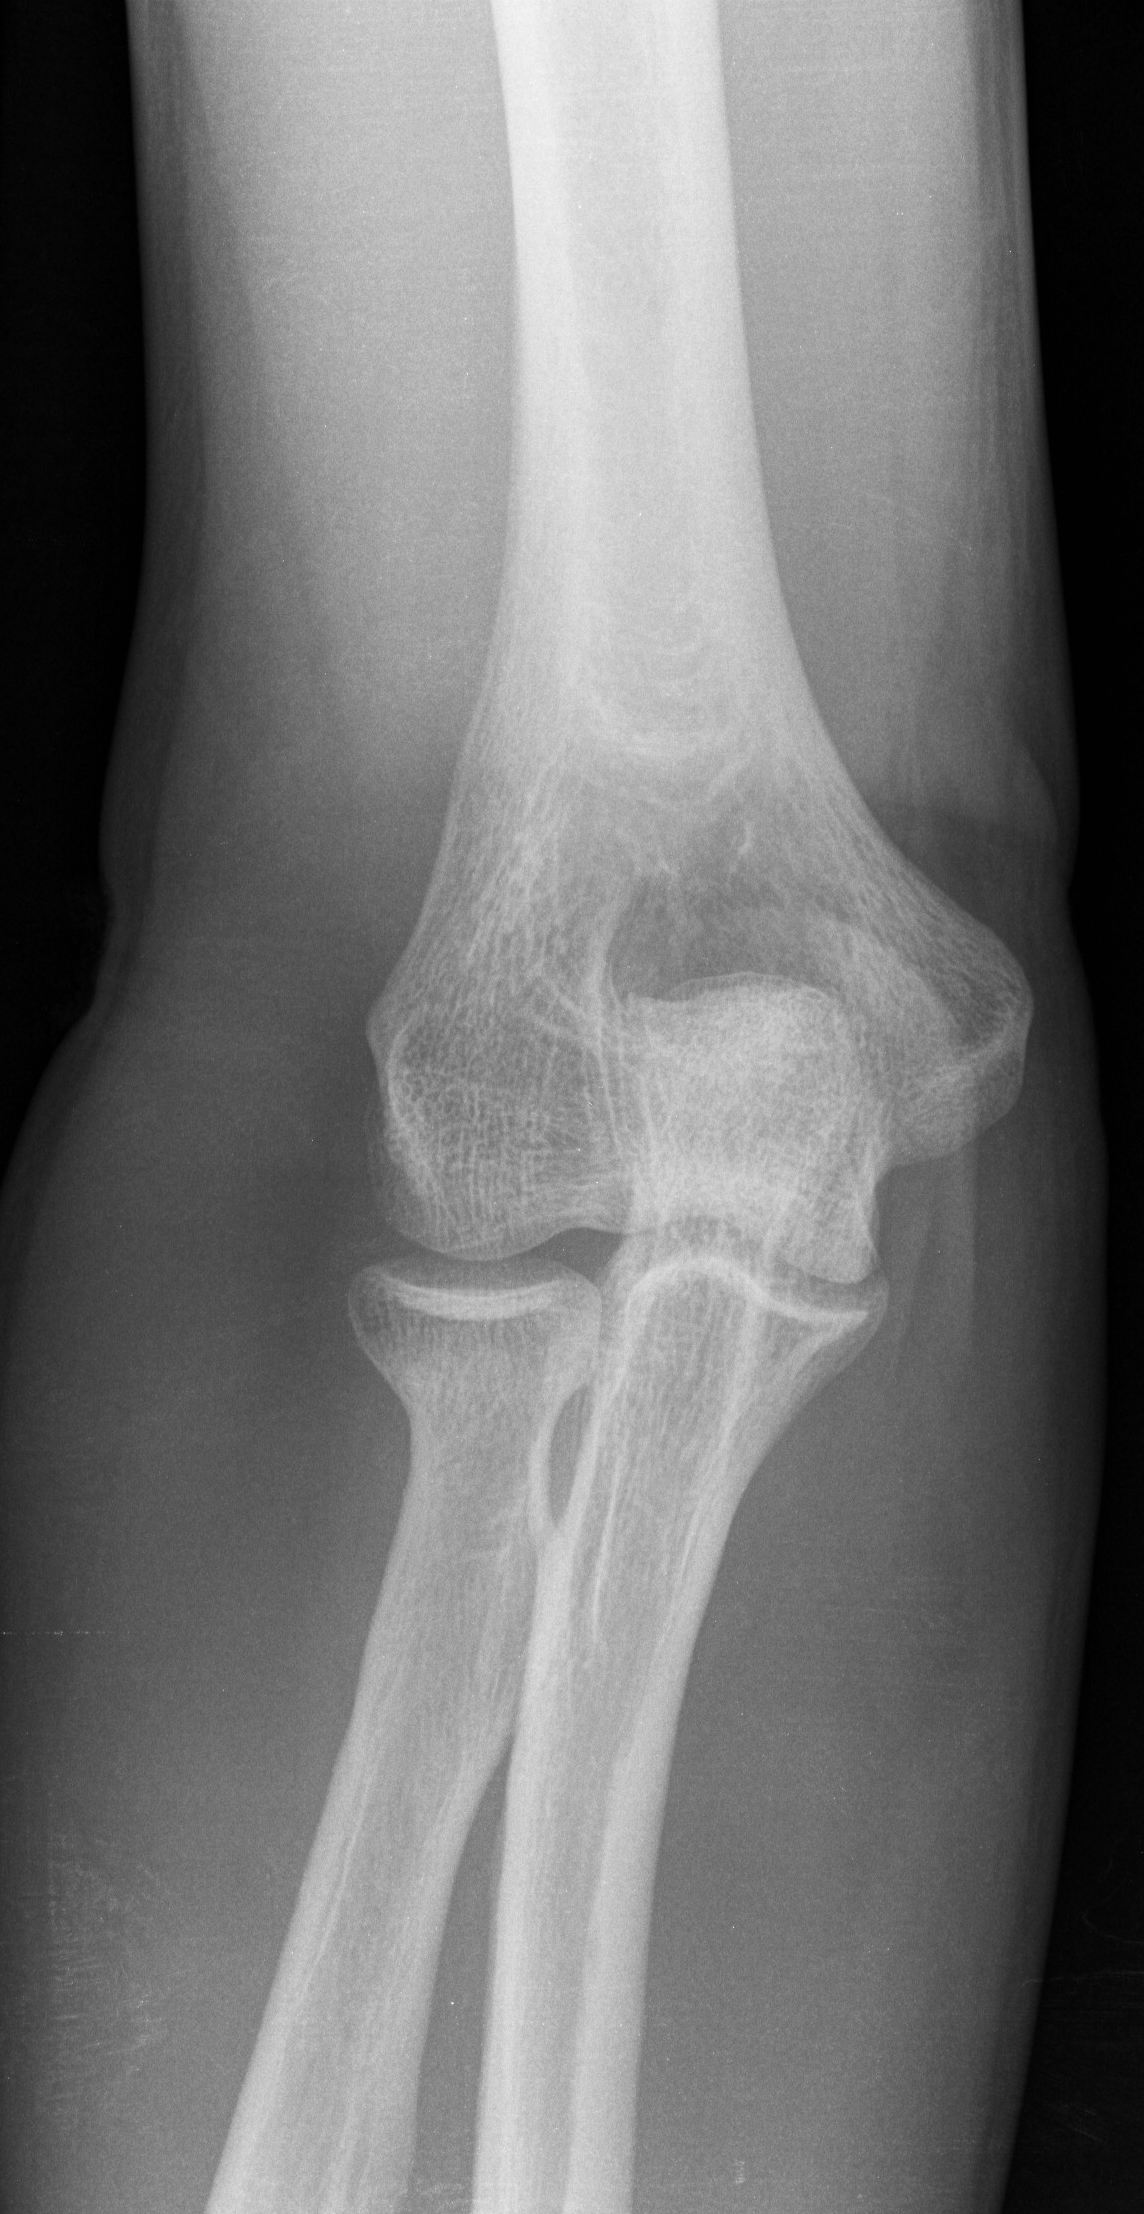
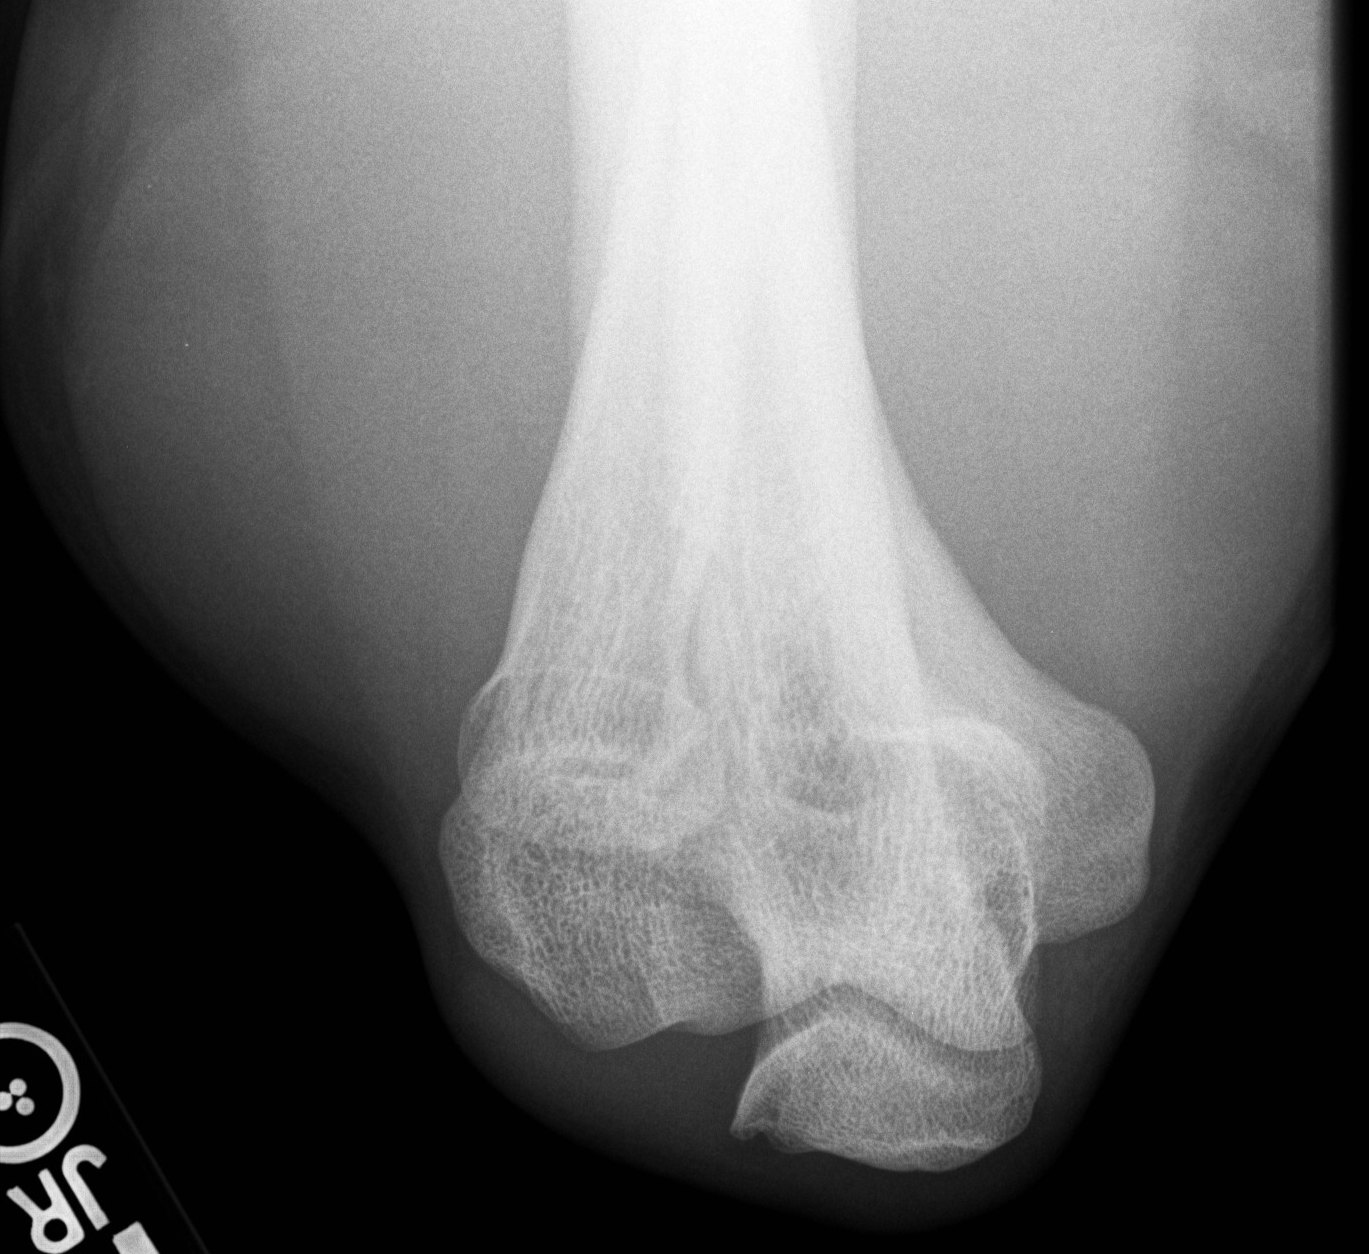
1. AP |
½ of 10x12 CW |
Supinate forearm, fully extended |
CR perpendicular to elbow joint |
|
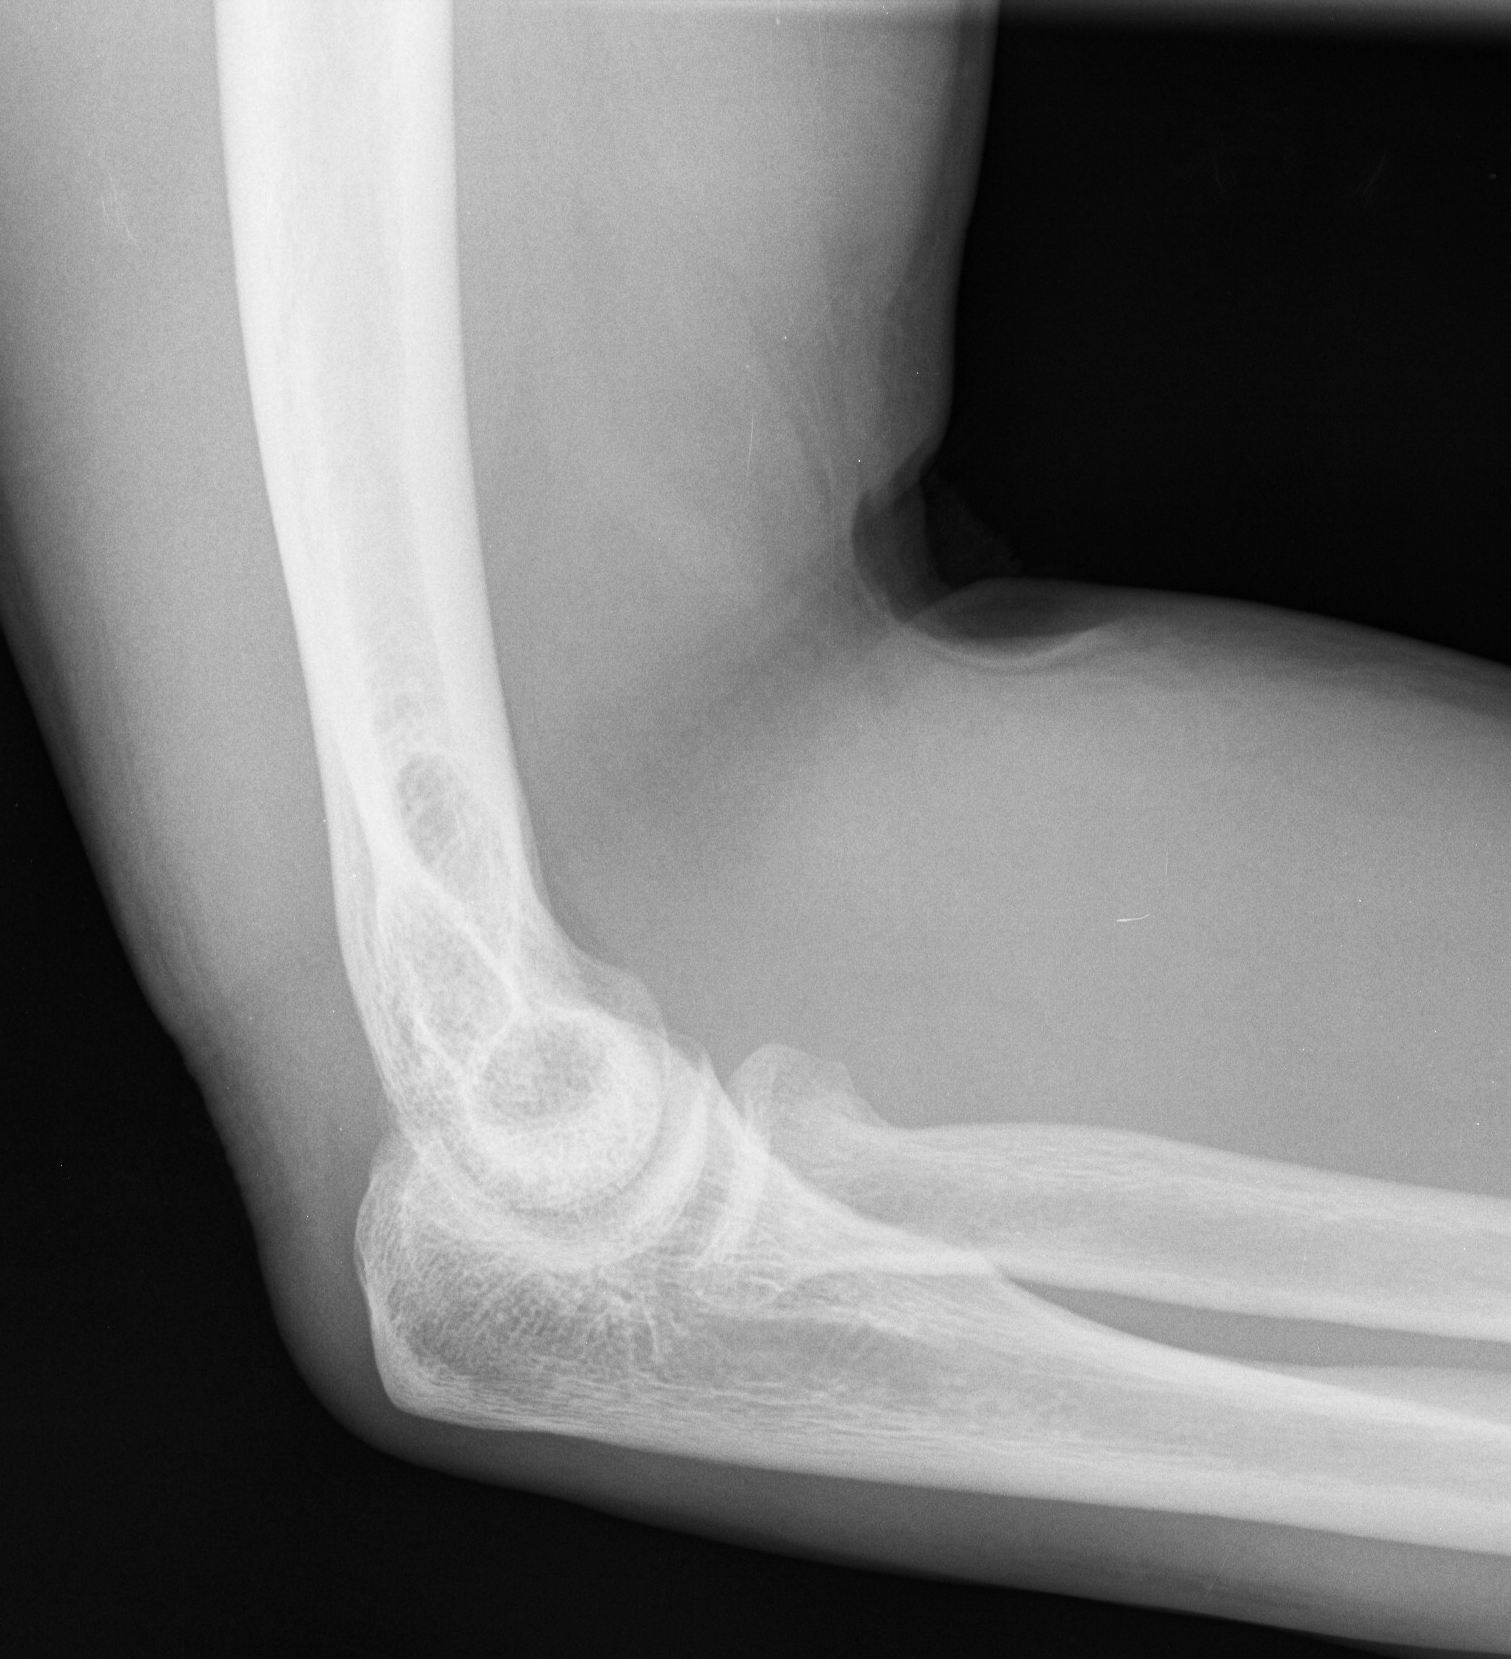
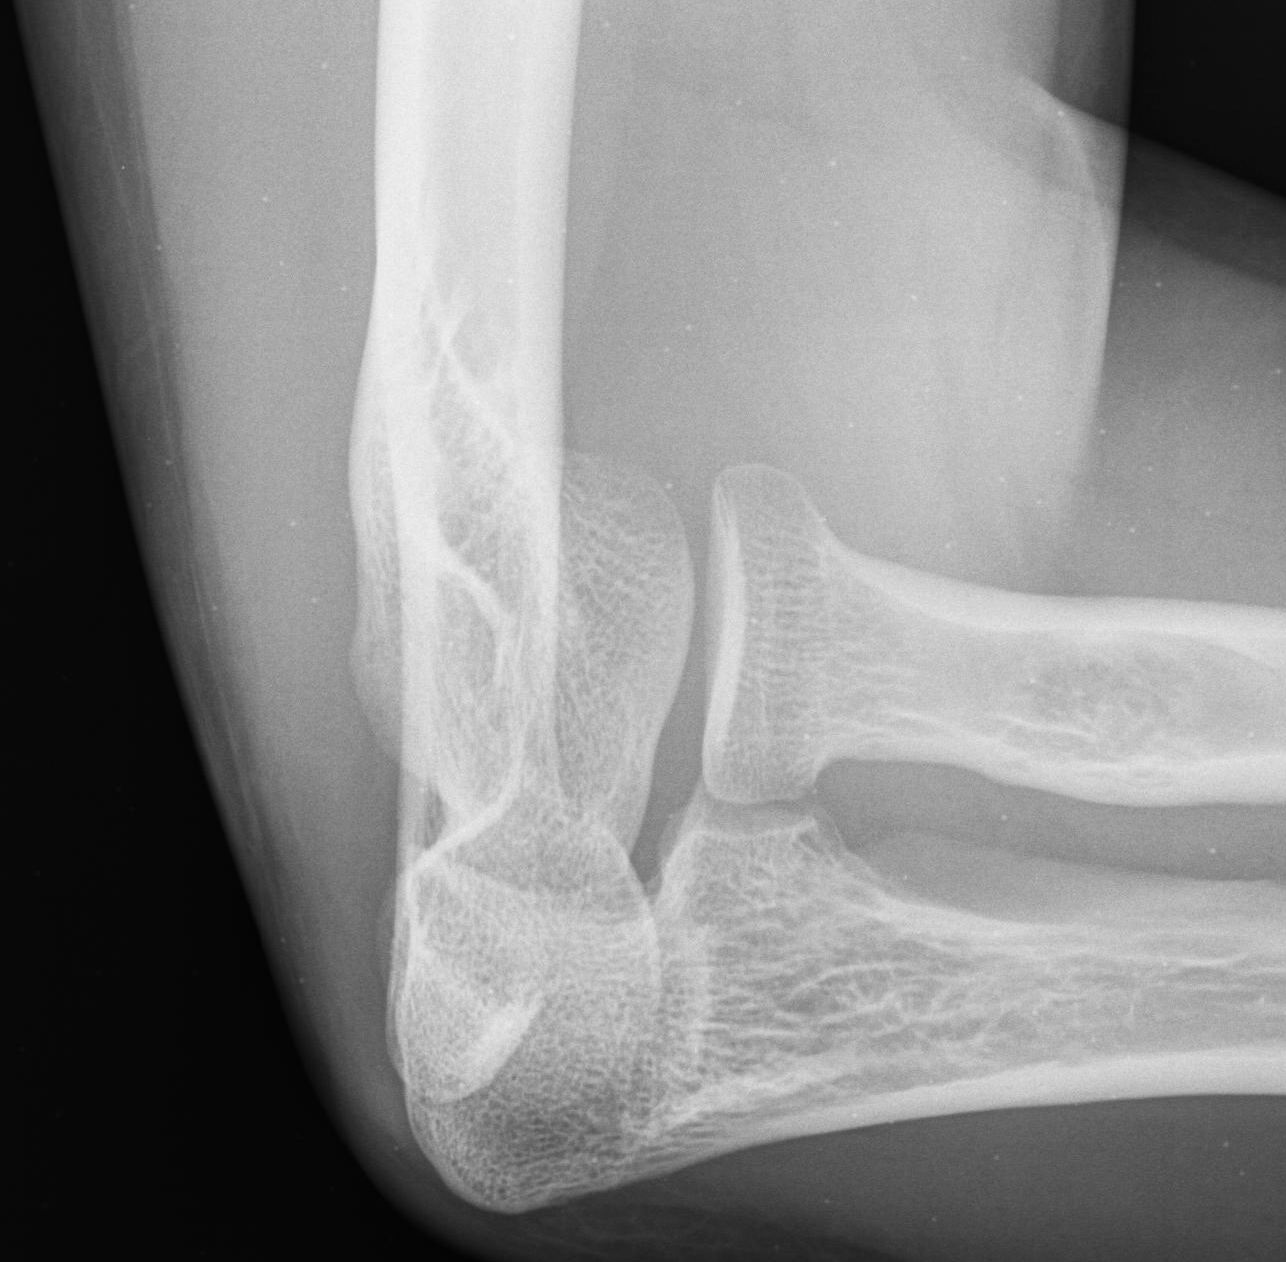
2. Lateral |
½ of 10x12 CW |
Flex elbow 90E, have forearm and humerus in the same plane, wrist and elbow in true lateral |
CR perpendicular to elbow joint |
|
ELBOW (Trauma, acute injuries) |
|||
|
1. AP |
½ of 10x12 CW |
Same as described above for chronic conditions. |
Same as described above. |
|
2. Lateral |
½ of 10x12 CW |
Same as described above for chronic conditions. |
Same as described above. |
|
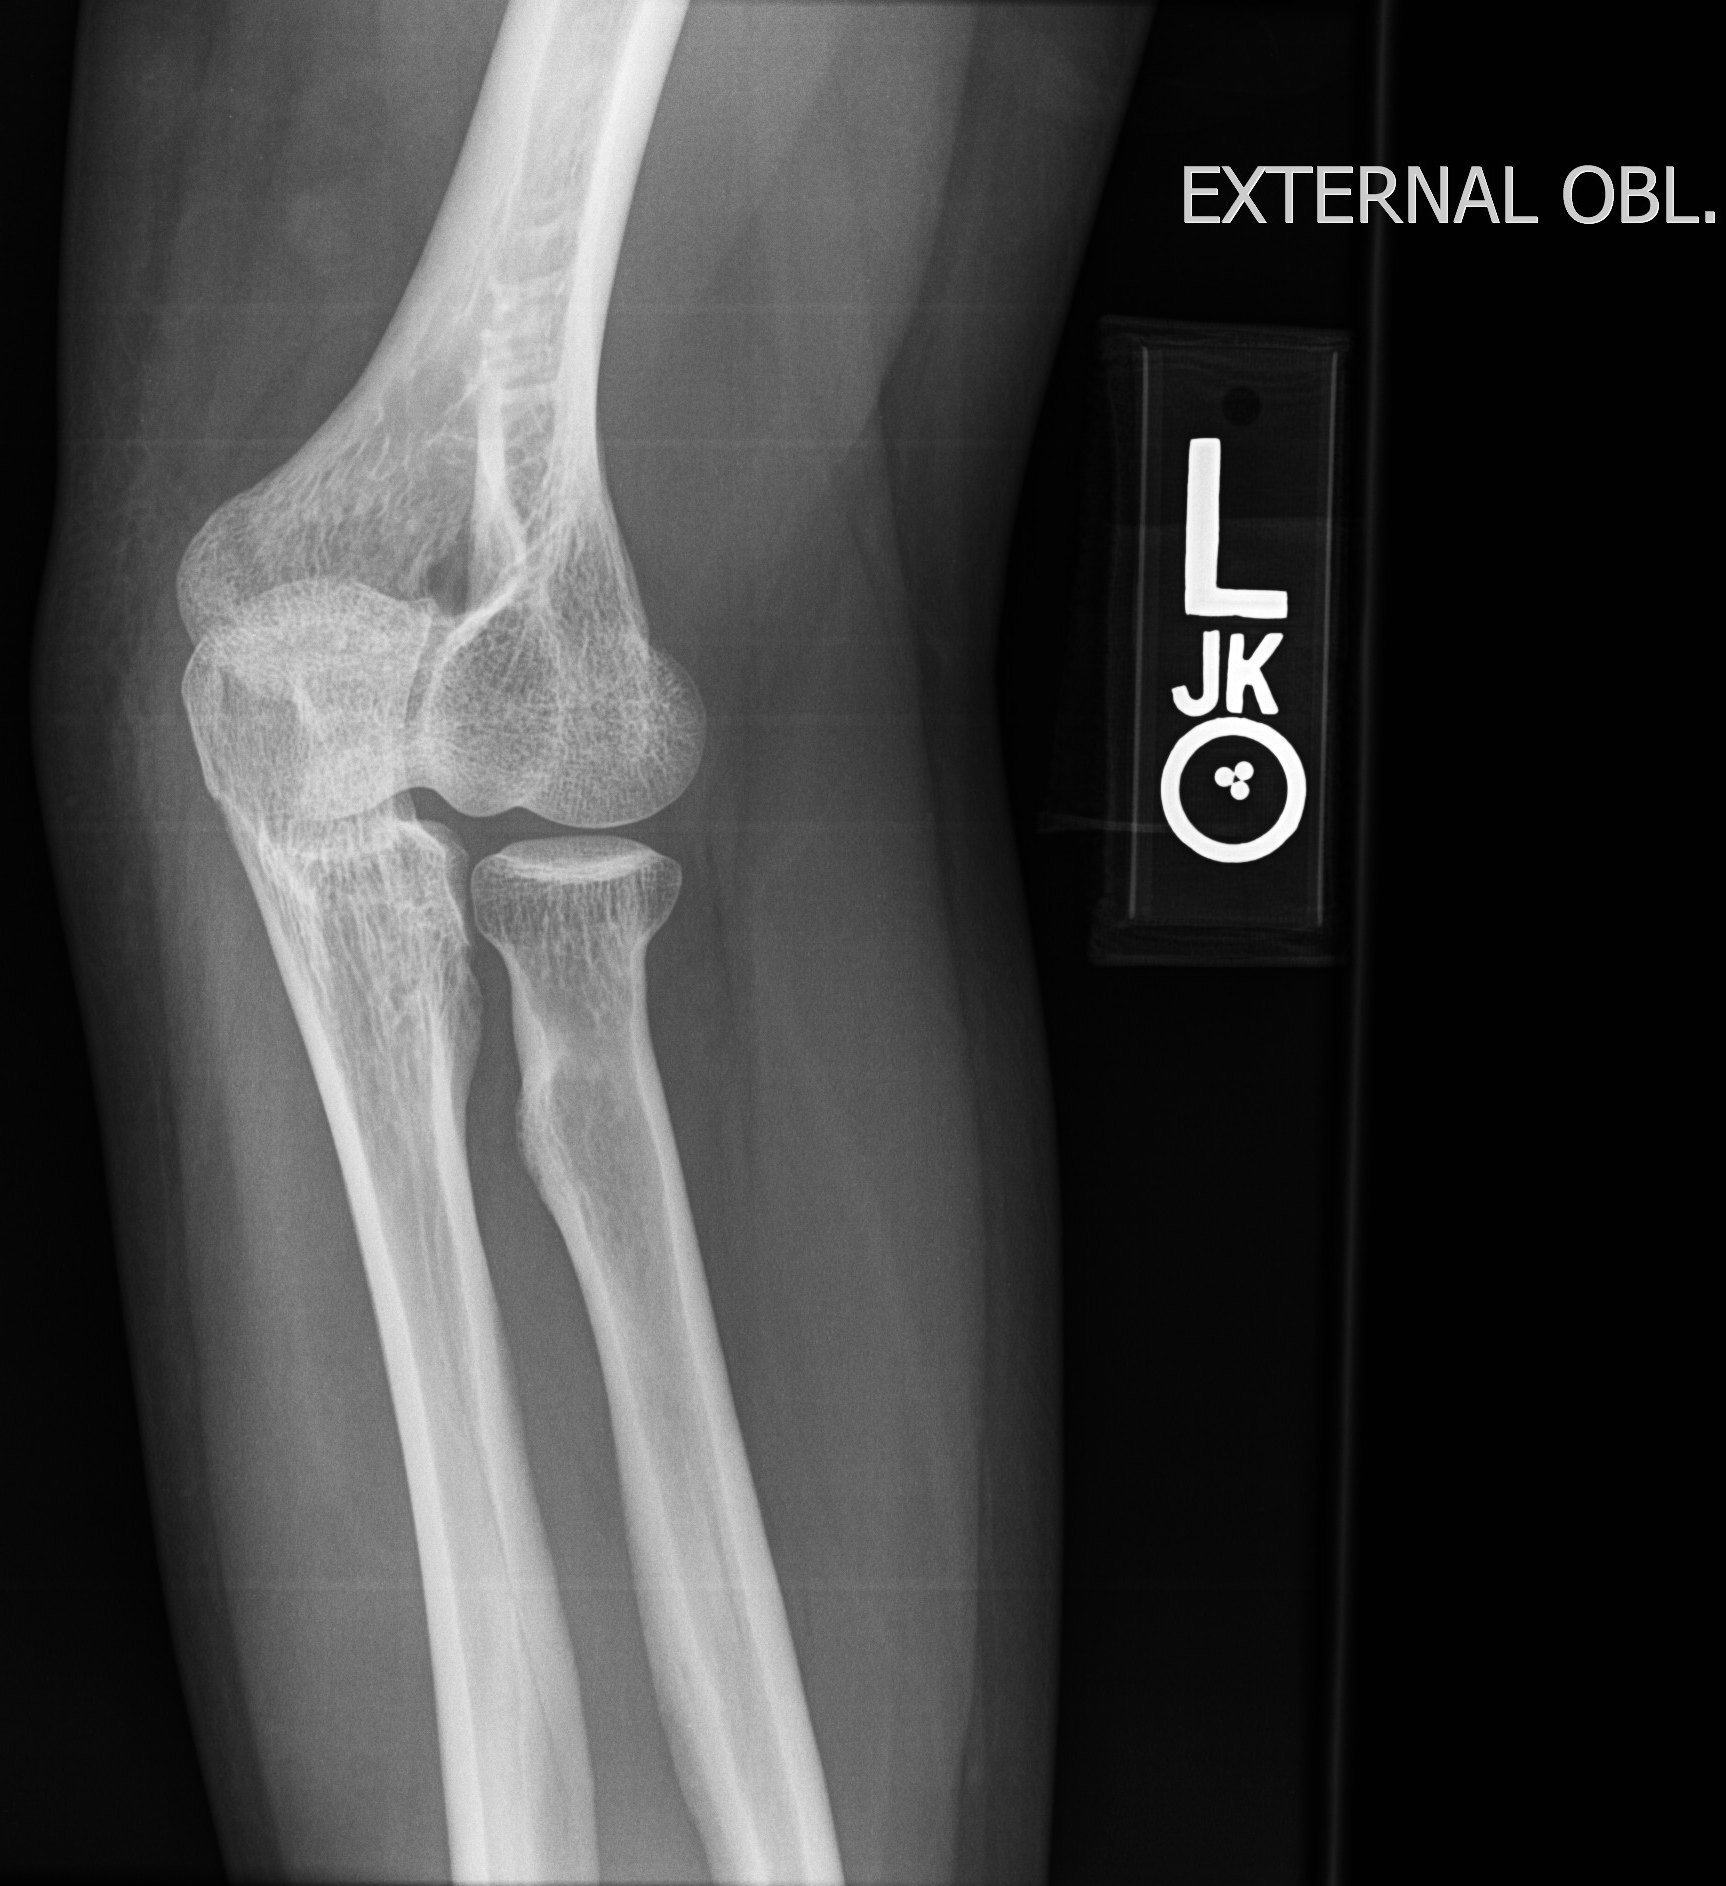
3. Lateral oblique (radial) |
½ of 10x12 CW |
Forearm fully extended, supinate hand and laterally rotate arm to form an angle of 45E off film |
CR perpendicular to elbow joint |
|
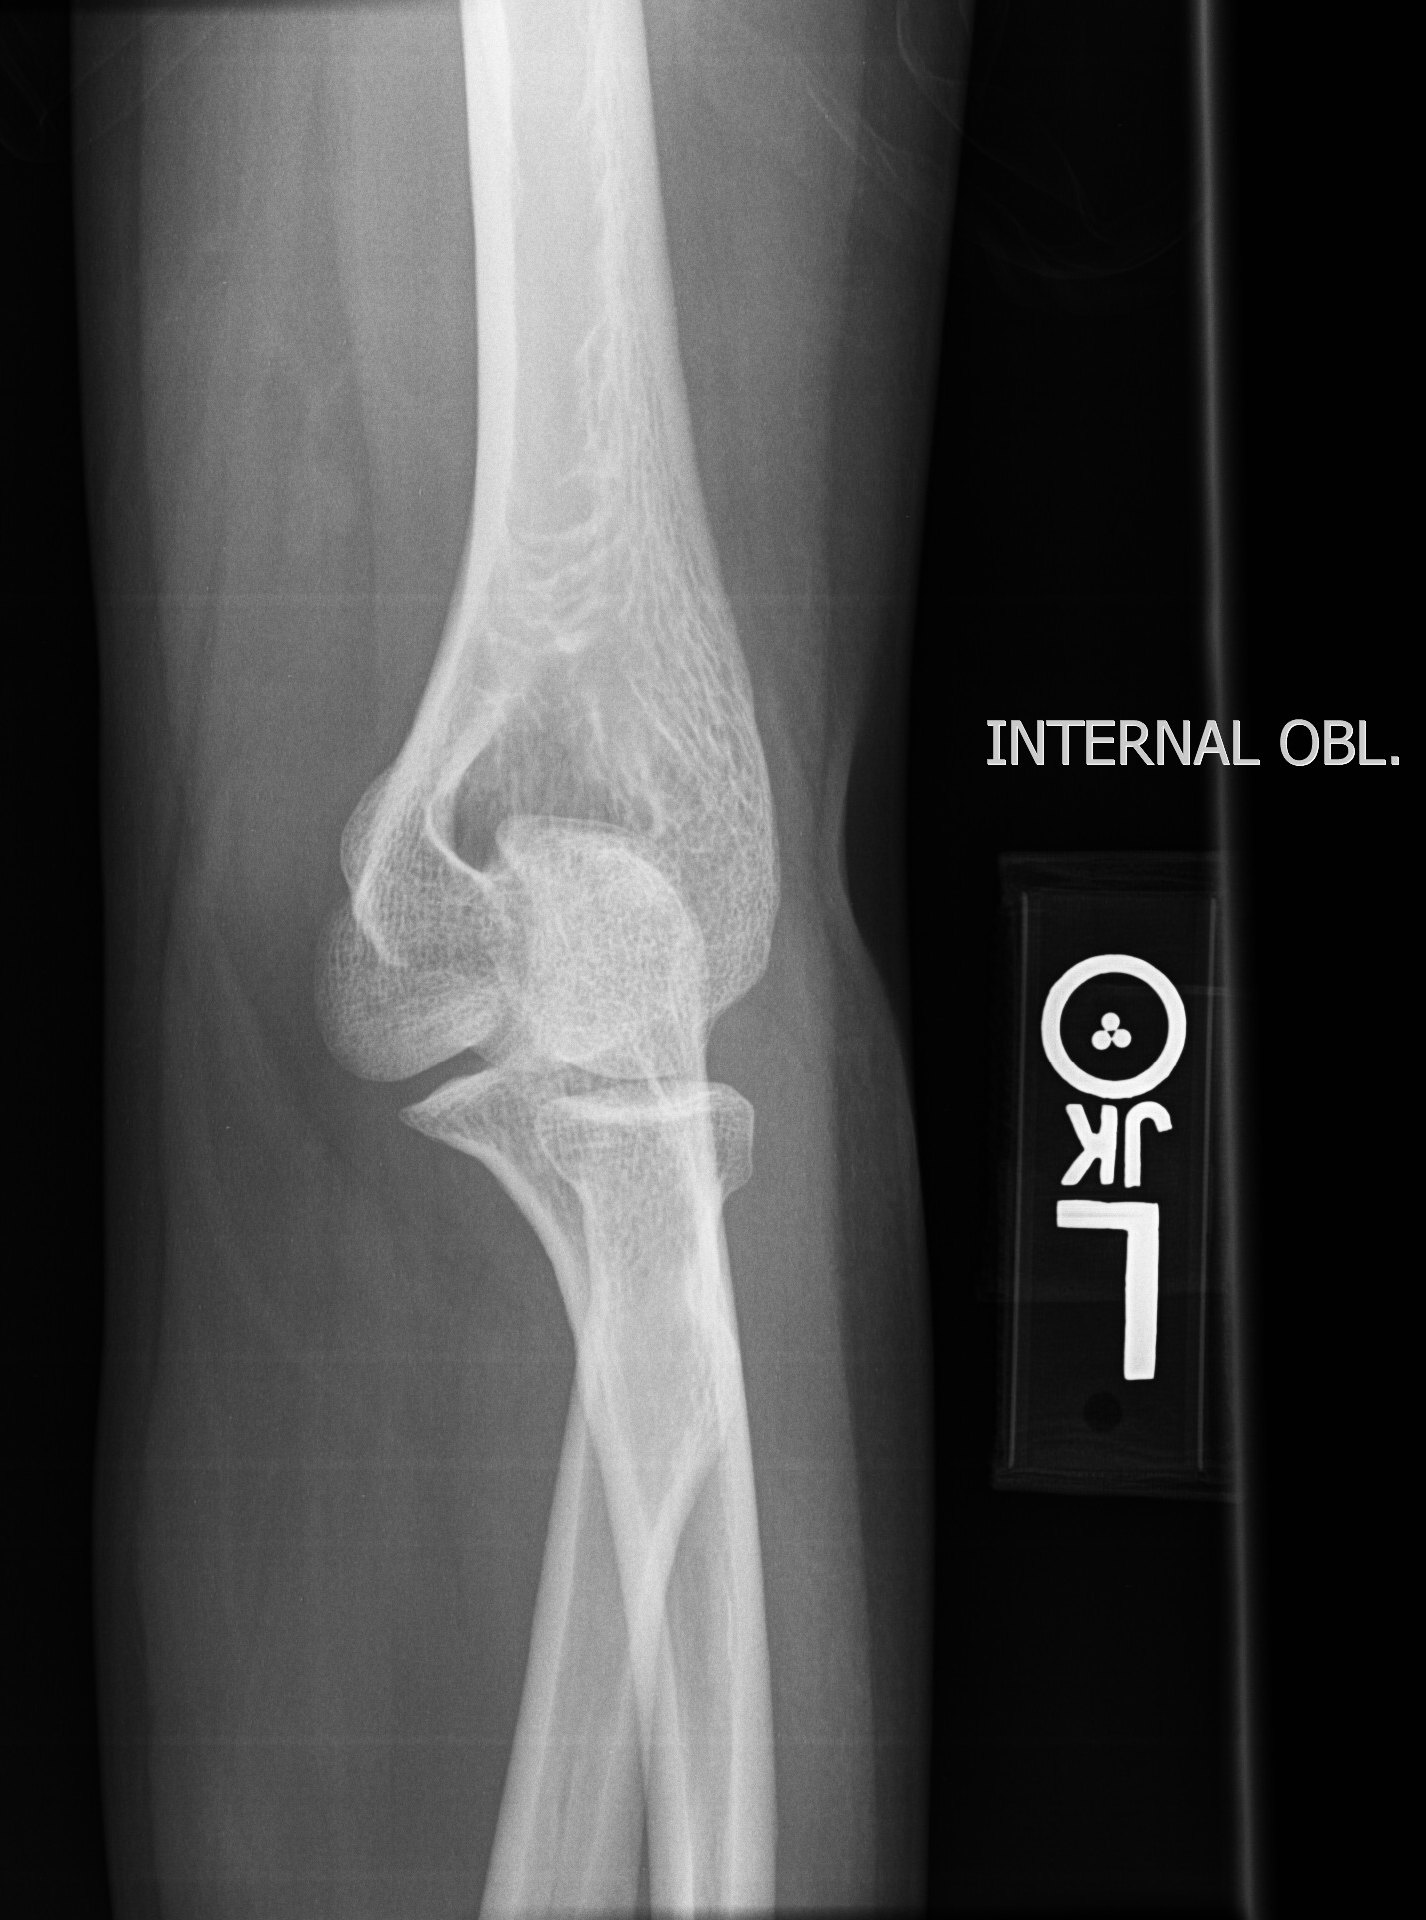
4. Medial oblique (ulnar) |
½ of 10x12 CW |
Forearm fully extended, pronate hand |
CR perpendicular to elbow joint |
|
5. Radial head view |
8x10 LW |
Elbow in true lateral, flexed 90E, humerus and wrist in same plane |
CR angled 45E towards humerus, enters at radial head |
|
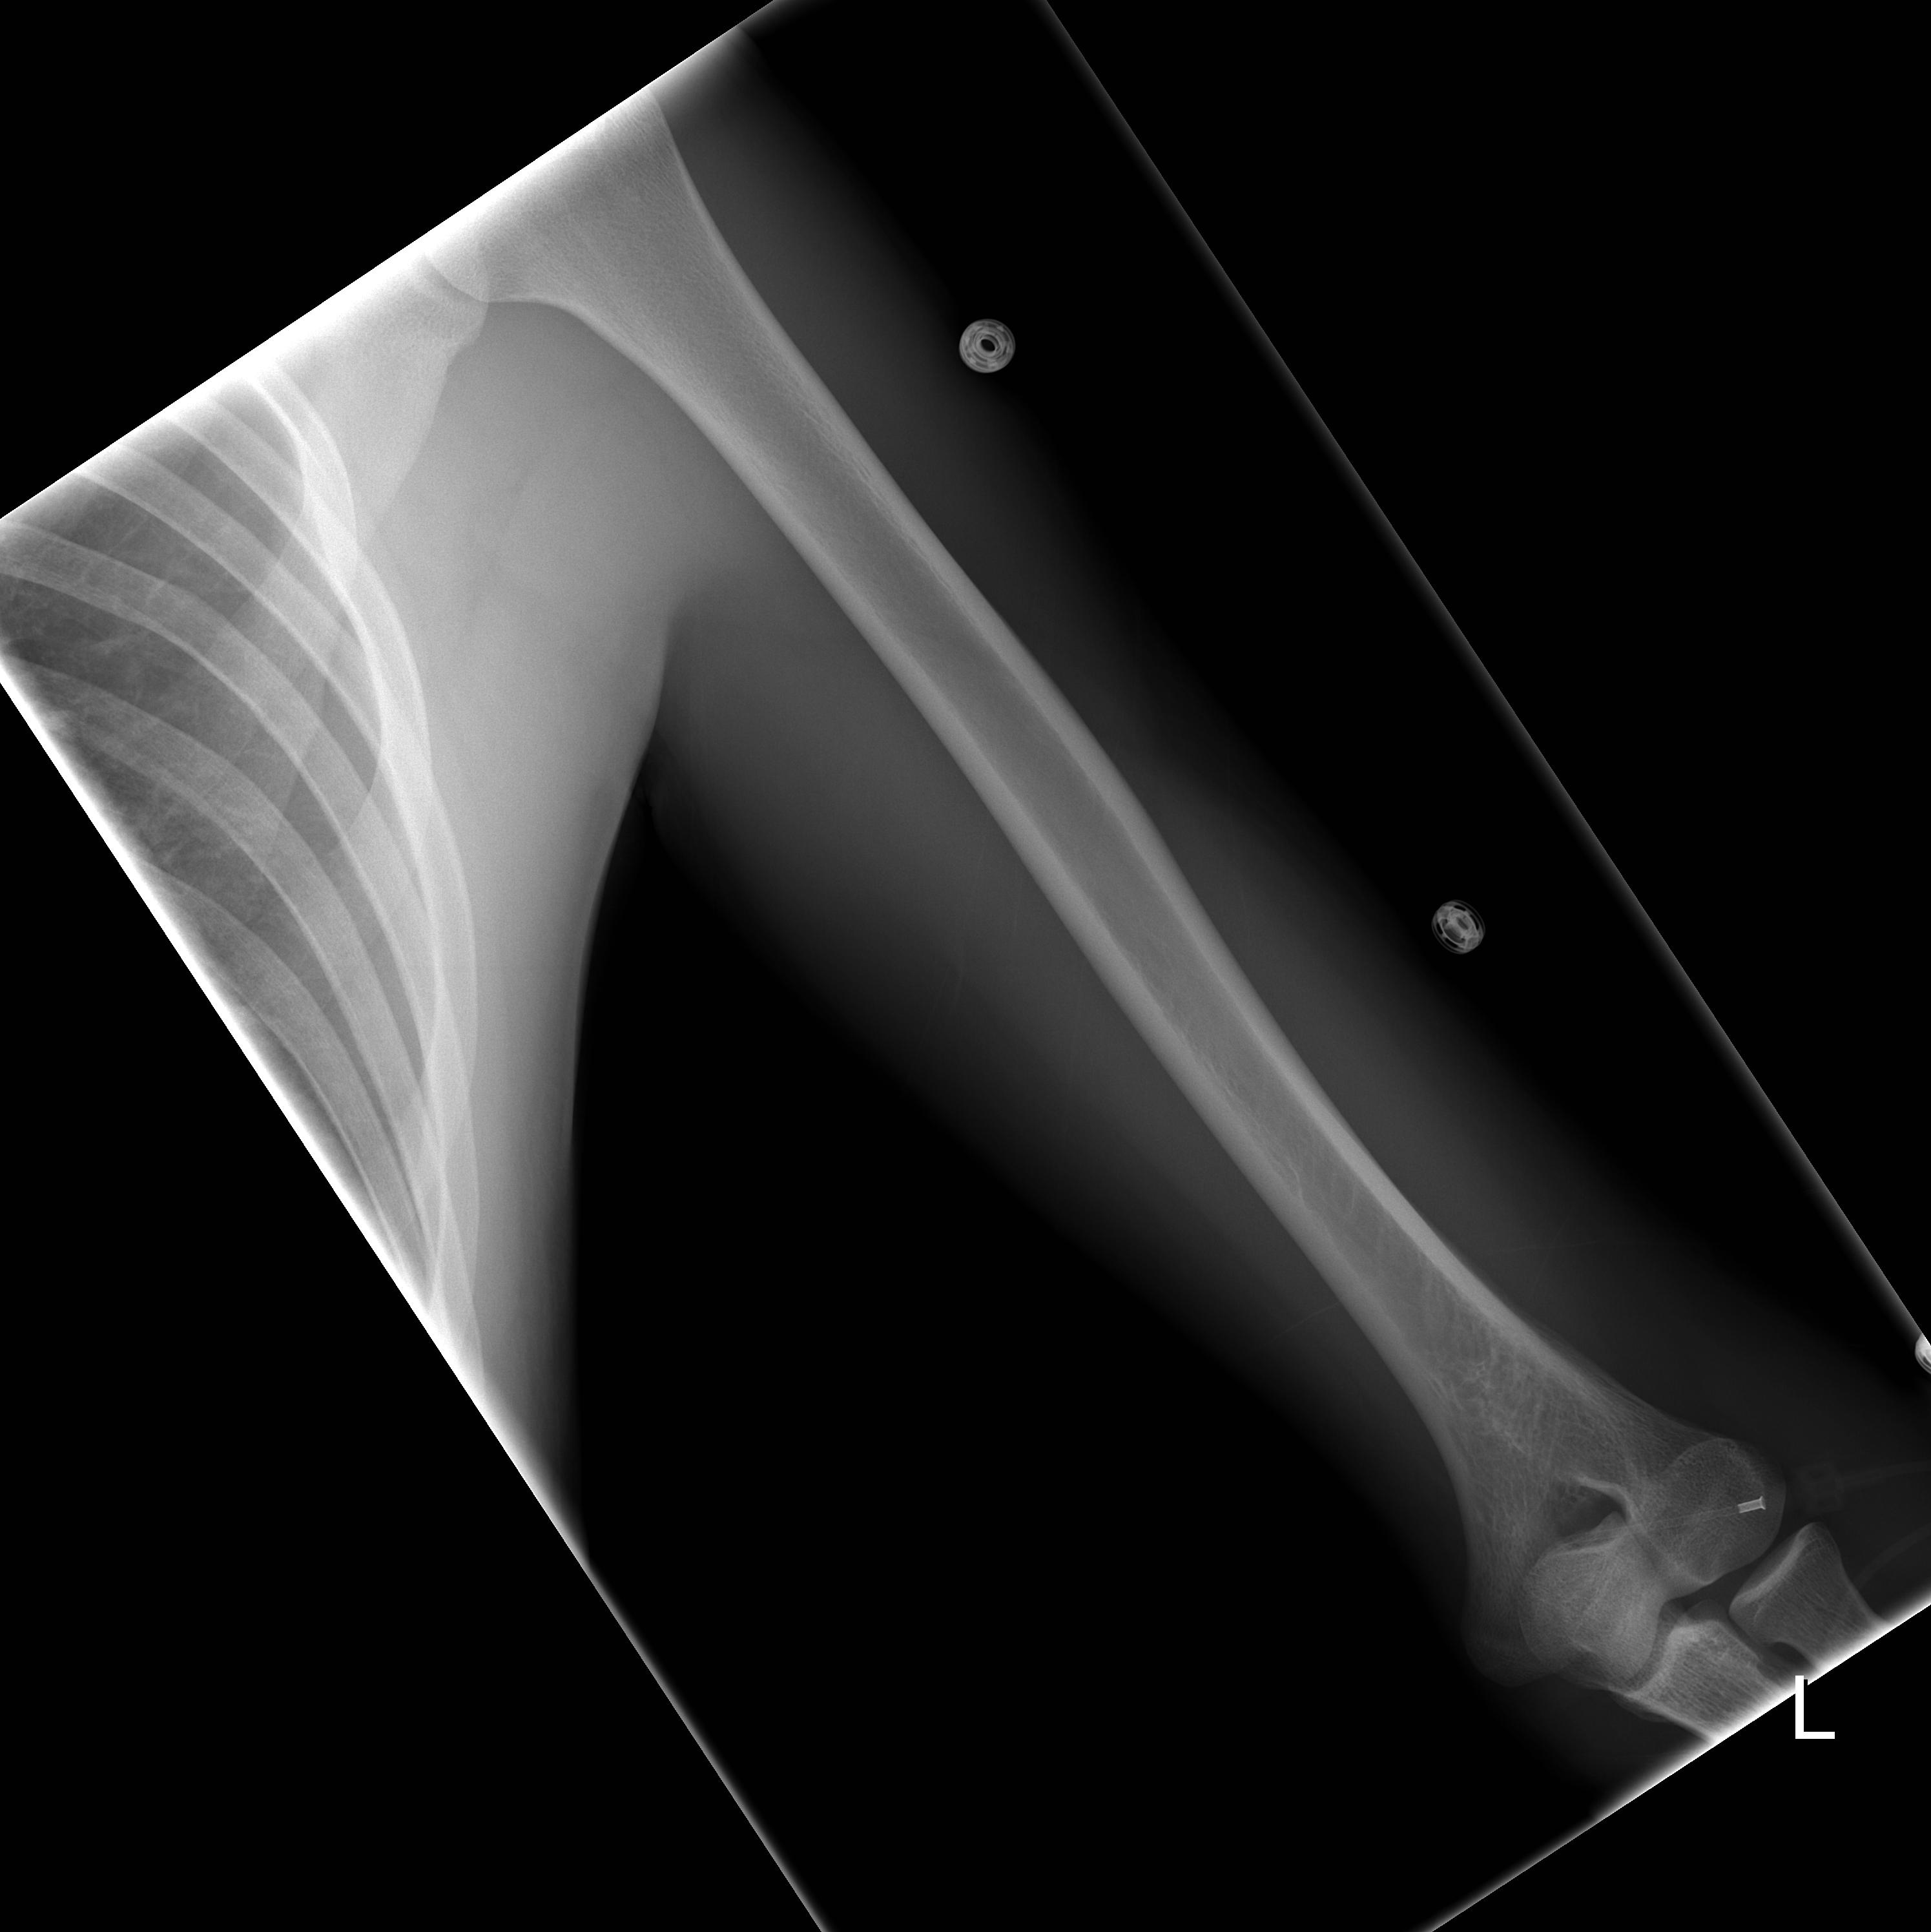
1. AP - include BOTH joints |
14x17 LW |
Patient supine or upright, supinate hand and arm, fully extended |
CR perpendicular to mid-humerus |
|
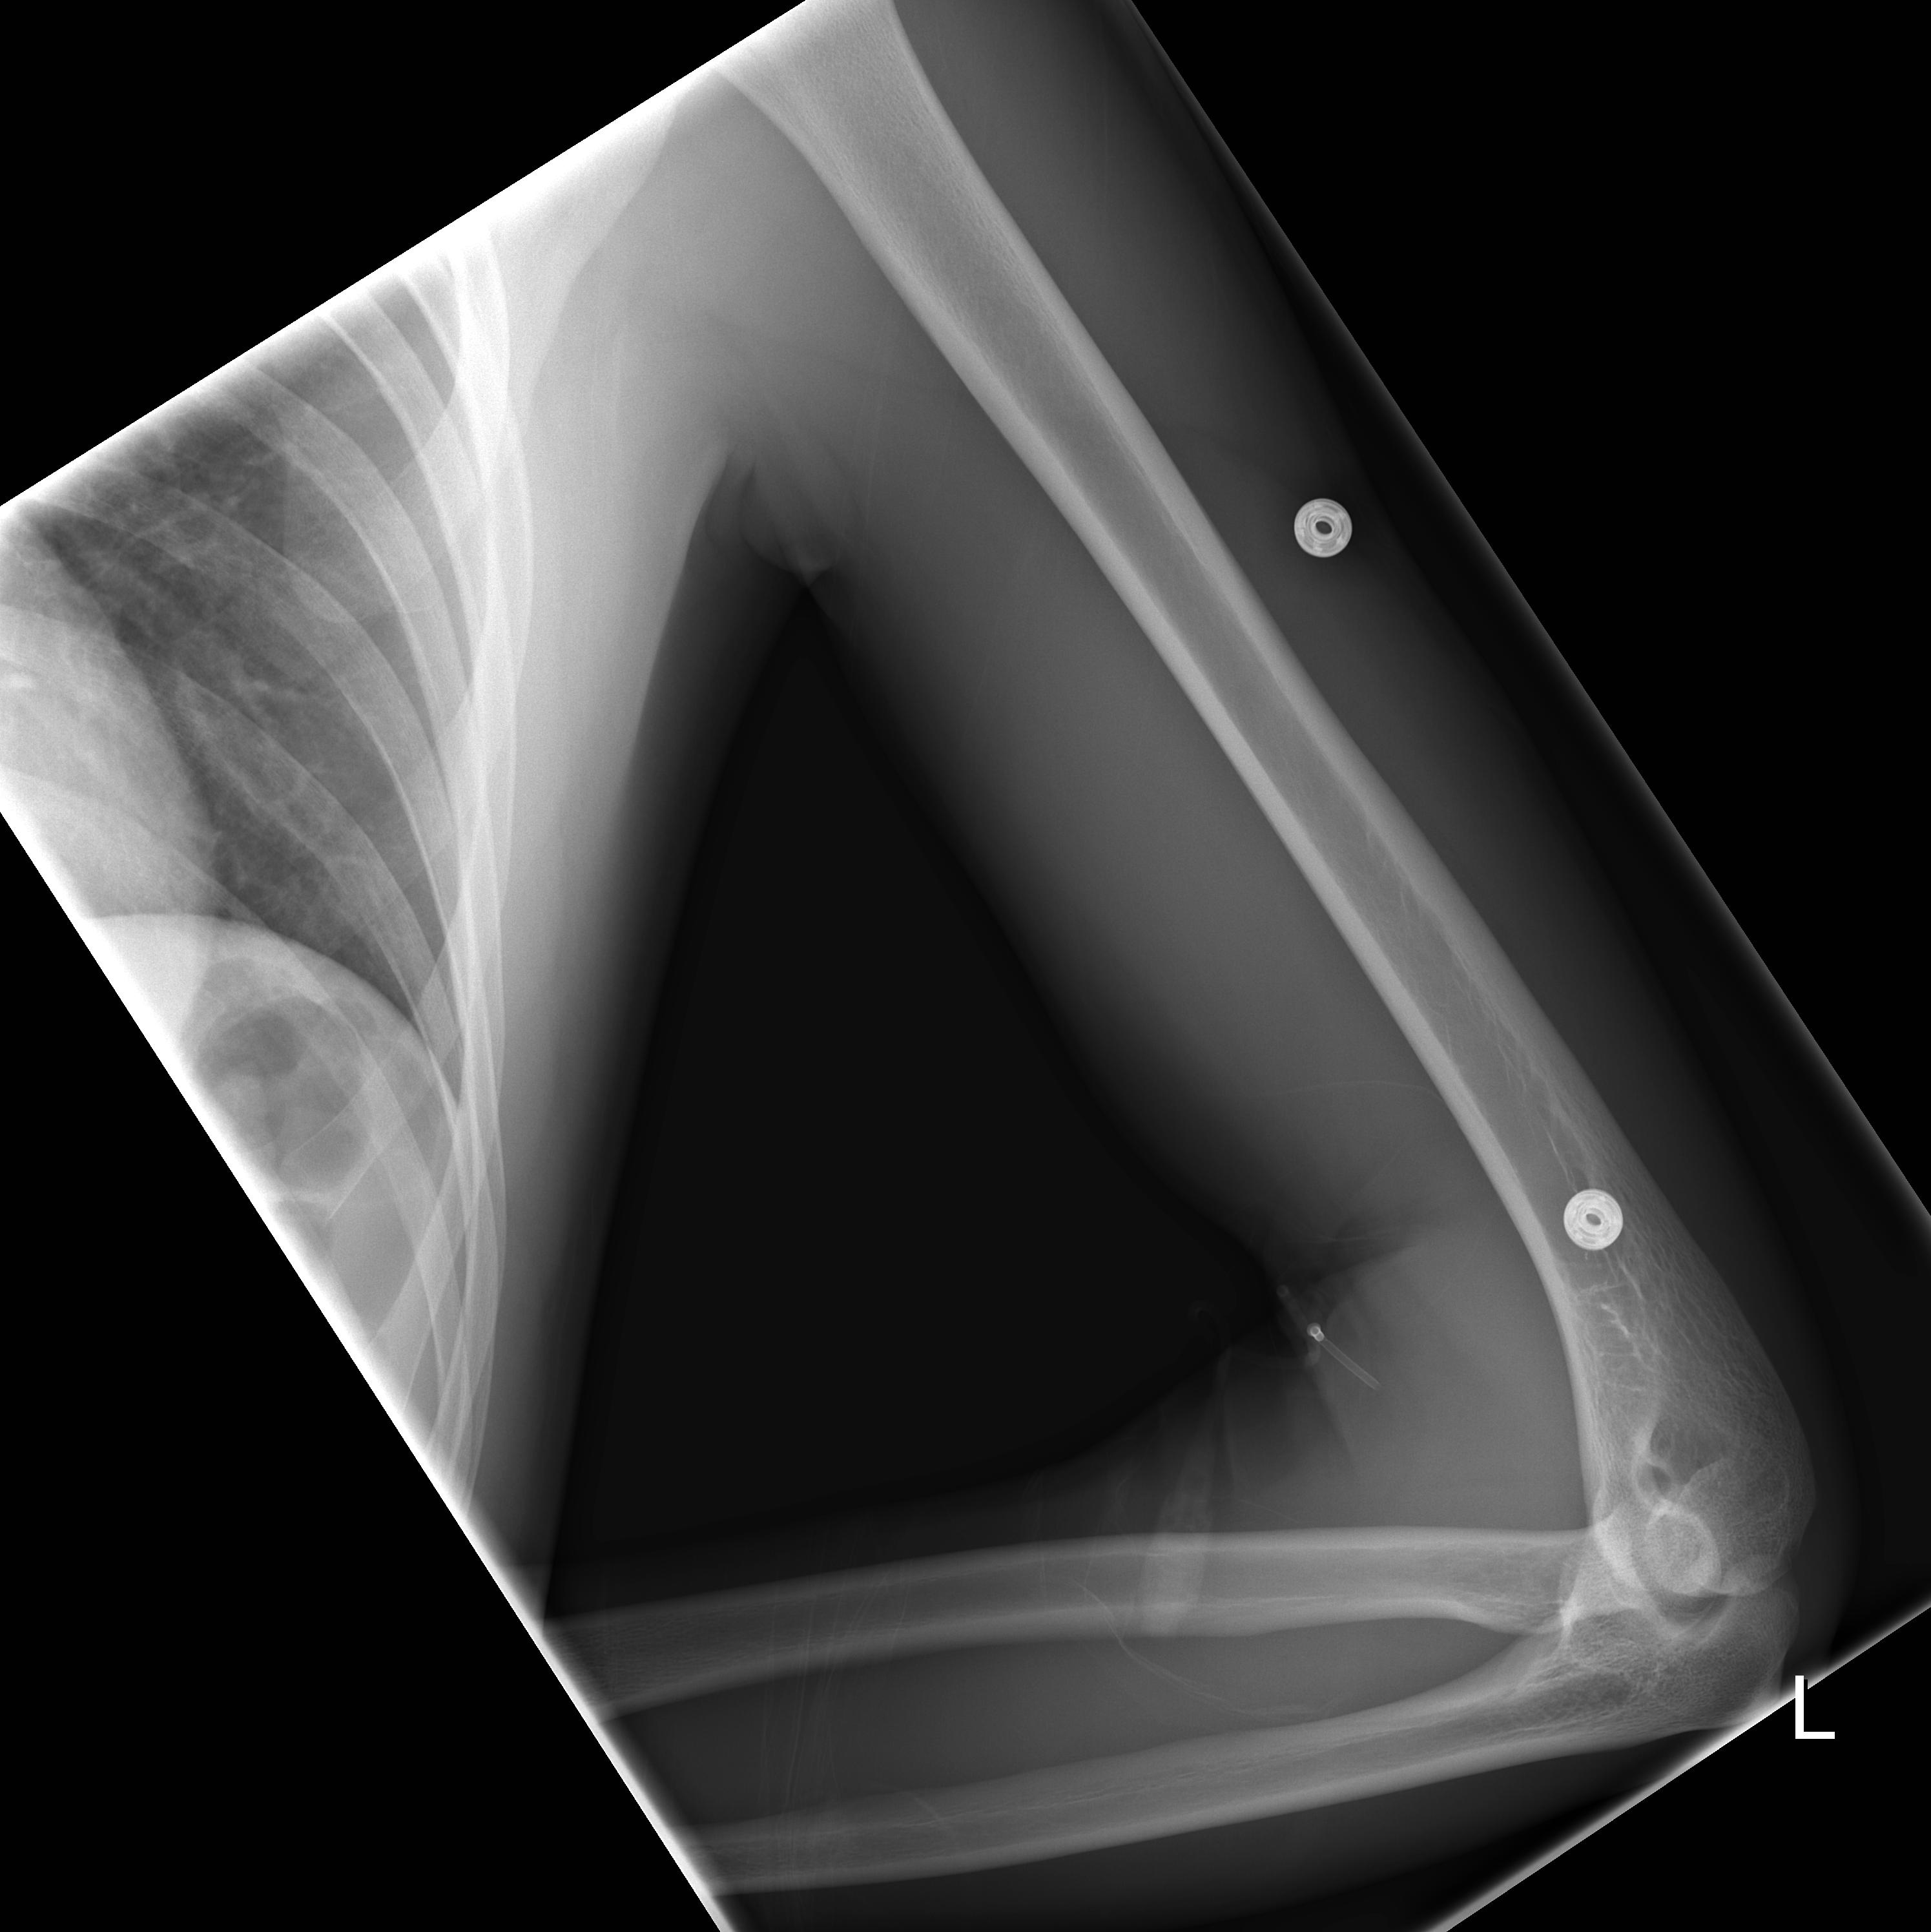
2. Lateral - include BOTH joints |
14x17LW |
Patient supine or upright, abduct arm and flex elbow 90E, rotate humerus 90E from AP |
CR perpendicular to mid-humerus |
|
SHOULDER (Non trauma, chronic pain) |
|||
|
1. AP - internal rotation |
10x12 CW |
Patient supine or upright, rotate arm internally until epicondyles of humerus are perpendicular to film |
CR perpendicular to glenoid fossa |
|
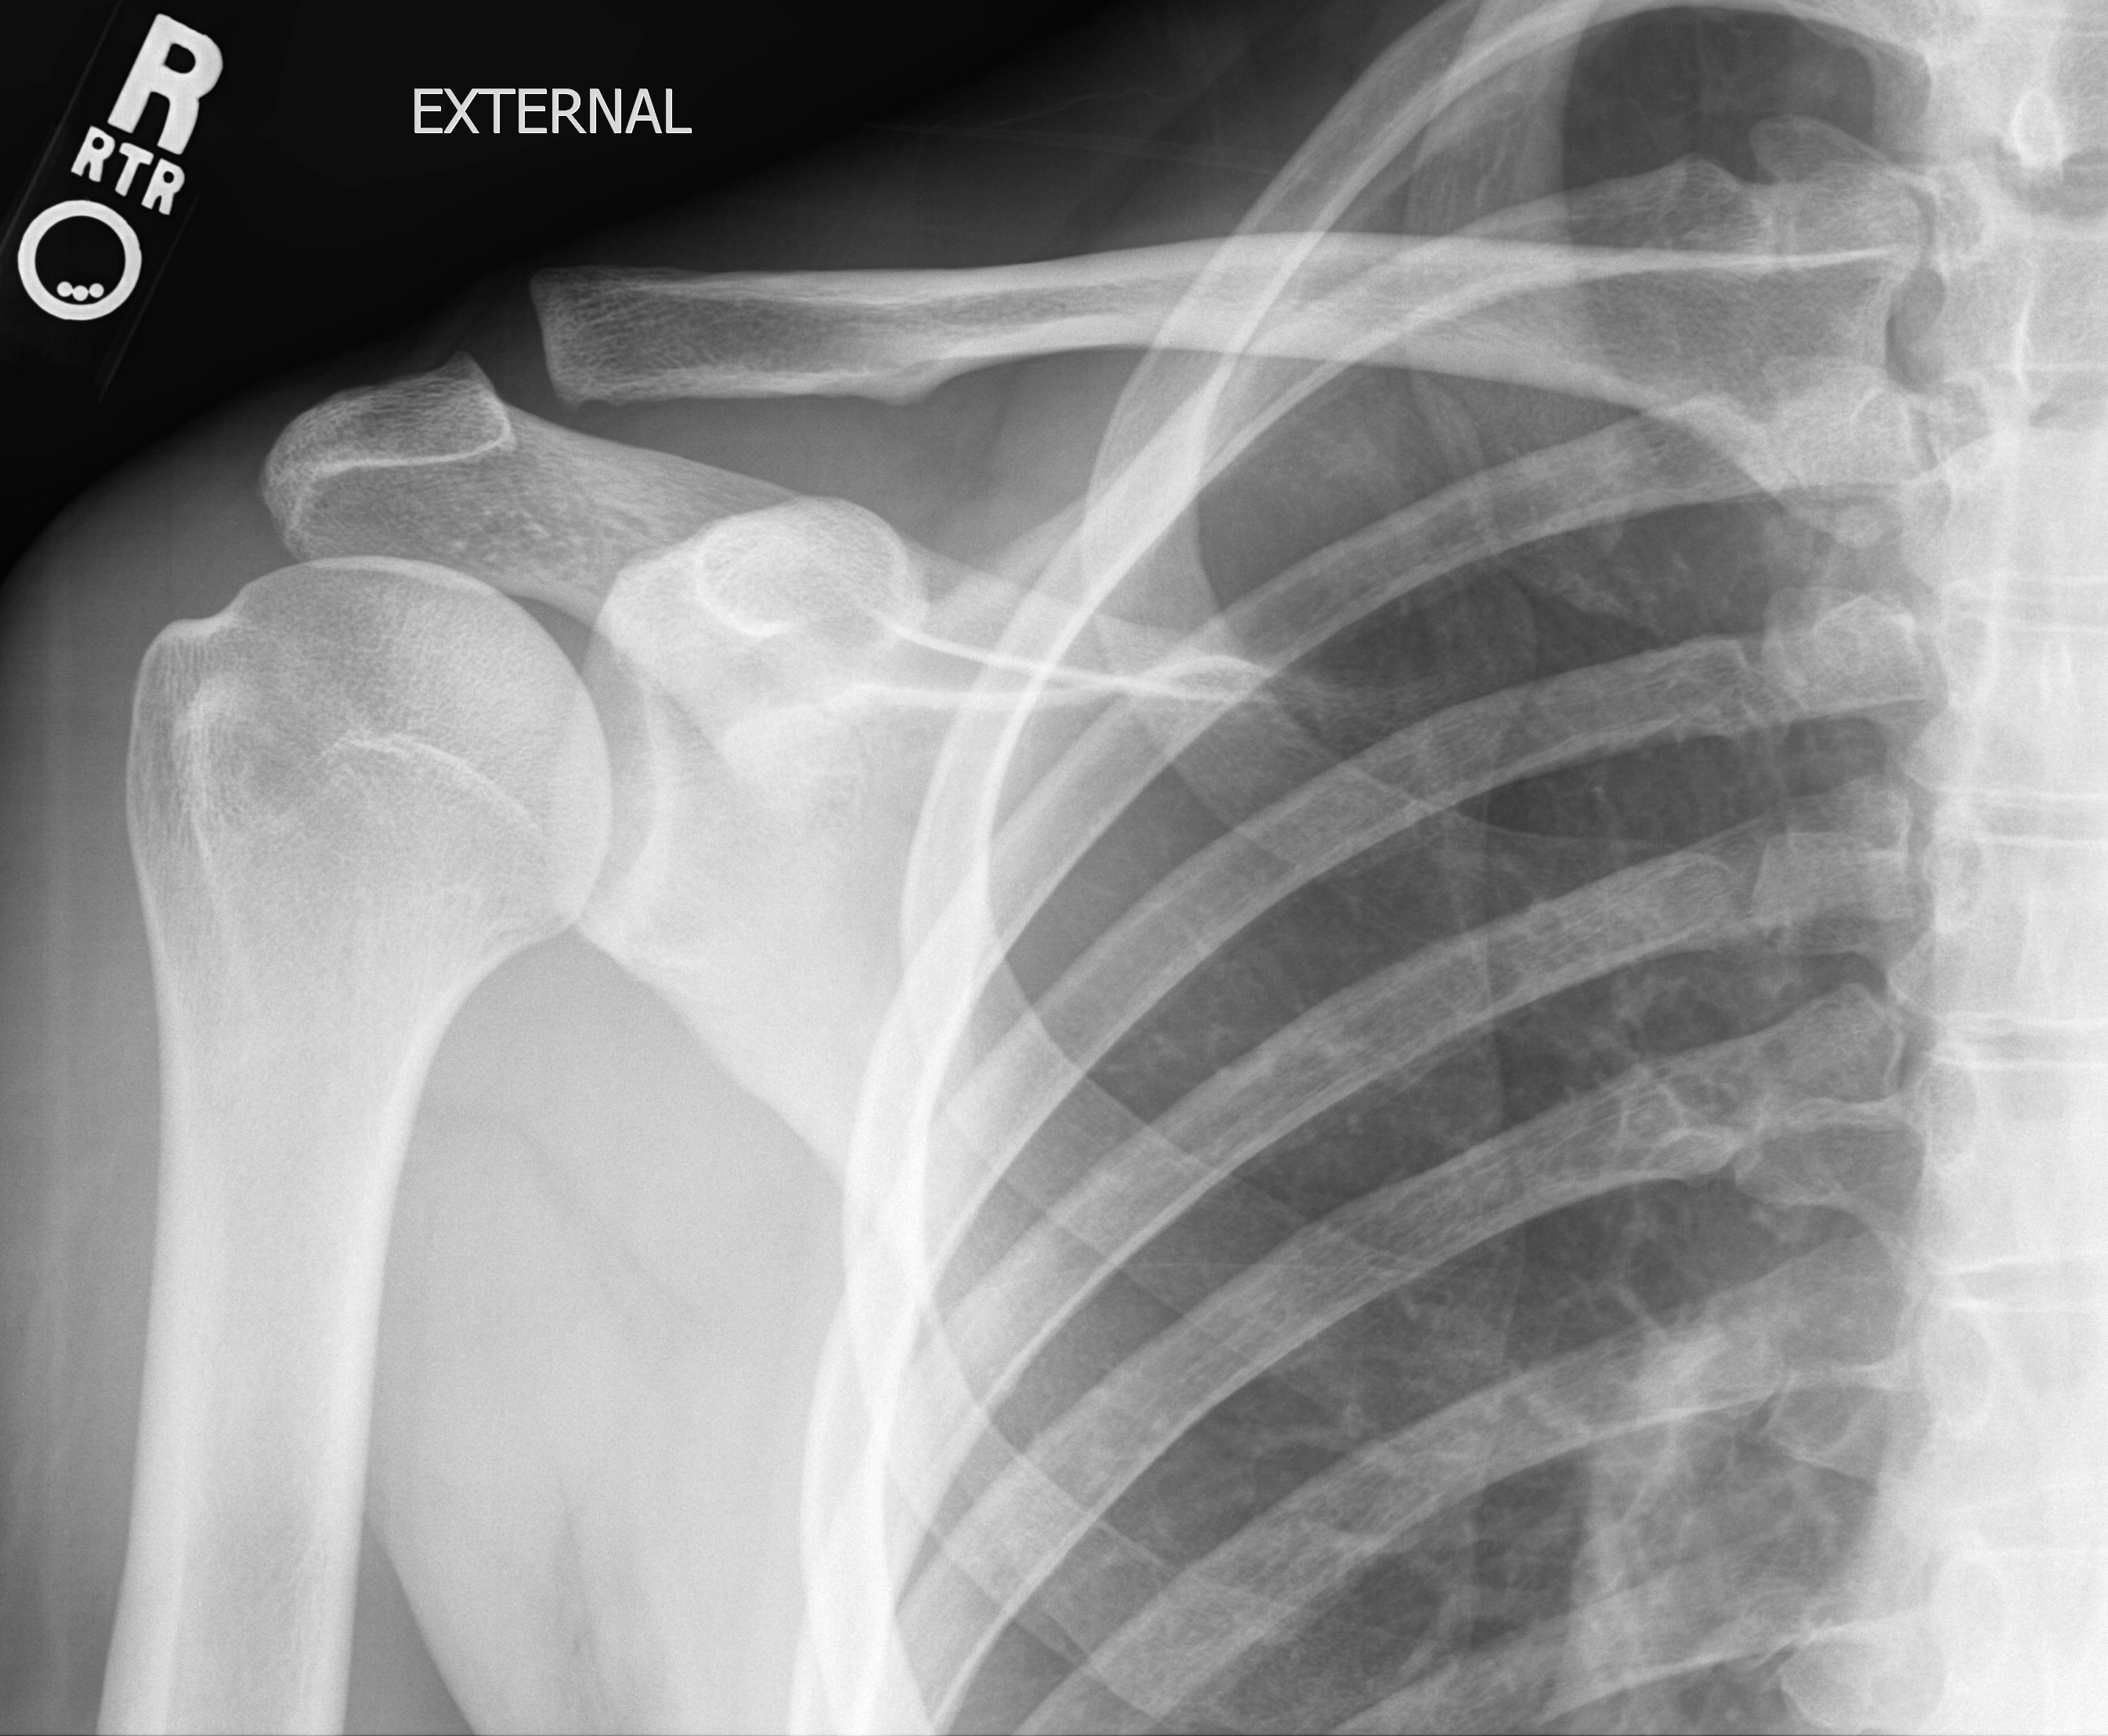
2. AP - external rotation |
10x12 CW |
Patient supine or upright, rotate arm externally to place epicondyles parallel to film |
CR perpendicular to glenoid fossa |
|
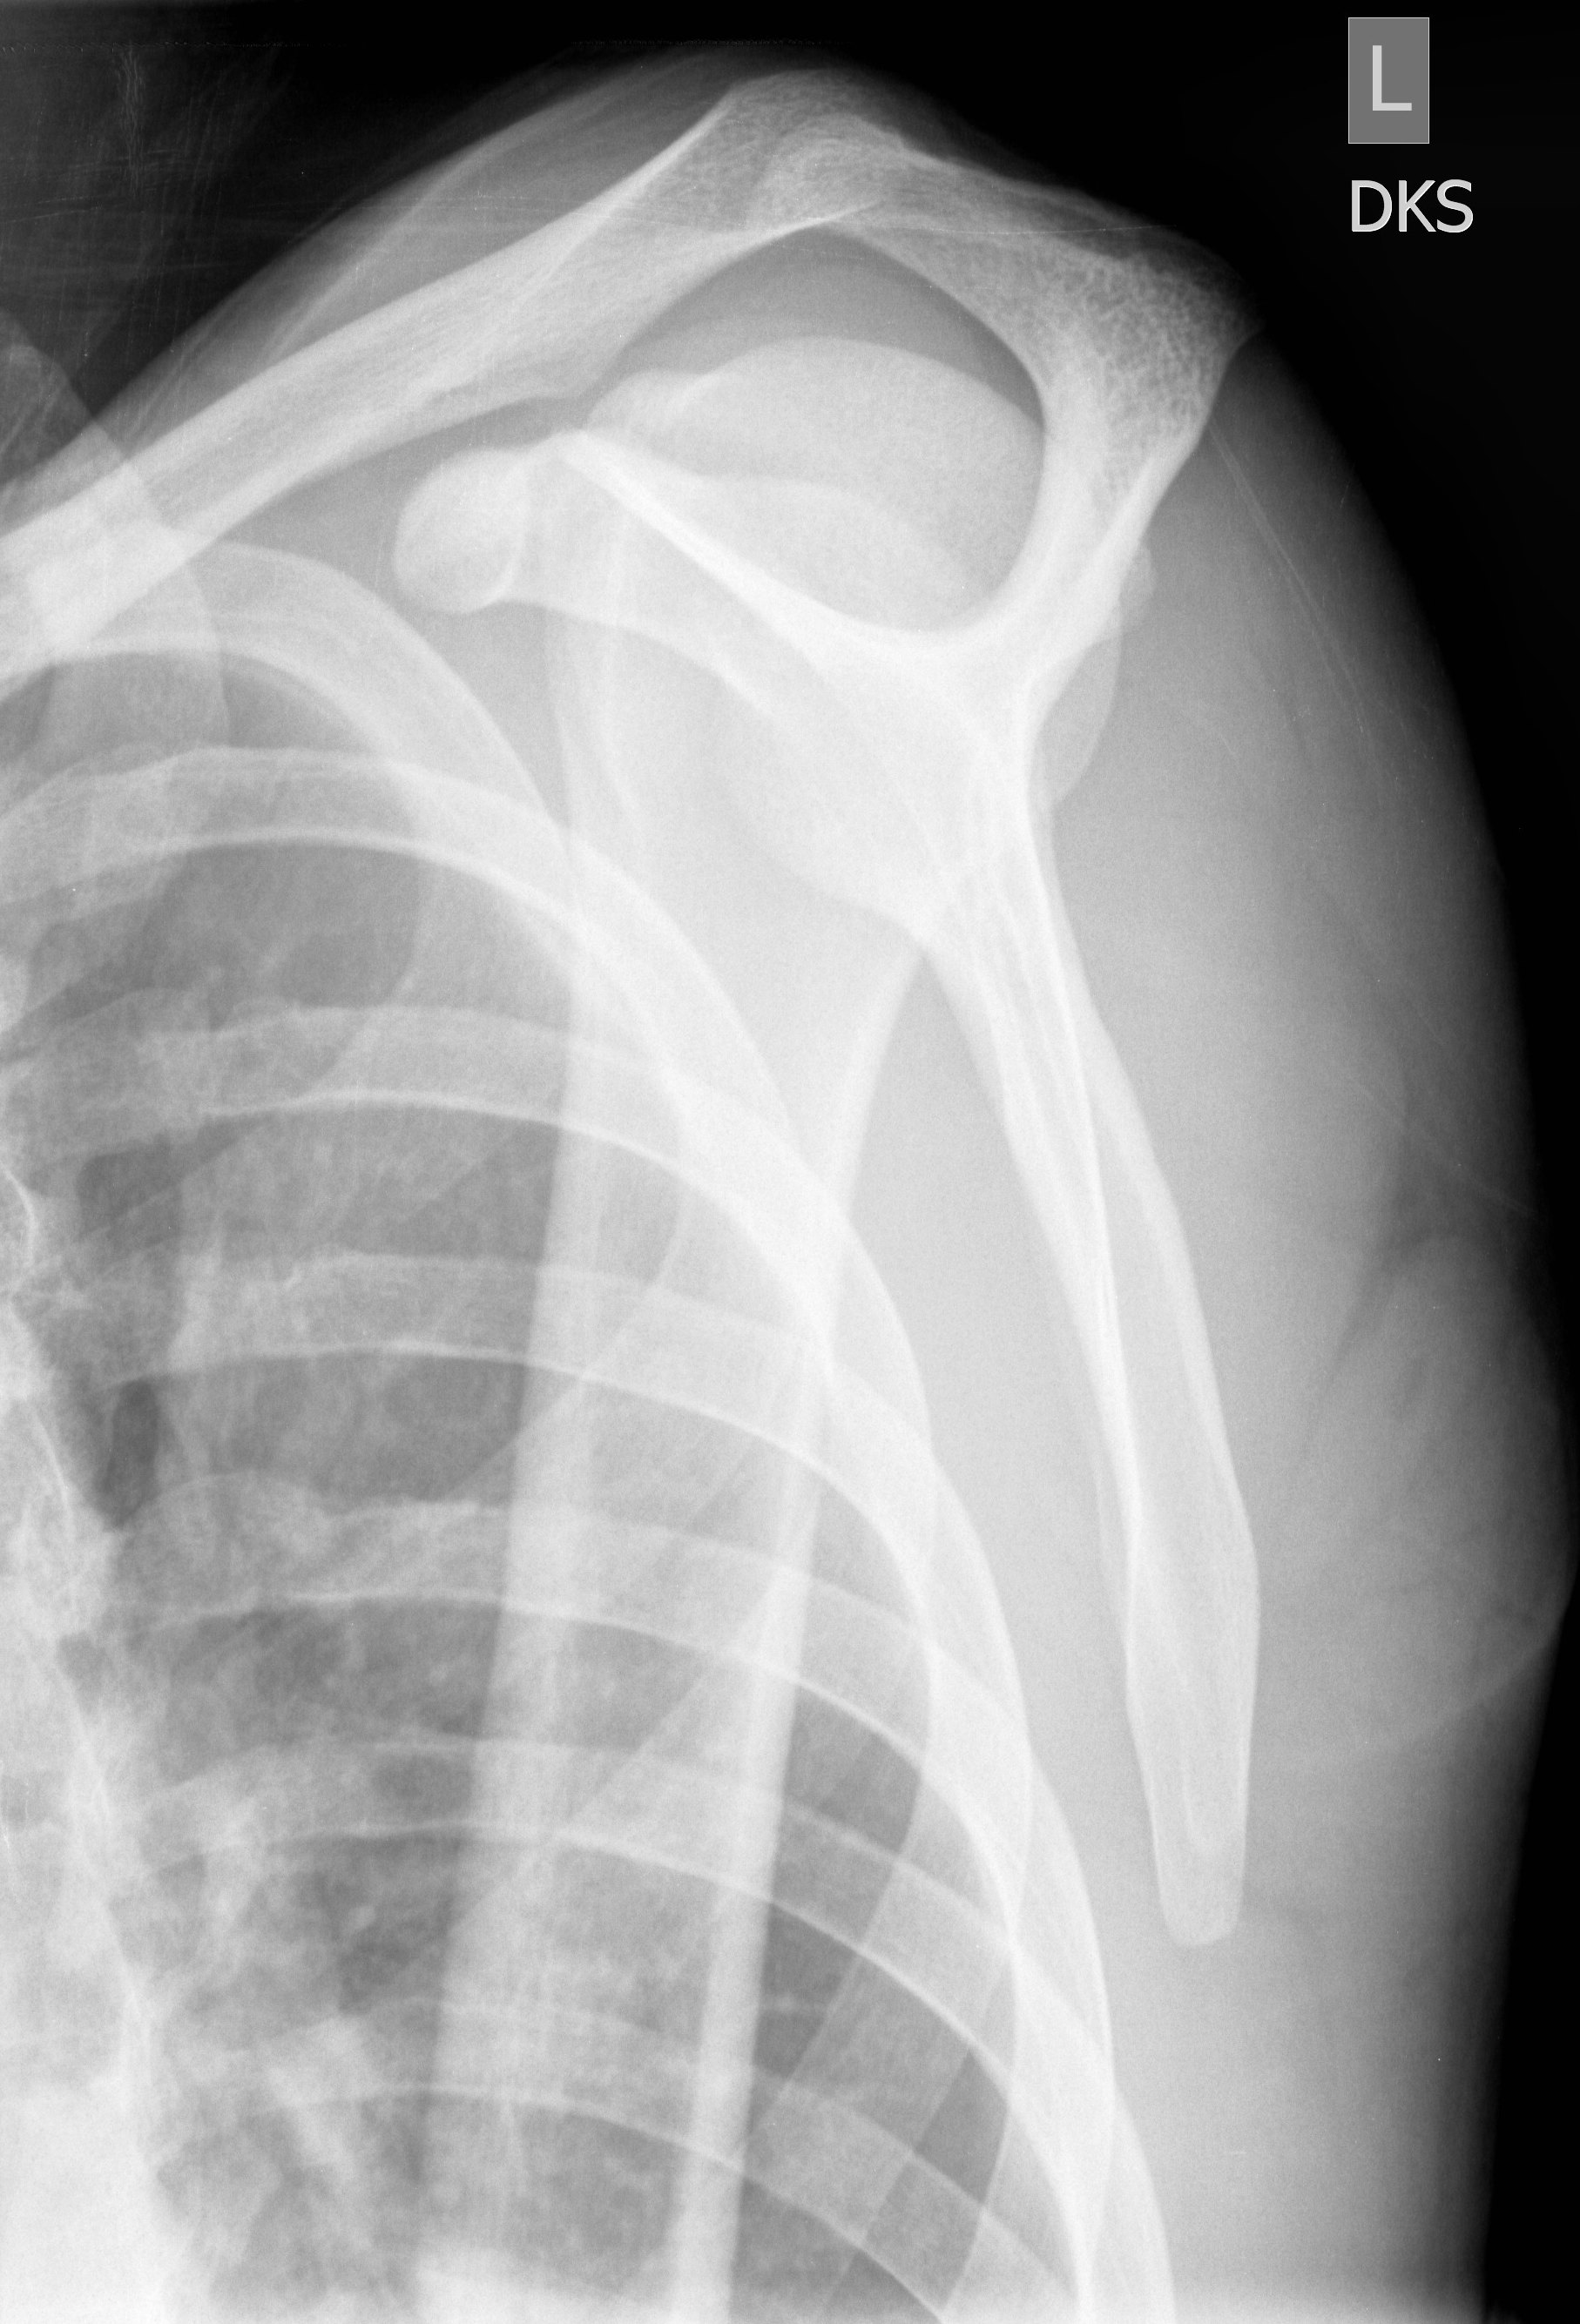
SHOULDER (Trauma, acute injuries - perform the following procedures) |
|
||
|
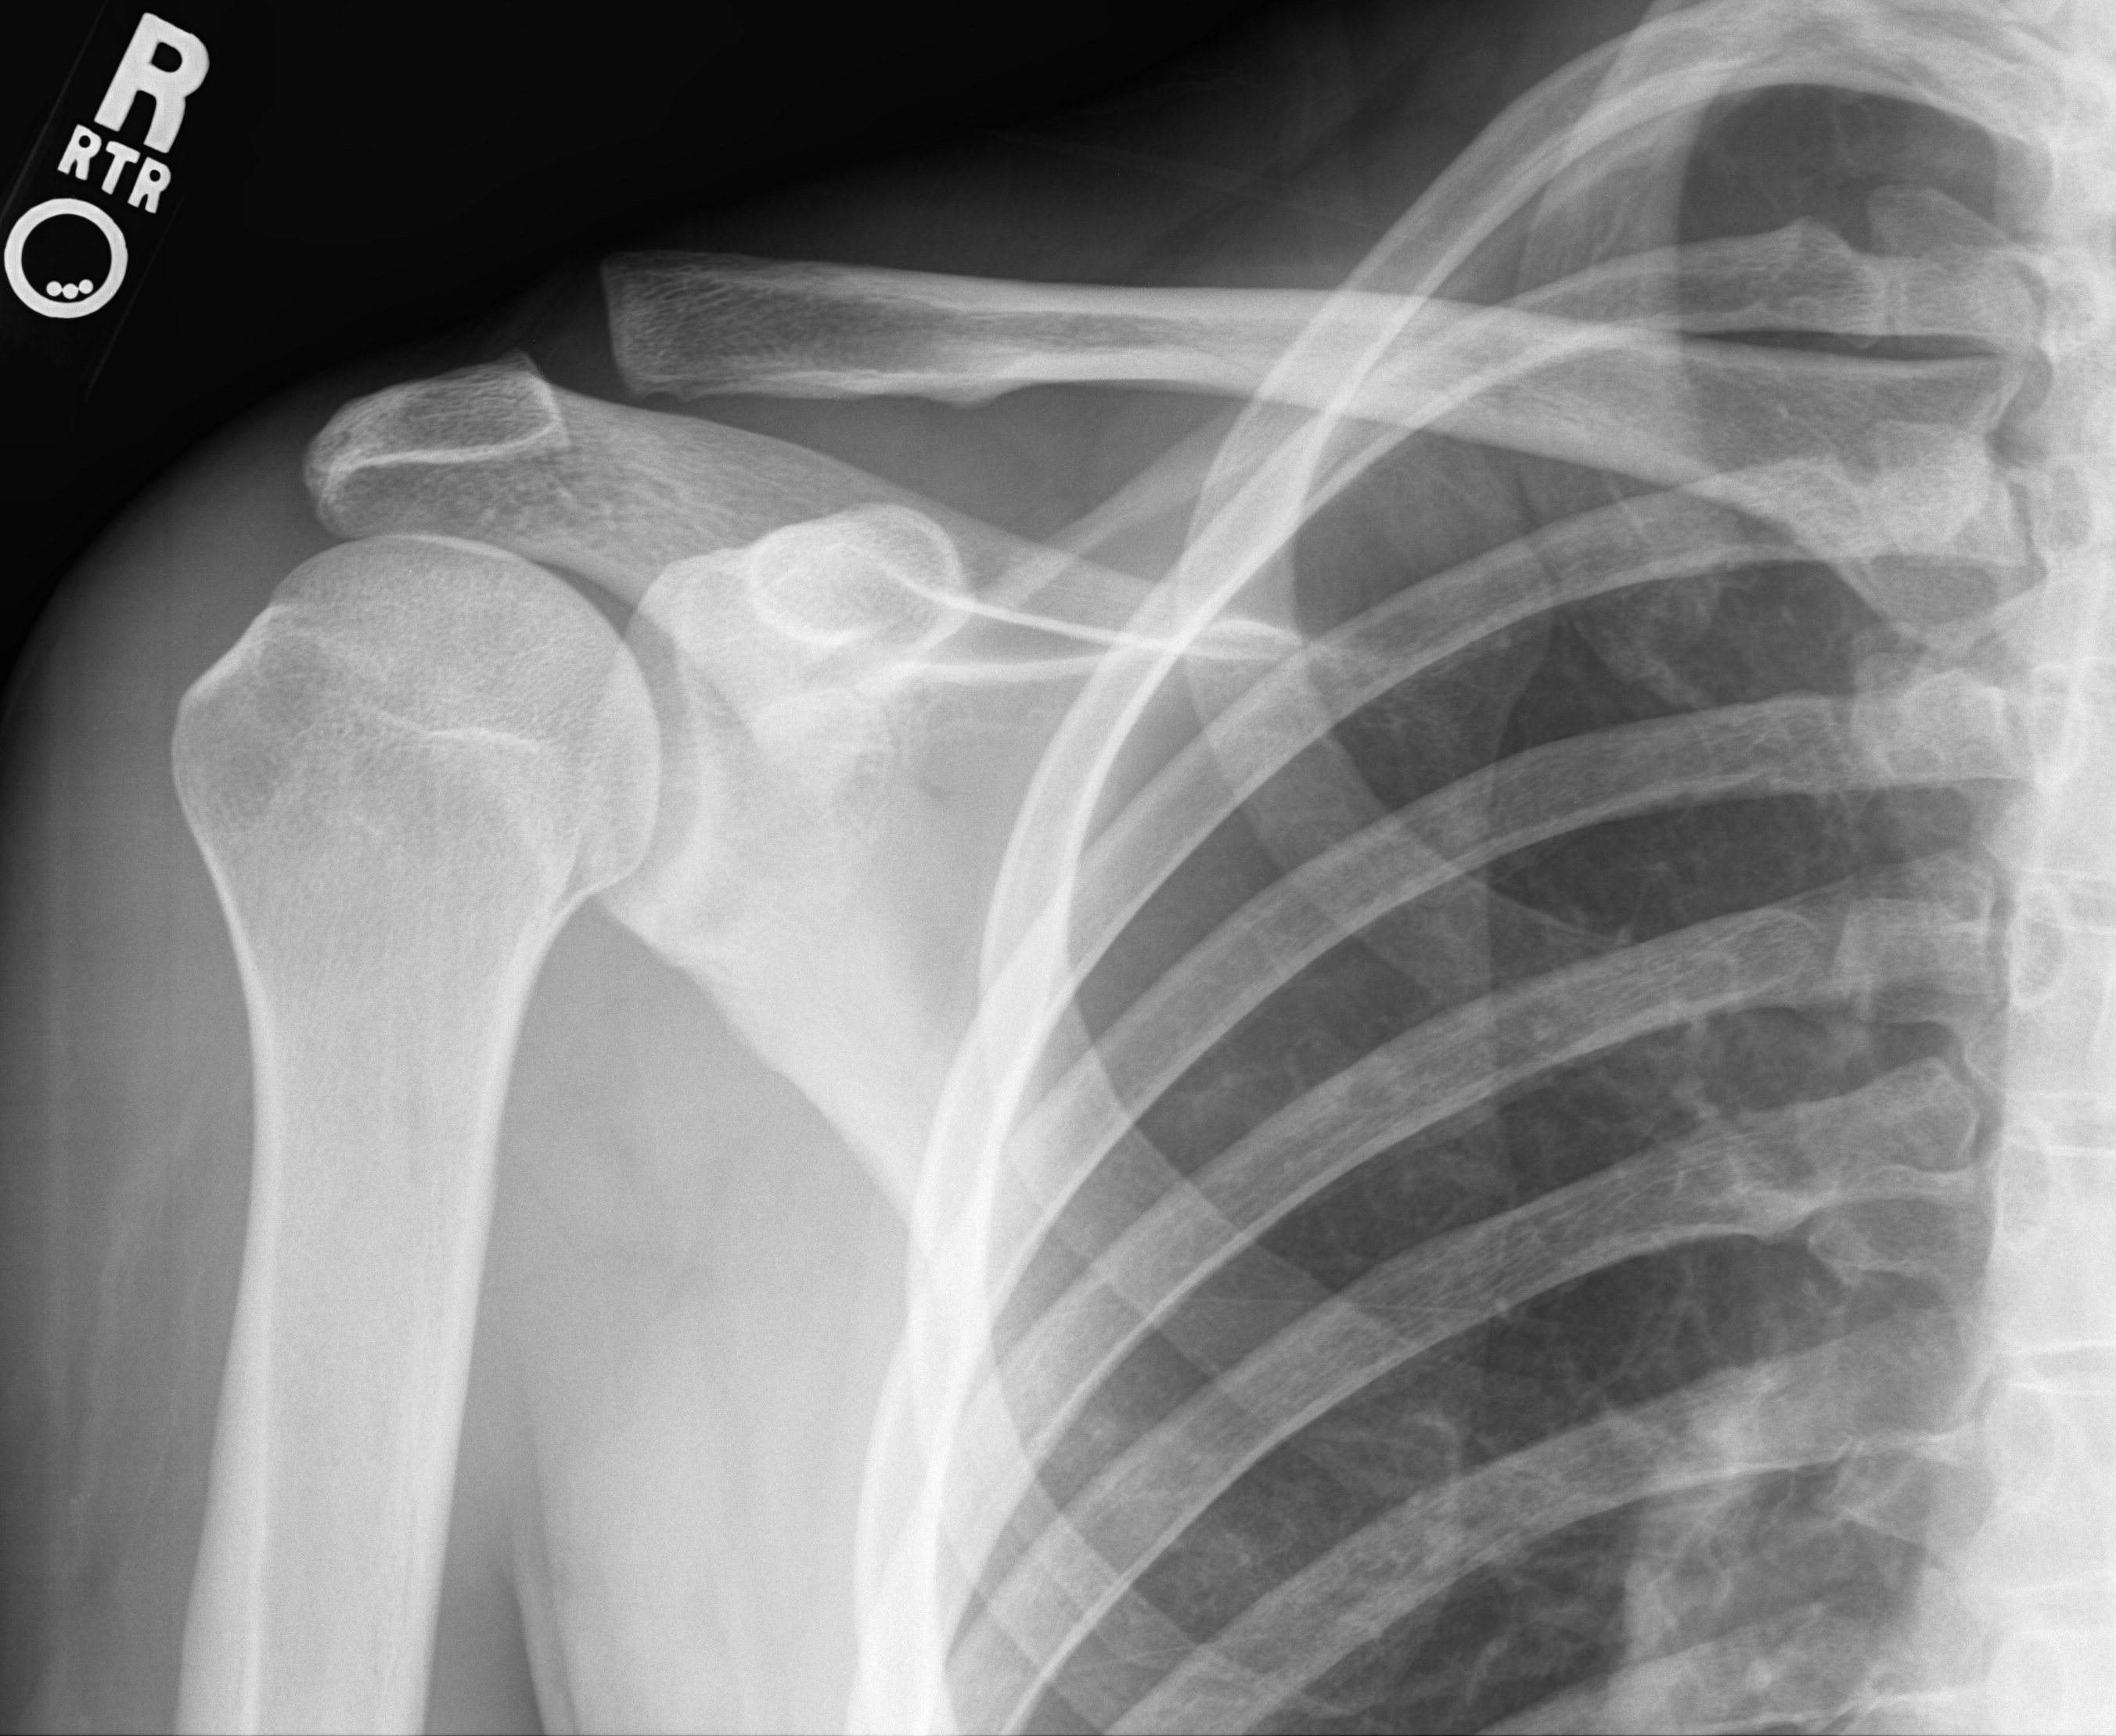
1. AP - neutral position |
10x12 CW |
Patient supine or upright, do not rotate arm. |
CR perpendicular to glenoid fossa |
|
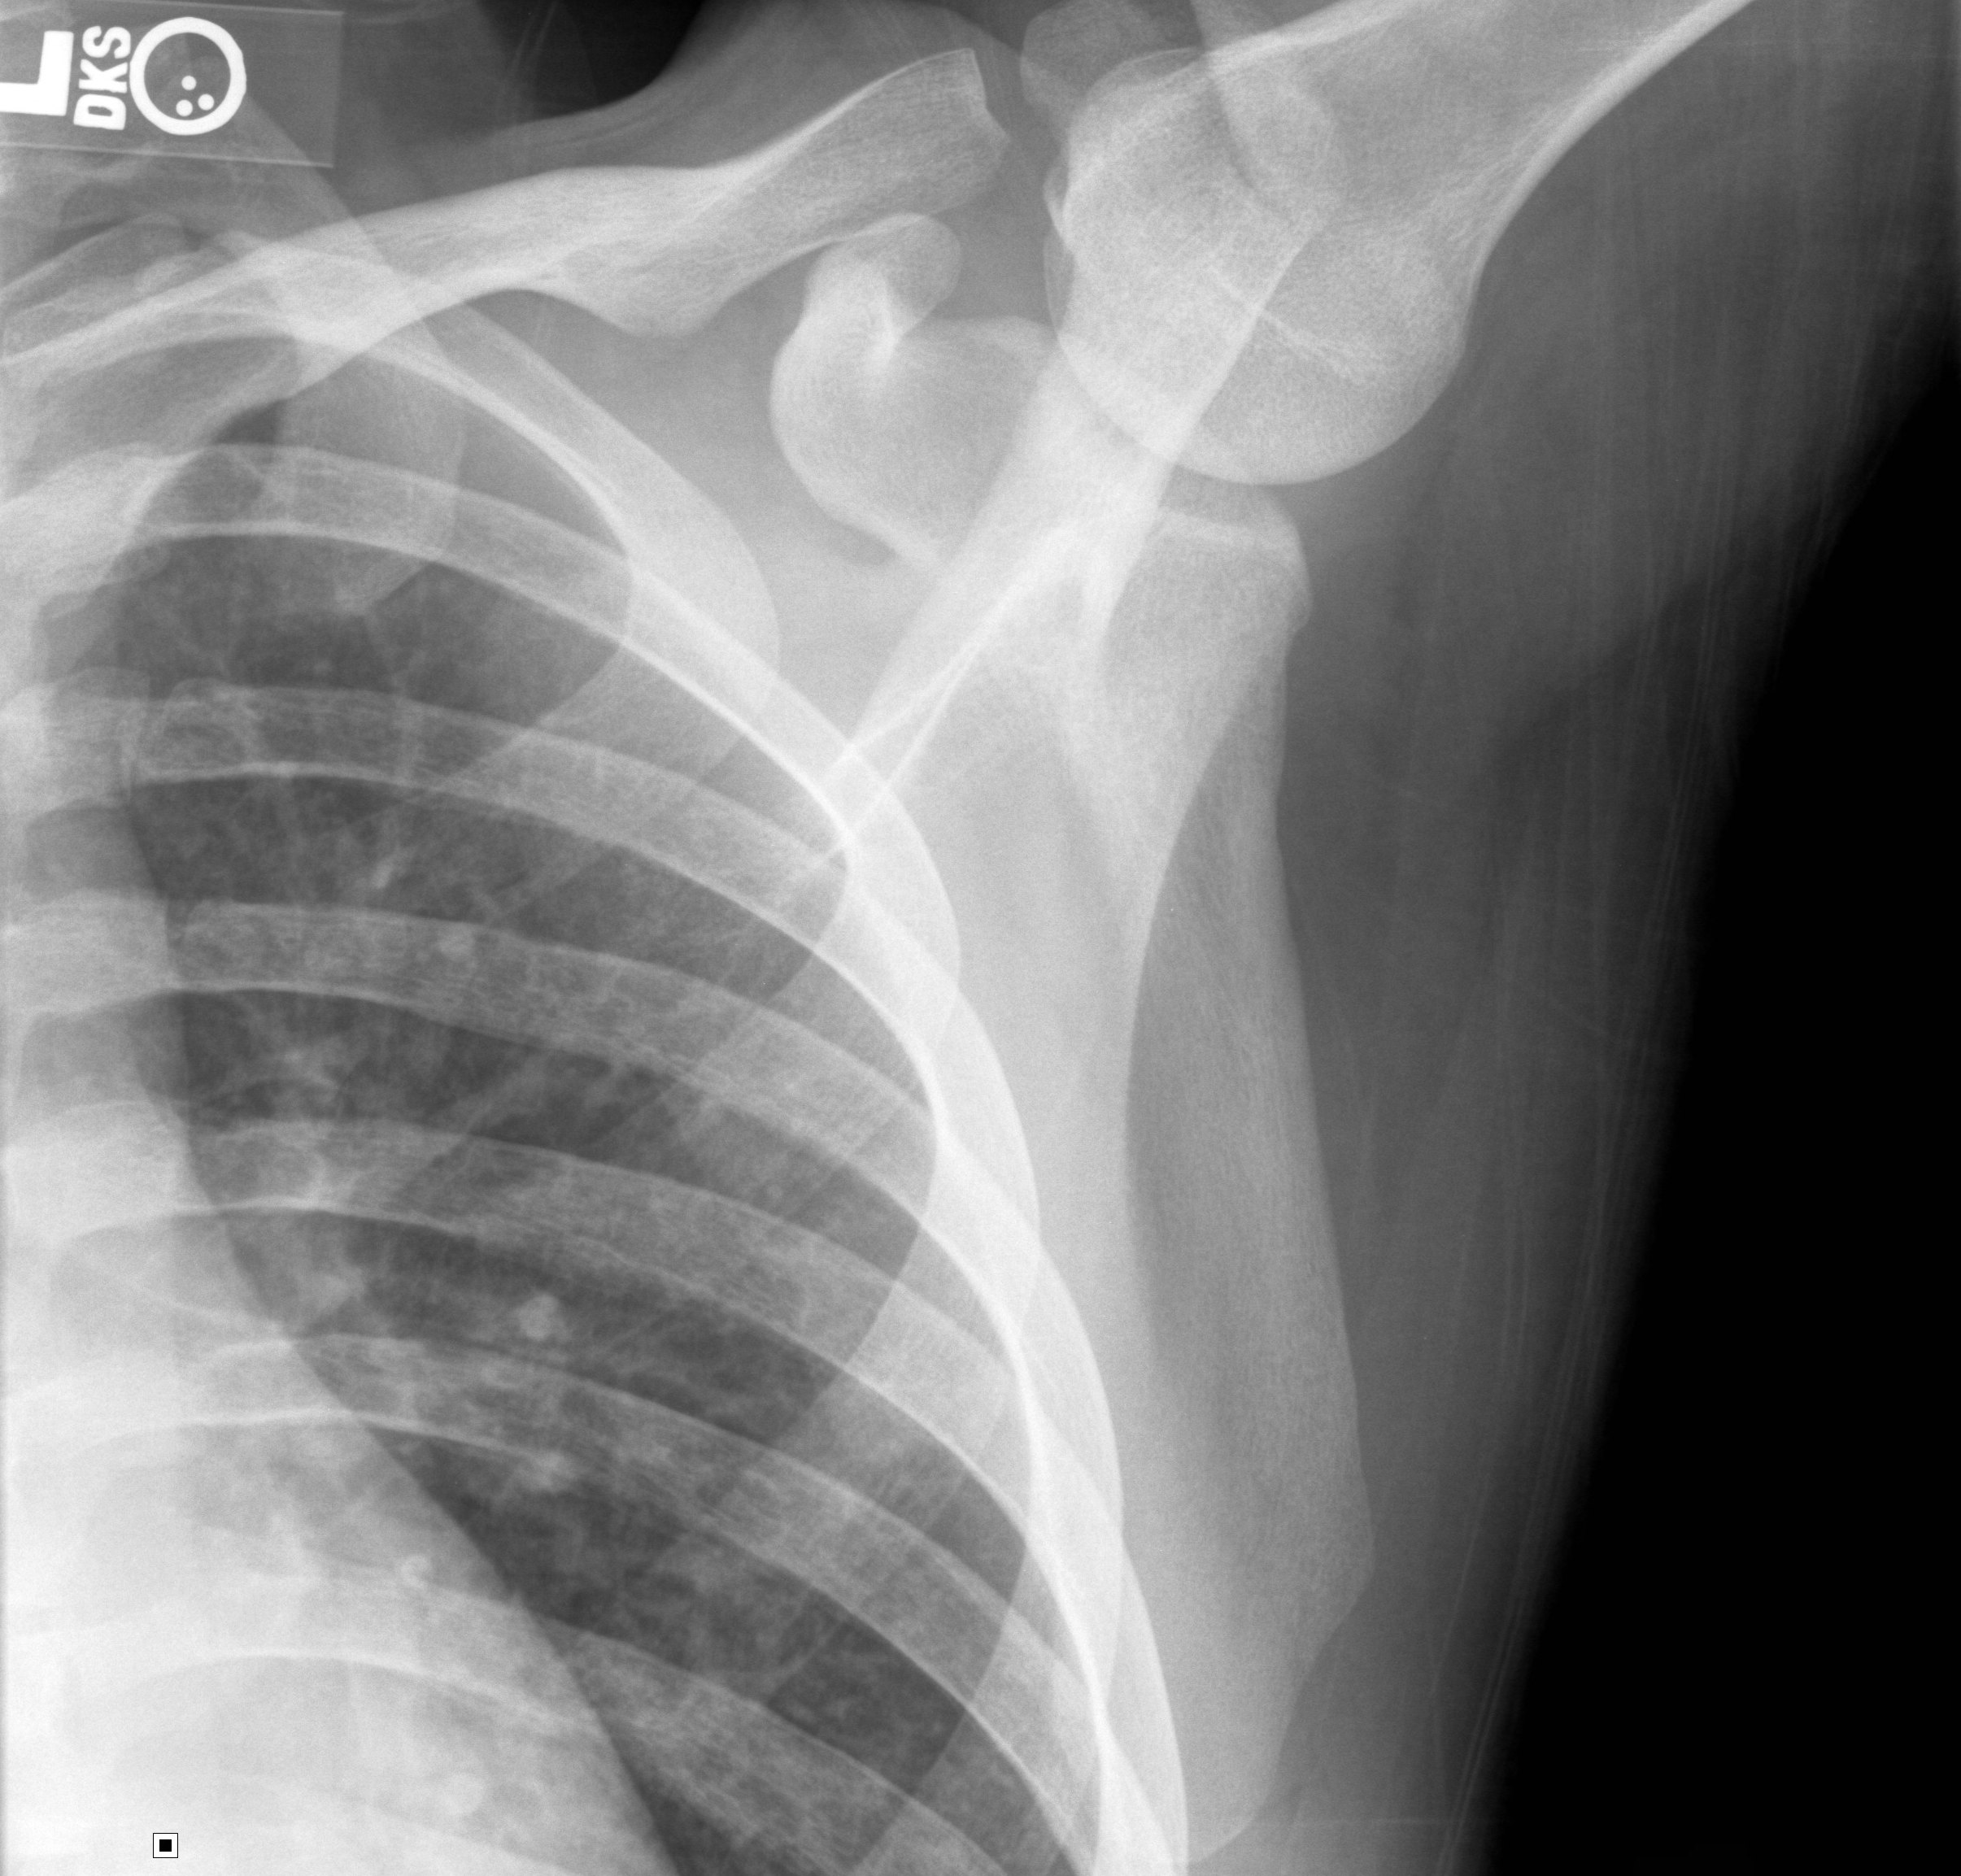
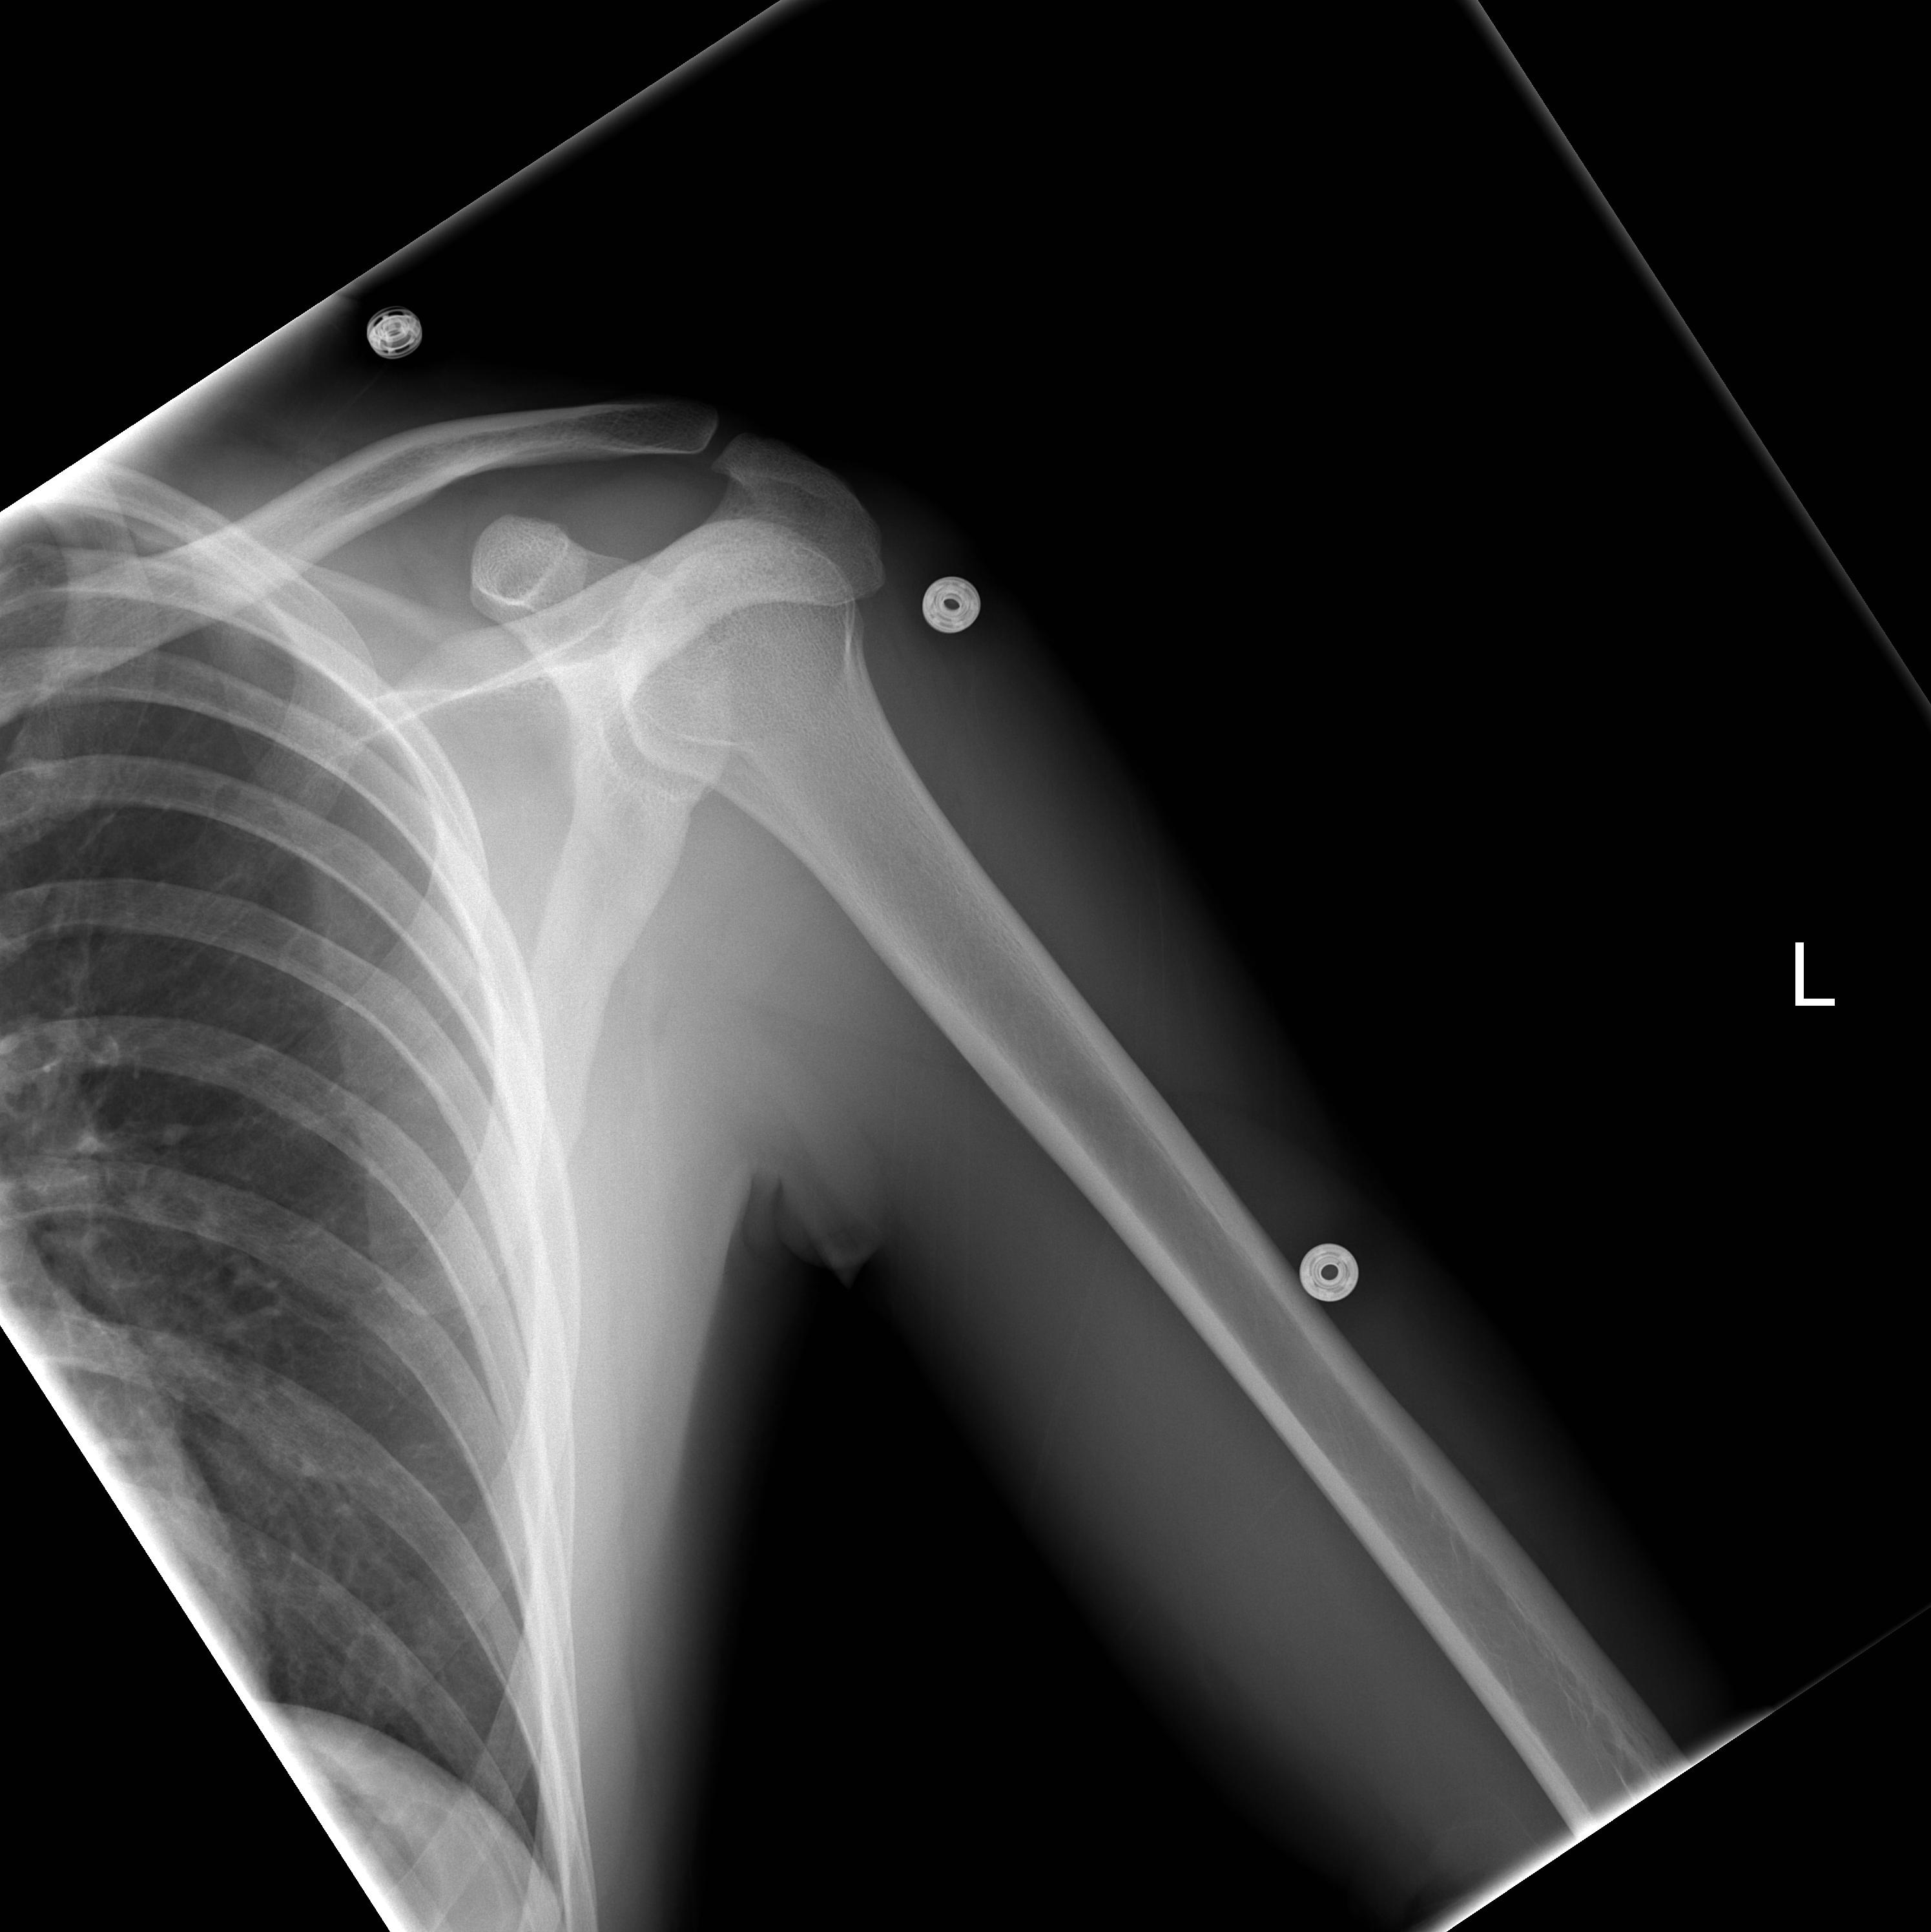
2. Lateral "Y" view - patient placed PA |
10x12 LW |
Patient PA , rotate patient's non-affected side away from film until scapula is perpendicular to film, the affected shoulder usually forms angle of 60E with film |
CR perpendicular to mid vertebral border of scapula |
|
SHOULDER - ADDITIONAL VIEWS (As directed by radiologist.) |
|||
|
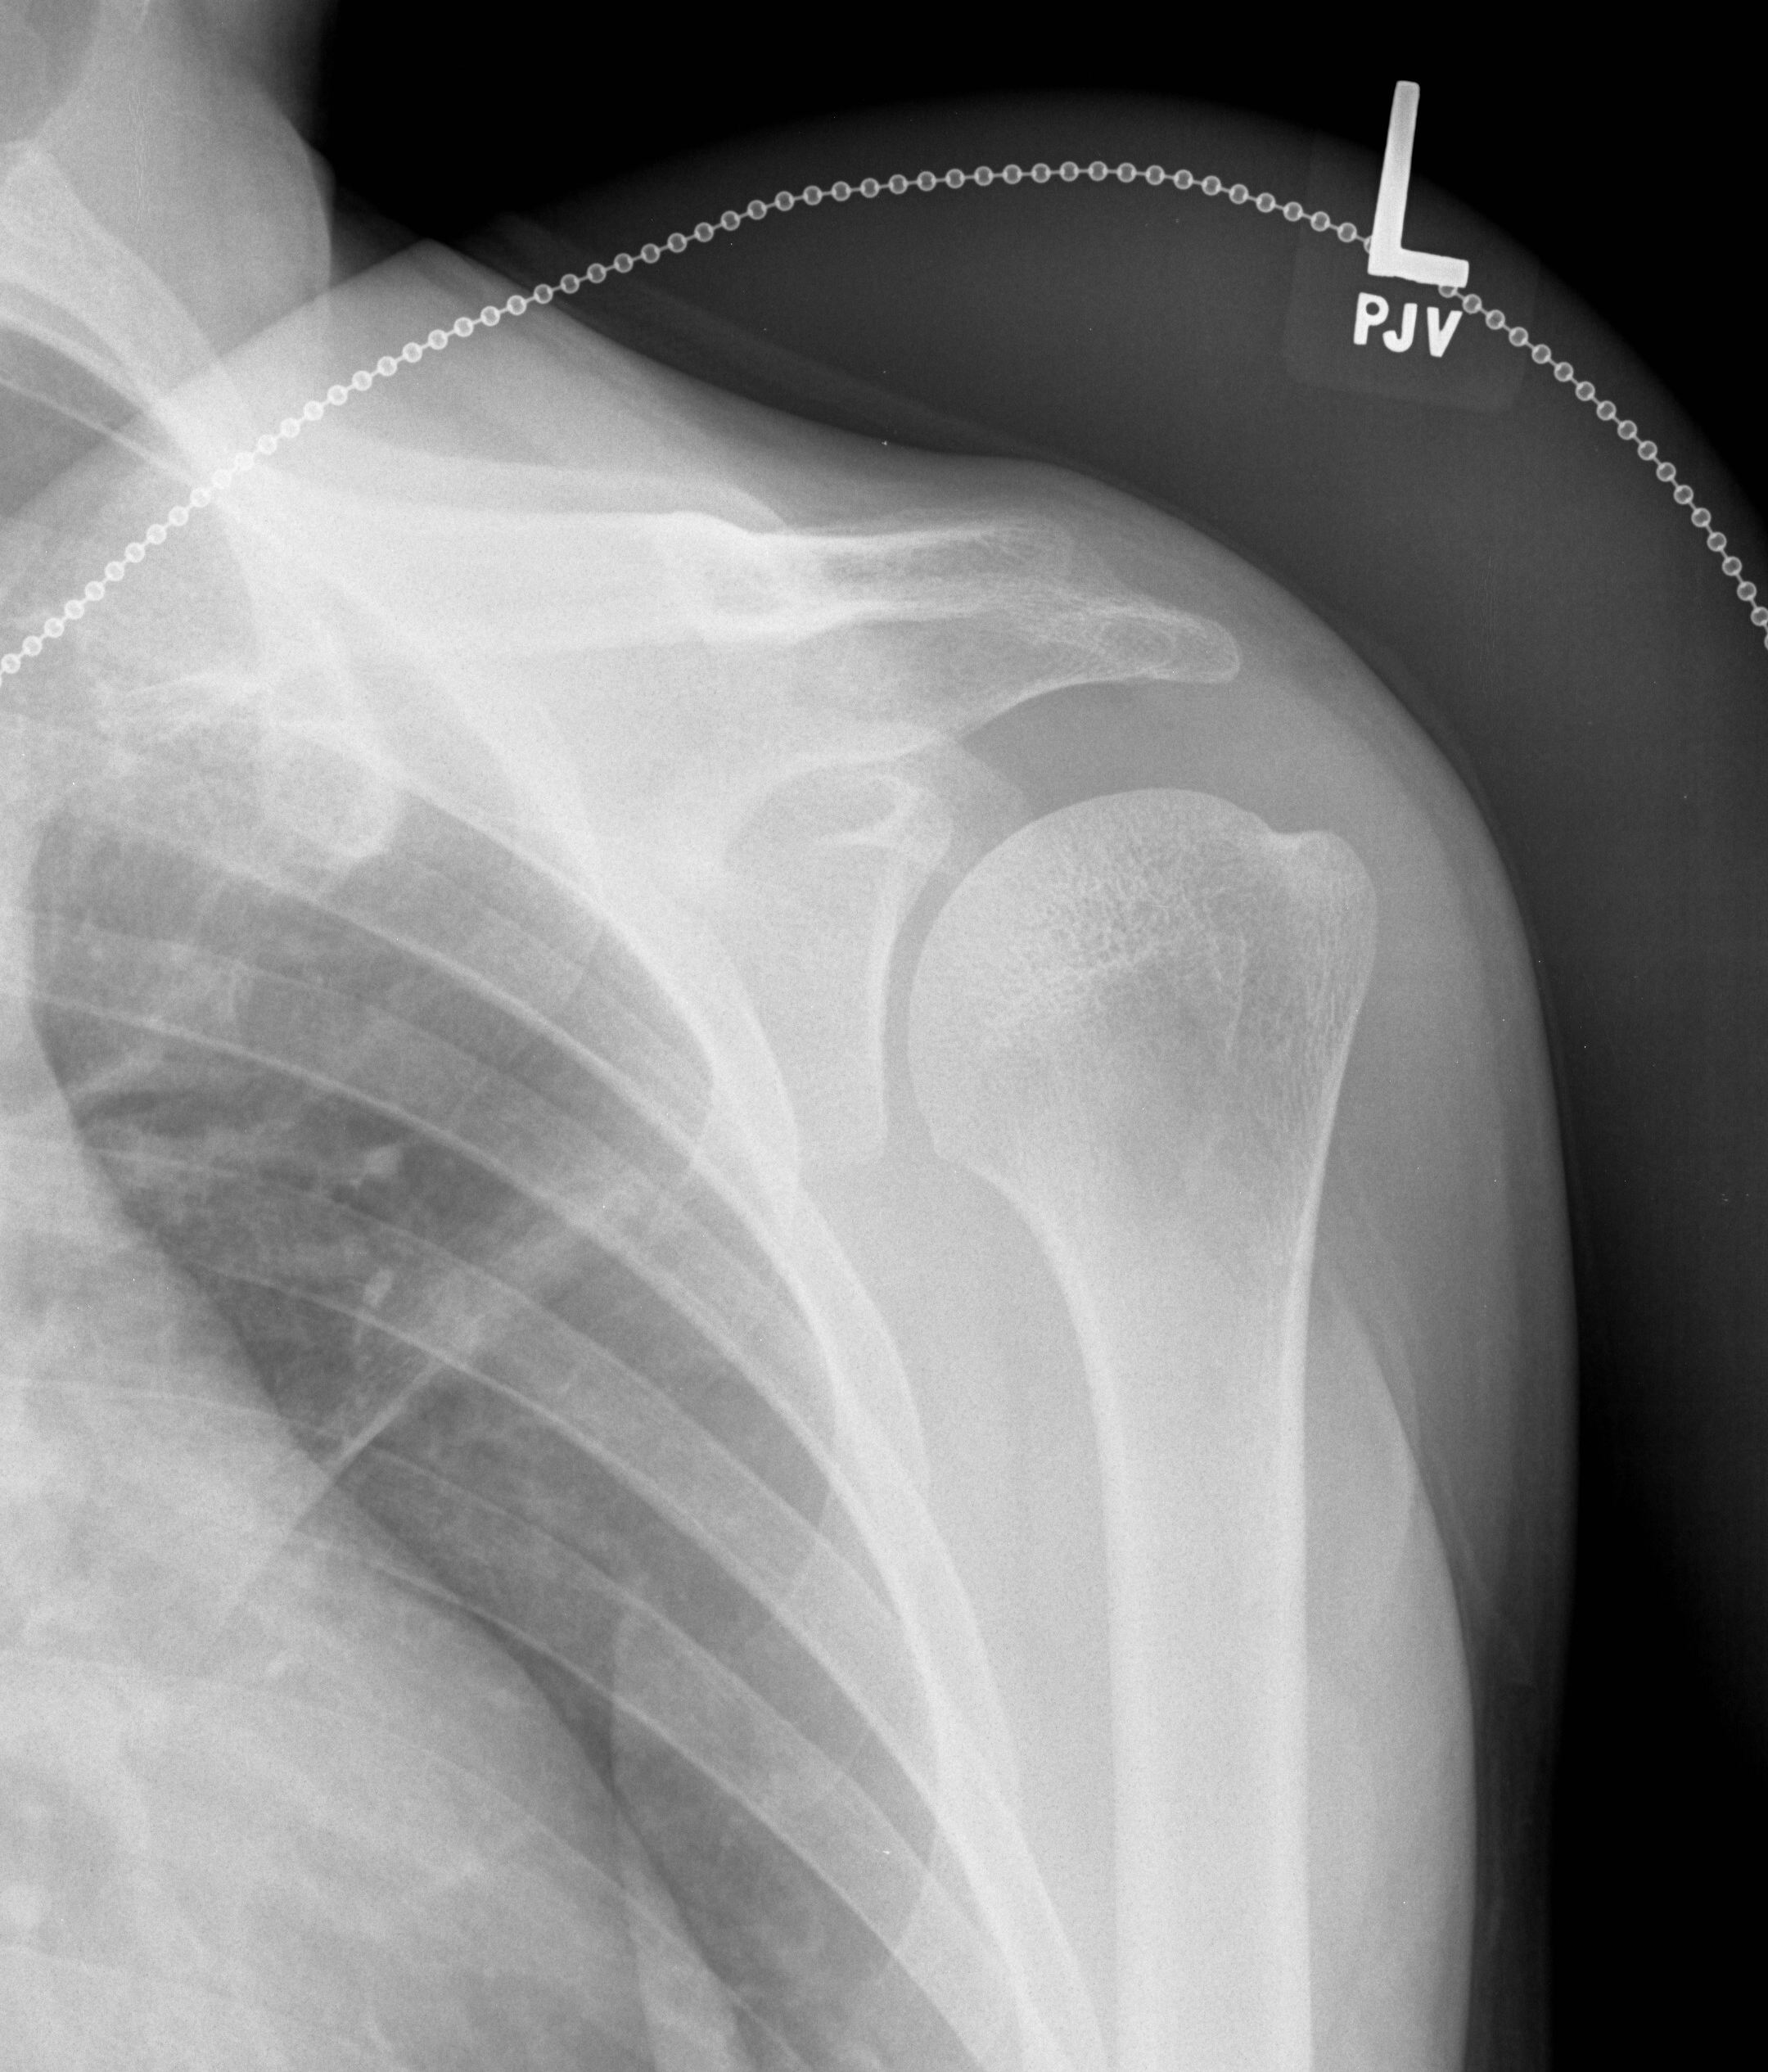
1. Axillary view |
8x10 CW |
Abduct arm 90E away from body, supinate hand, rotate head away, place cassette firmly against shoulder and neck |
CR perpendicular to glenoid fossa |
|
3. Supraspinatus view (Bigliani method) |
8x10 LW |
Follow positioning protocol for Lateral "Y" view |
CR angled 15E caudad, enters at coracoid process |
|
1. AP - 0 tube angle |
10x12 CW |
Patient supine or upright with no rotation |
CR perpendicular to mid-clavicle |
|
2. AP - axial view |
10x12 CW |
Patient supine or upright with no rotation |
CR angled 20E cephalic |
|
1. AP - non-weight bearing (Use 72" SID) |
14x17 CW to include both joints or two 8x10 CW for each AC joint |
Patient upright in AP position, equal weight on both feet, no rotation, arms relaxed at sides. patient to suspend respiration during exposure. Always include both joints bilaterally. |
CR perpendicular to AC joints |
|
2. AP - weight bearing |
|
Follow non-weight bearing protocol, add 10 pound weights to each hand. Always include both joints bilaterally. Strap weights to wrist for optimum films. |
CR perpendicular to AC joints |
|
1. AP |
10x12 LW |
Patient supine or upright, rotate patients body until scapula rests on table, abduct affected arm 90E away from trunk, flex elbow for patient comfort |
CR perpendicular to mid-scapula |
|
2. Lateral |
10x12 LW |
Patient PA, recumbent or erect, rotate patient's non-affected side away from Bucky until the scapula is lateral, angle of affected shoulder and film will be approximately 60E |
CR perpendicular to mid-scapula |
|
LOWER EXTREMITIES |
|||
|
TOES (AP view of foot to be done with acute injuries, otherwise AP of affected toe only.) |
|||
|
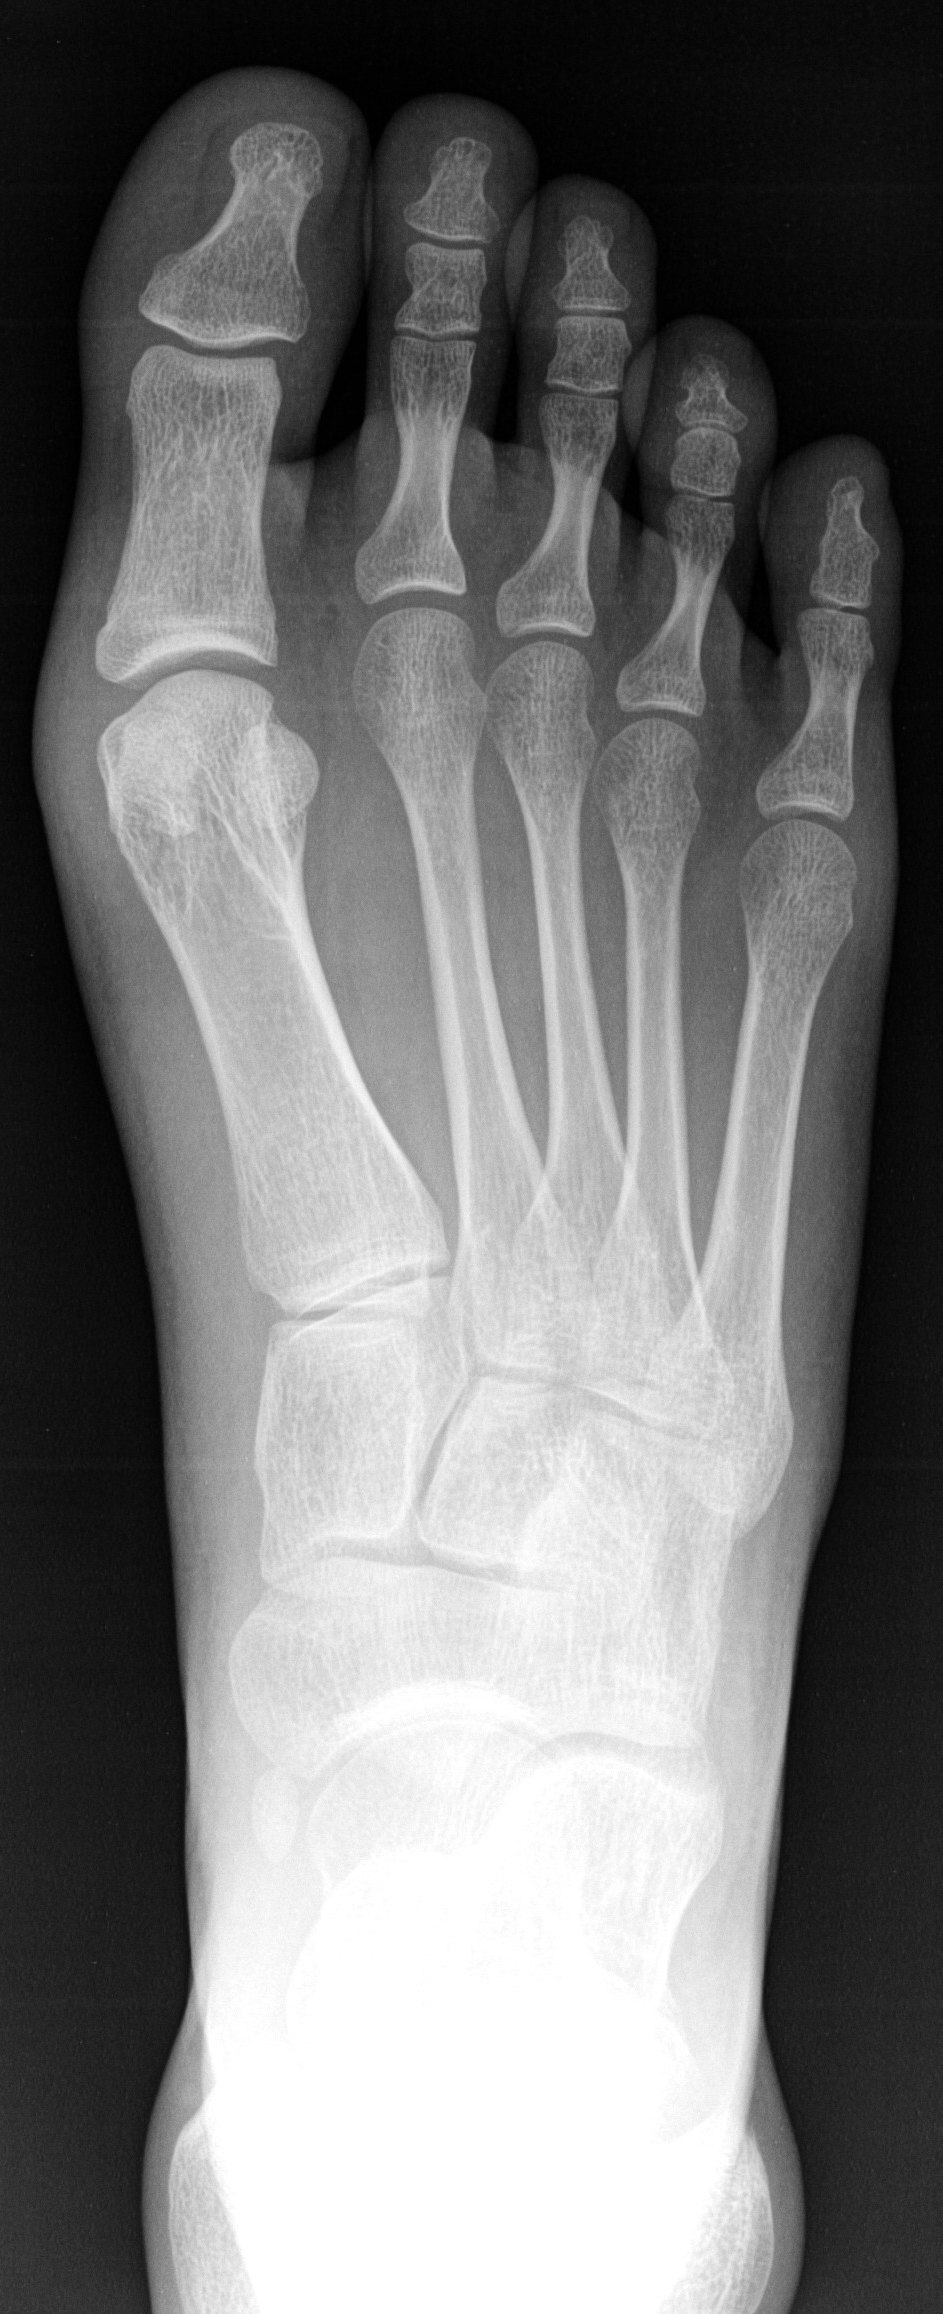
1. AP foot |
½ of 10x12 LW |
Place sole of foot flatly on cassette in dorsal plantar position |
CR angled 5E-10E to base of third (3rd) metatarsal |
|
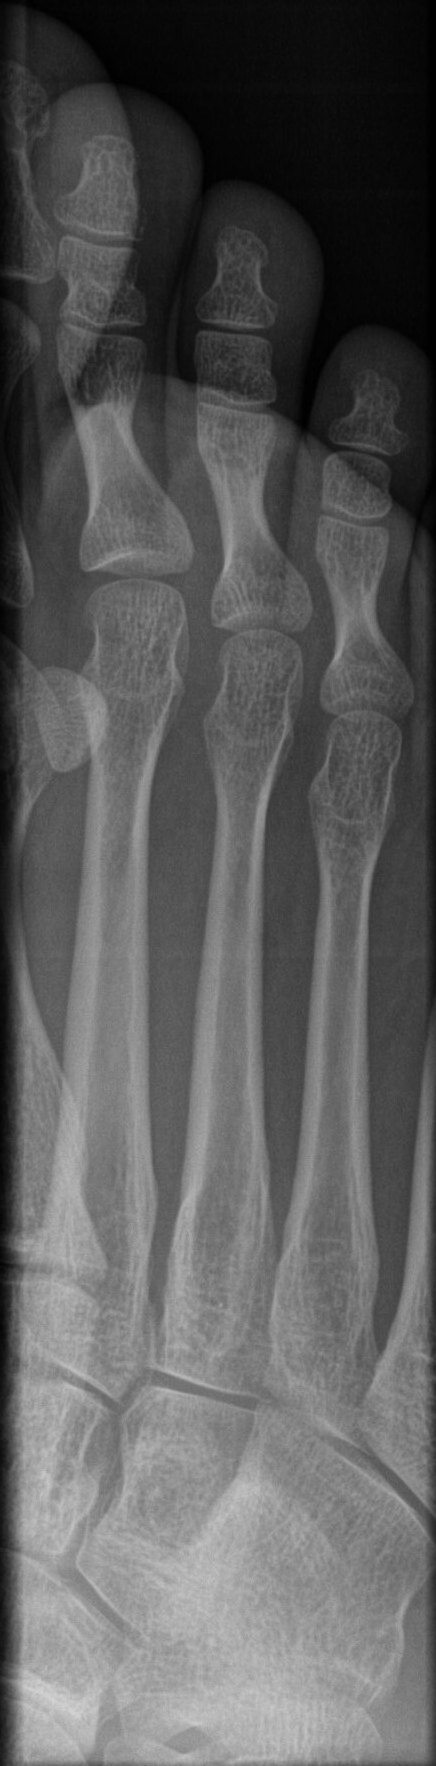
2. Medial oblique of affected toe(s) |
1/4 of 10x12 LW |
From AP position, internally rotate foot 45E |
CR perpendicular to proximal PIP joint |
|
3. Lateral of toe(s) |
1/4 of 10x12 LW |
Rotate foot towards affected side, until foot is in lateral position |
CR perpendicular to proximal PIP joint |
|
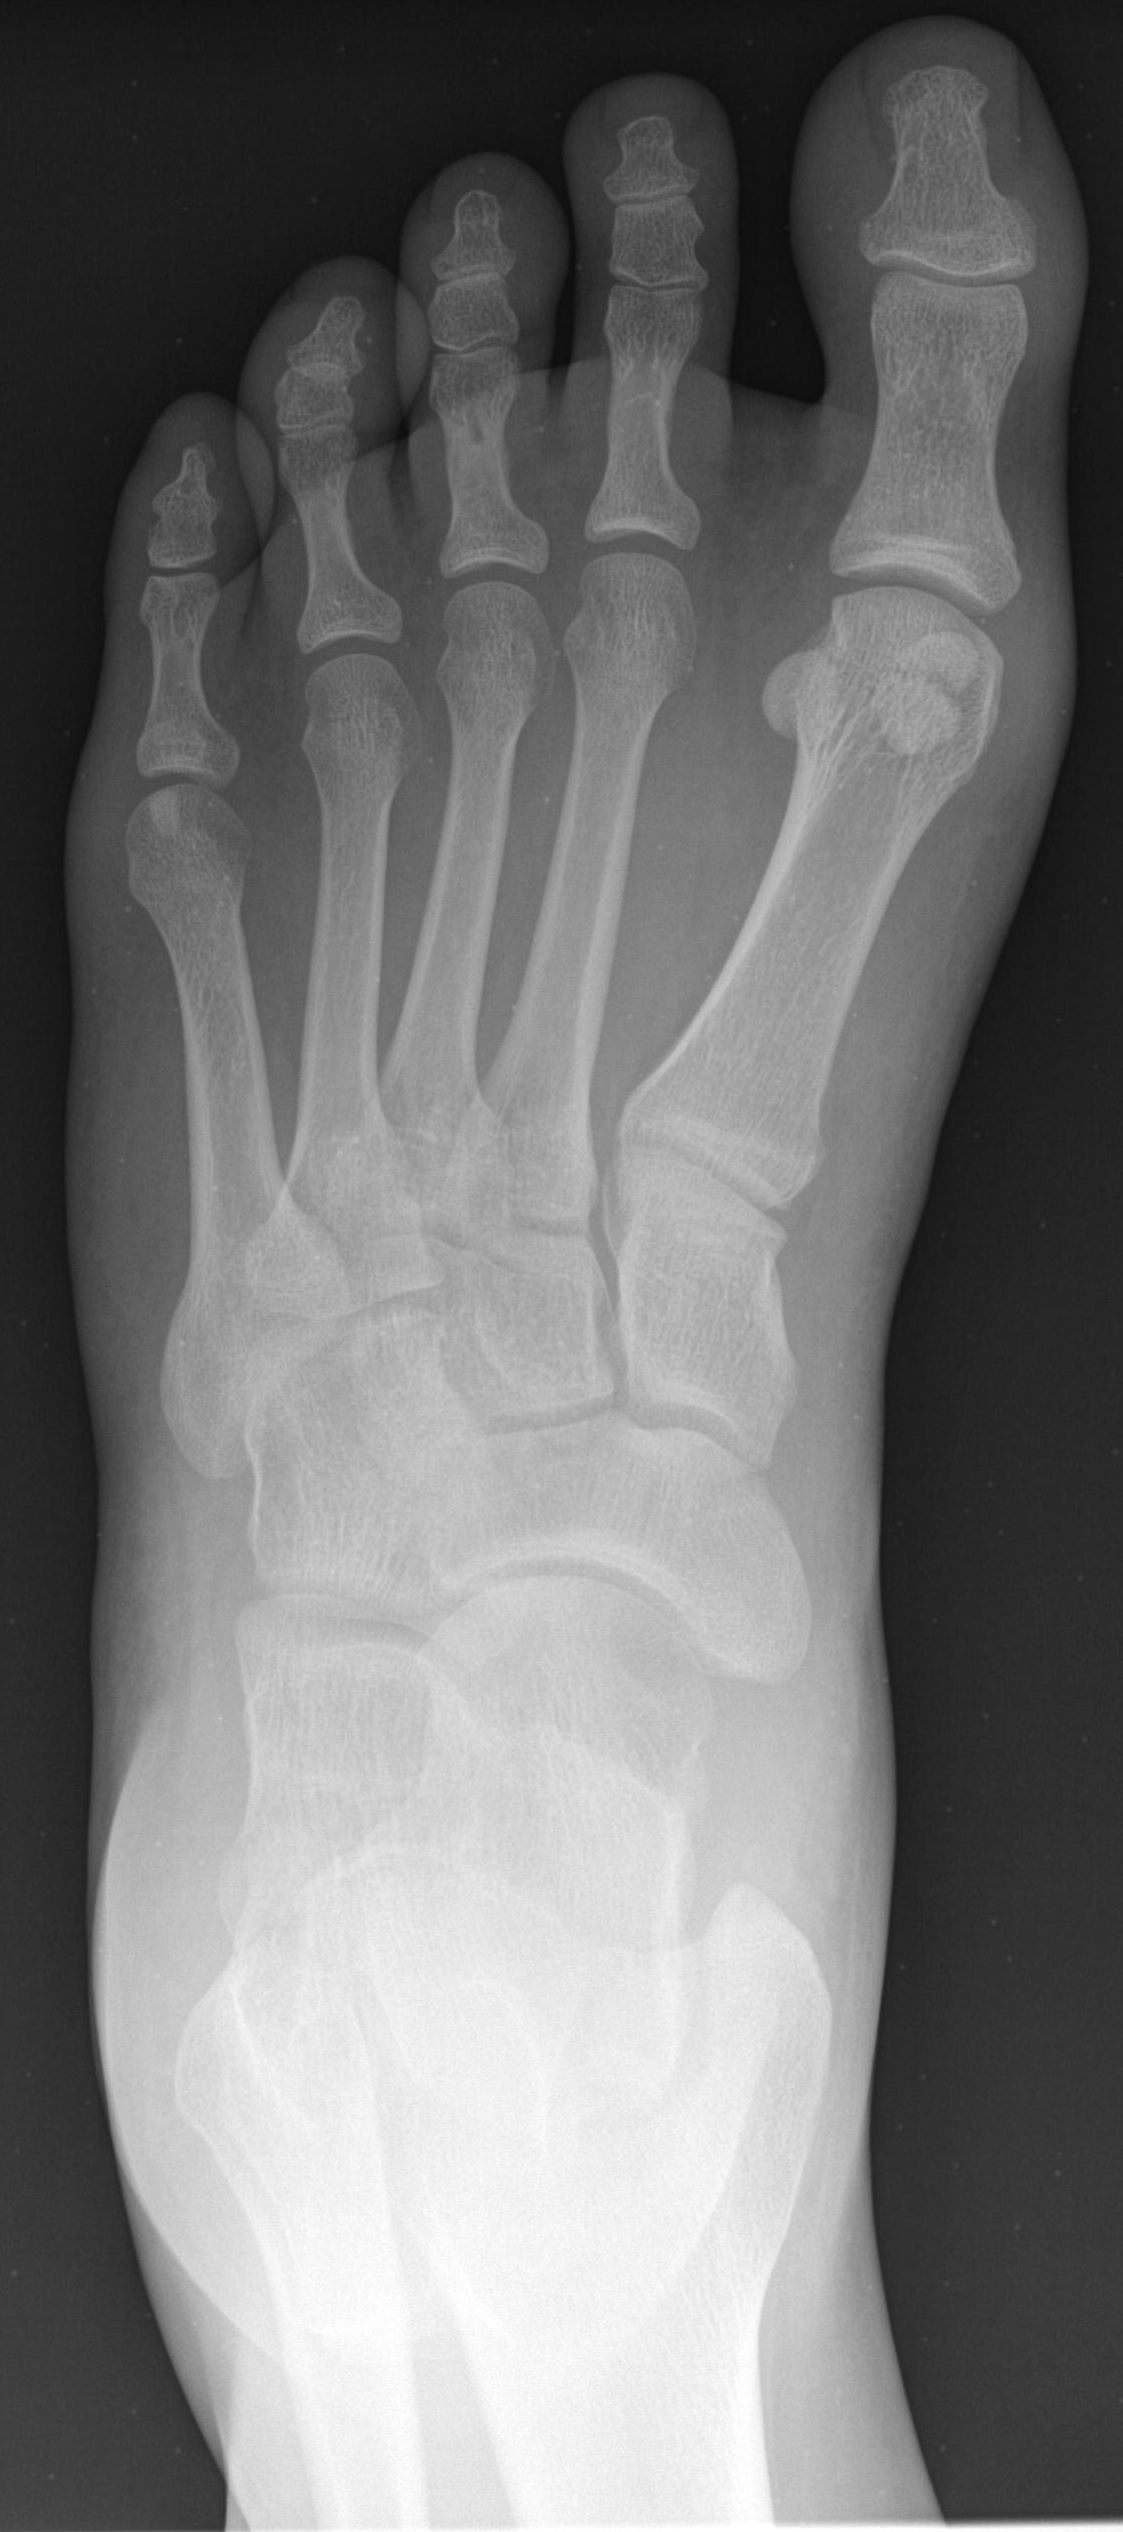
1. AP (Dorsoplantar) |
½ of 10x12 LW |
Plantar surface of foot against film, with no rotation |
CR angled 5E-10E to base of third (3rd) metatarsal |
|
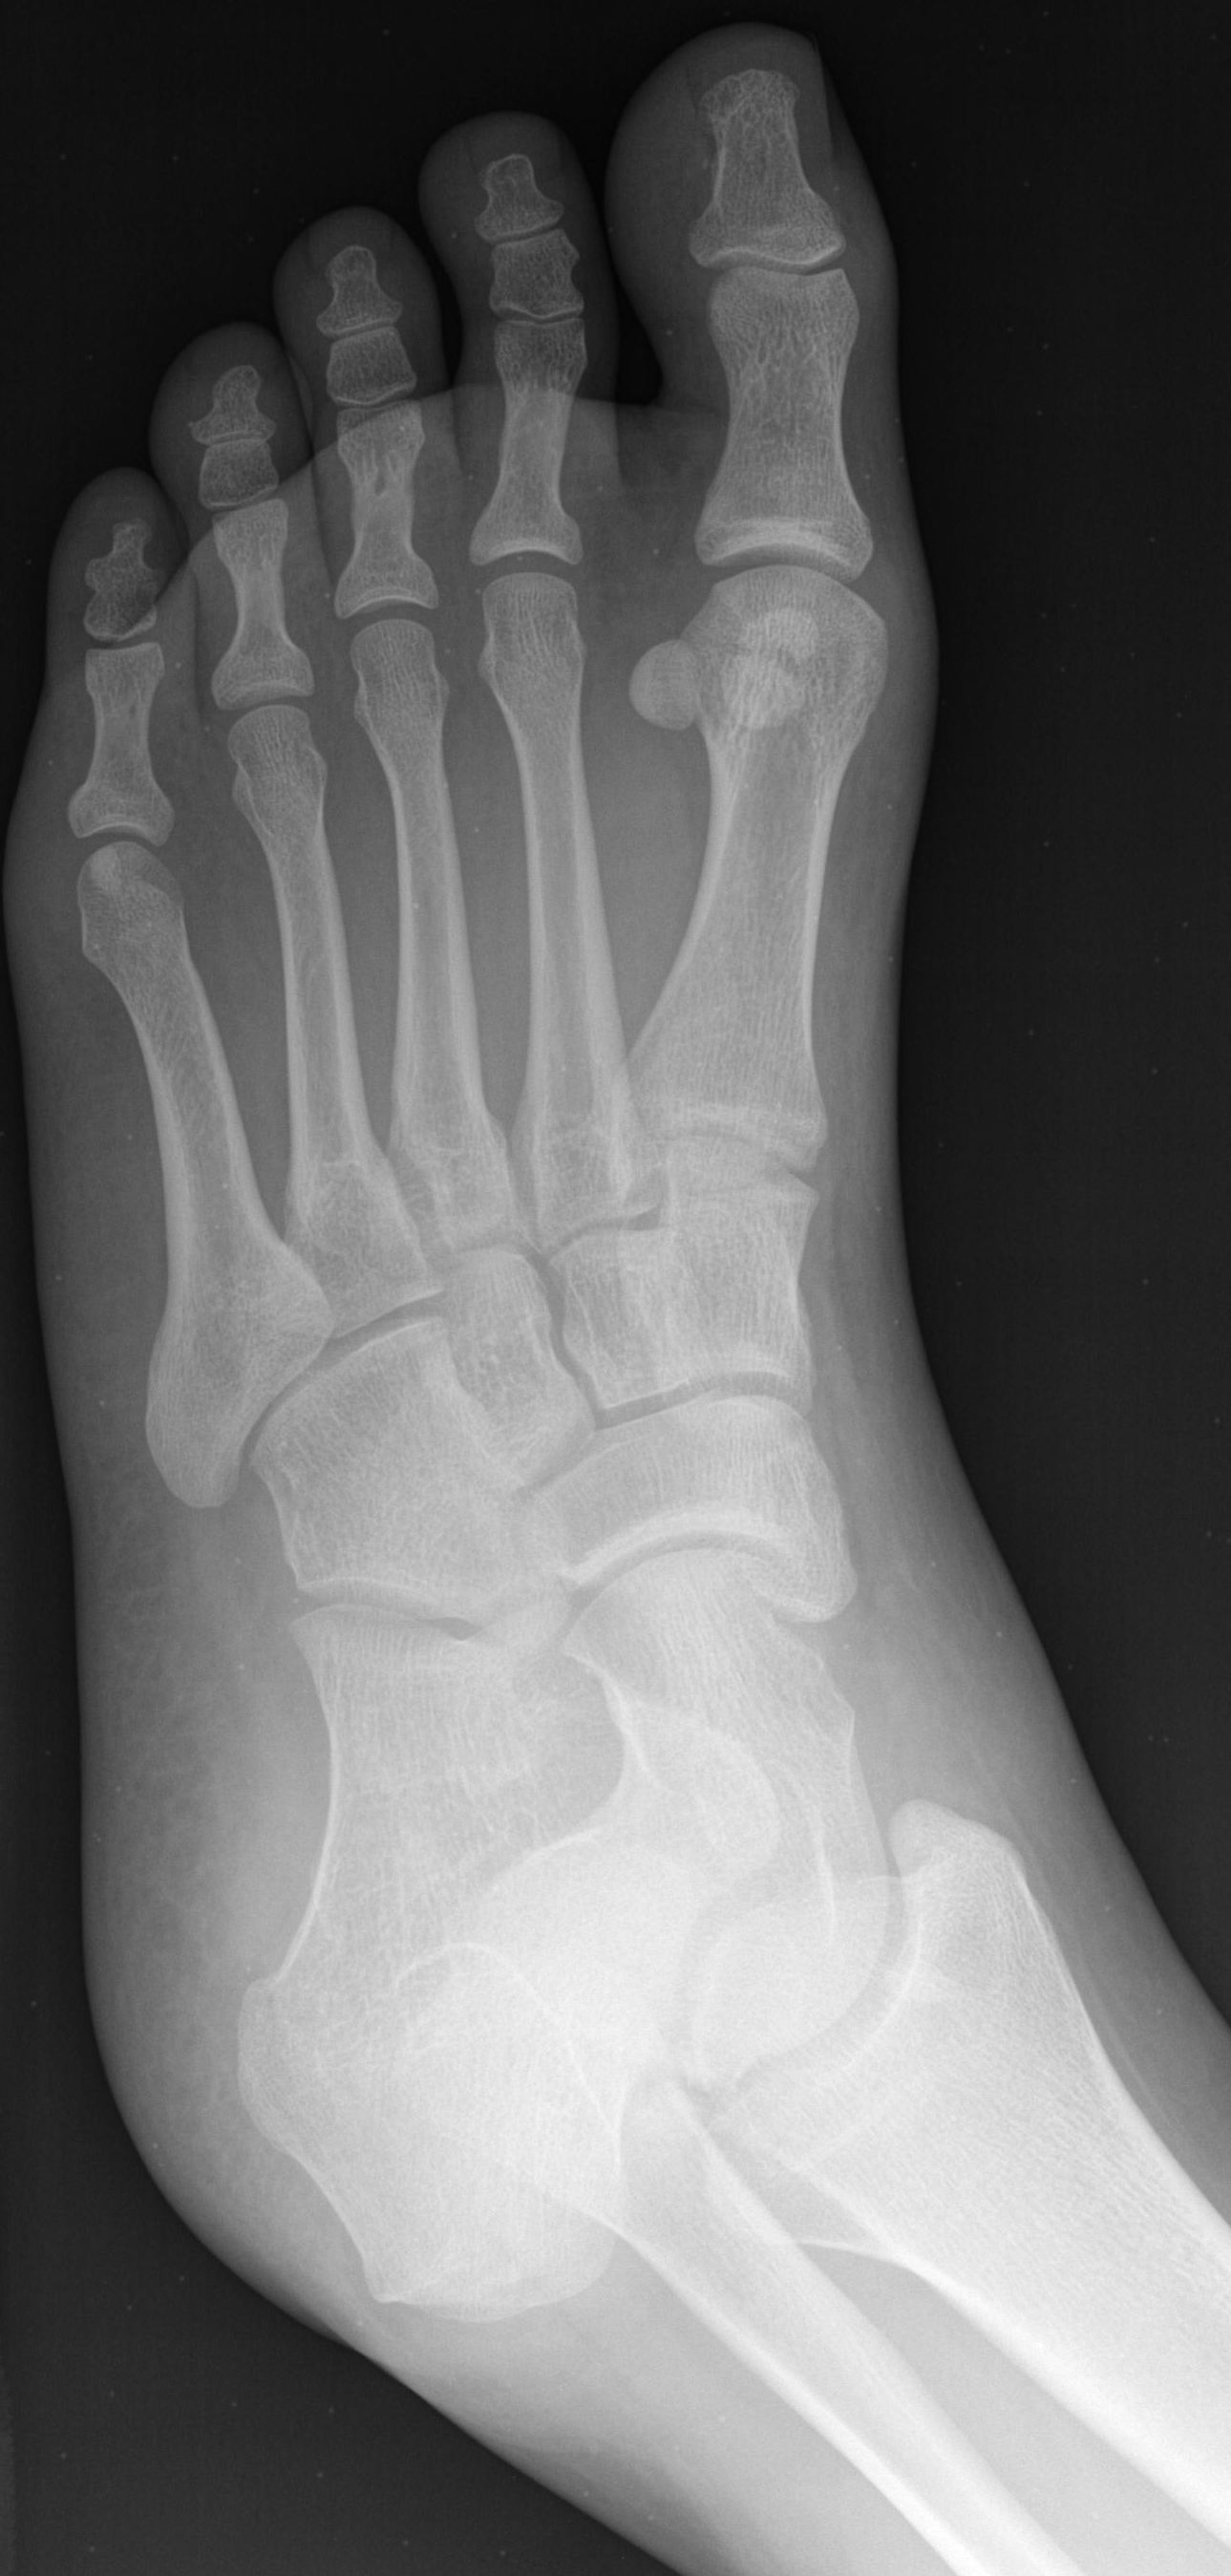
2. Medial Oblique |
½ of 10x12 LW |
Rotate foot medially 45E |
CR perpendicular to base of third (3rd) metatarsal |
|
3. Medial-Lateral Lateral |
½ of 10x12 LW |
Rotate foot laterally until foot is in lateral position |
CR perpendicular to base of third (3rd) metatarsal |
|
1. AP |
½ of 10x12 LW |
Patient upright, follow positioning protocol above |
CR angled 5E-10E to base of third (3rd) metatarsal |
|
2. Lateral |
½ of 10x12 LW |
Patient upright, follow positioning protocol above |
Horizontal CR perpendicular to base of third (3rd) metatarsal |
|
3. Oblique |
½ of 10x12 LW |
Patient upright, foot in Dorsoplantar position |
CR angled 45E medially to base of third (3rd) metatarsal |
|
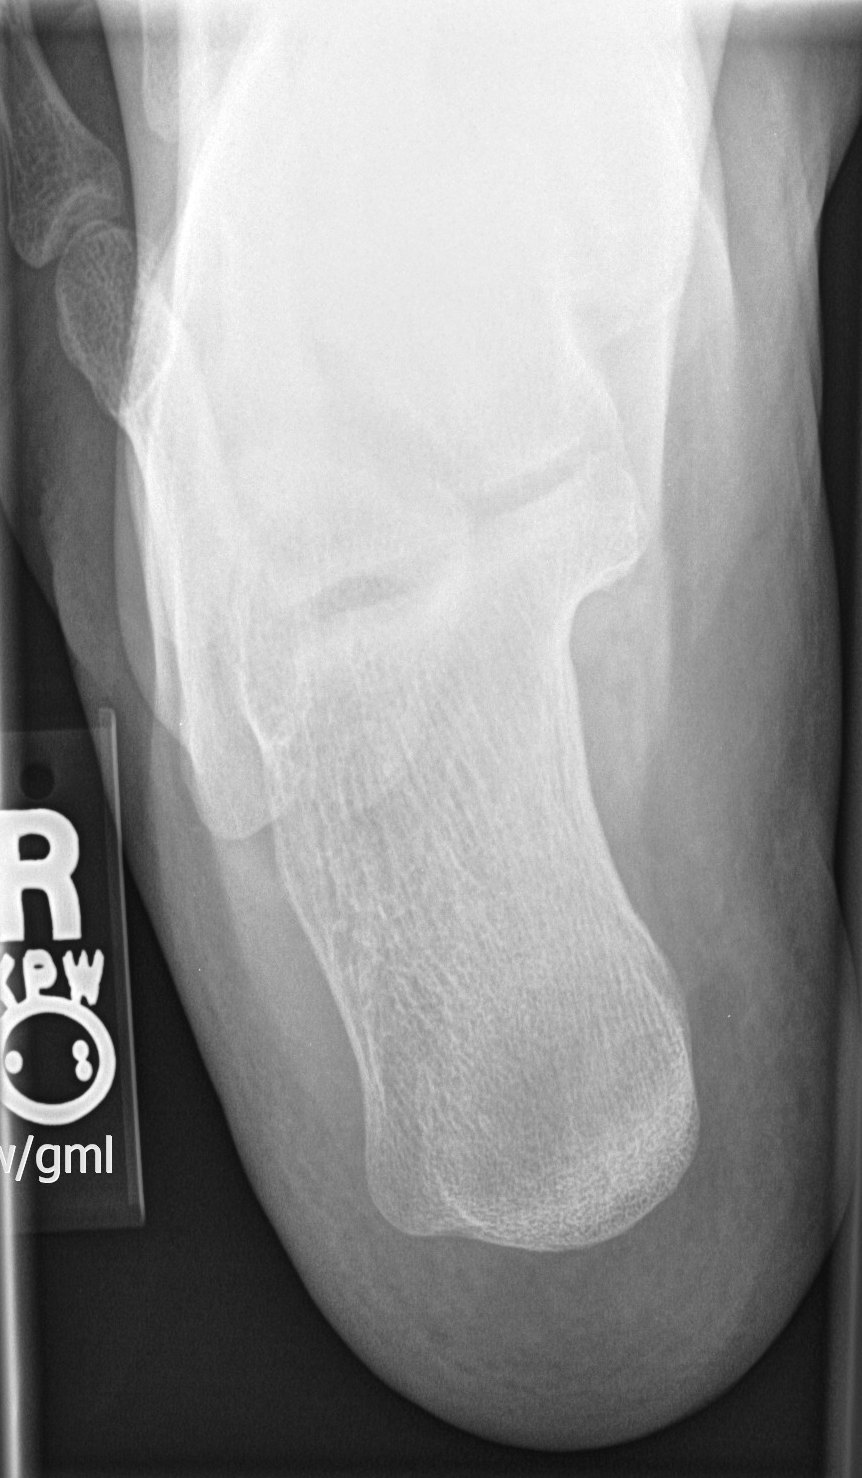
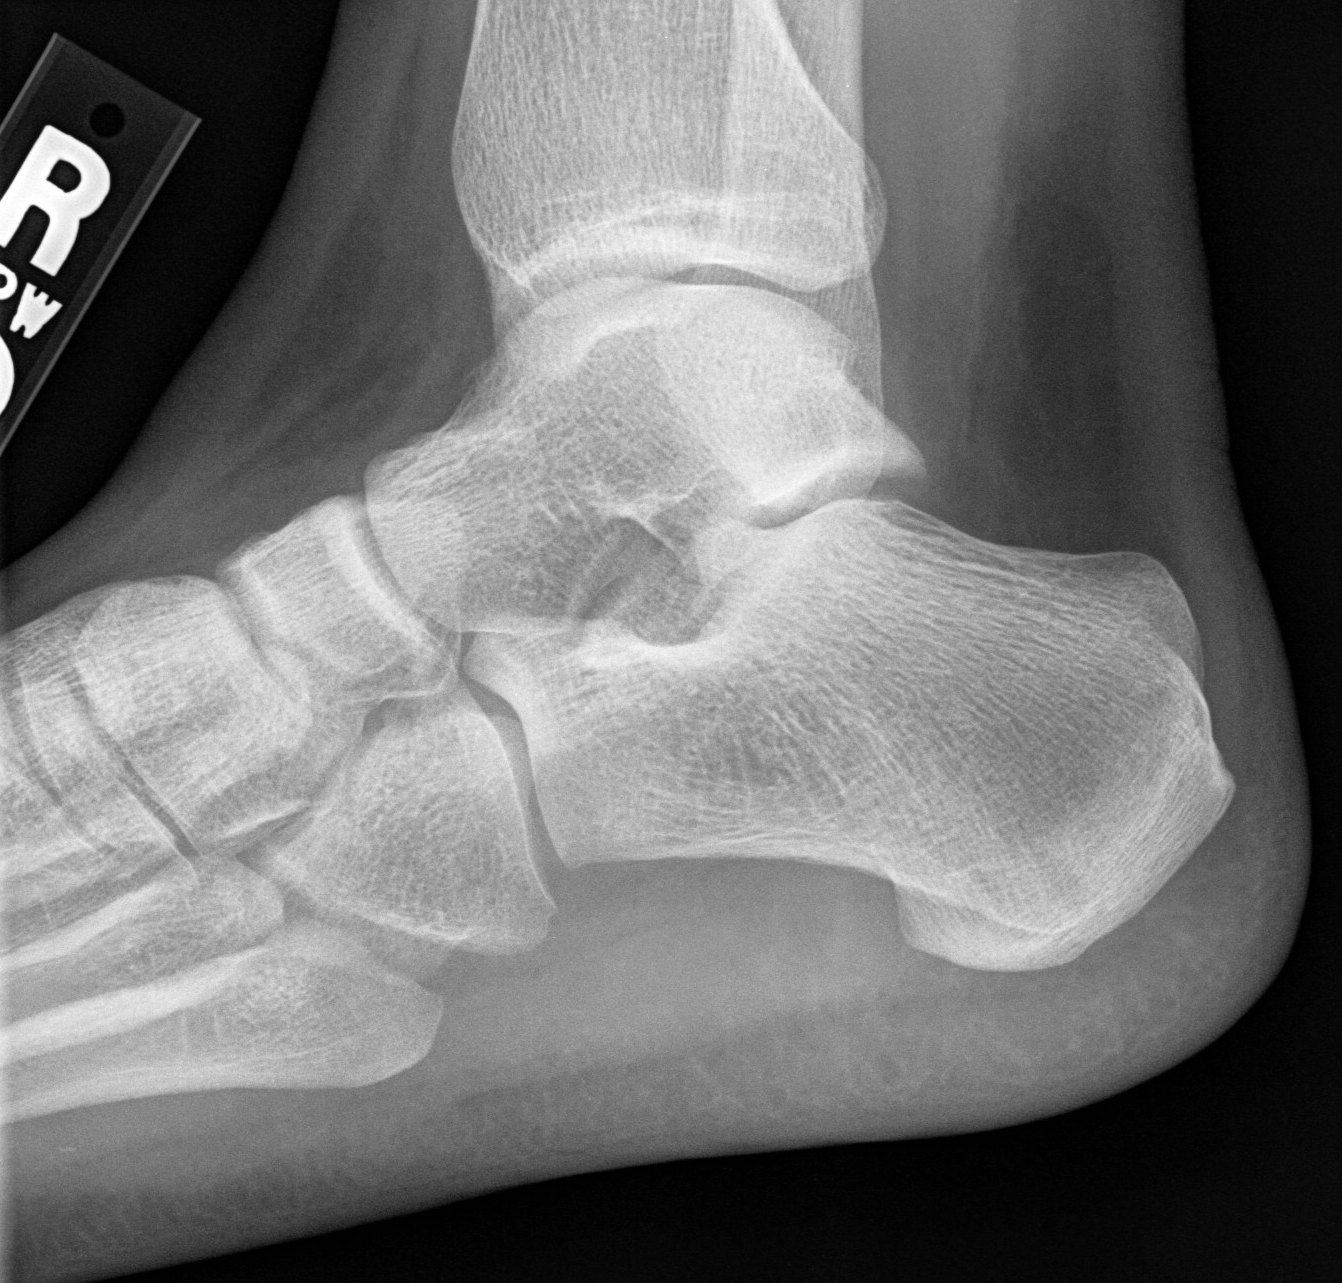
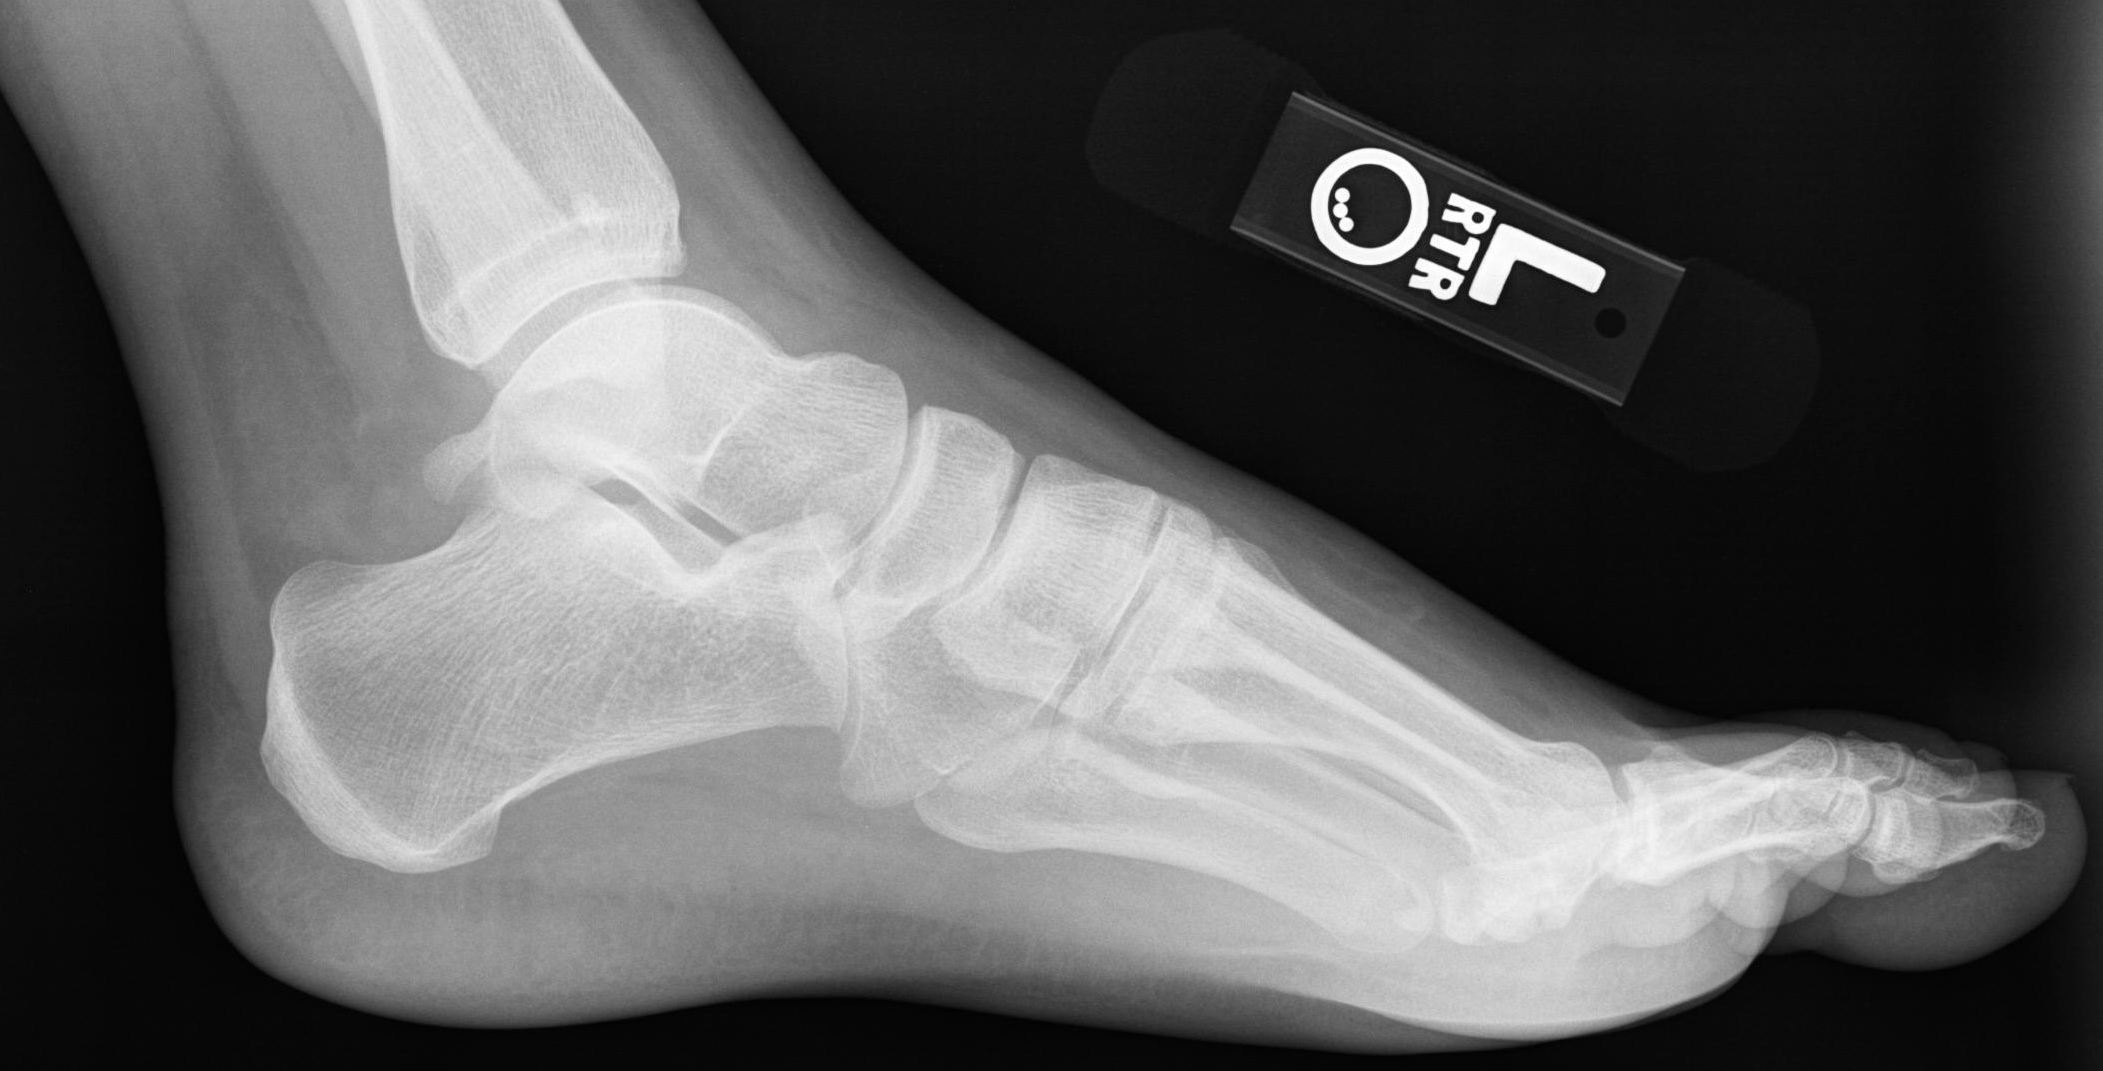
1. Lateral calcaneus |
½ of 8x10 CW |
Place foot in mediolateral position |
CR perpendicular to mid-calcaneus |
|
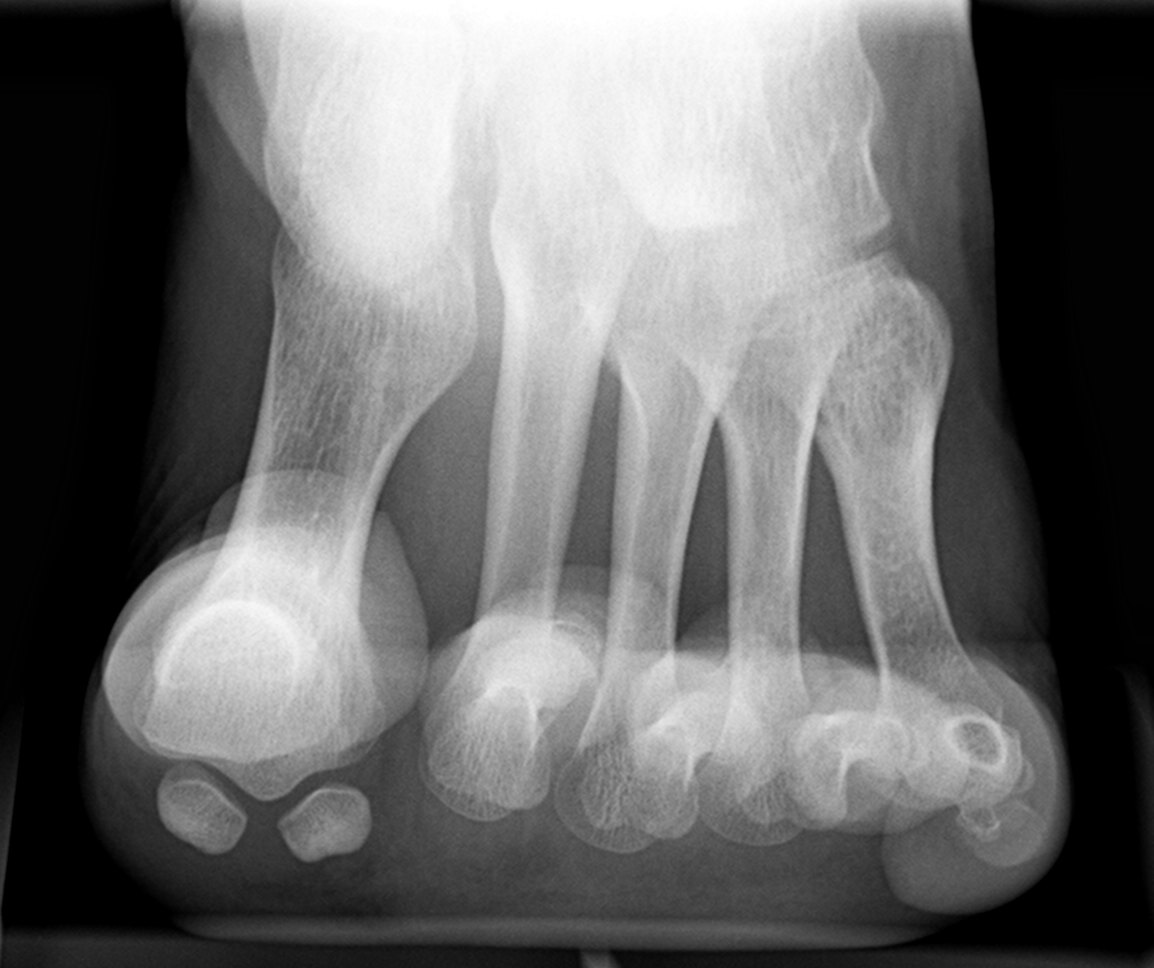
2. Axial plantodorsal |
½ of 8x10 CW |
Place plantar surface perpendicular to film |
CR angled 40E with long axis of the foot, to base of 3rd metatarsal |
|
1. AP |
½ of 10x12 CW |
Place foot so that plantar surface of foot is perpendicular to film |
CR perpendicular to ankle joint |
|
2. Mortise |
½ of 10x12 CW |
From AP position, rotate leg medially 10E -15E until intermalleolar line is parallel to film |
CR perpendicular to ankle joint |
|
3. Mediolateral lateral |
8x10 LW |
From AP position, rotate leg, foot and ankle towards affected side until foot is in lateral position |
CR perpendicular to medial malleolus |
|
1. AP |
14x17 on diagonal |
Patient supine, leg fully extended, no rotation on pelvis or leg |
CR perpendicular to mid-tibia |
|
2. Mediolateral lateral |
14x17 on diagonal |
Patient to lie on affected side, ensure affected leg is in lateral position with the unaffected side anterior to part |
CR perpendicular to mid-tibia |
|
|
|
|
|
|
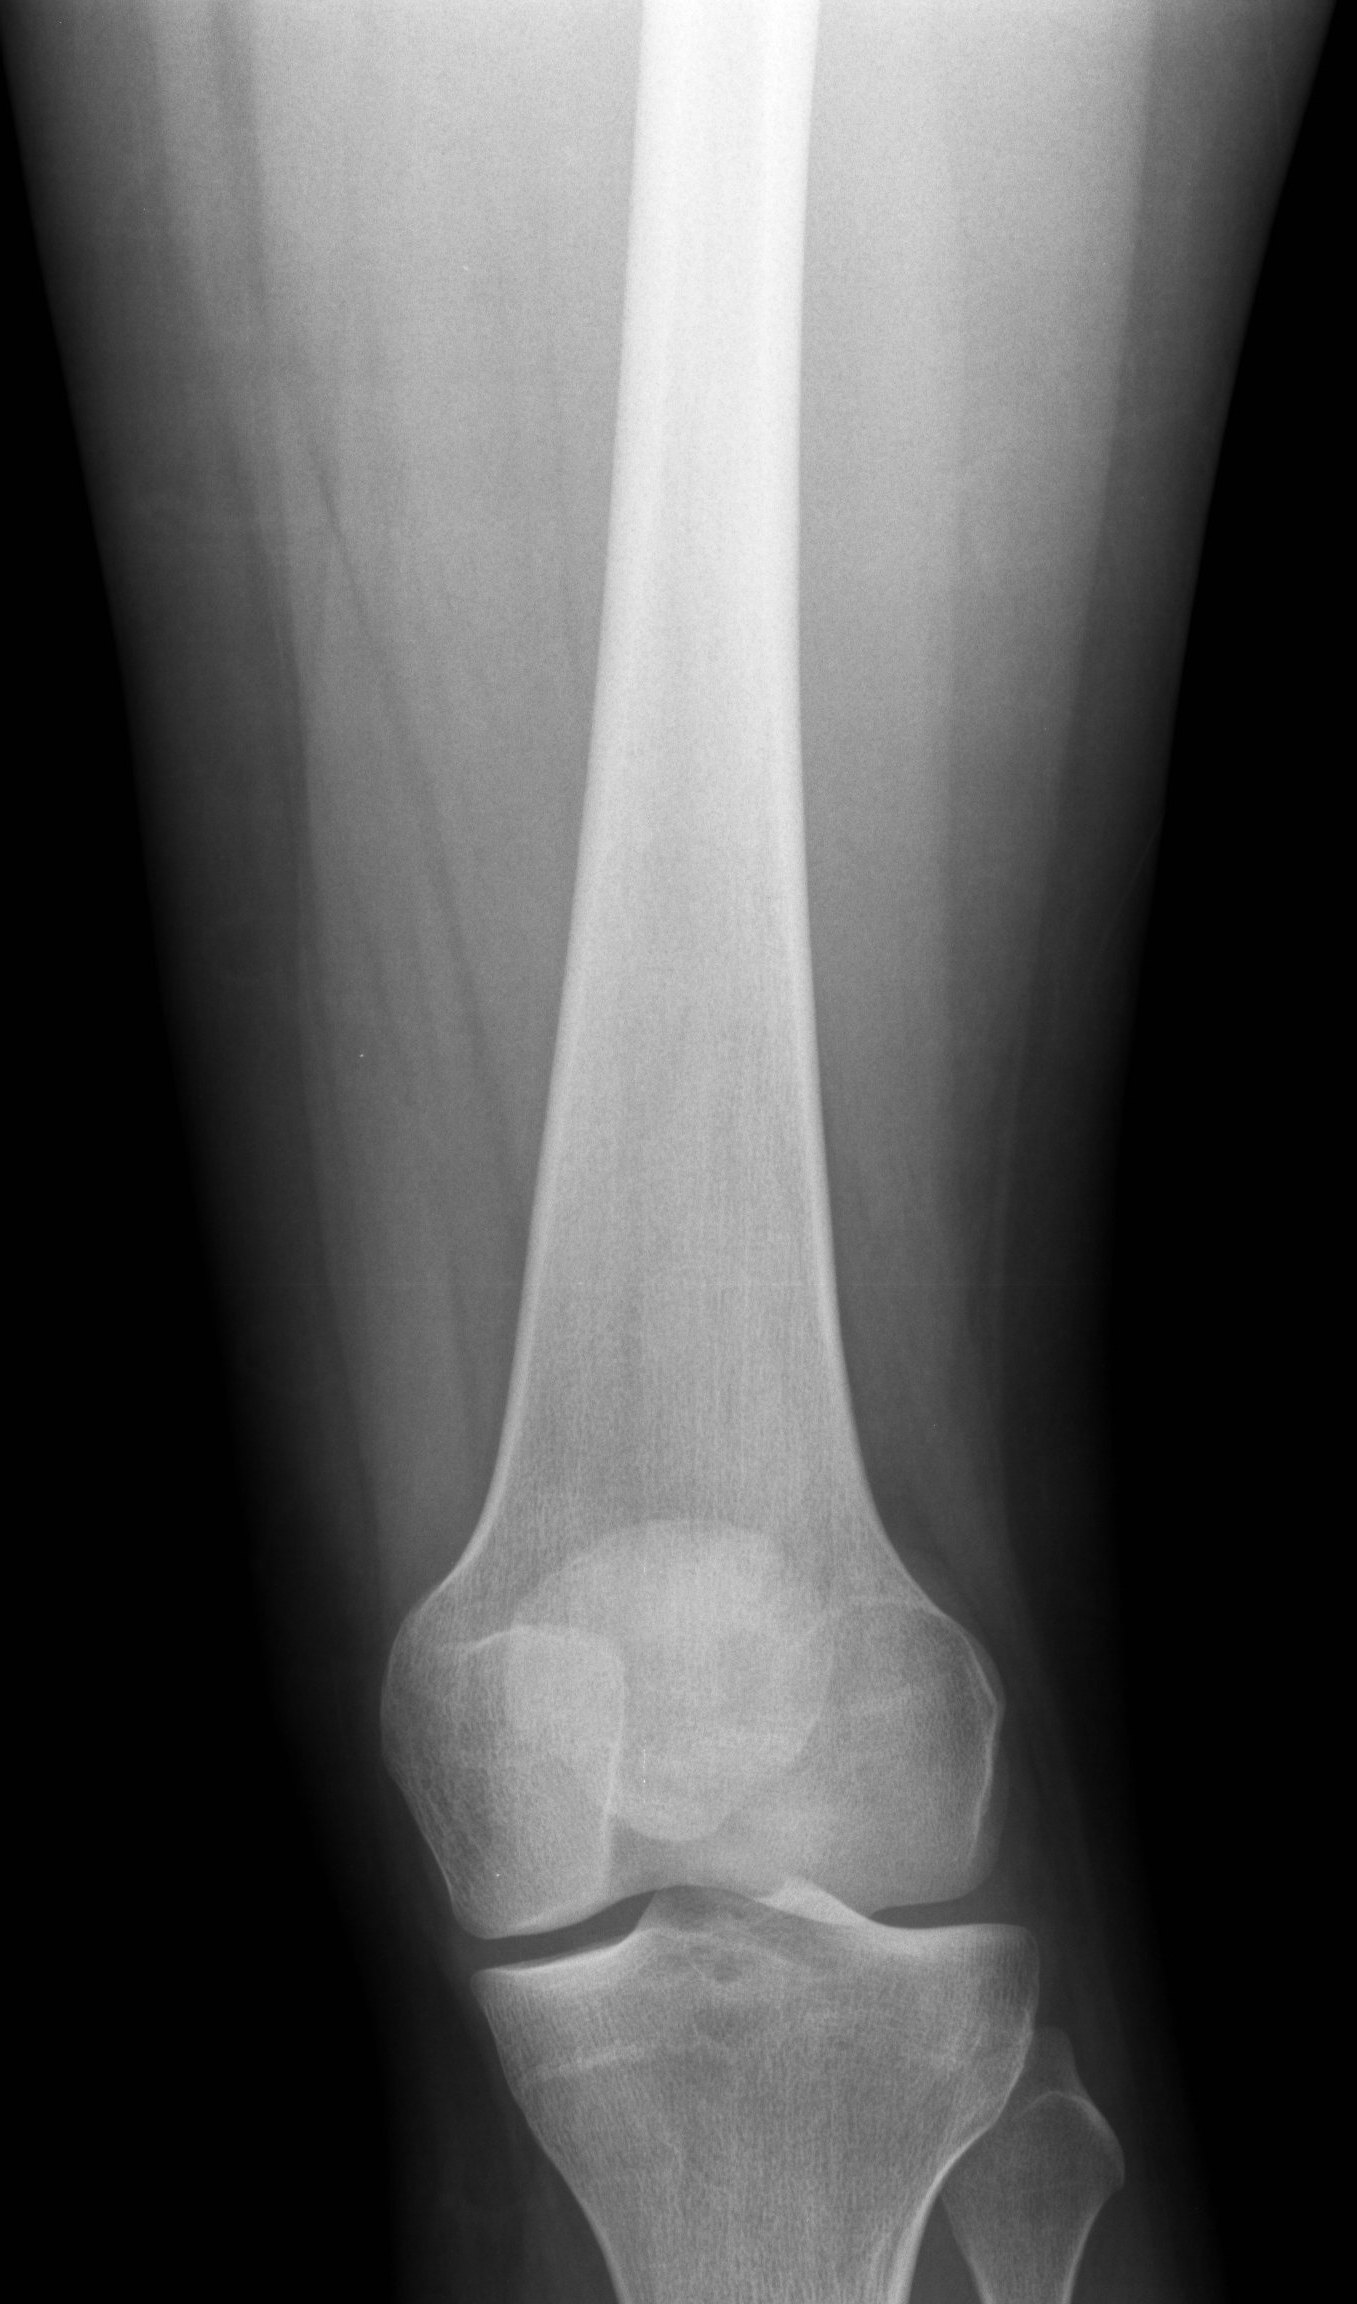
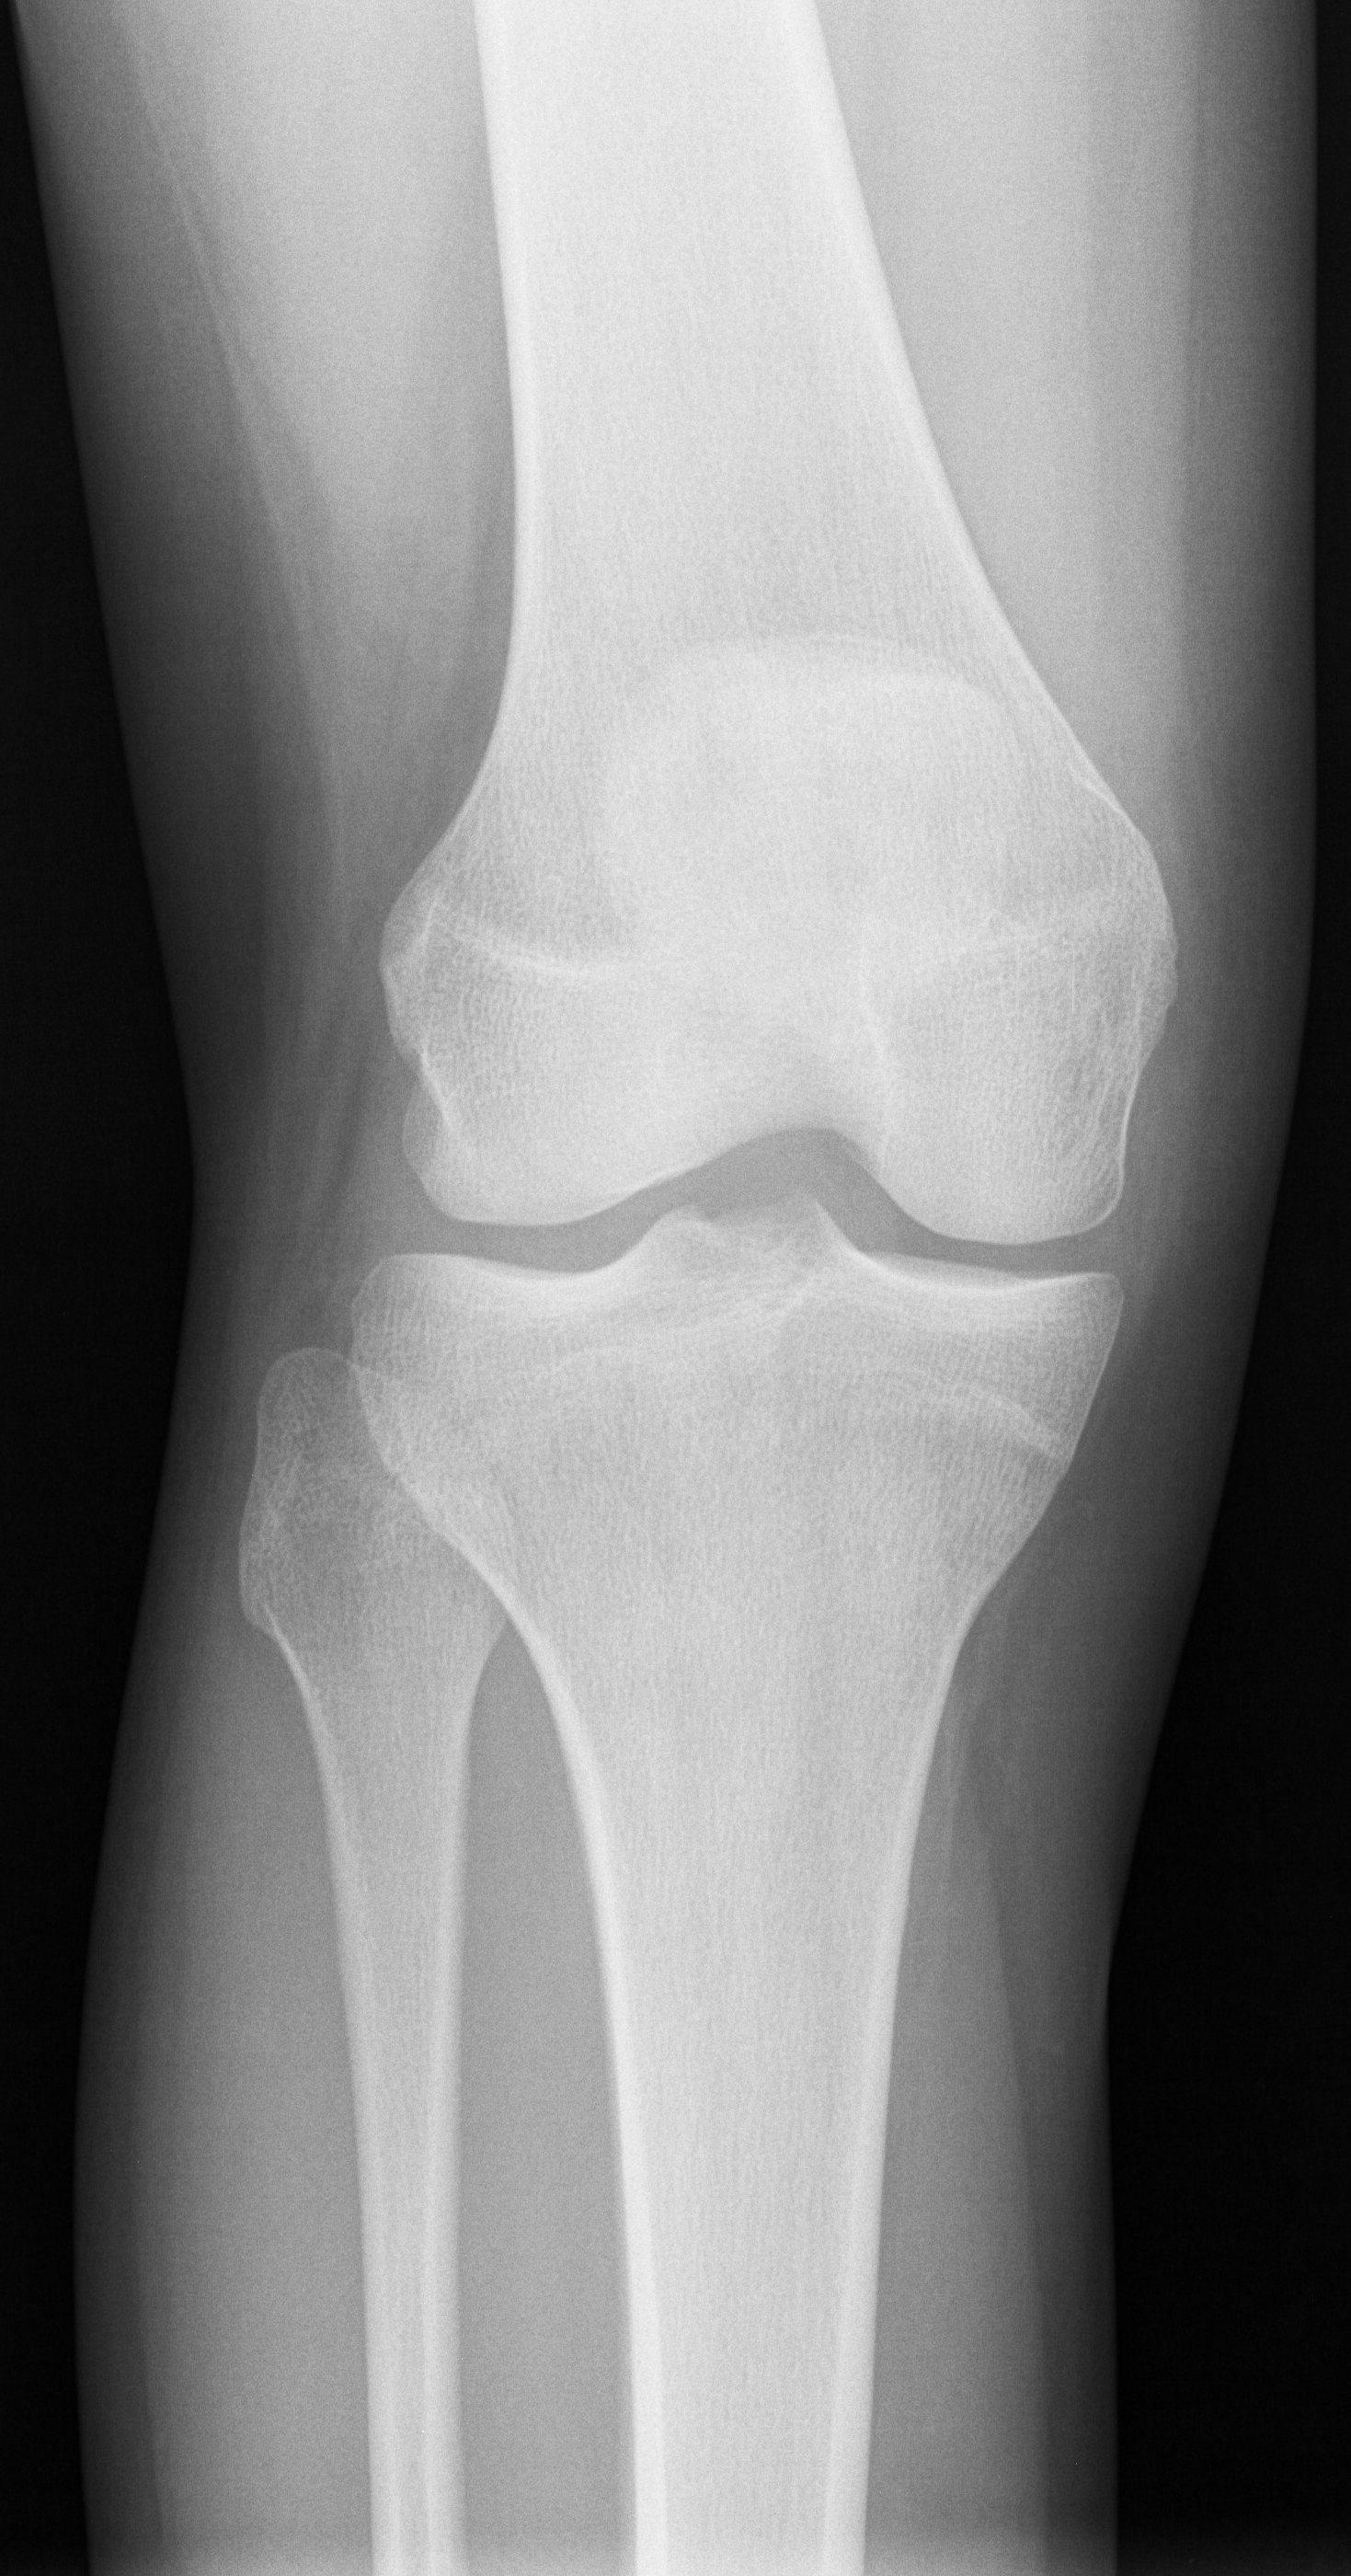
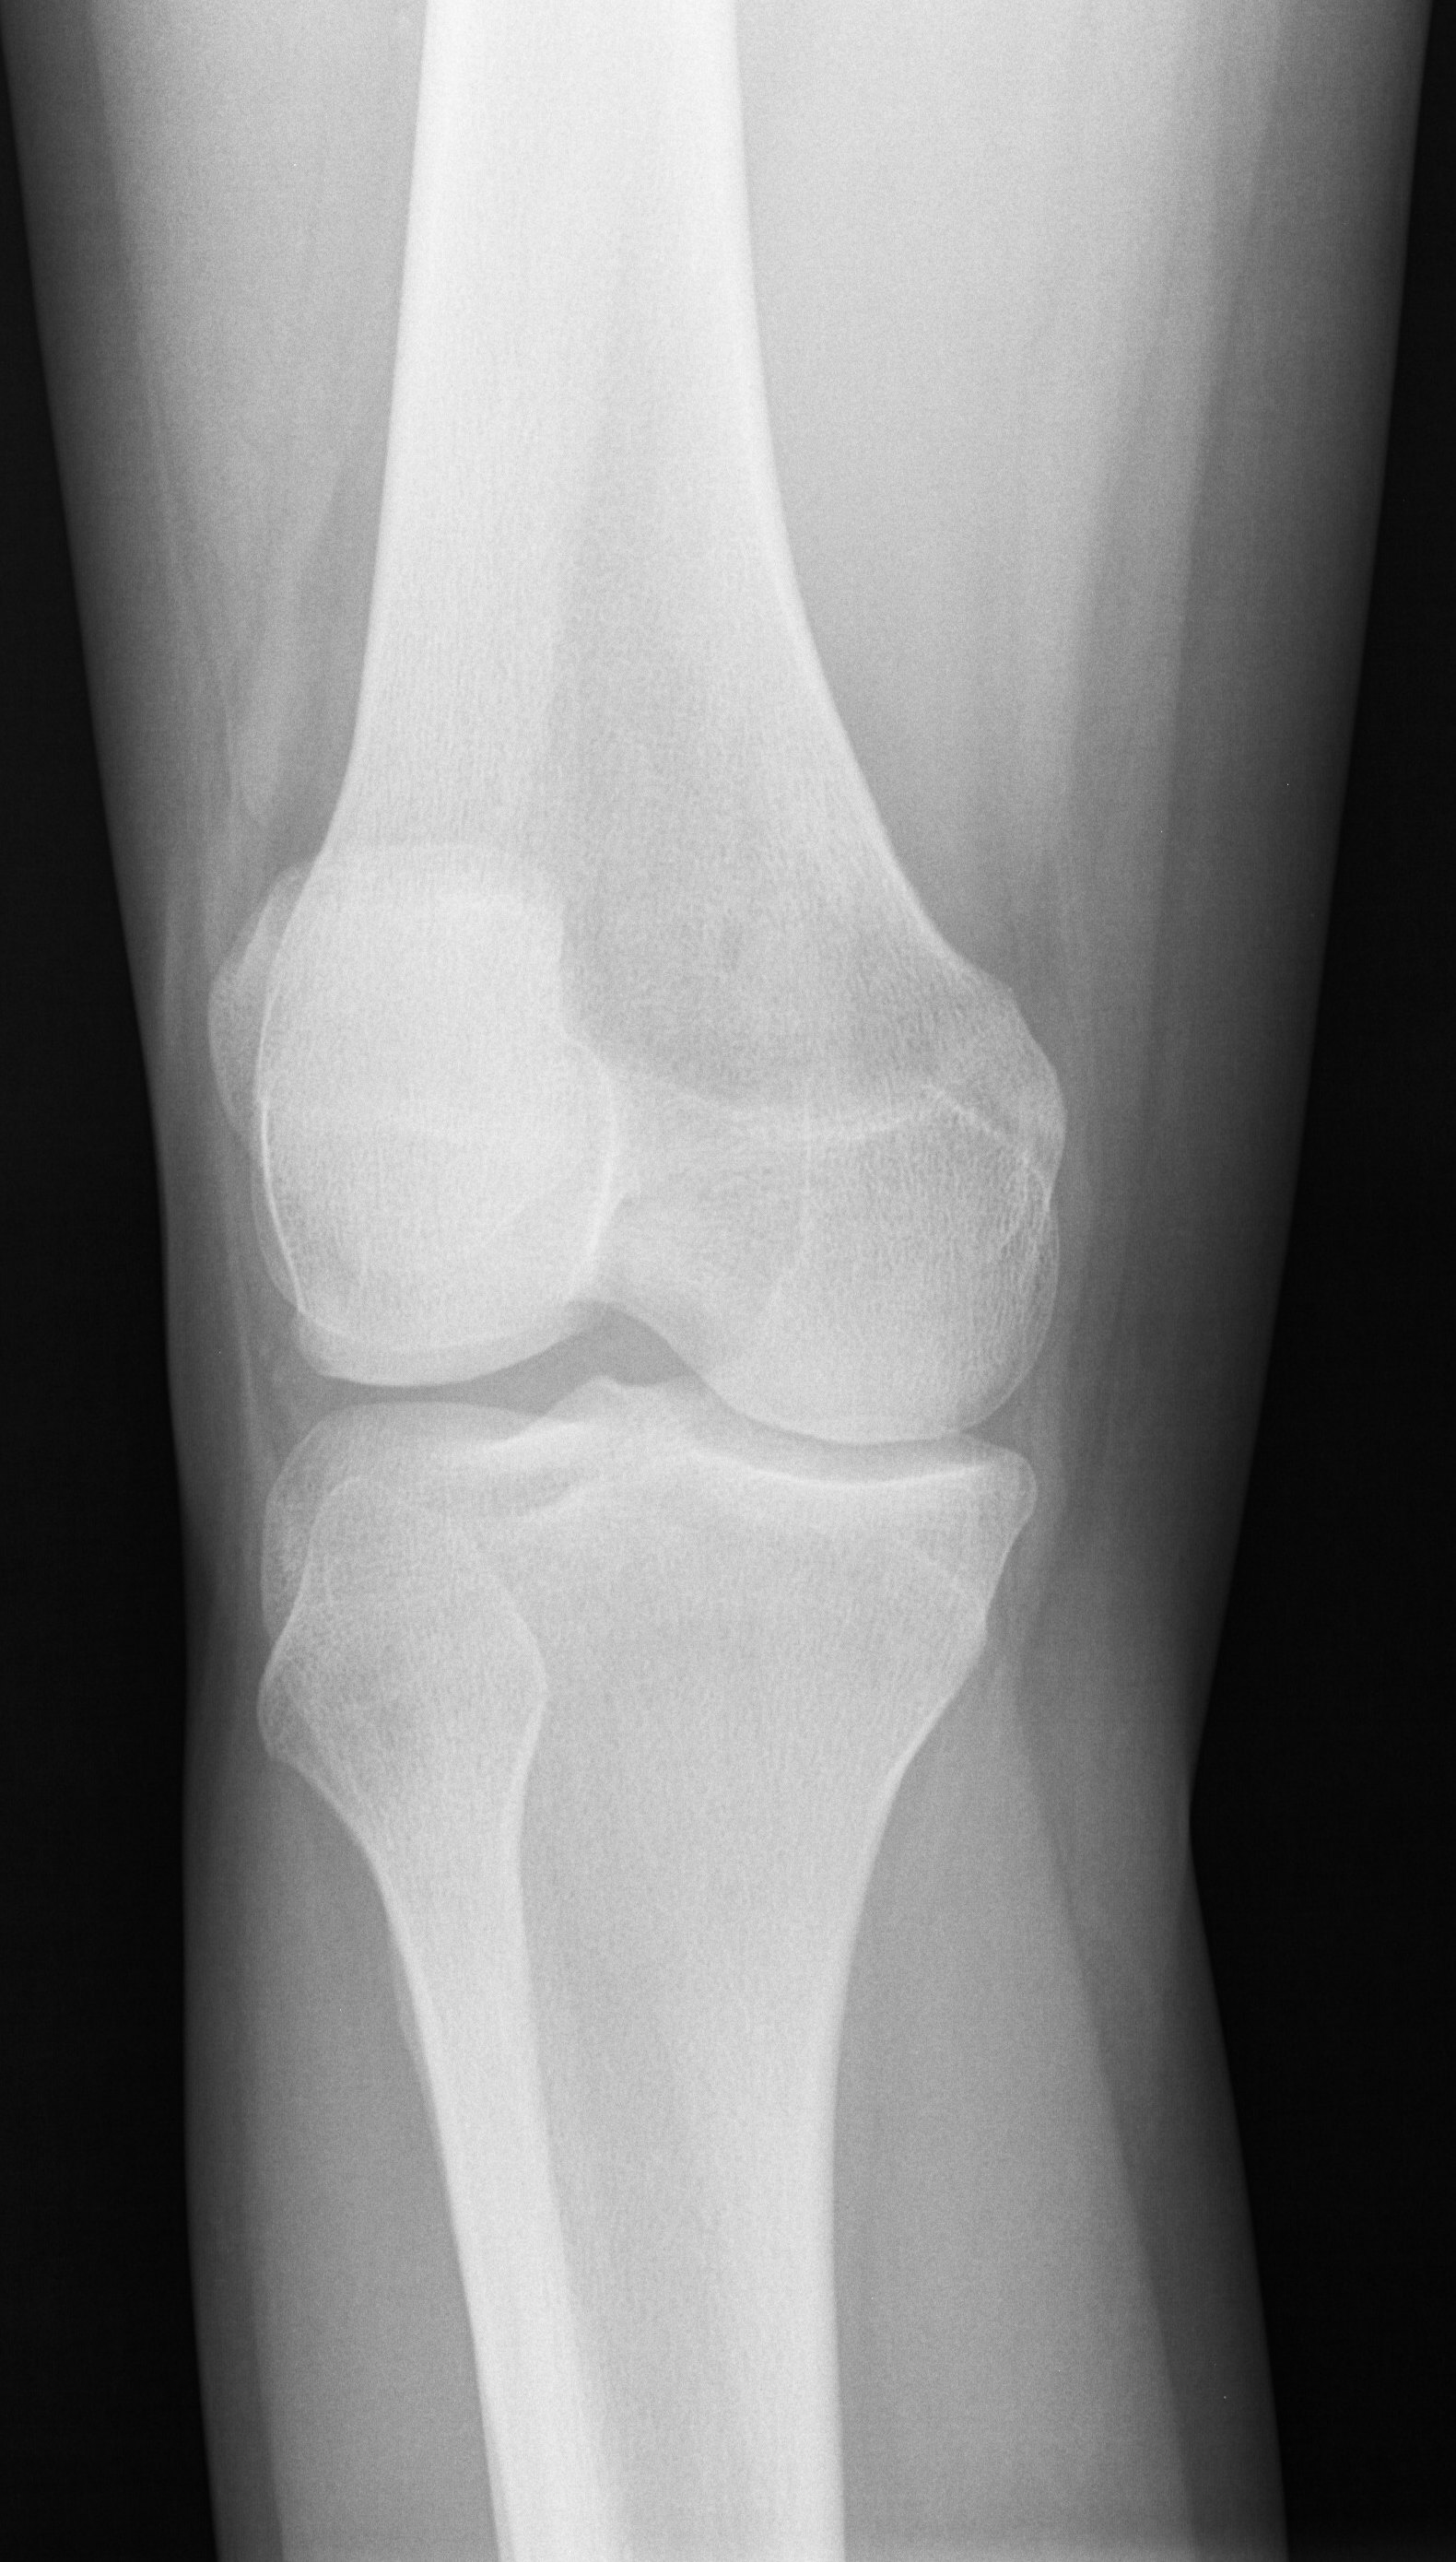
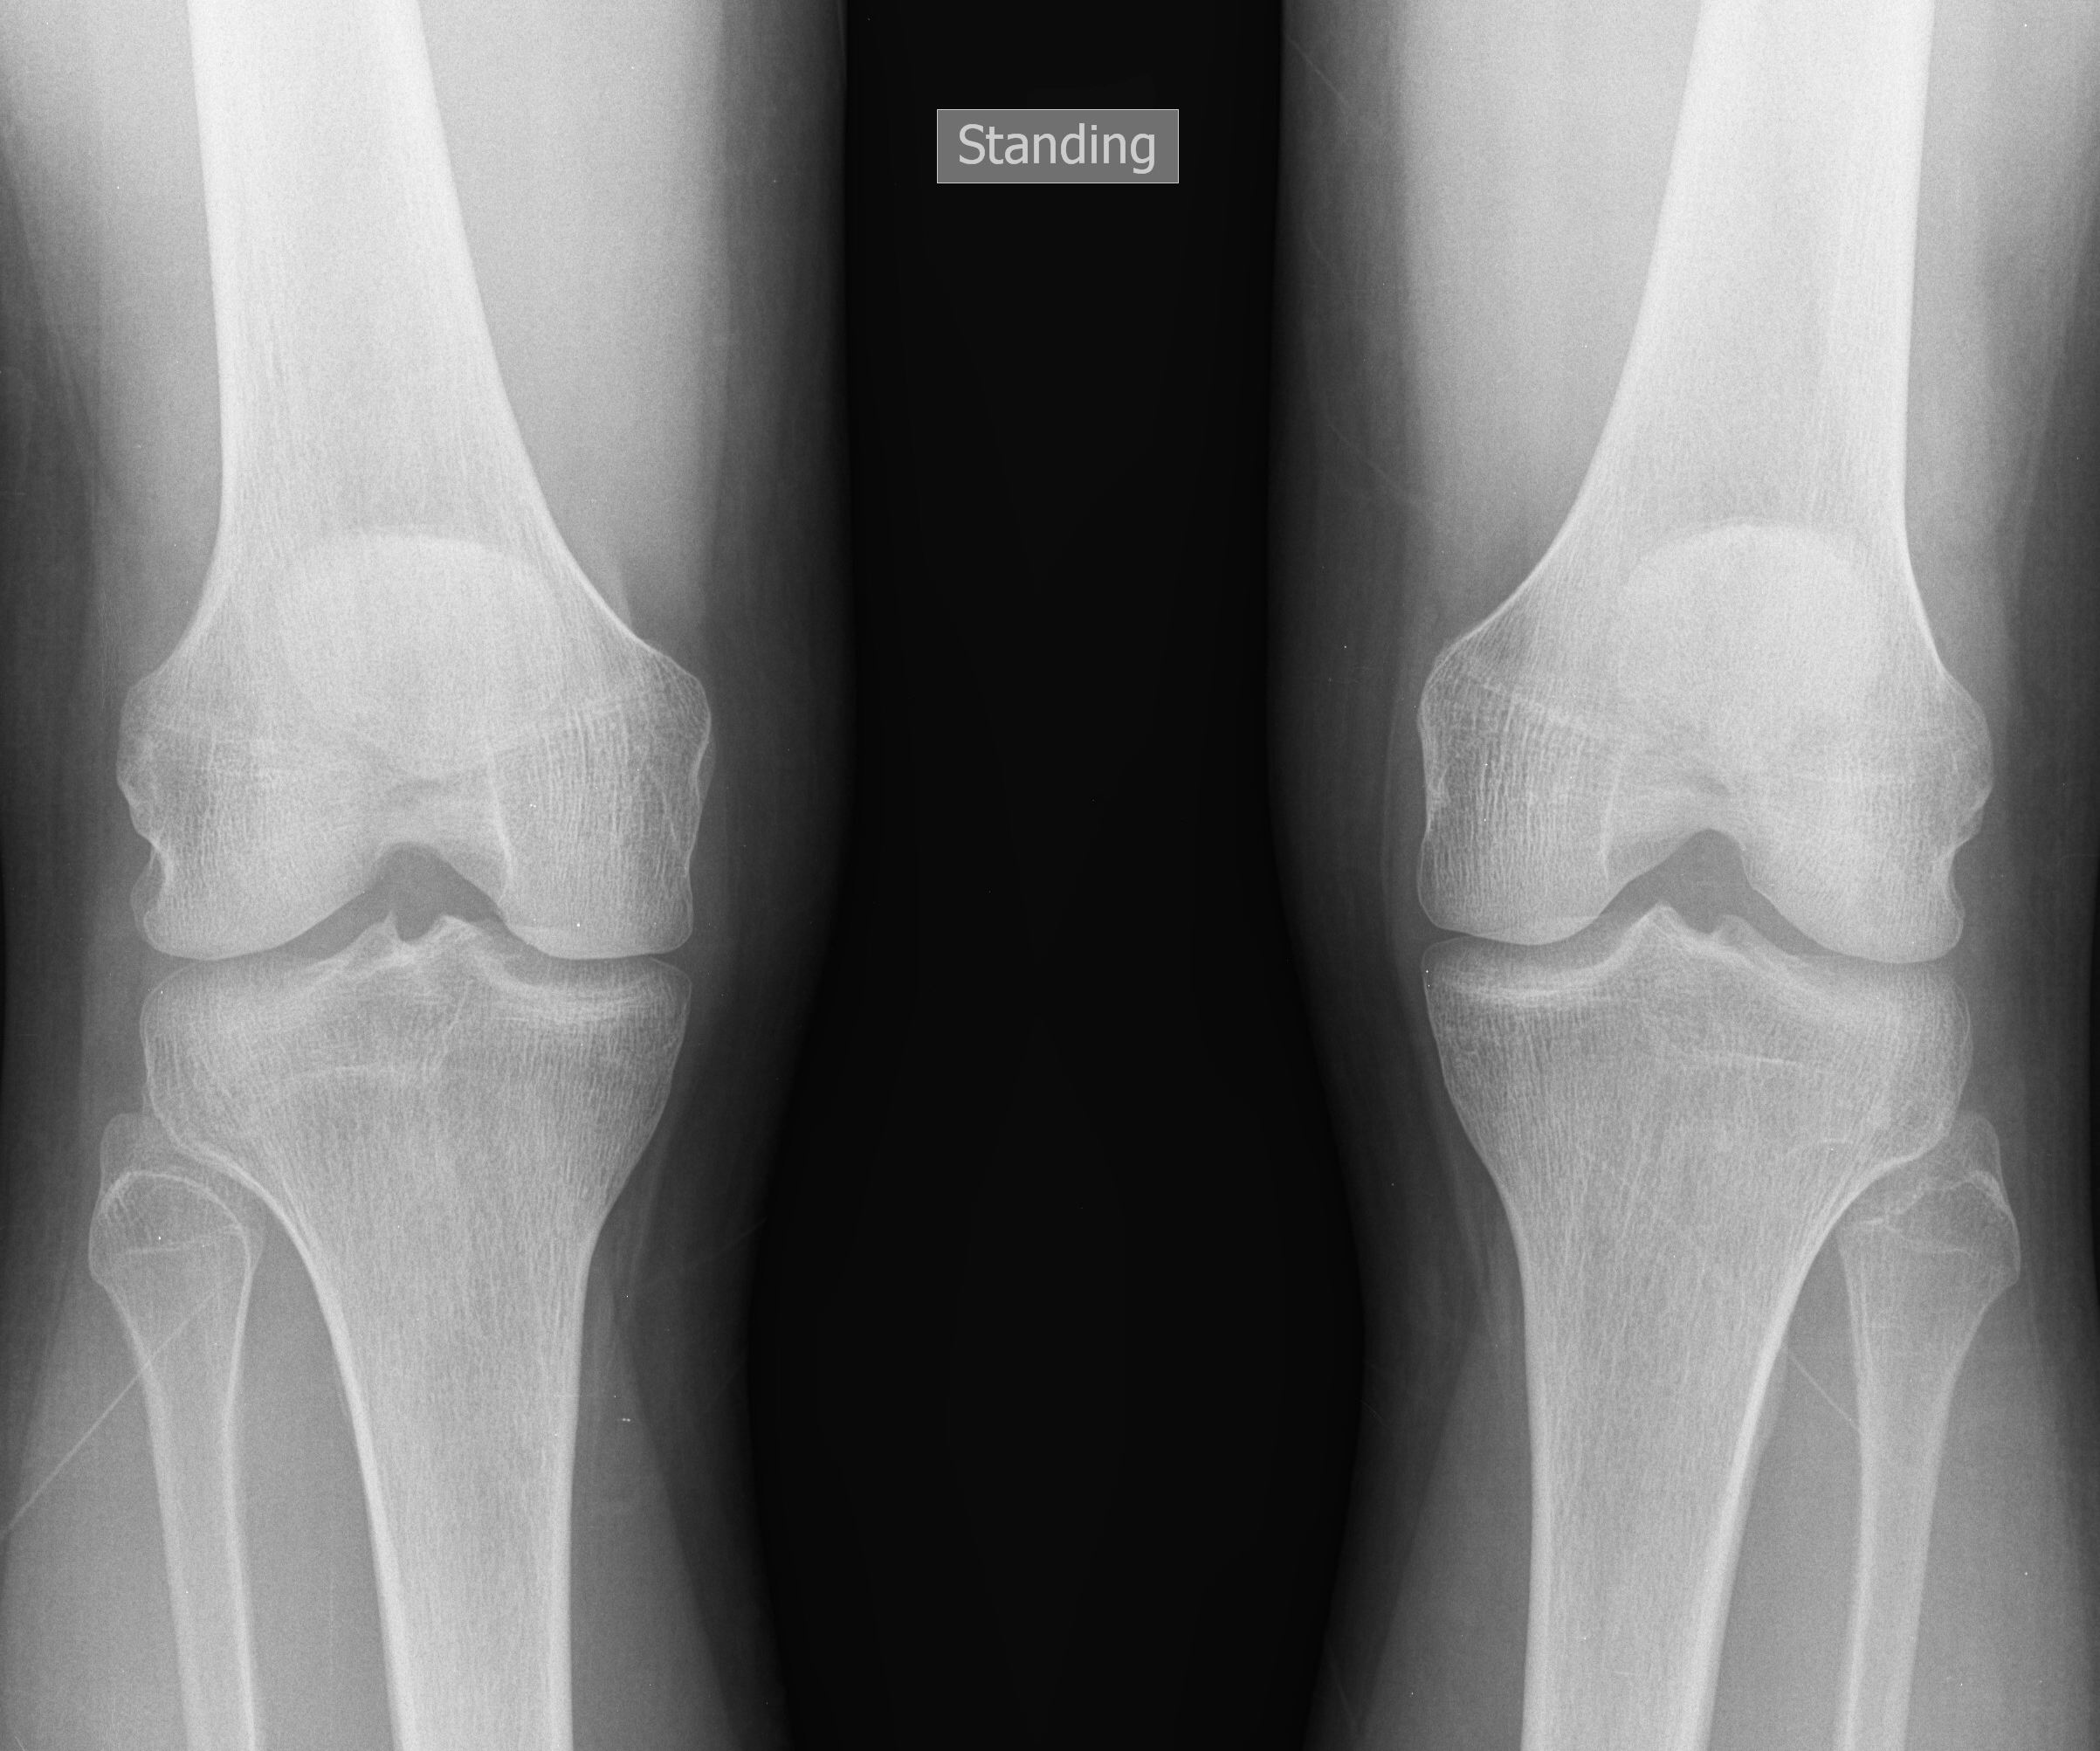
1. AP |
10x12 LW |
Patient supine, leg extended, femoral epicondyles parallel to table. Perform erect if standing films ordered. |
CR perpendicular to 1cm inferior to patellar apex |
|
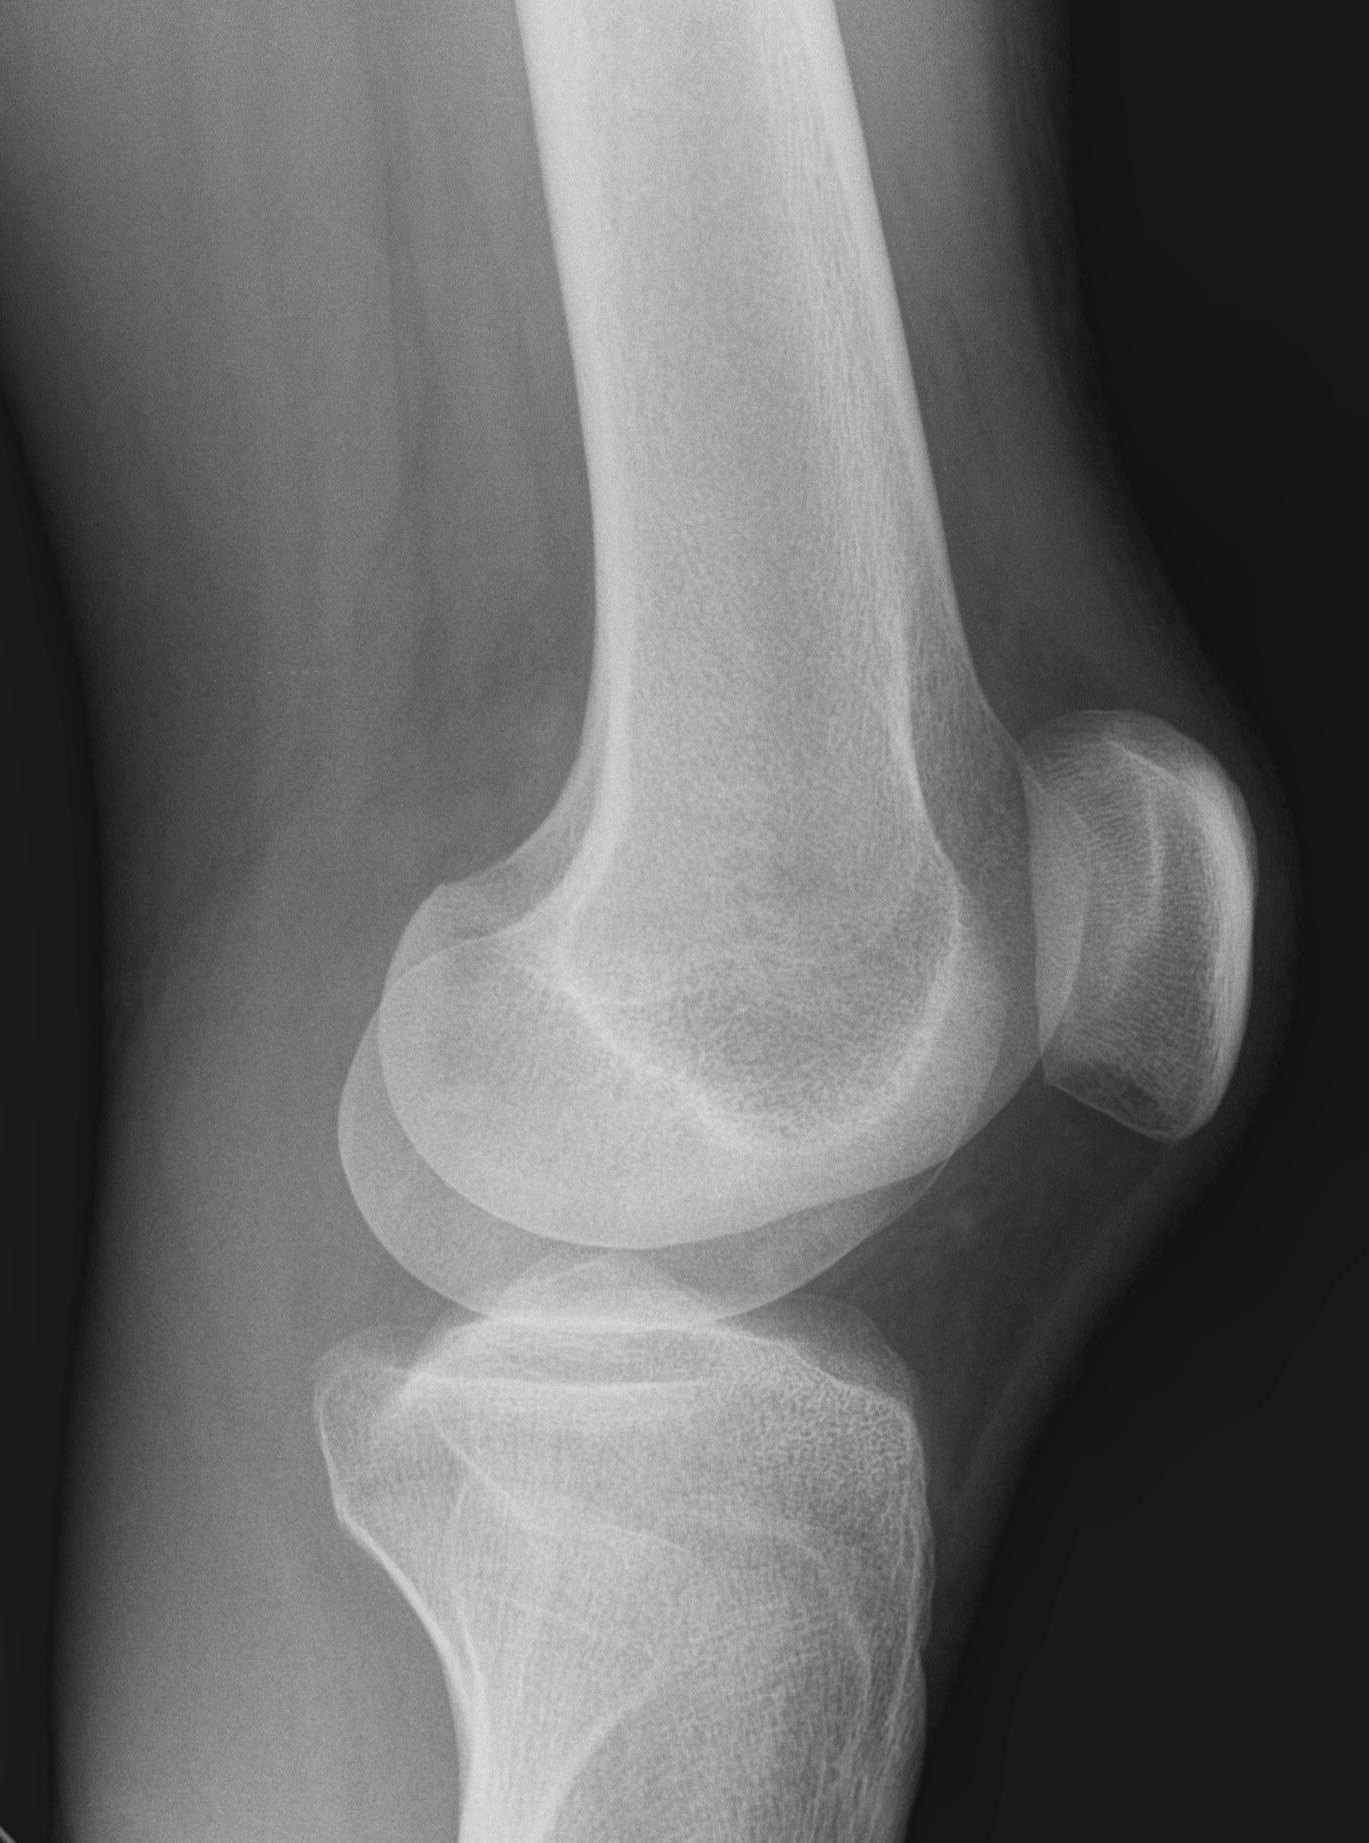
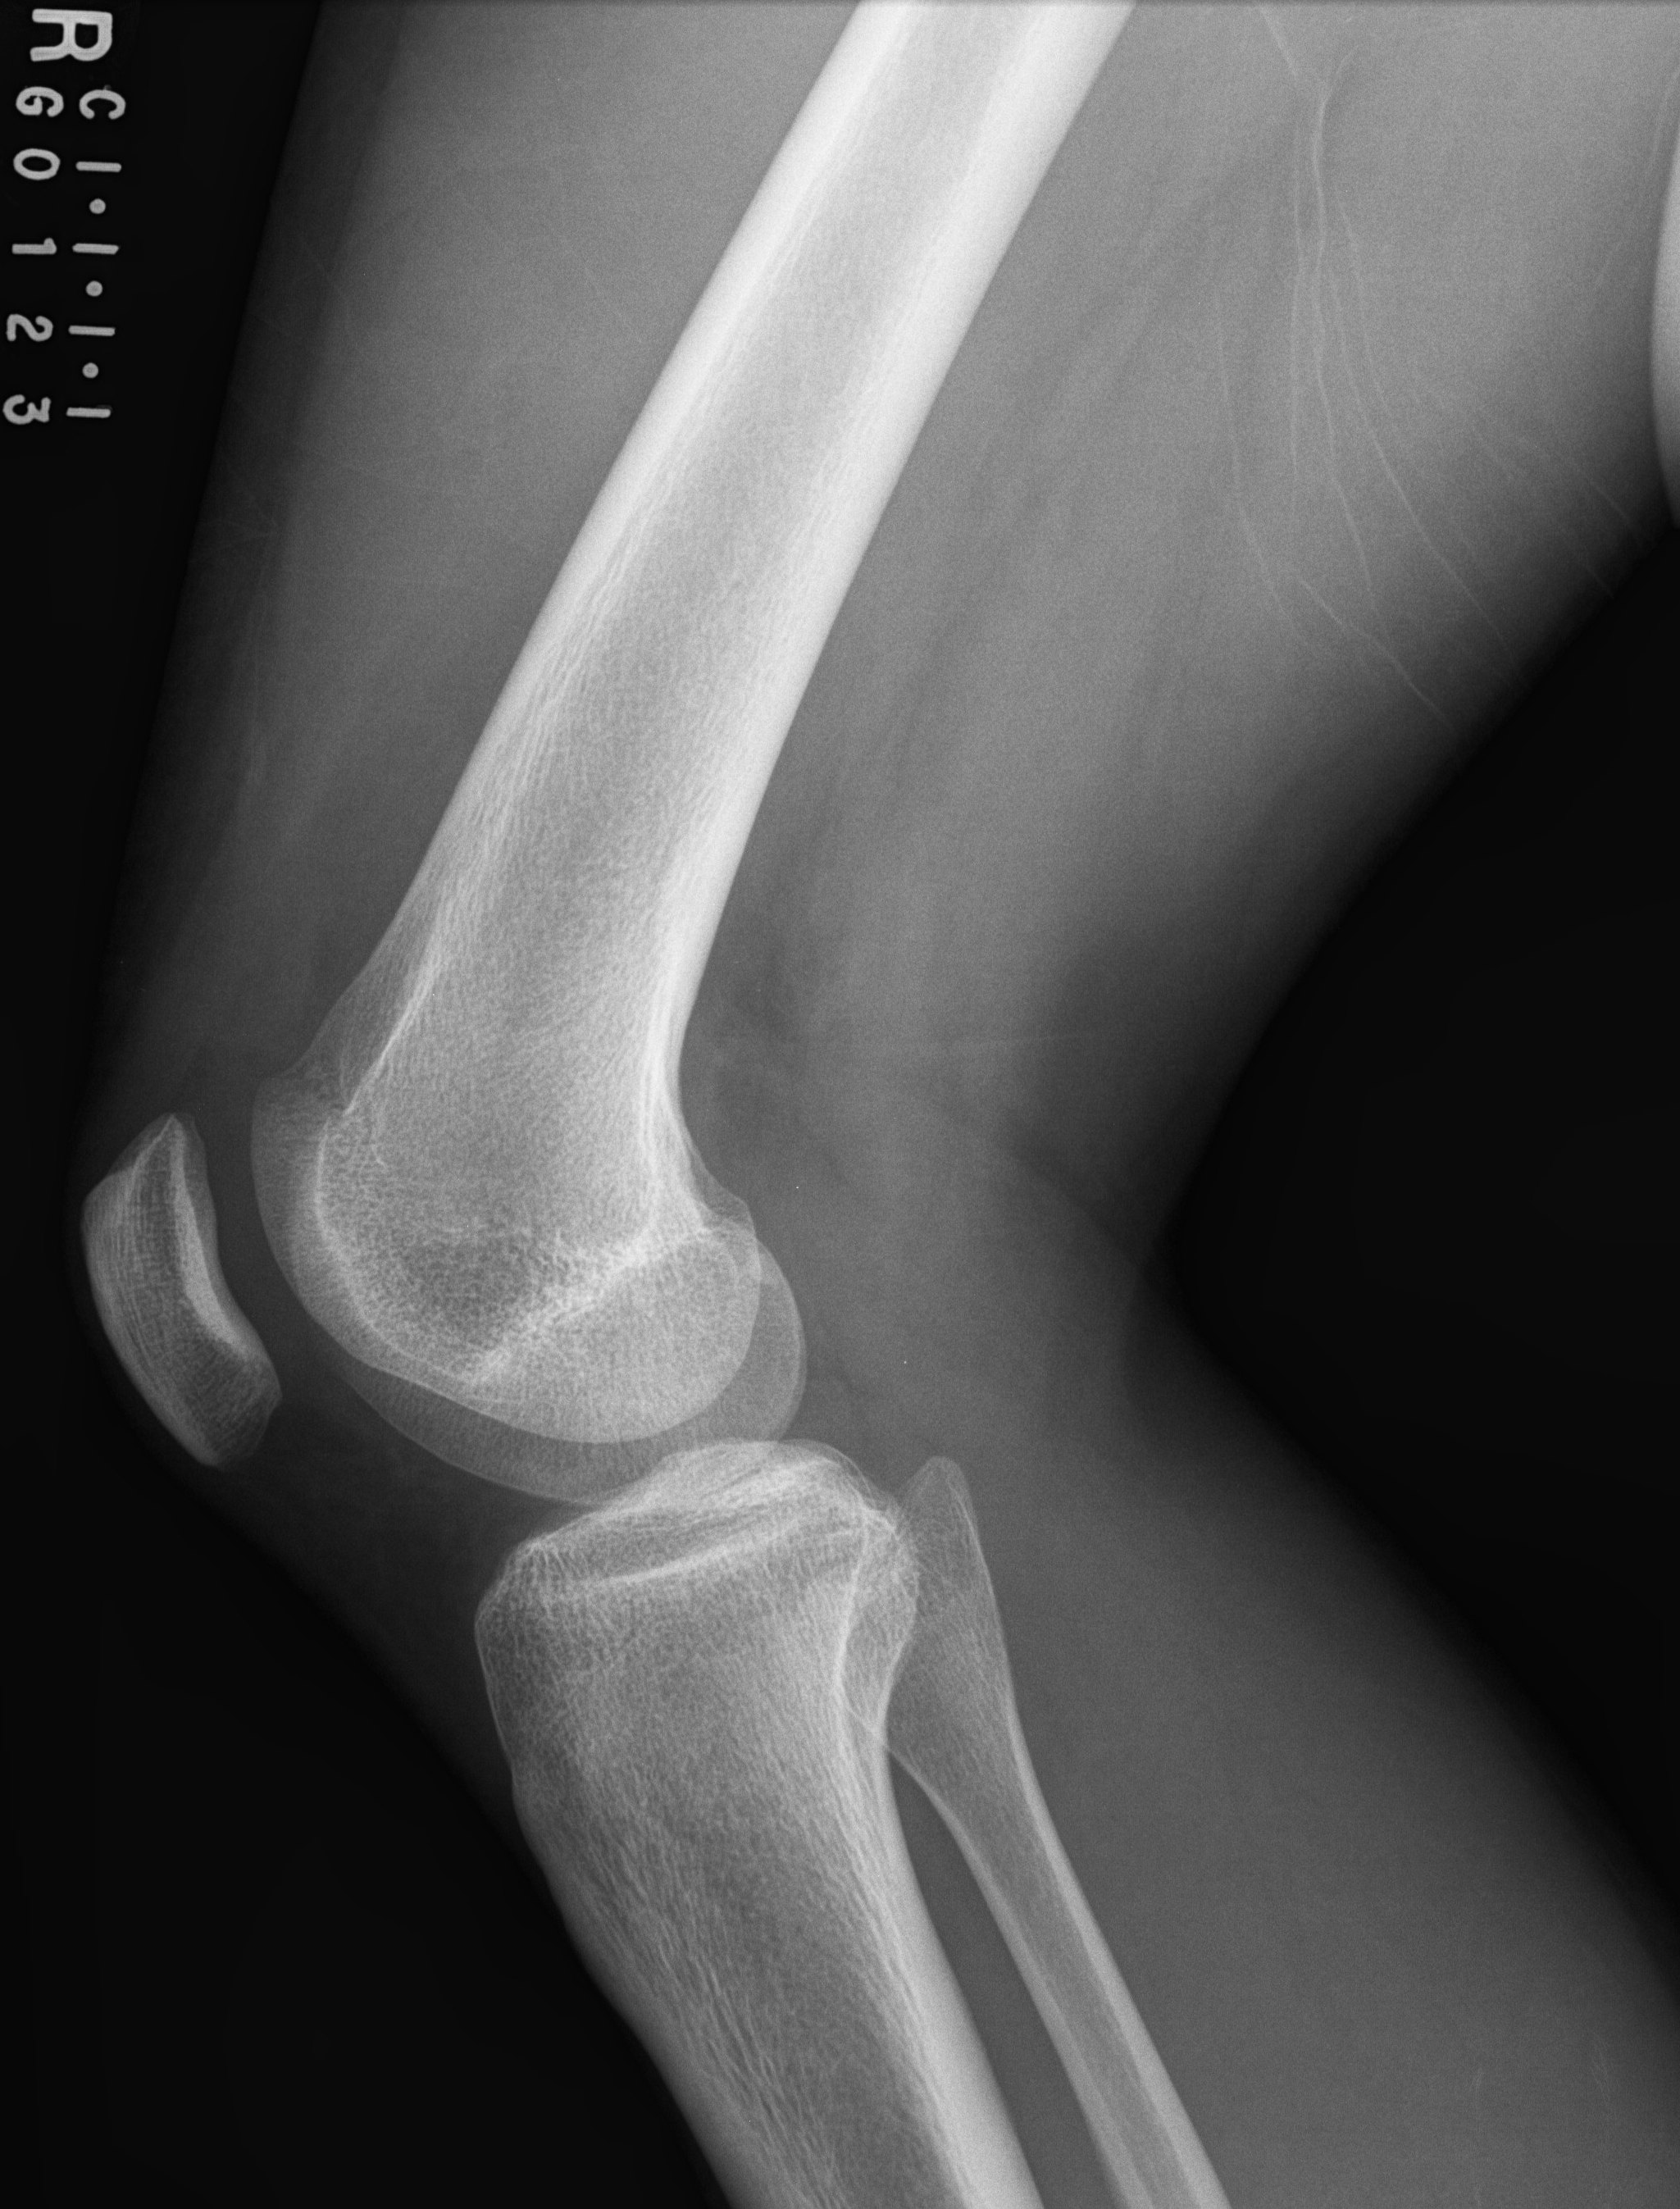
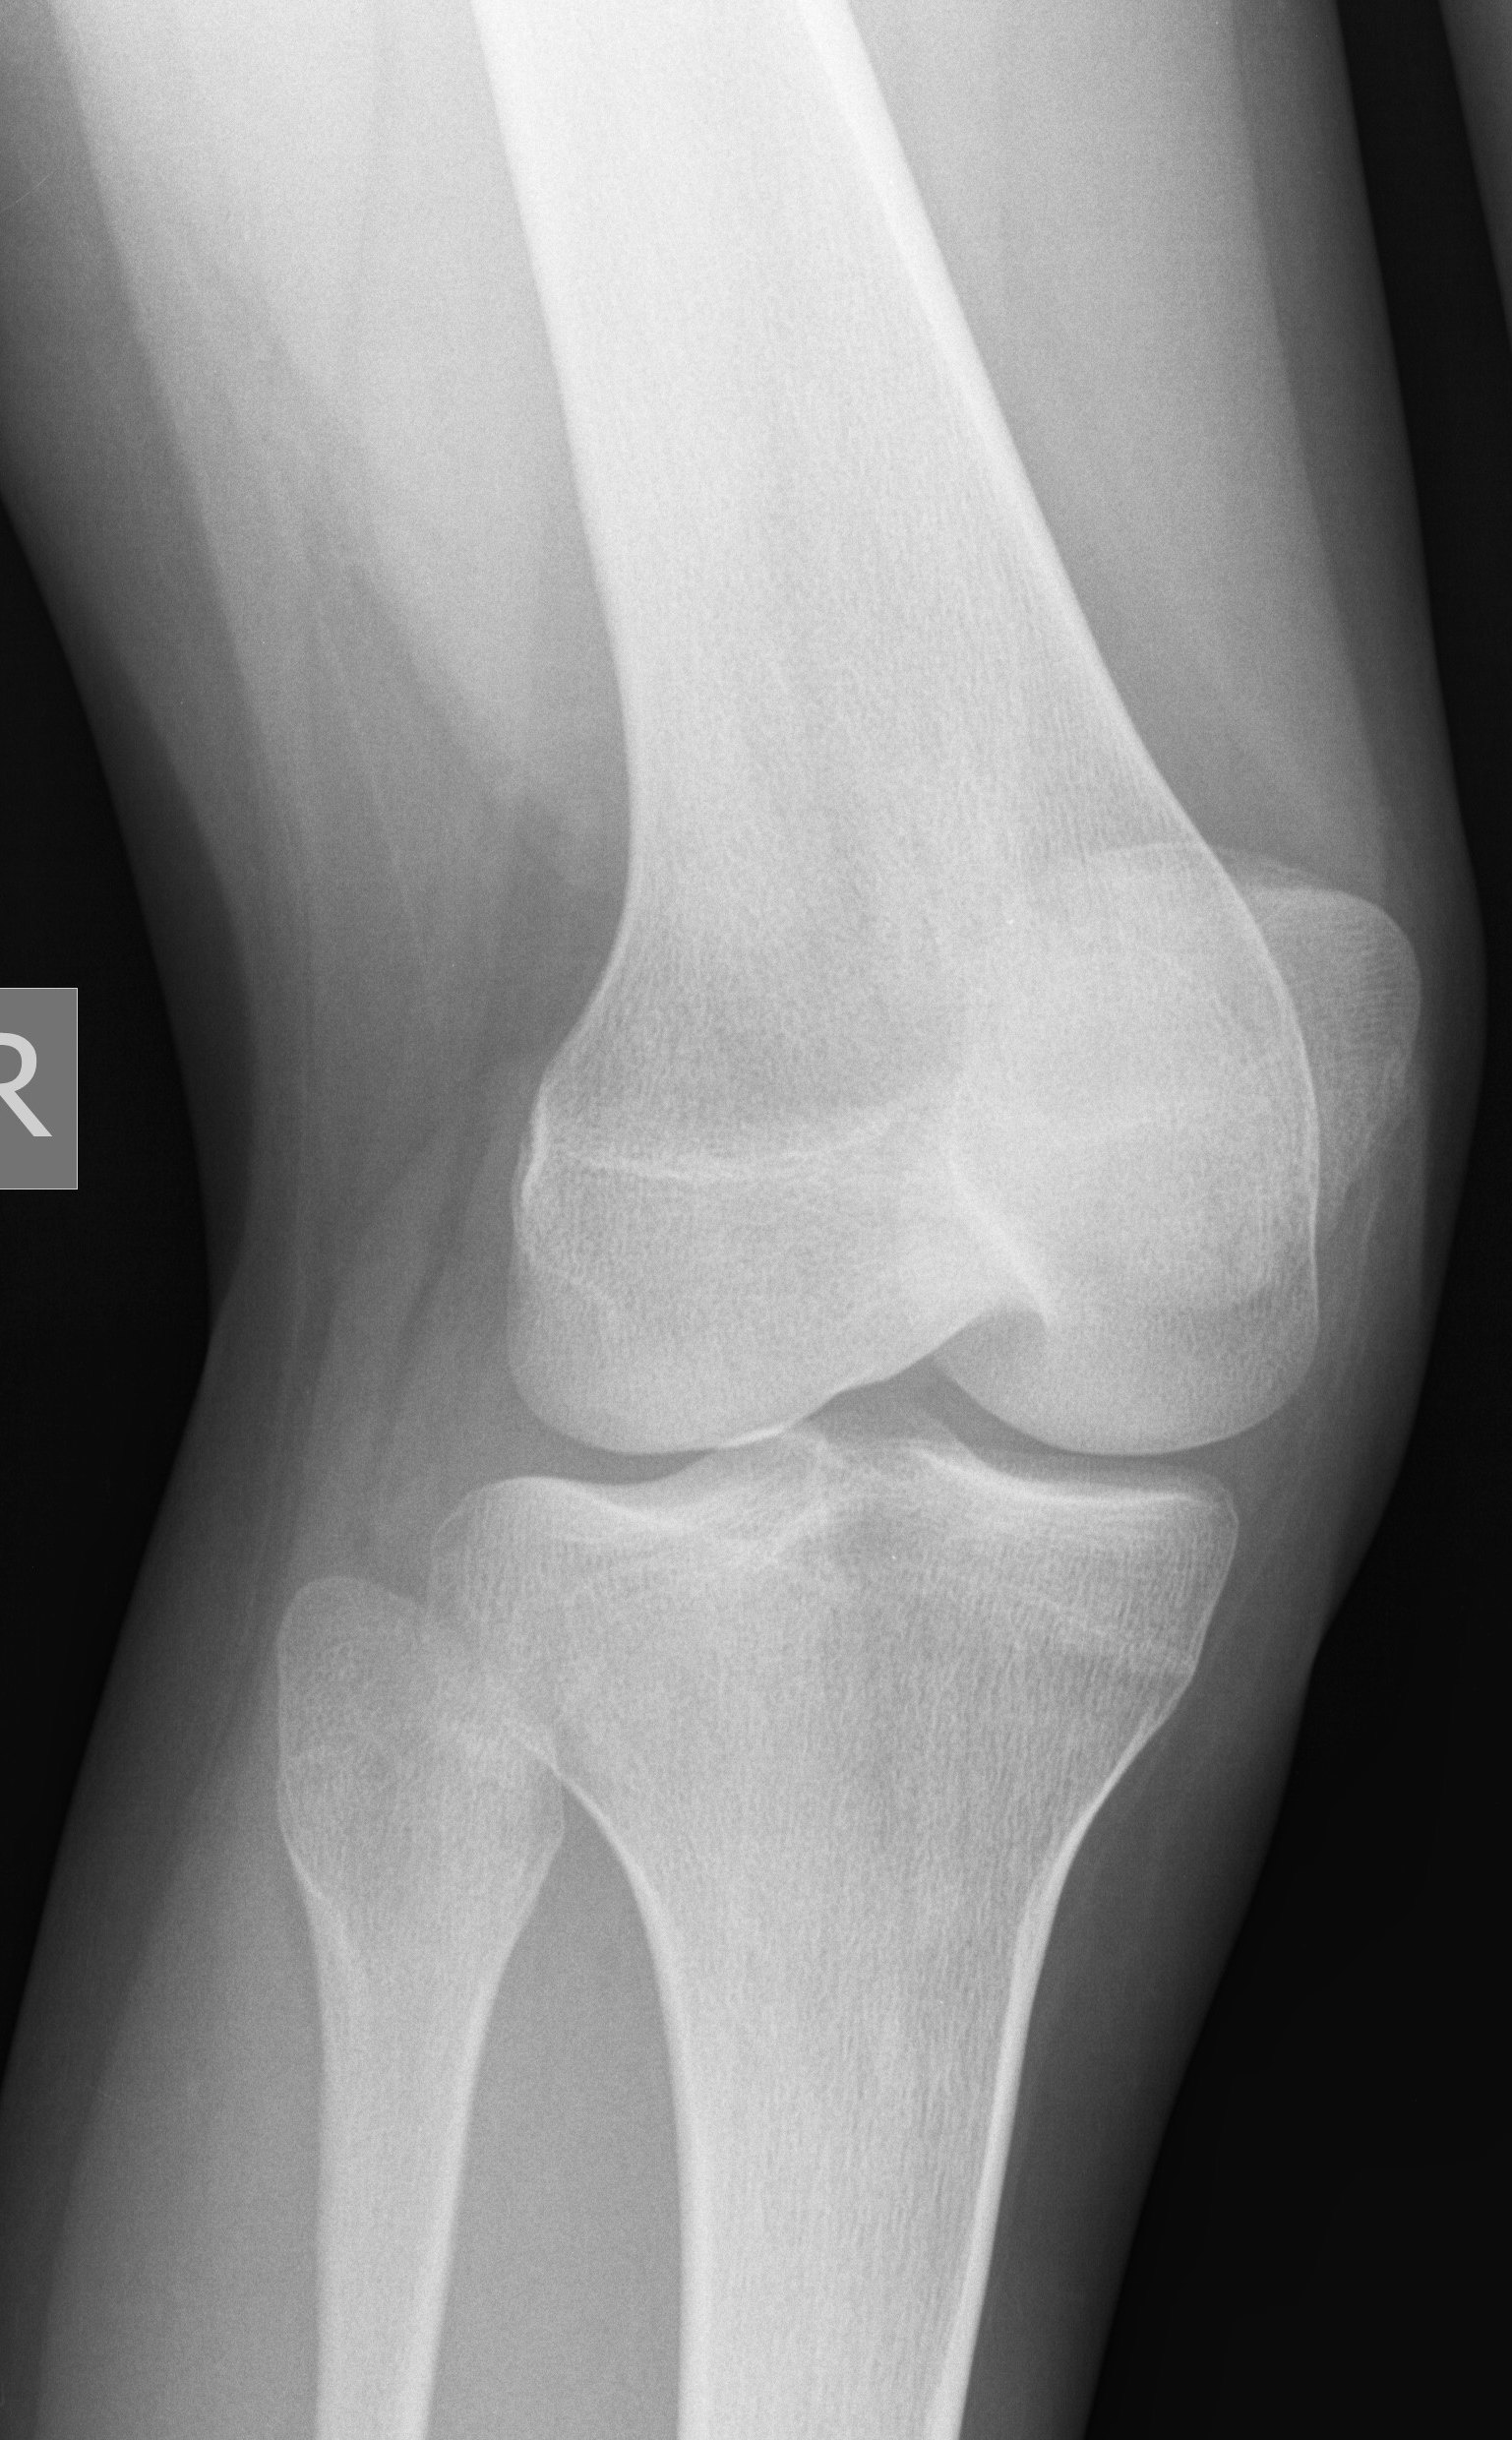
2. Mediolateral lateral |
10x12 LW |
Patient to lie on affected side, unaffected leg anterior to part, knee flexed about 45E |
CR angled 5E cephalic, to a point 1cm distal to epicondyle |
|
1. AP |
10x12 LW |
Same as described above. |
Same as described above. |
|
2. Mediolateral lateral |
10x12 LW |
Same as described above. |
Same as described above. |
|
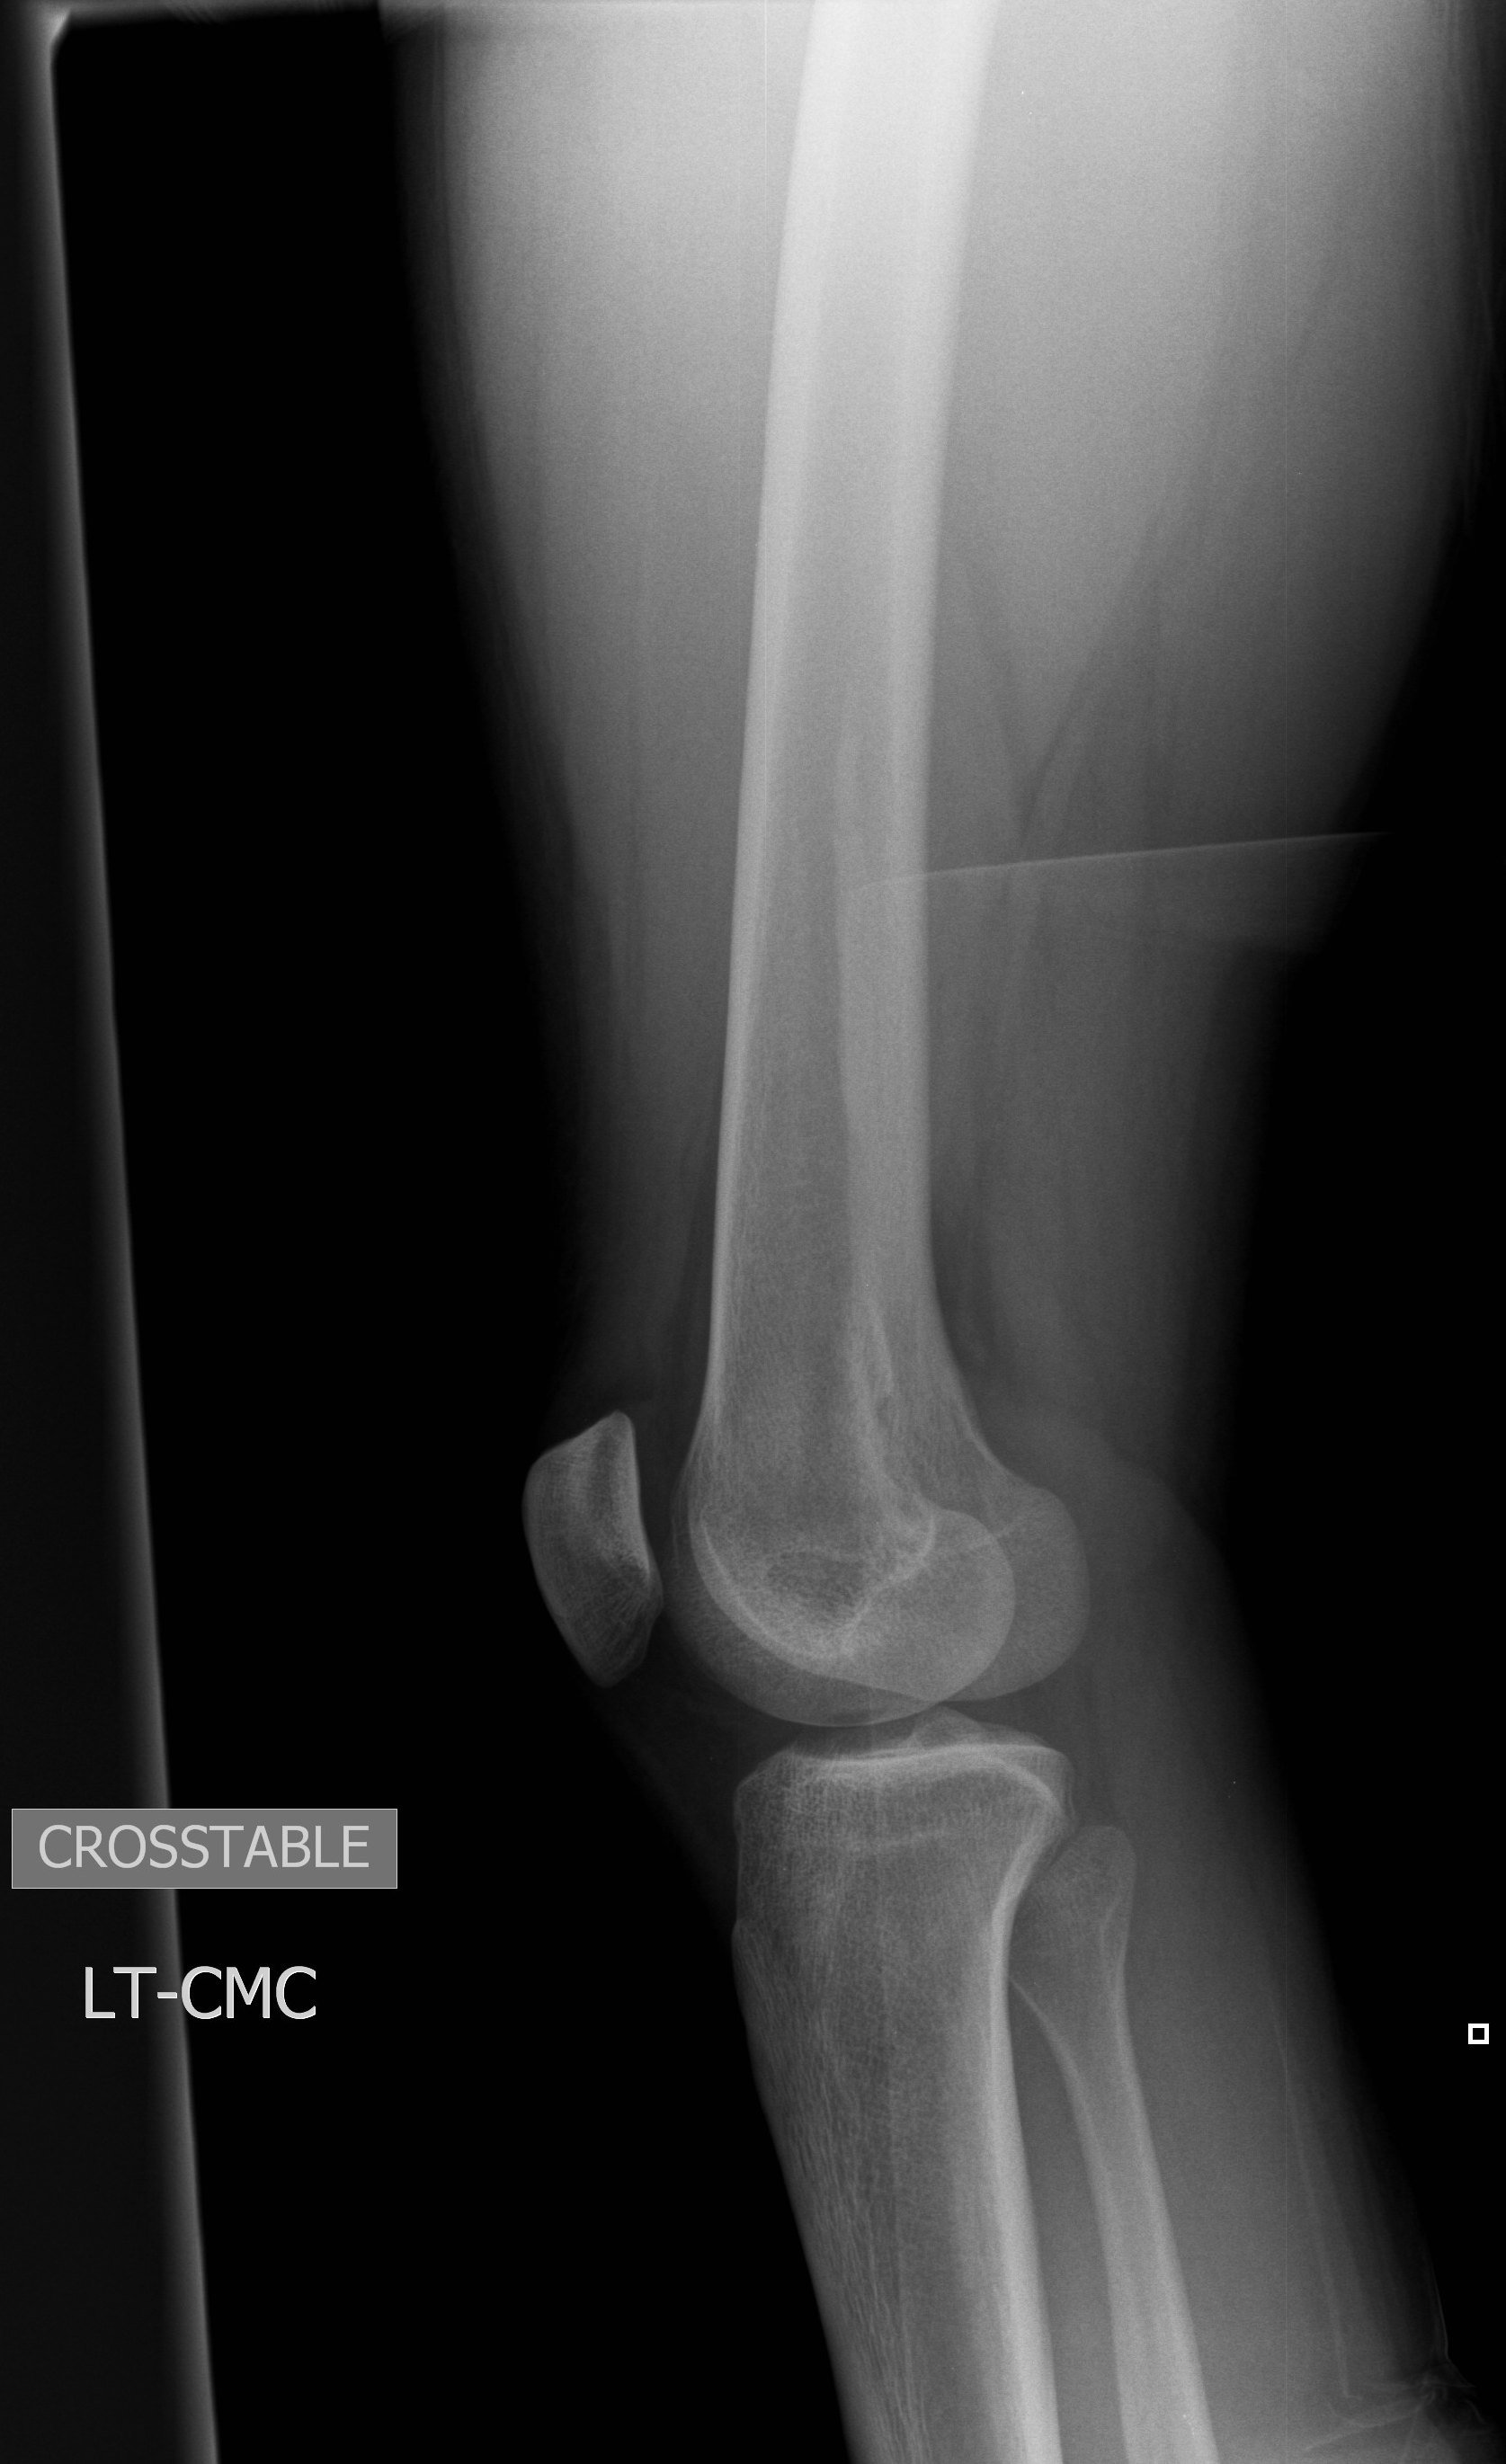
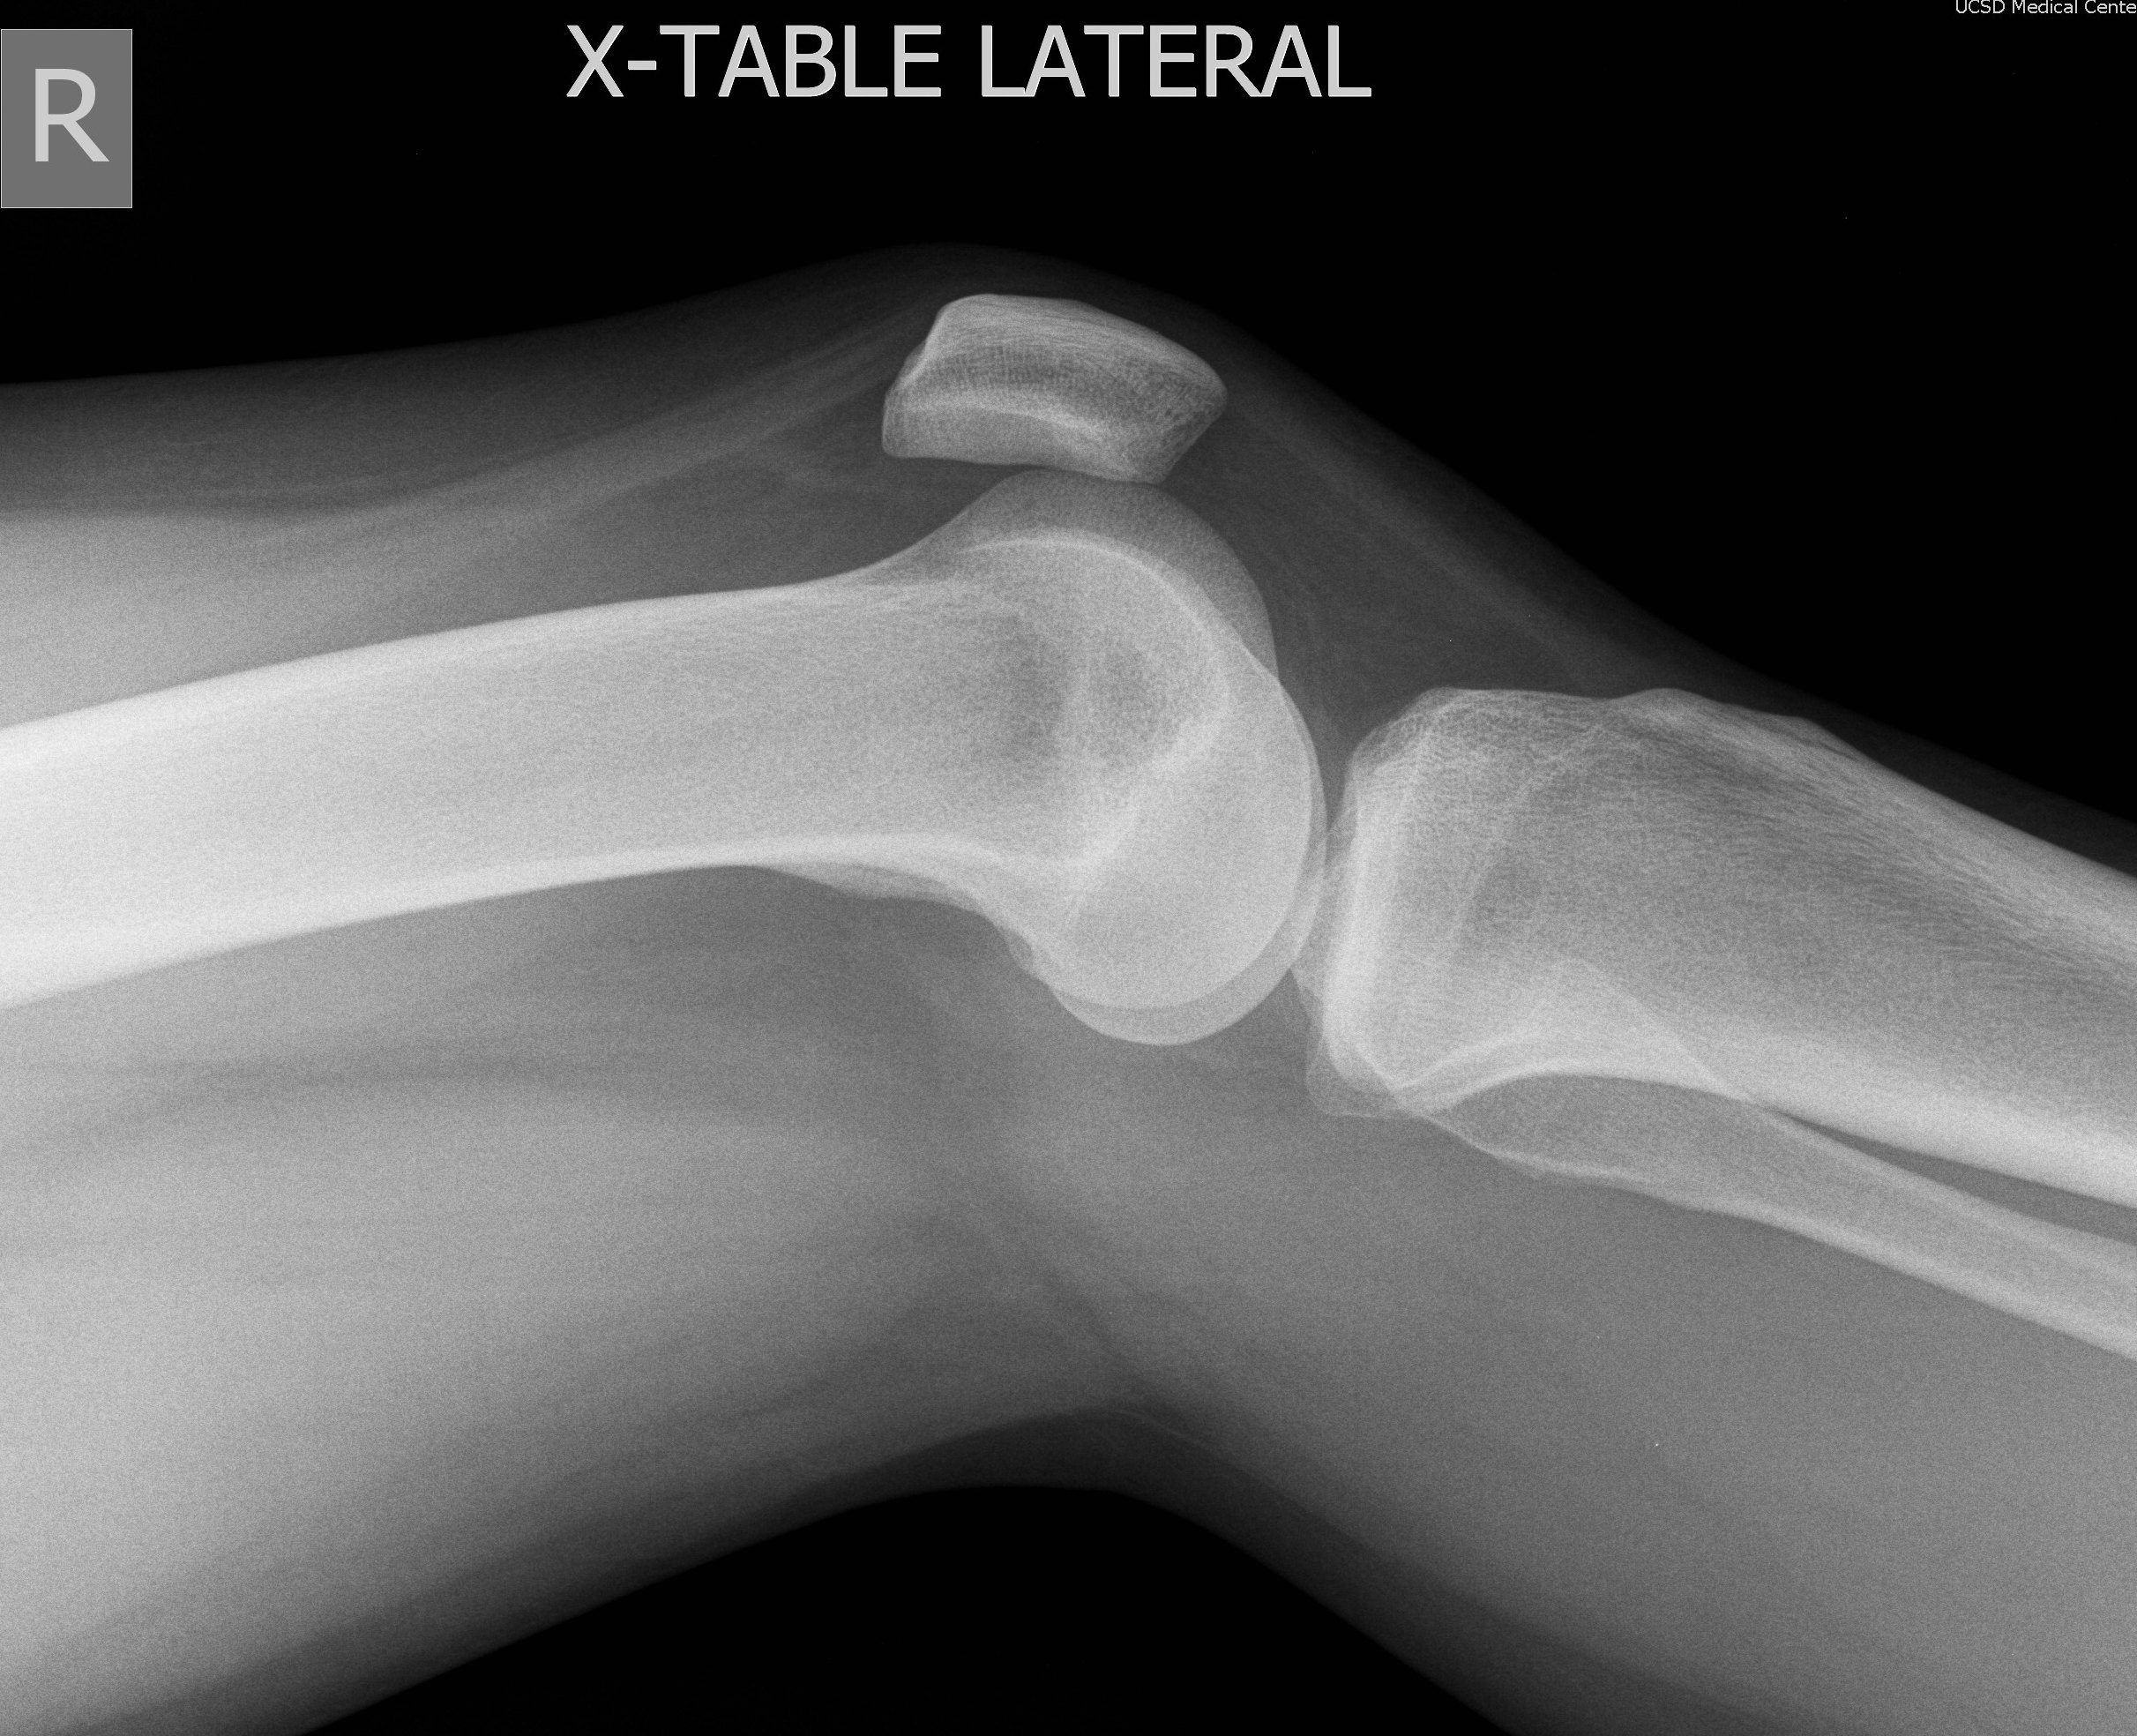
3. Lateromedial Cross table lateral |
10x12 CW |
Patient supine, part raised above tabletop, do not flex knee for cross-table lateral. |
Horizontal CR perpendicular to knee joint |
|
KNEE ADDITIONAL VIEWS - upon radiologist's approval |
|||
|
4. Medial oblique |
10x12 LW |
From AP position, rotate knee medially 45E |
CR perpendicular to 1 cm inferior to patellar apex |
|
5. Lateral oblique |
10x12 LW |
From AP position, rotate knee laterally 45E |
CR perpendicular to 1 cm inferior to patellar apex |
|
1. PA |
8x10 LW |
Patient supine or upright, femoral epicondyles parallel to film, leg fully extended |
CR perpendicular to mid-patella |
|
2. Mediolateral Lateral |
8x10 LW |
Patient to lie on affected side, with unaffected leg anterior, knee flexed 5E |
CR perpendicular to mid-patella |
|
3. Merchants View - bilateral patellar view |
11x14 CW |
Patient supine with legs flexed over Merchant board 30E-45E, knees close together, film to lie on distal tibias |
CR angled caudal parallel to patella, enters at joint space |
|
4. Axial projection (Sunrise method) |
8x10 LW |
Patient prone, knee flexed to maximum patient ability |
CR angled cephalic so that there is a 45E with tibia |
|
FEMUR - Include both joints on films if possible |
|||
|
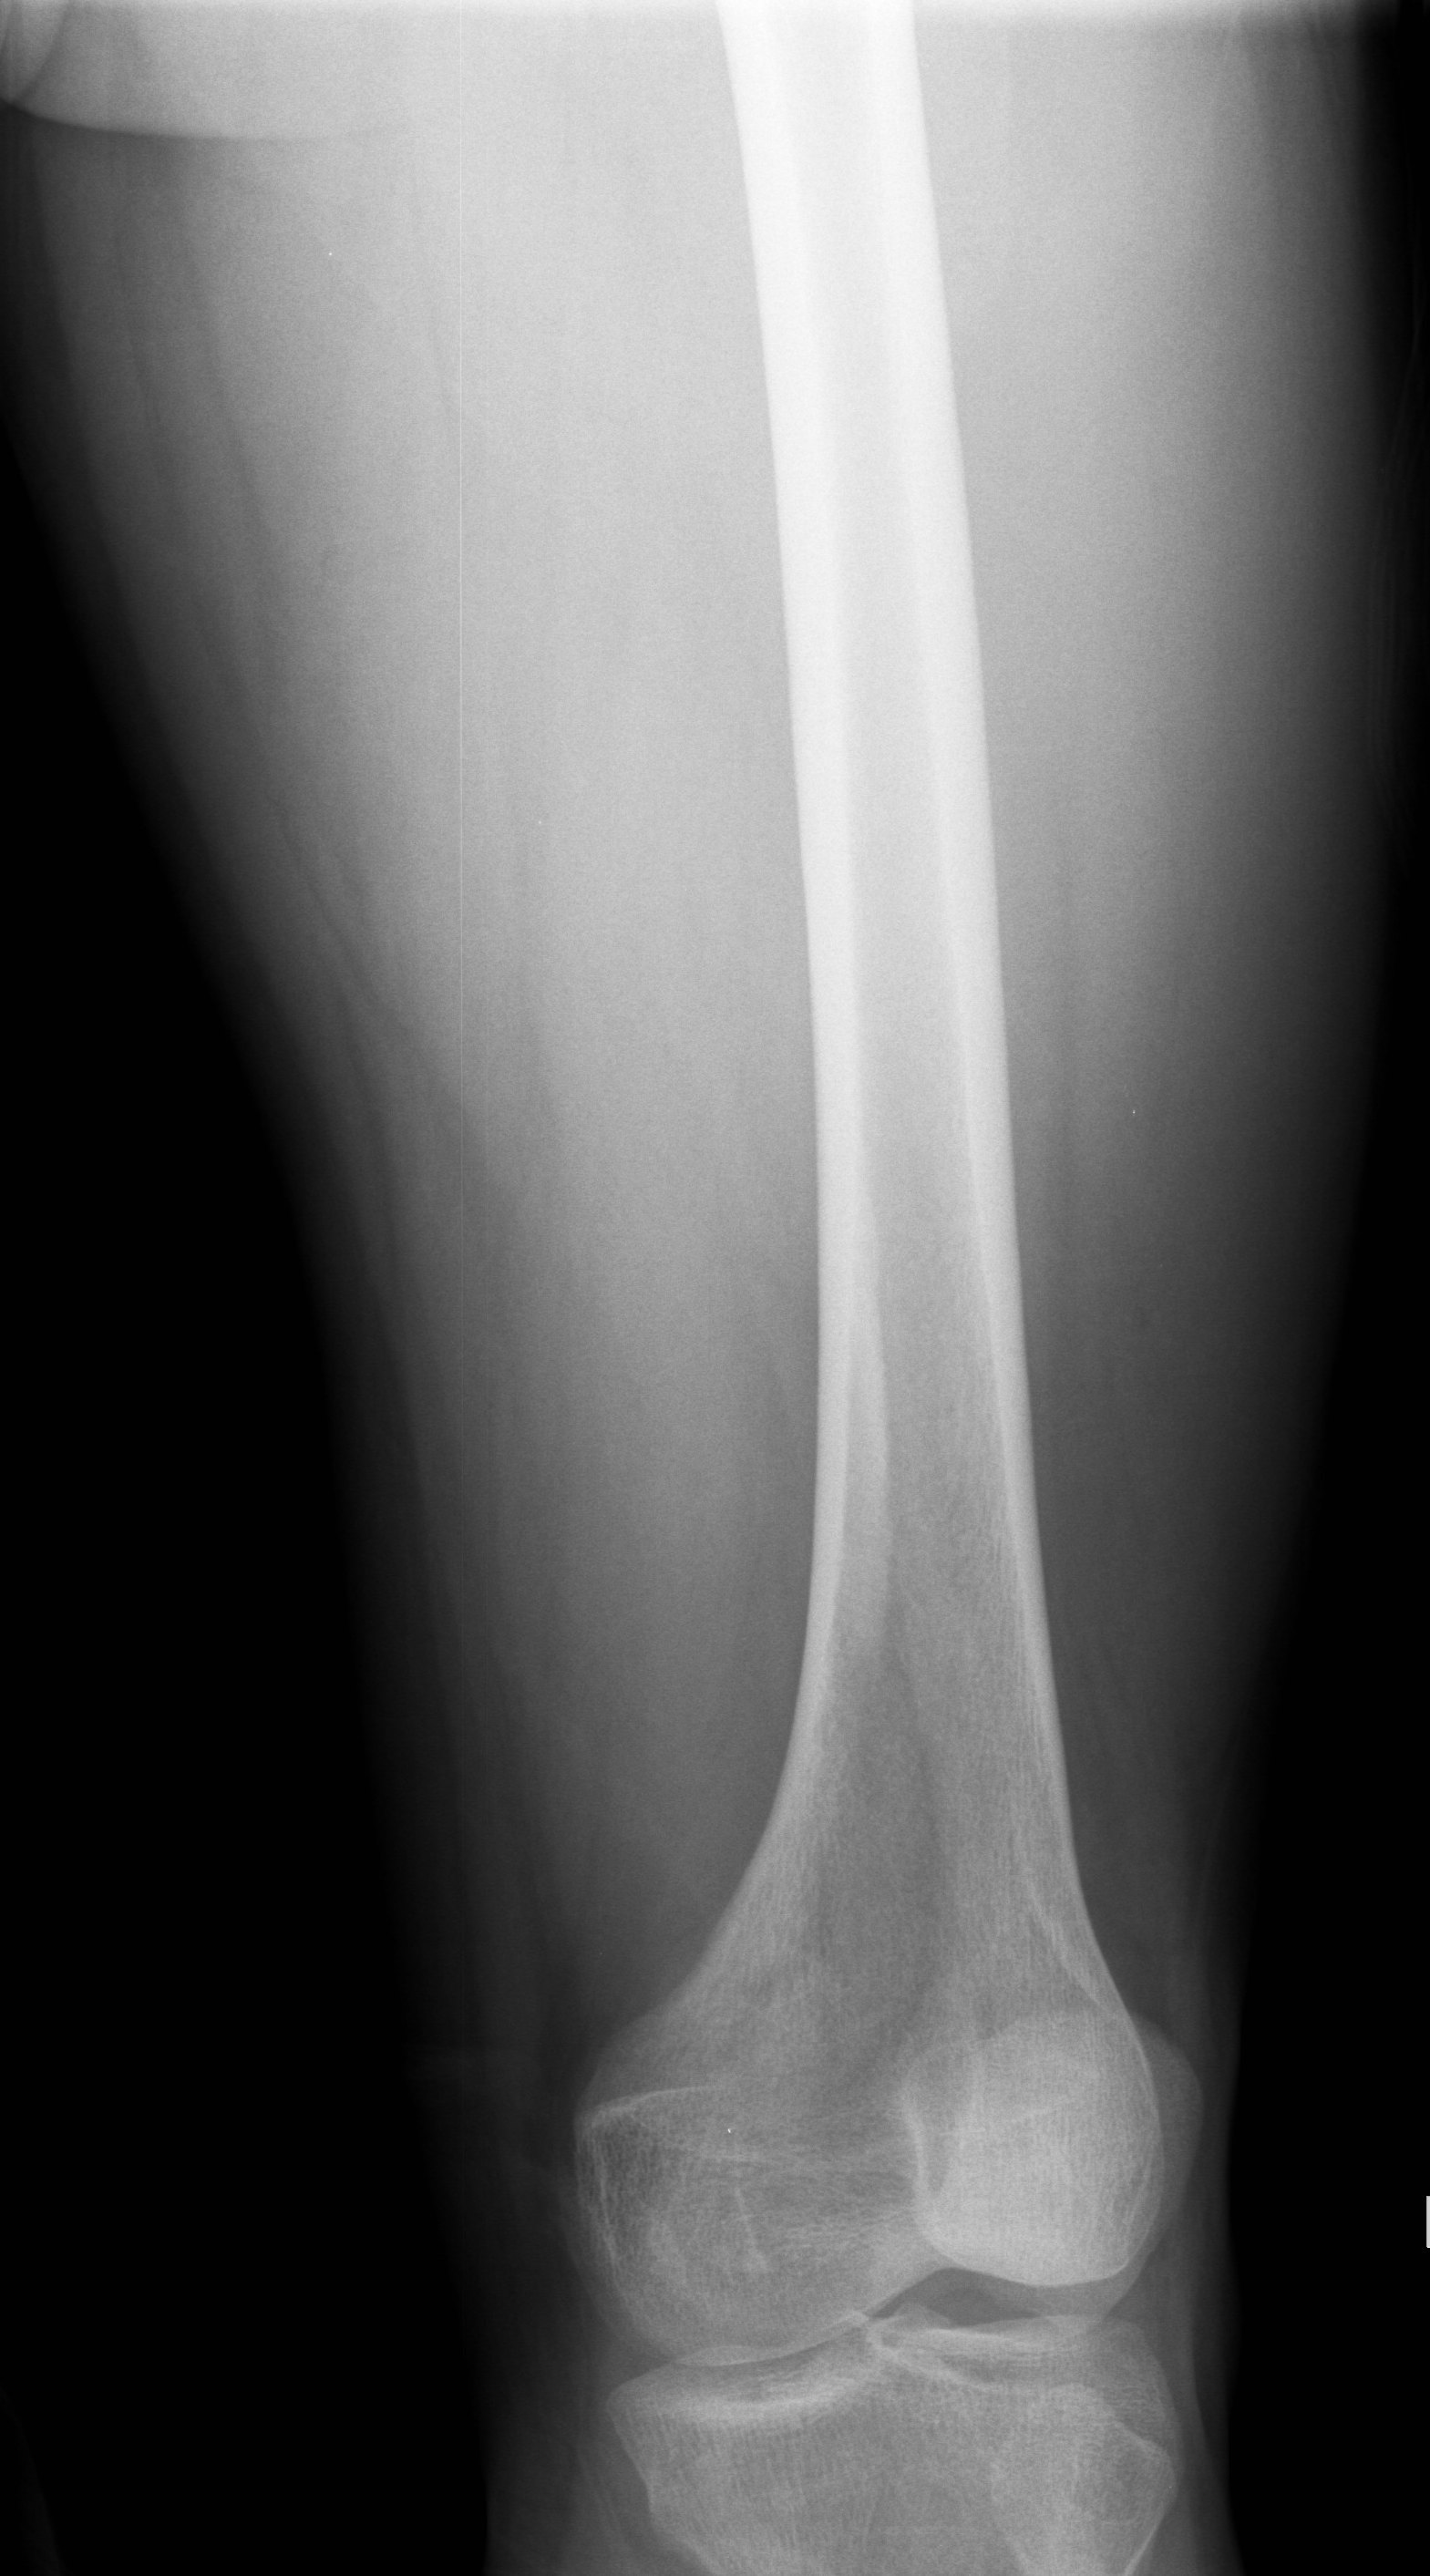
1. AP - to include knee and distal femur |
14x17 LW |
Patient supine, leg fully extended, femoral epicondyles parallel to film |
CR perpendicular centered to include knee joint |
|
2. AP - to include hip and proximal femur |
11x14 LW |
Position patient and part exactly as above if performing two exposures. |
CR perpendicular to include hip joint |
|
3. Mediolateral Lateral - to include knee |
14x17 LW |
Patient to lie on affected side, unaffected leg anterior to part, flex knee 45E |
CR perpendicular to include knee joint |
|
4. Lateral frog-leg hip |
11x14 LW |
Patient supine, flex knee and fully abduct leg |
CR perpendicular to femoral neck |
|
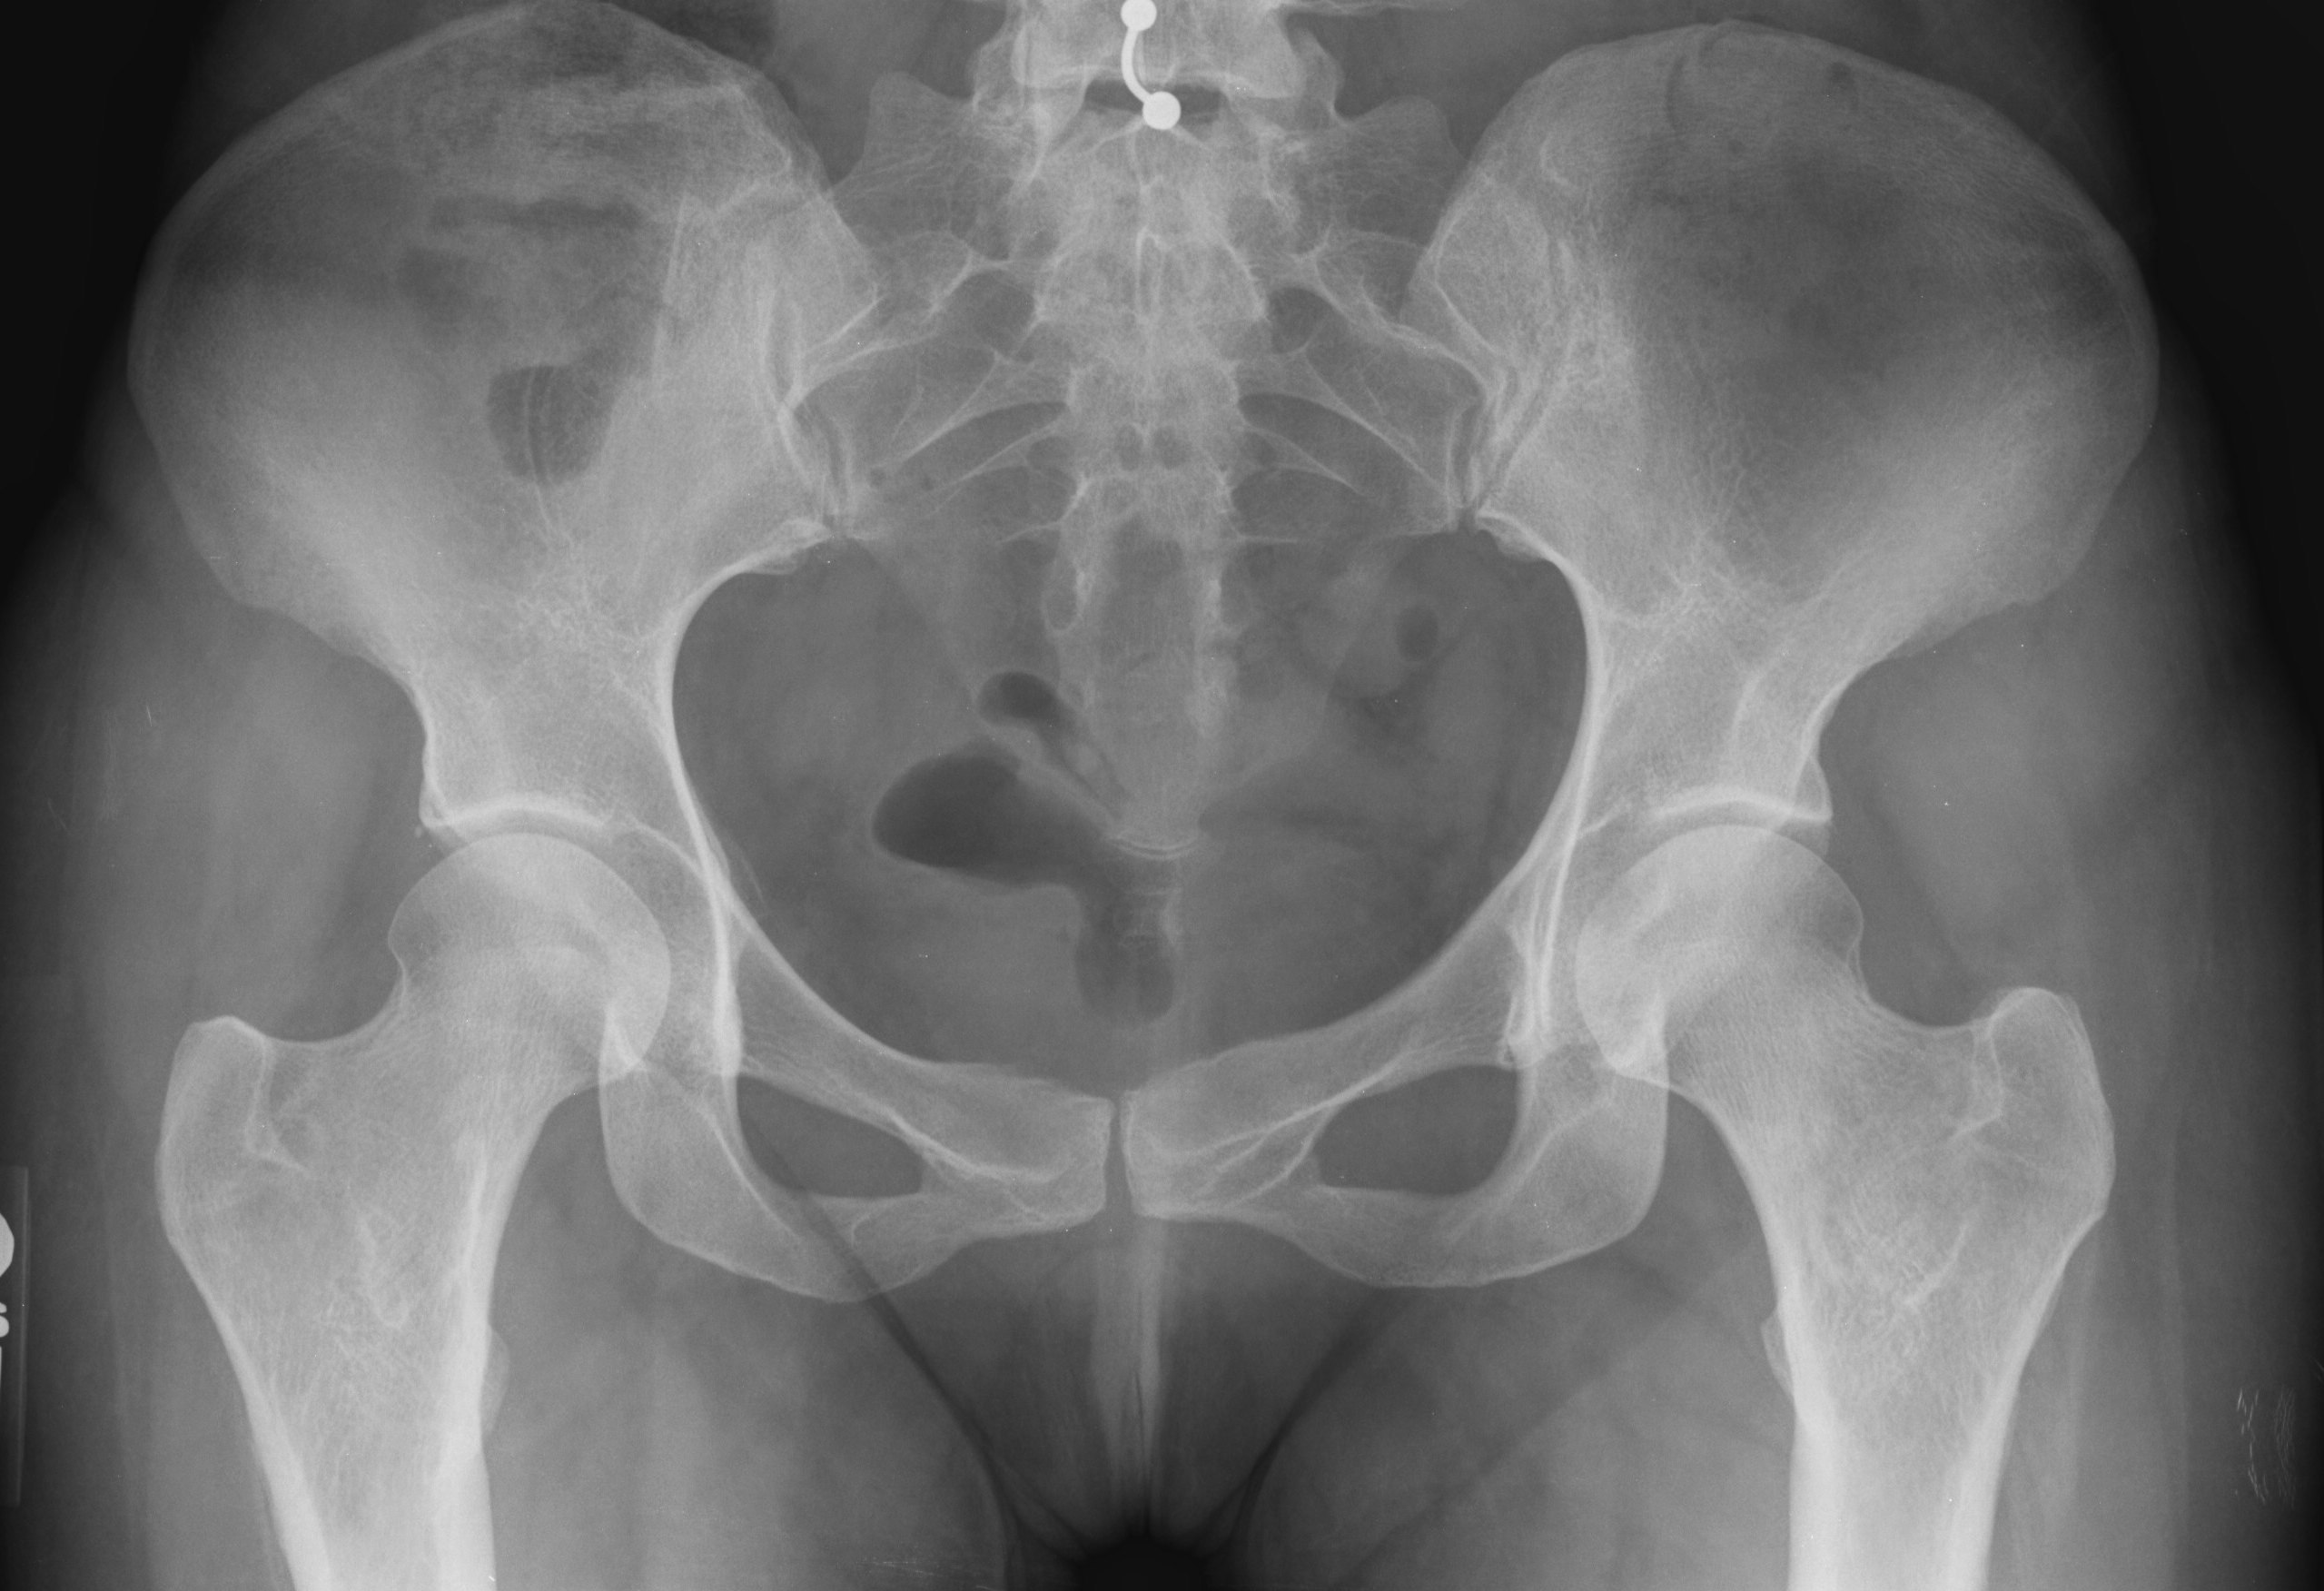
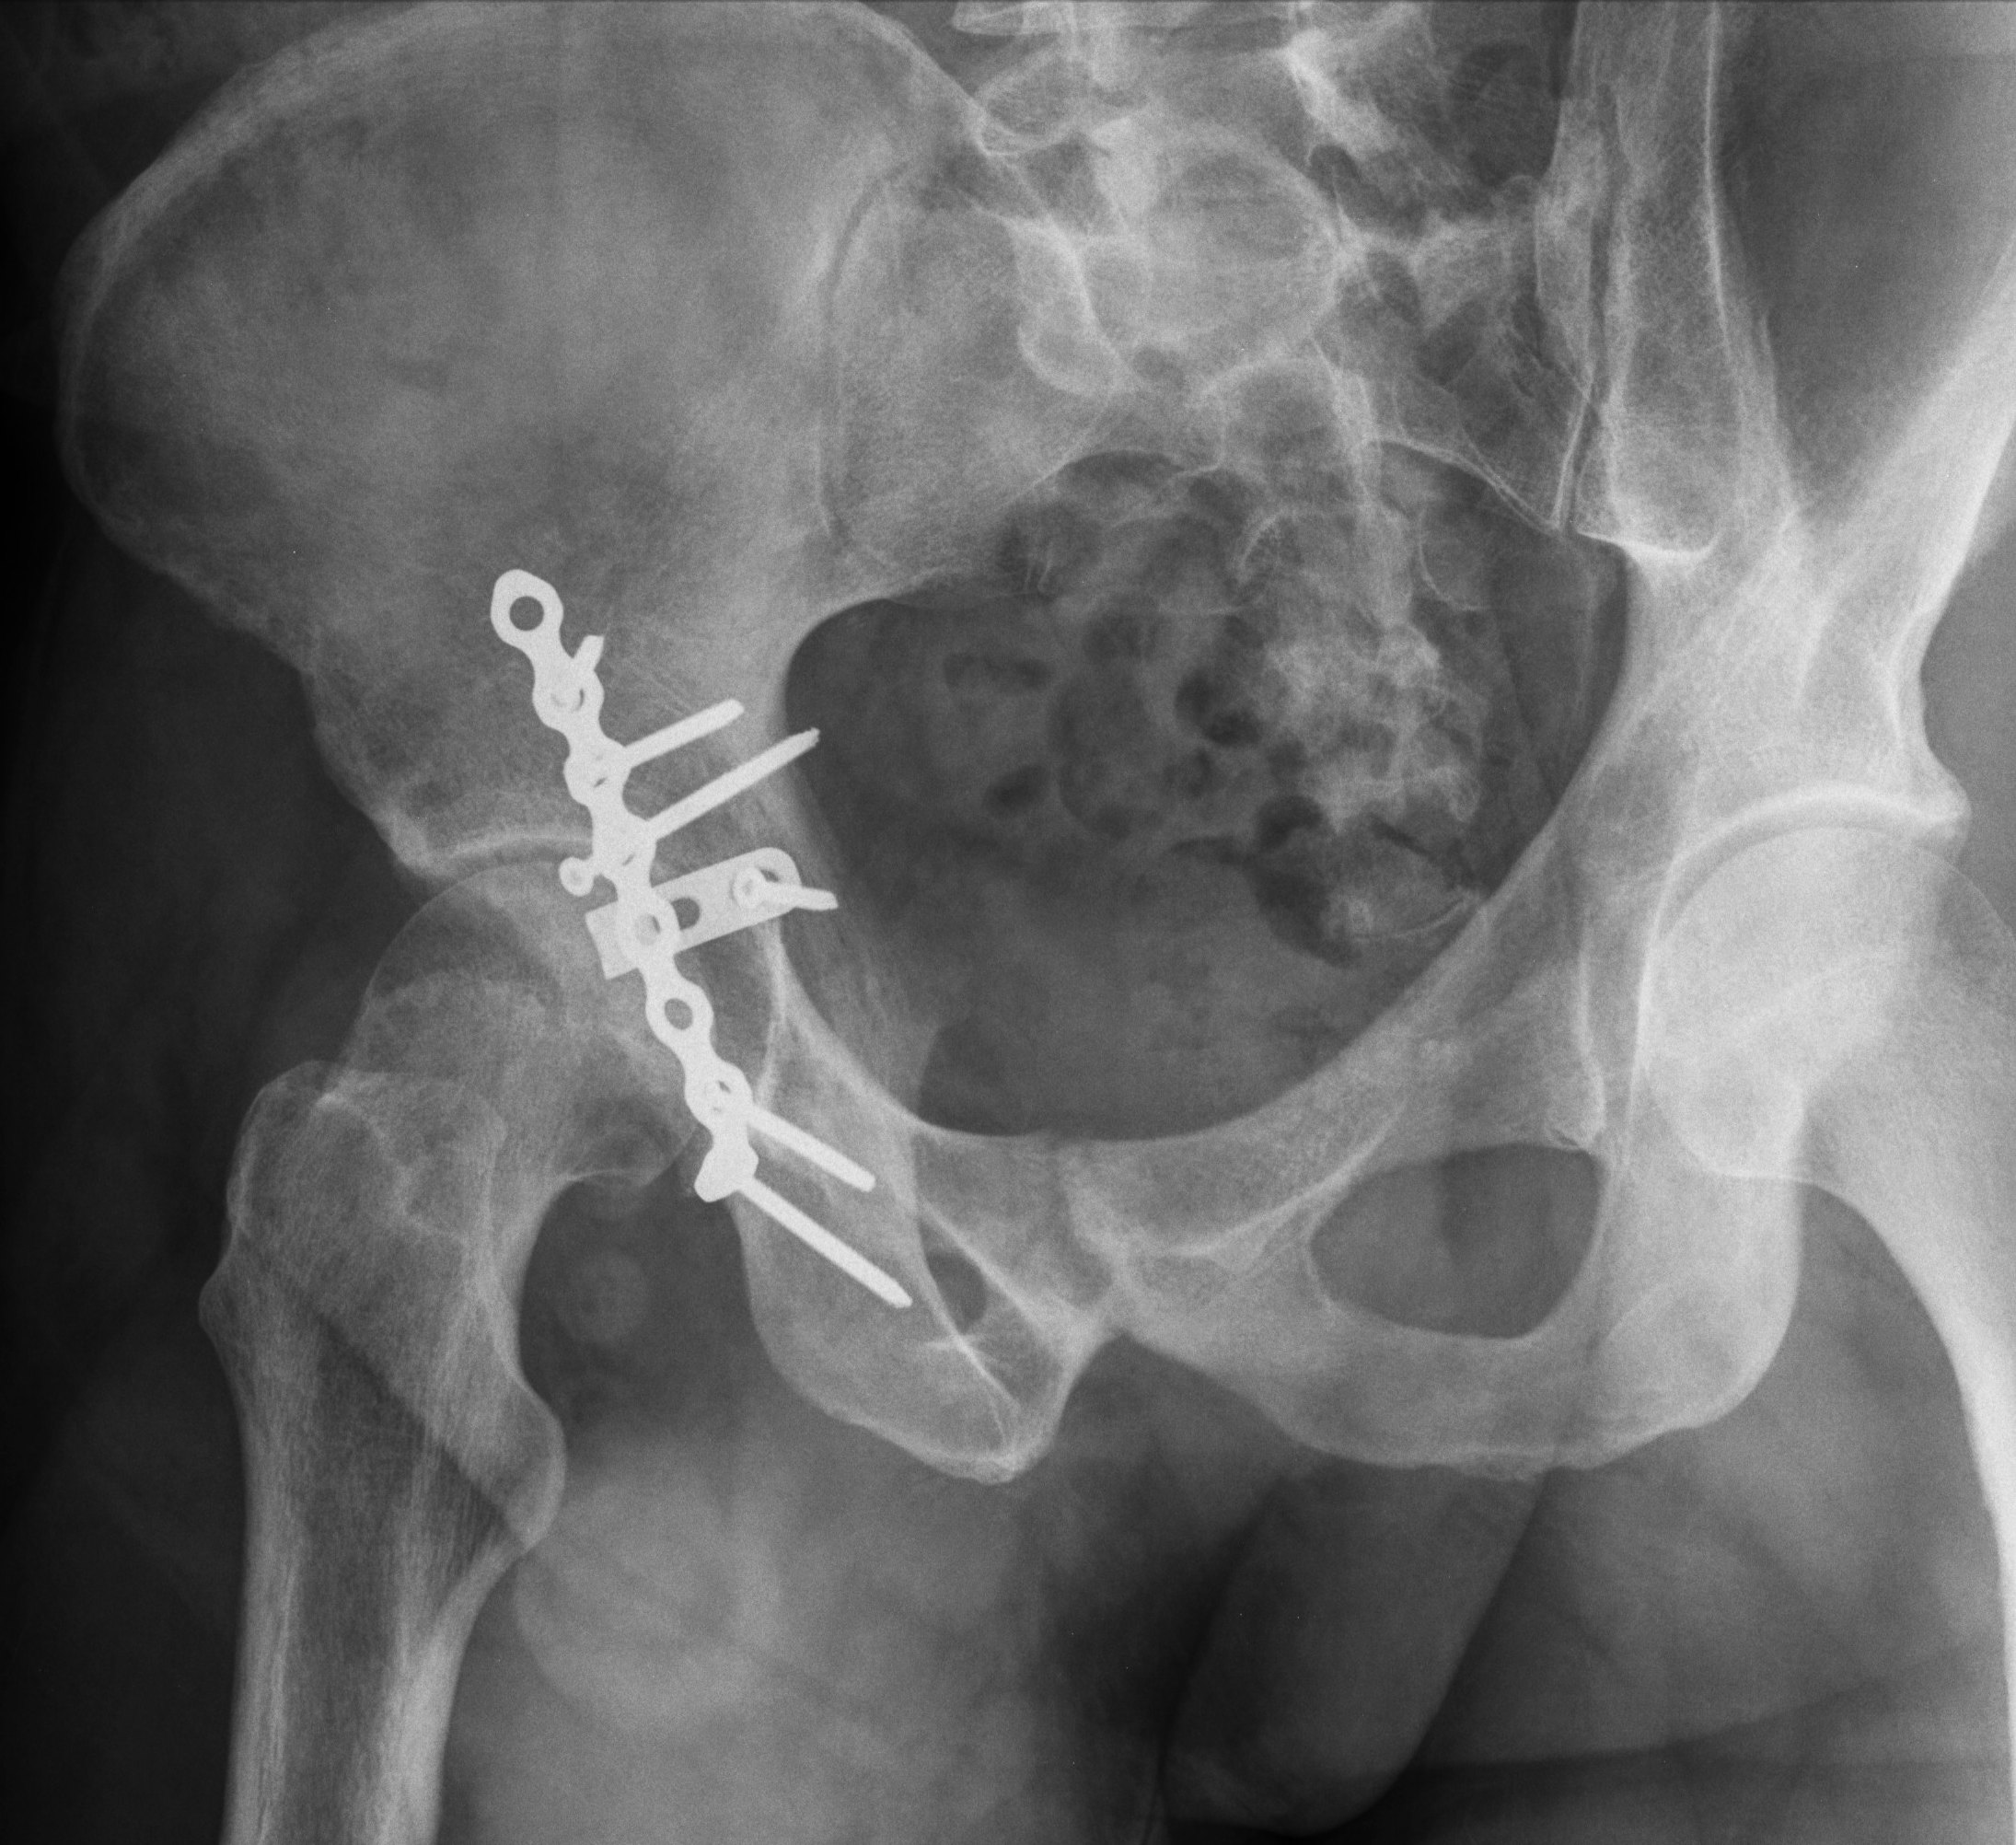
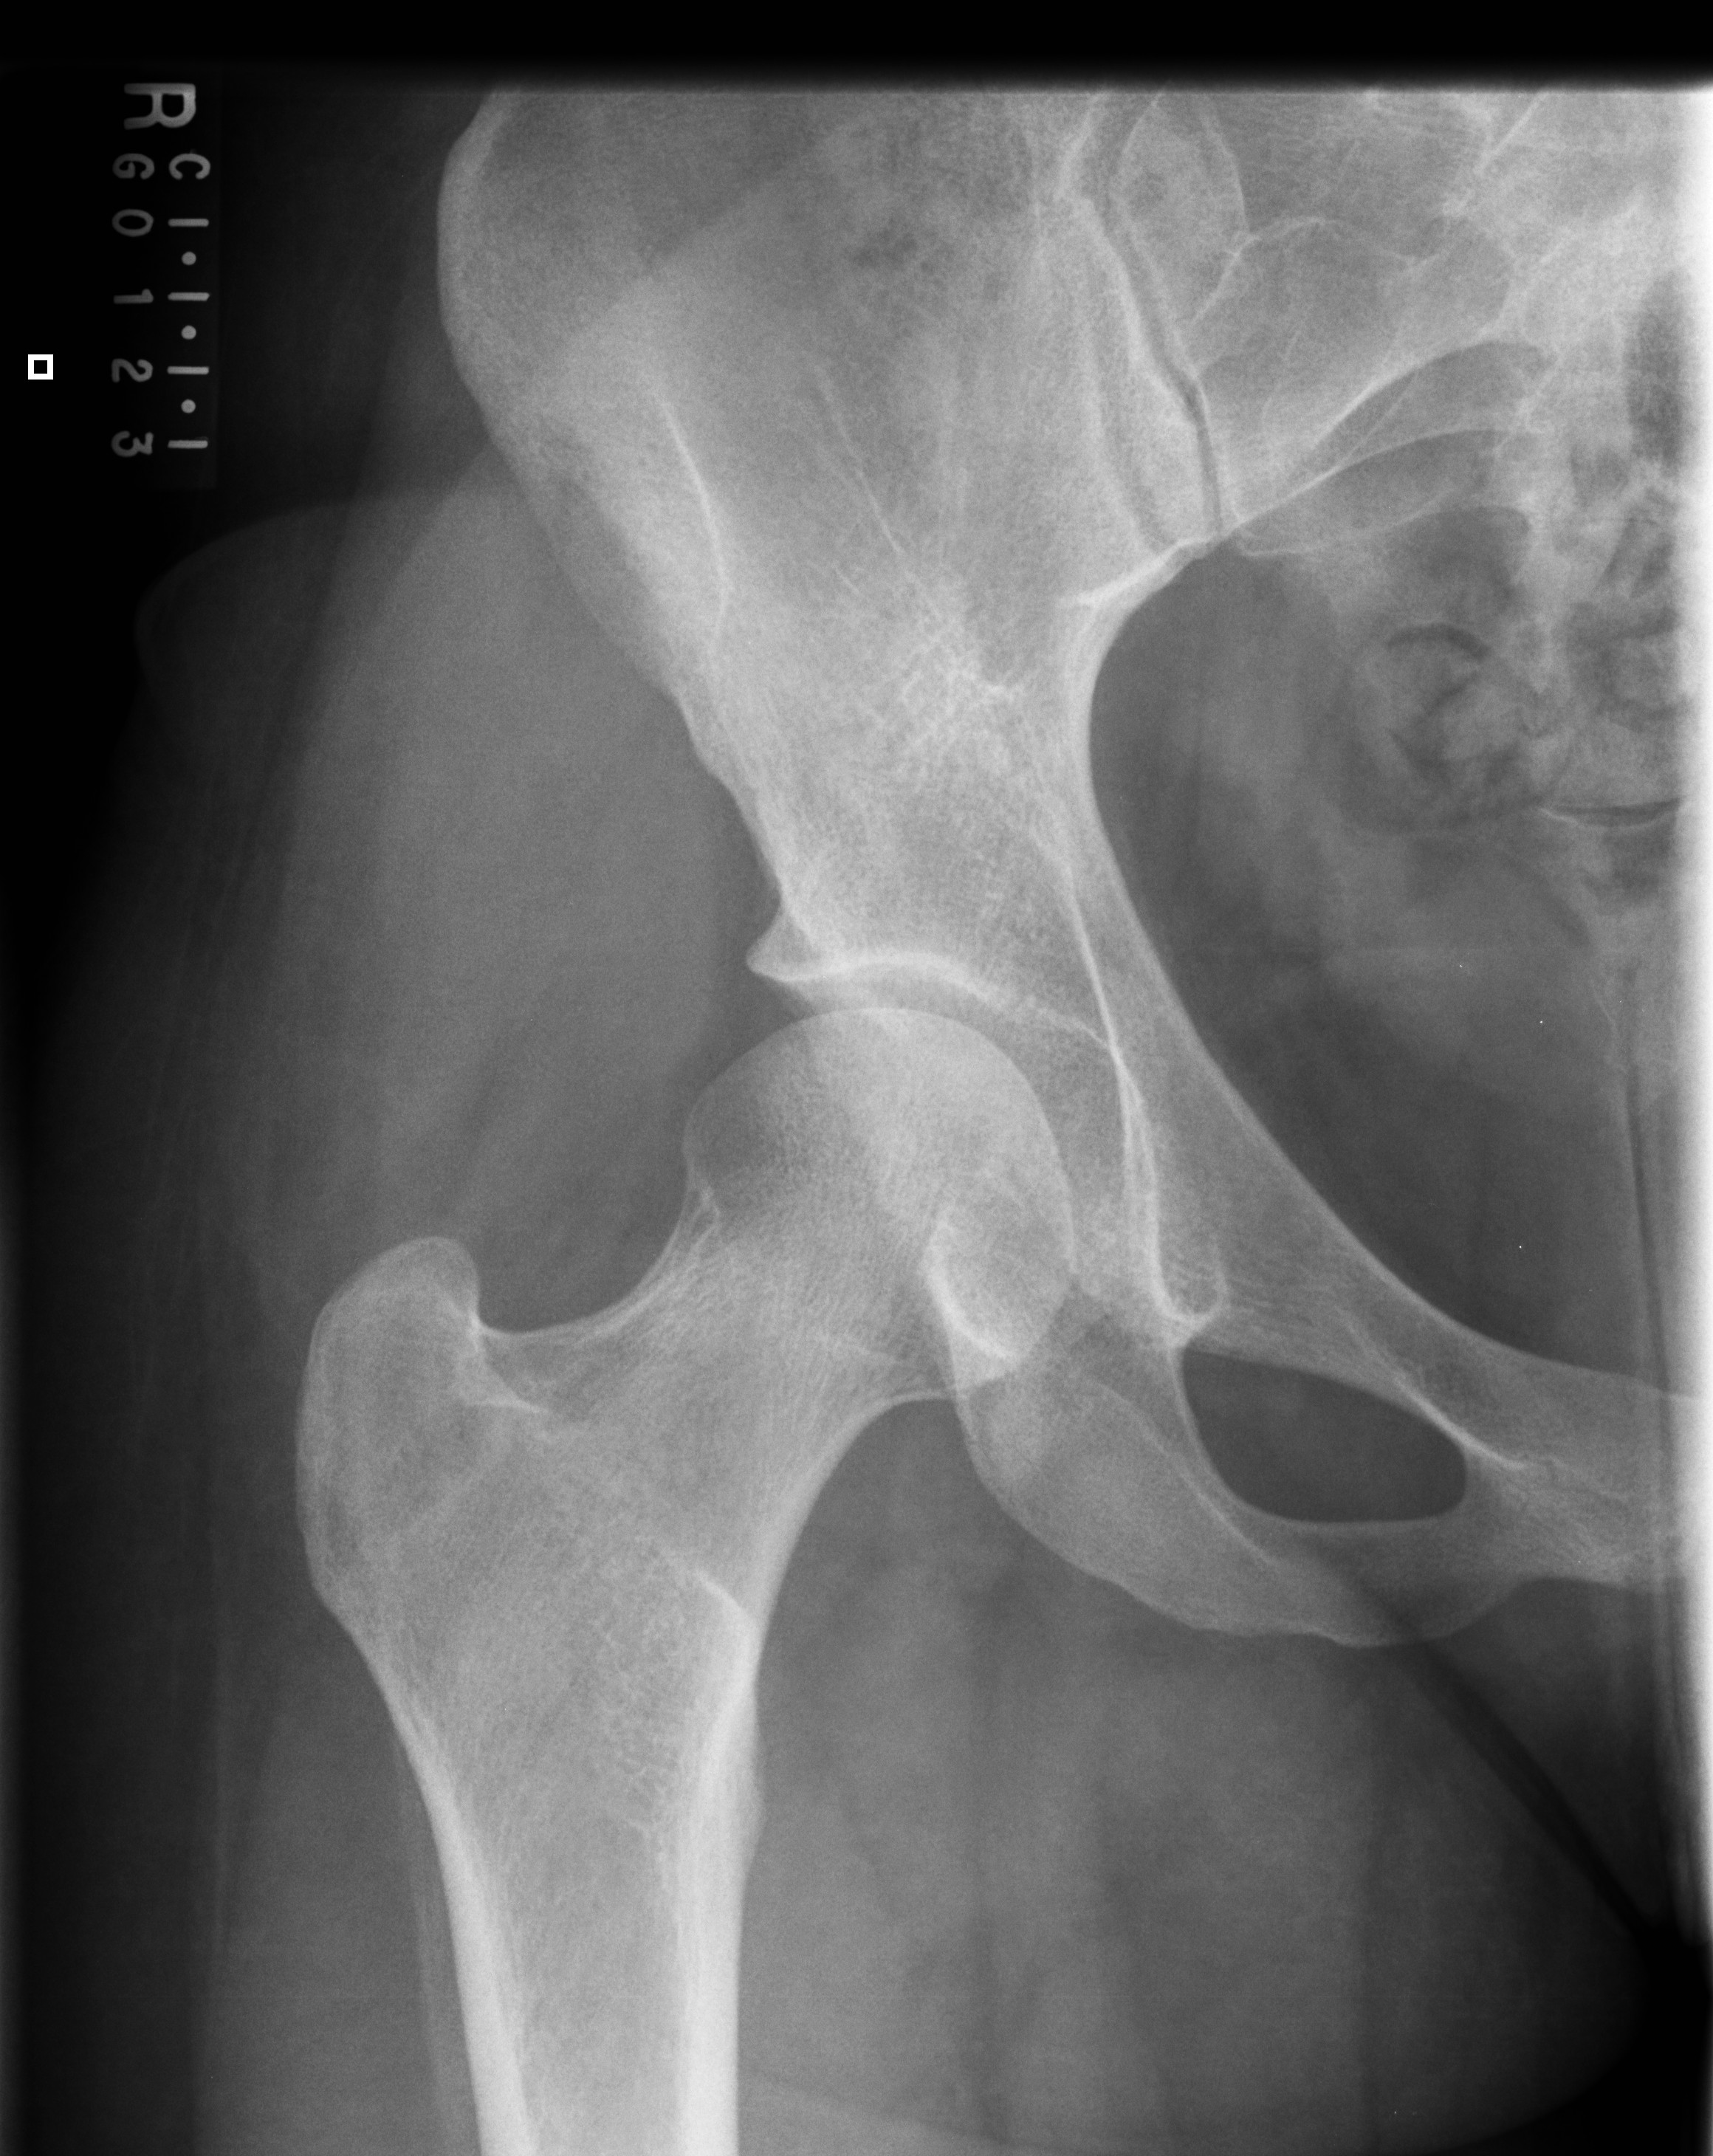
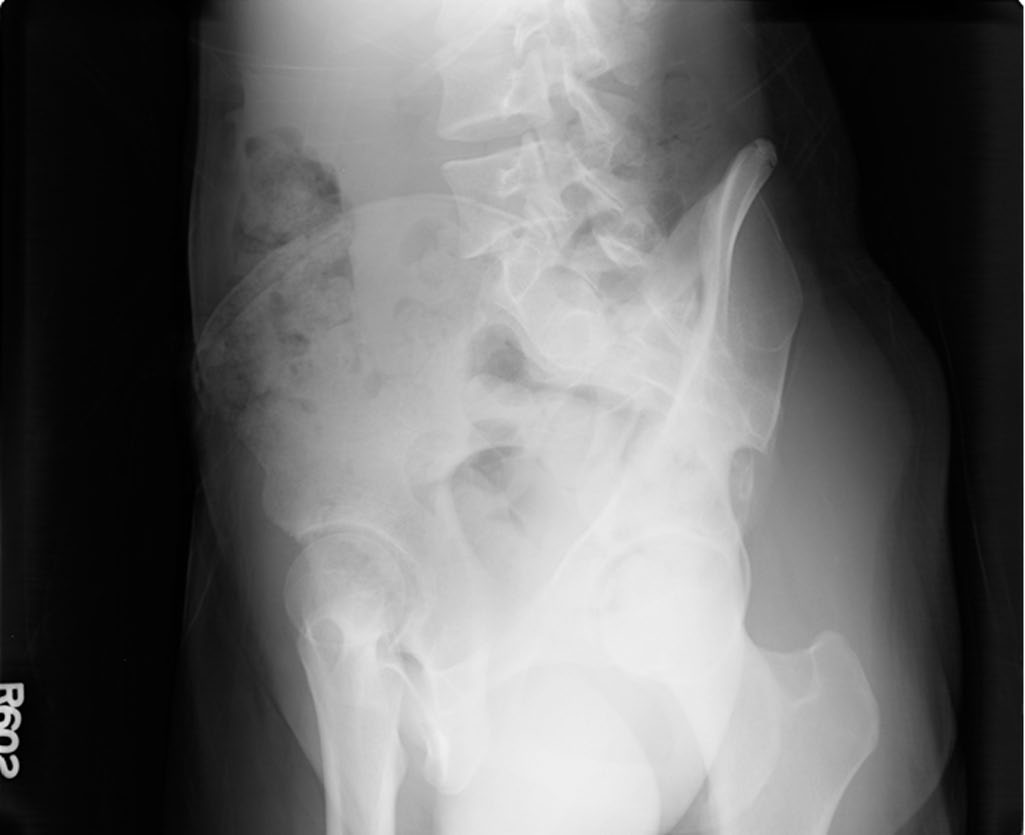
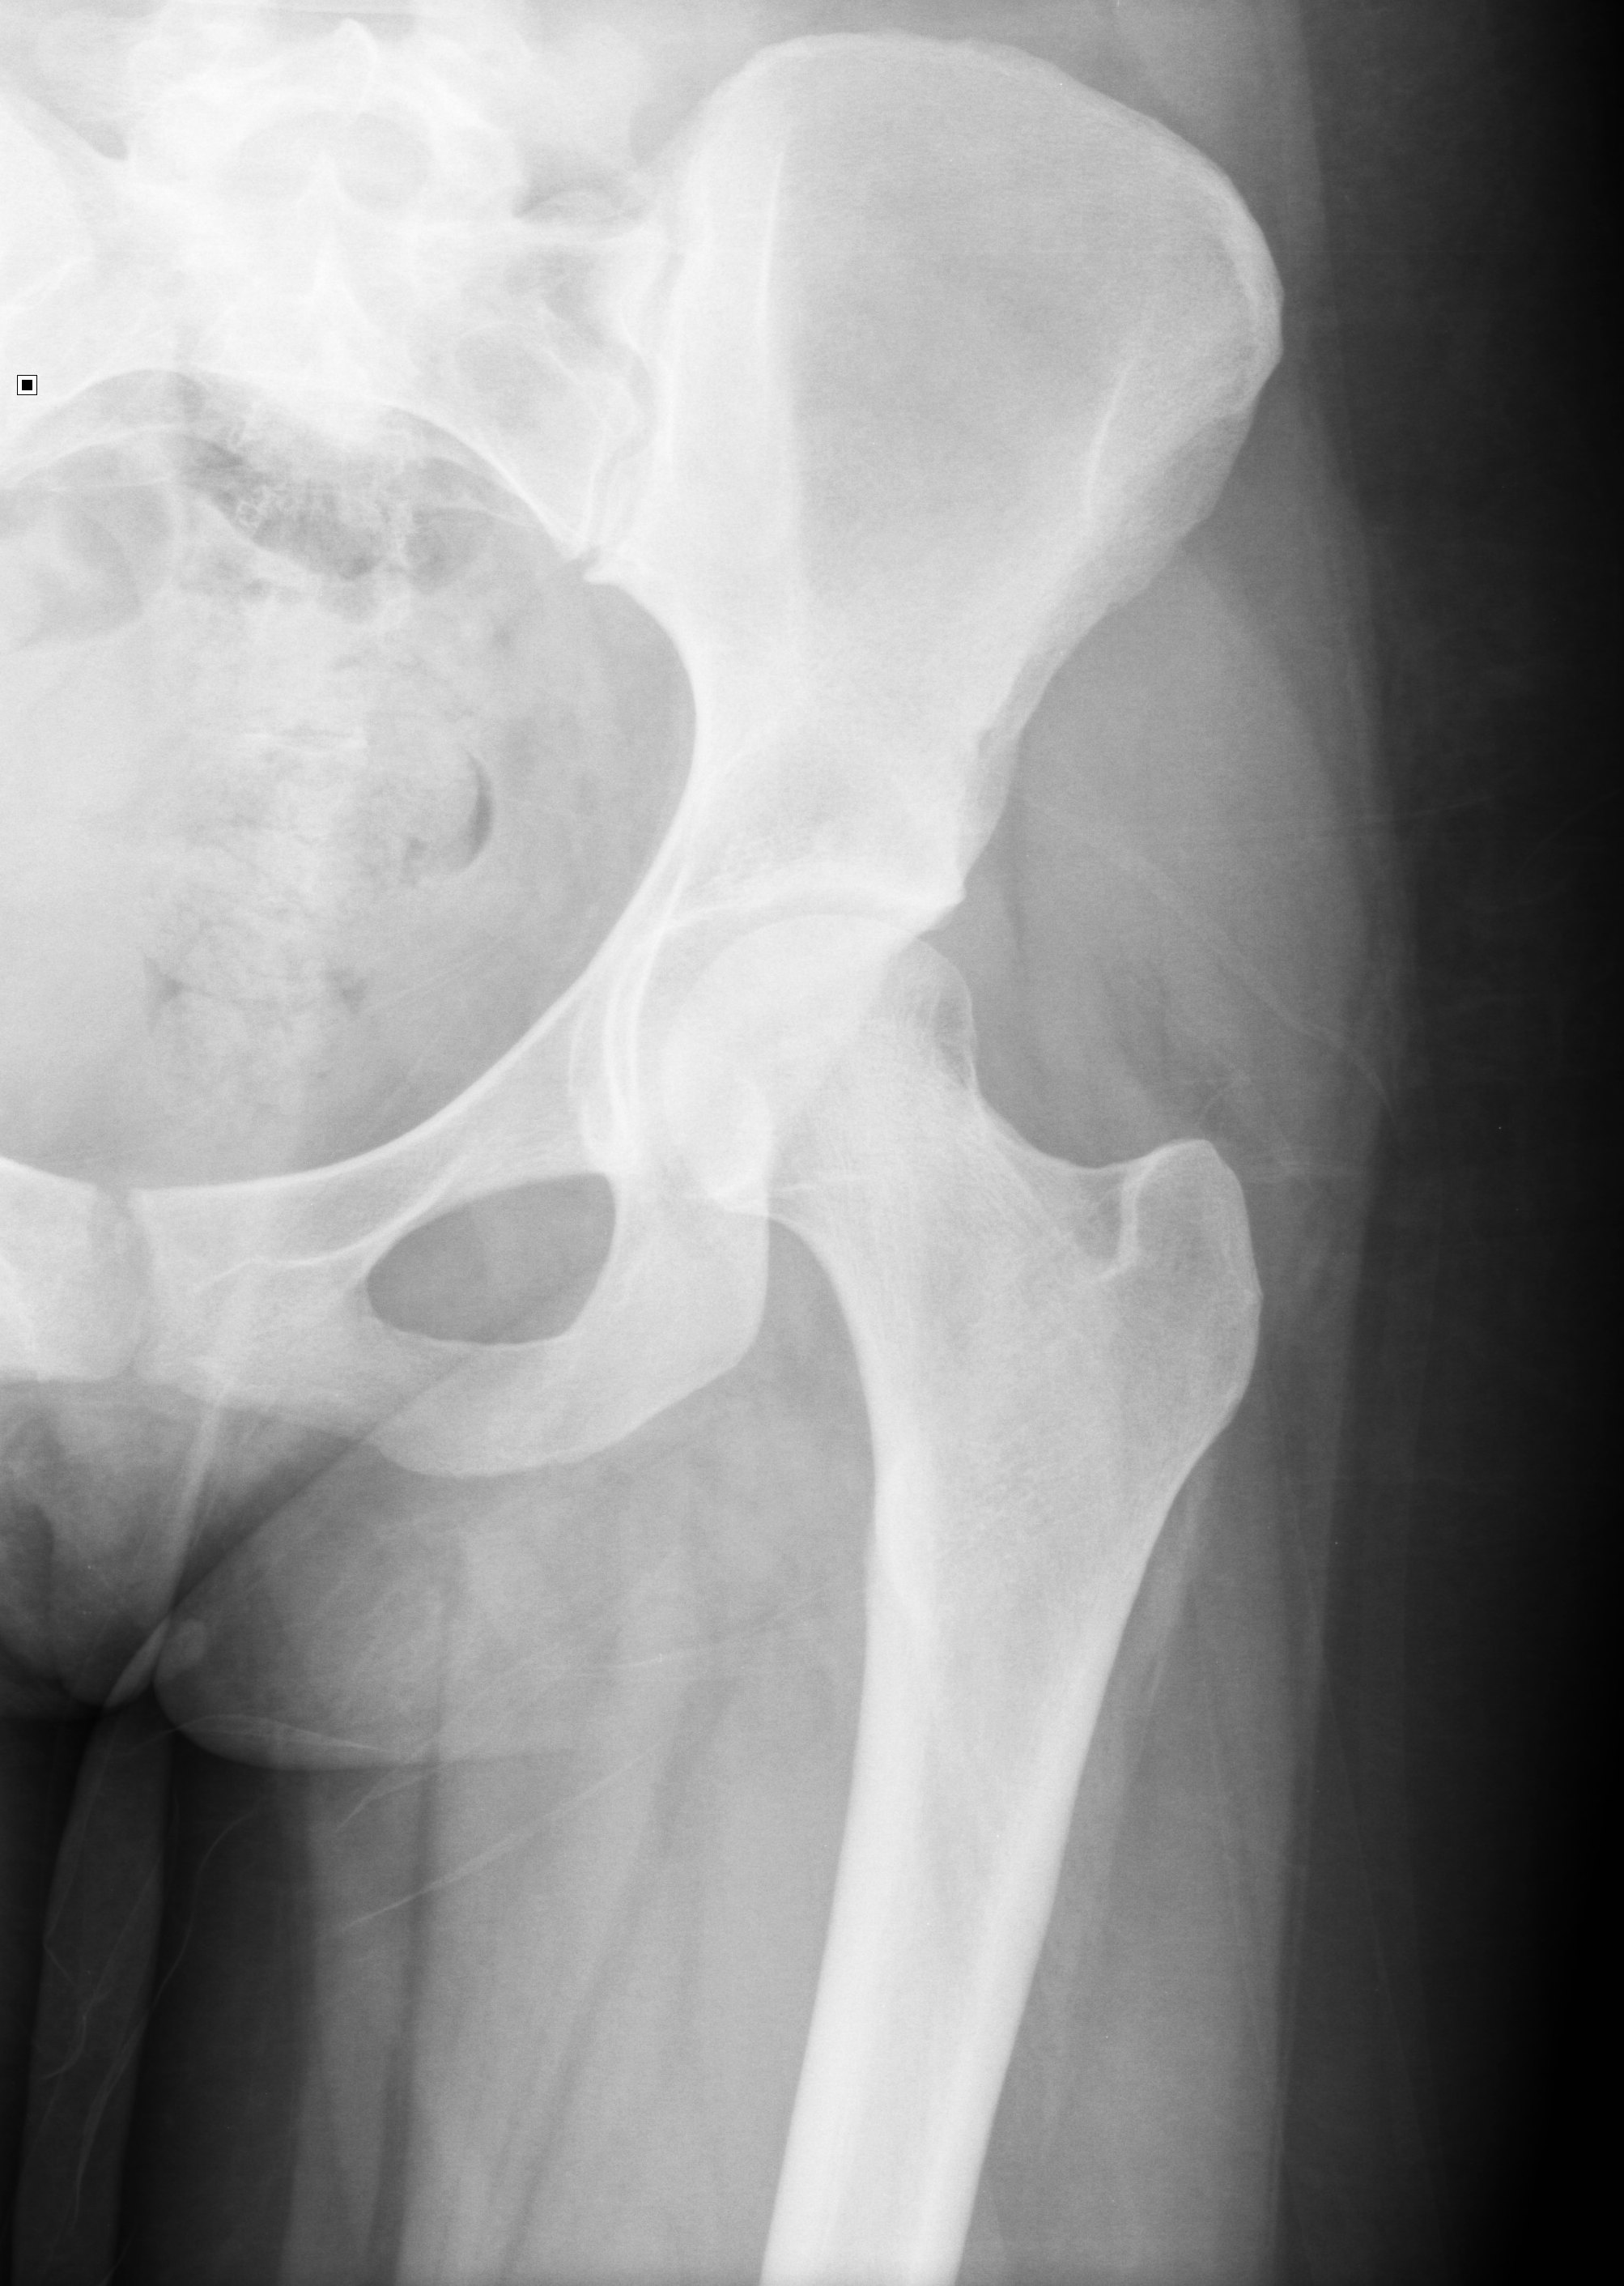
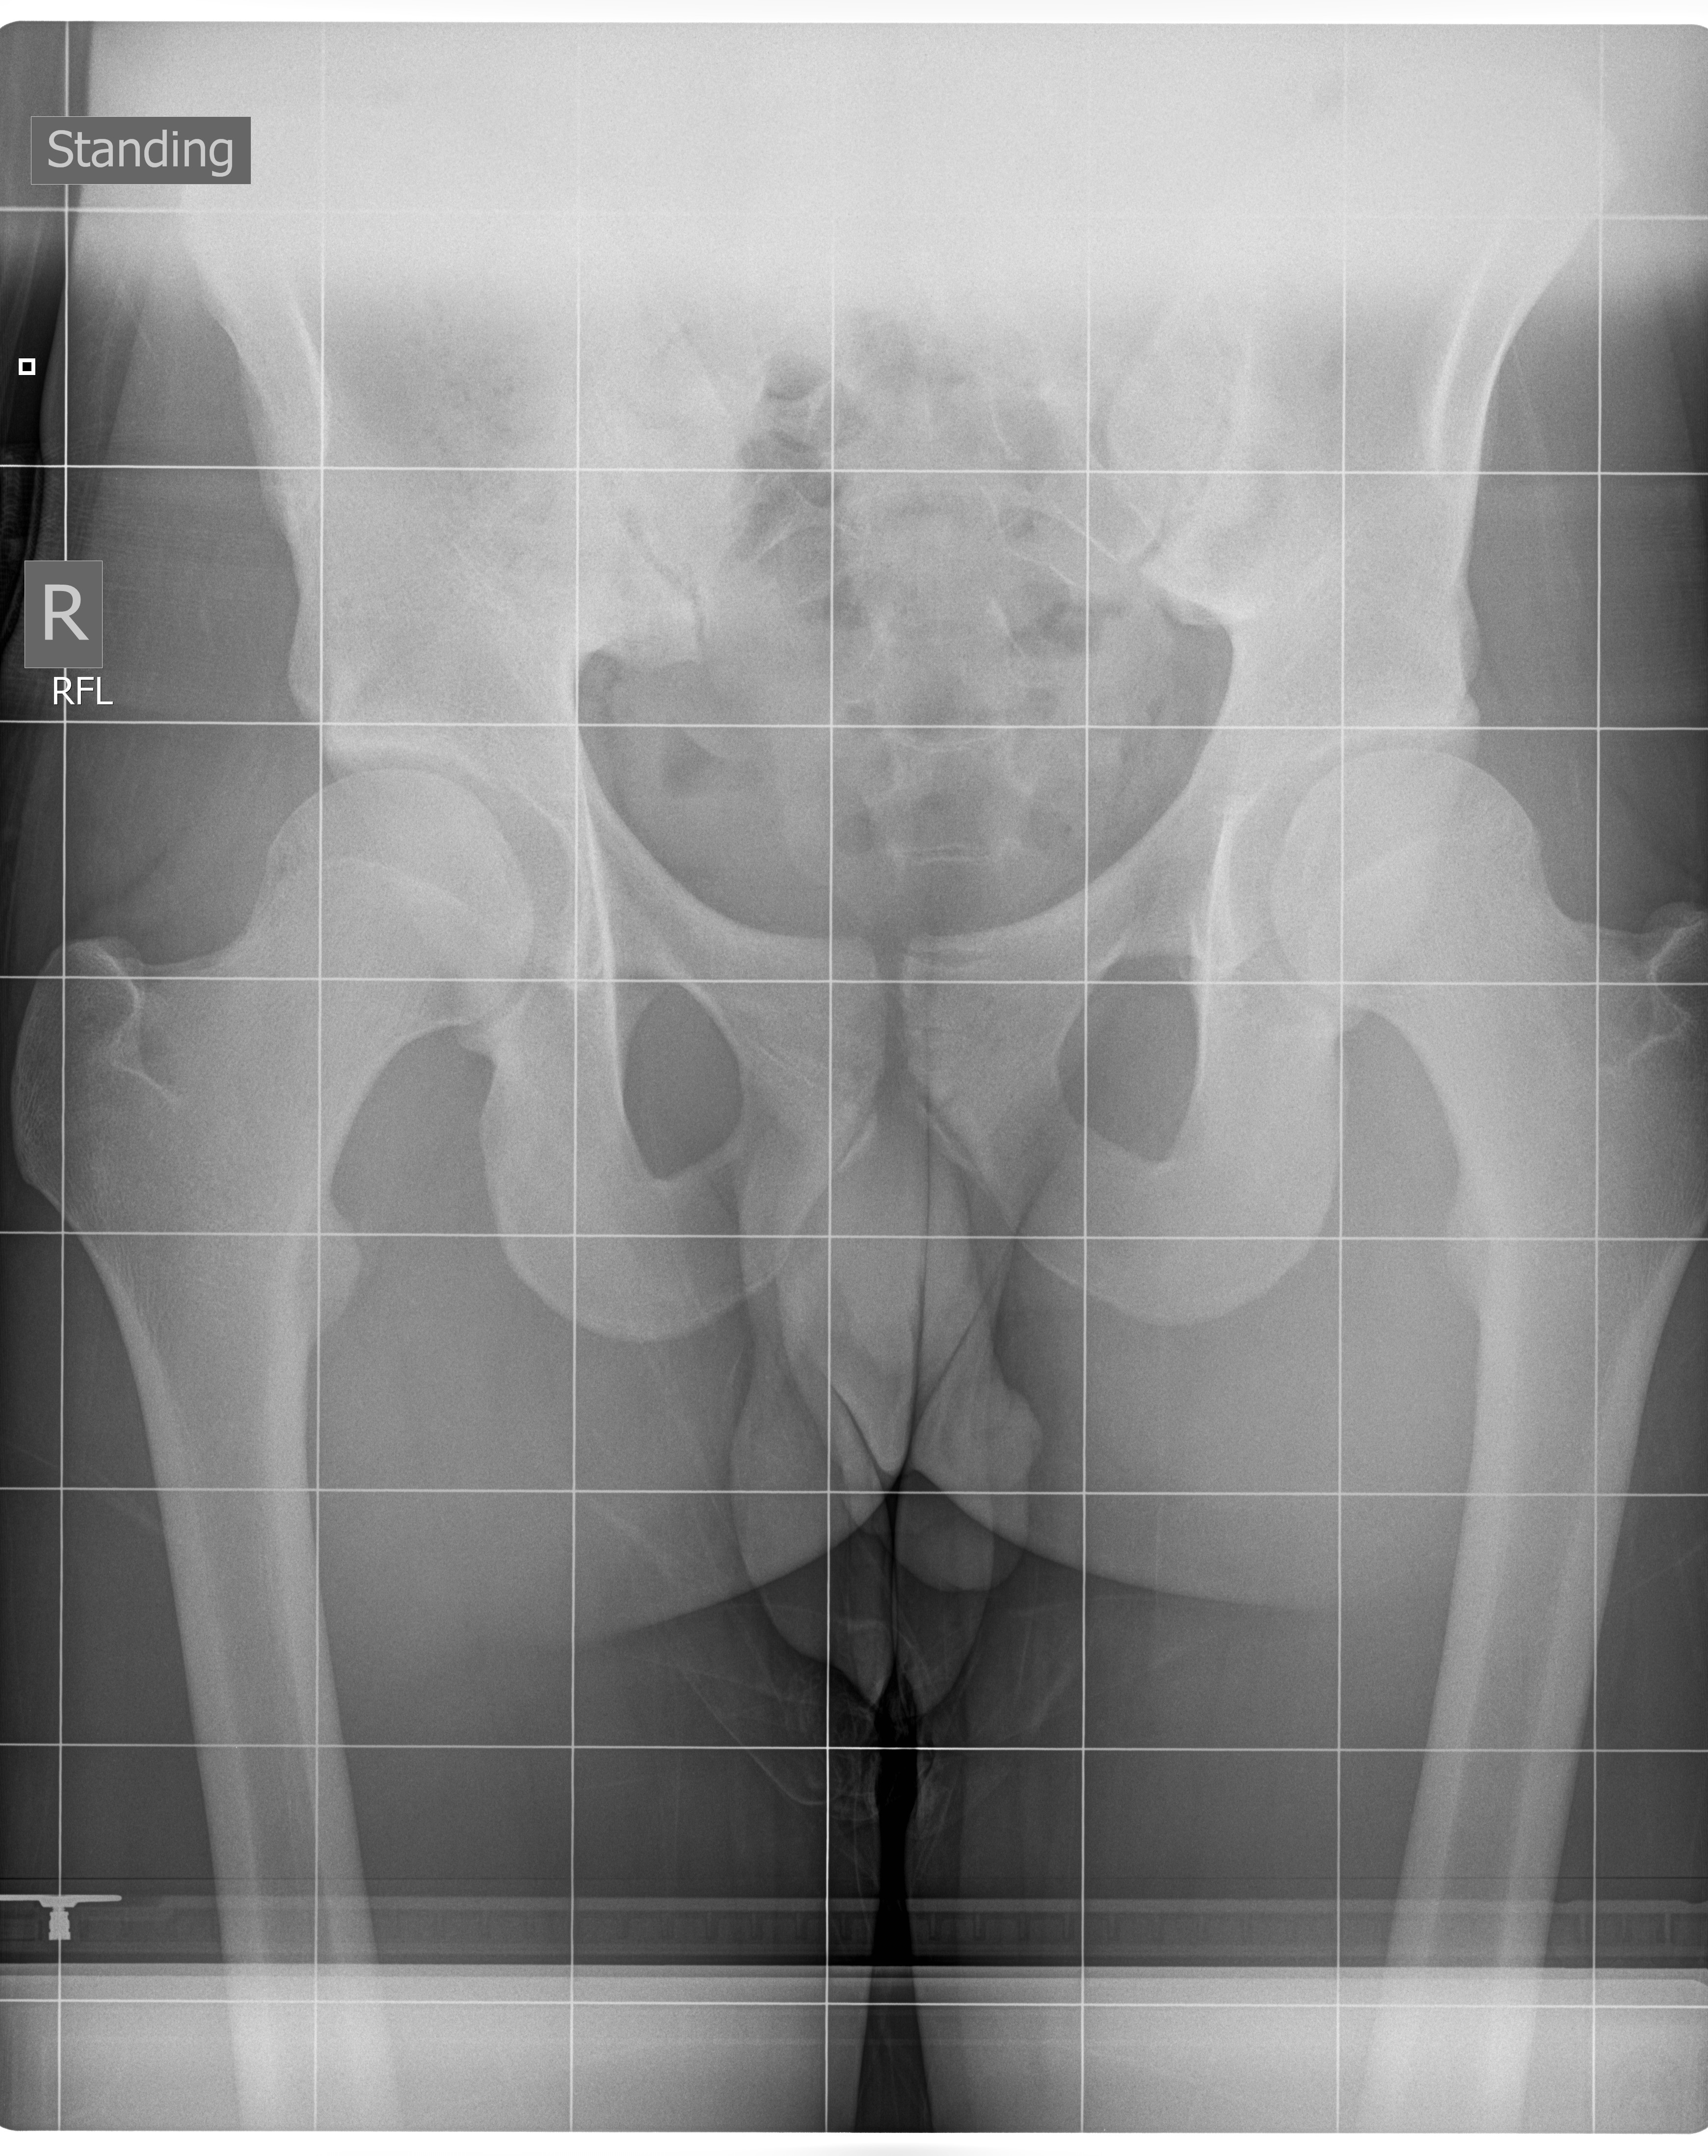
1. AP Pelvis |
14x17 CW |
Patient supine, legs fully extended and internally rotated 15E |
CR perpendicular to MSP 2" inferior to ASIS |
|
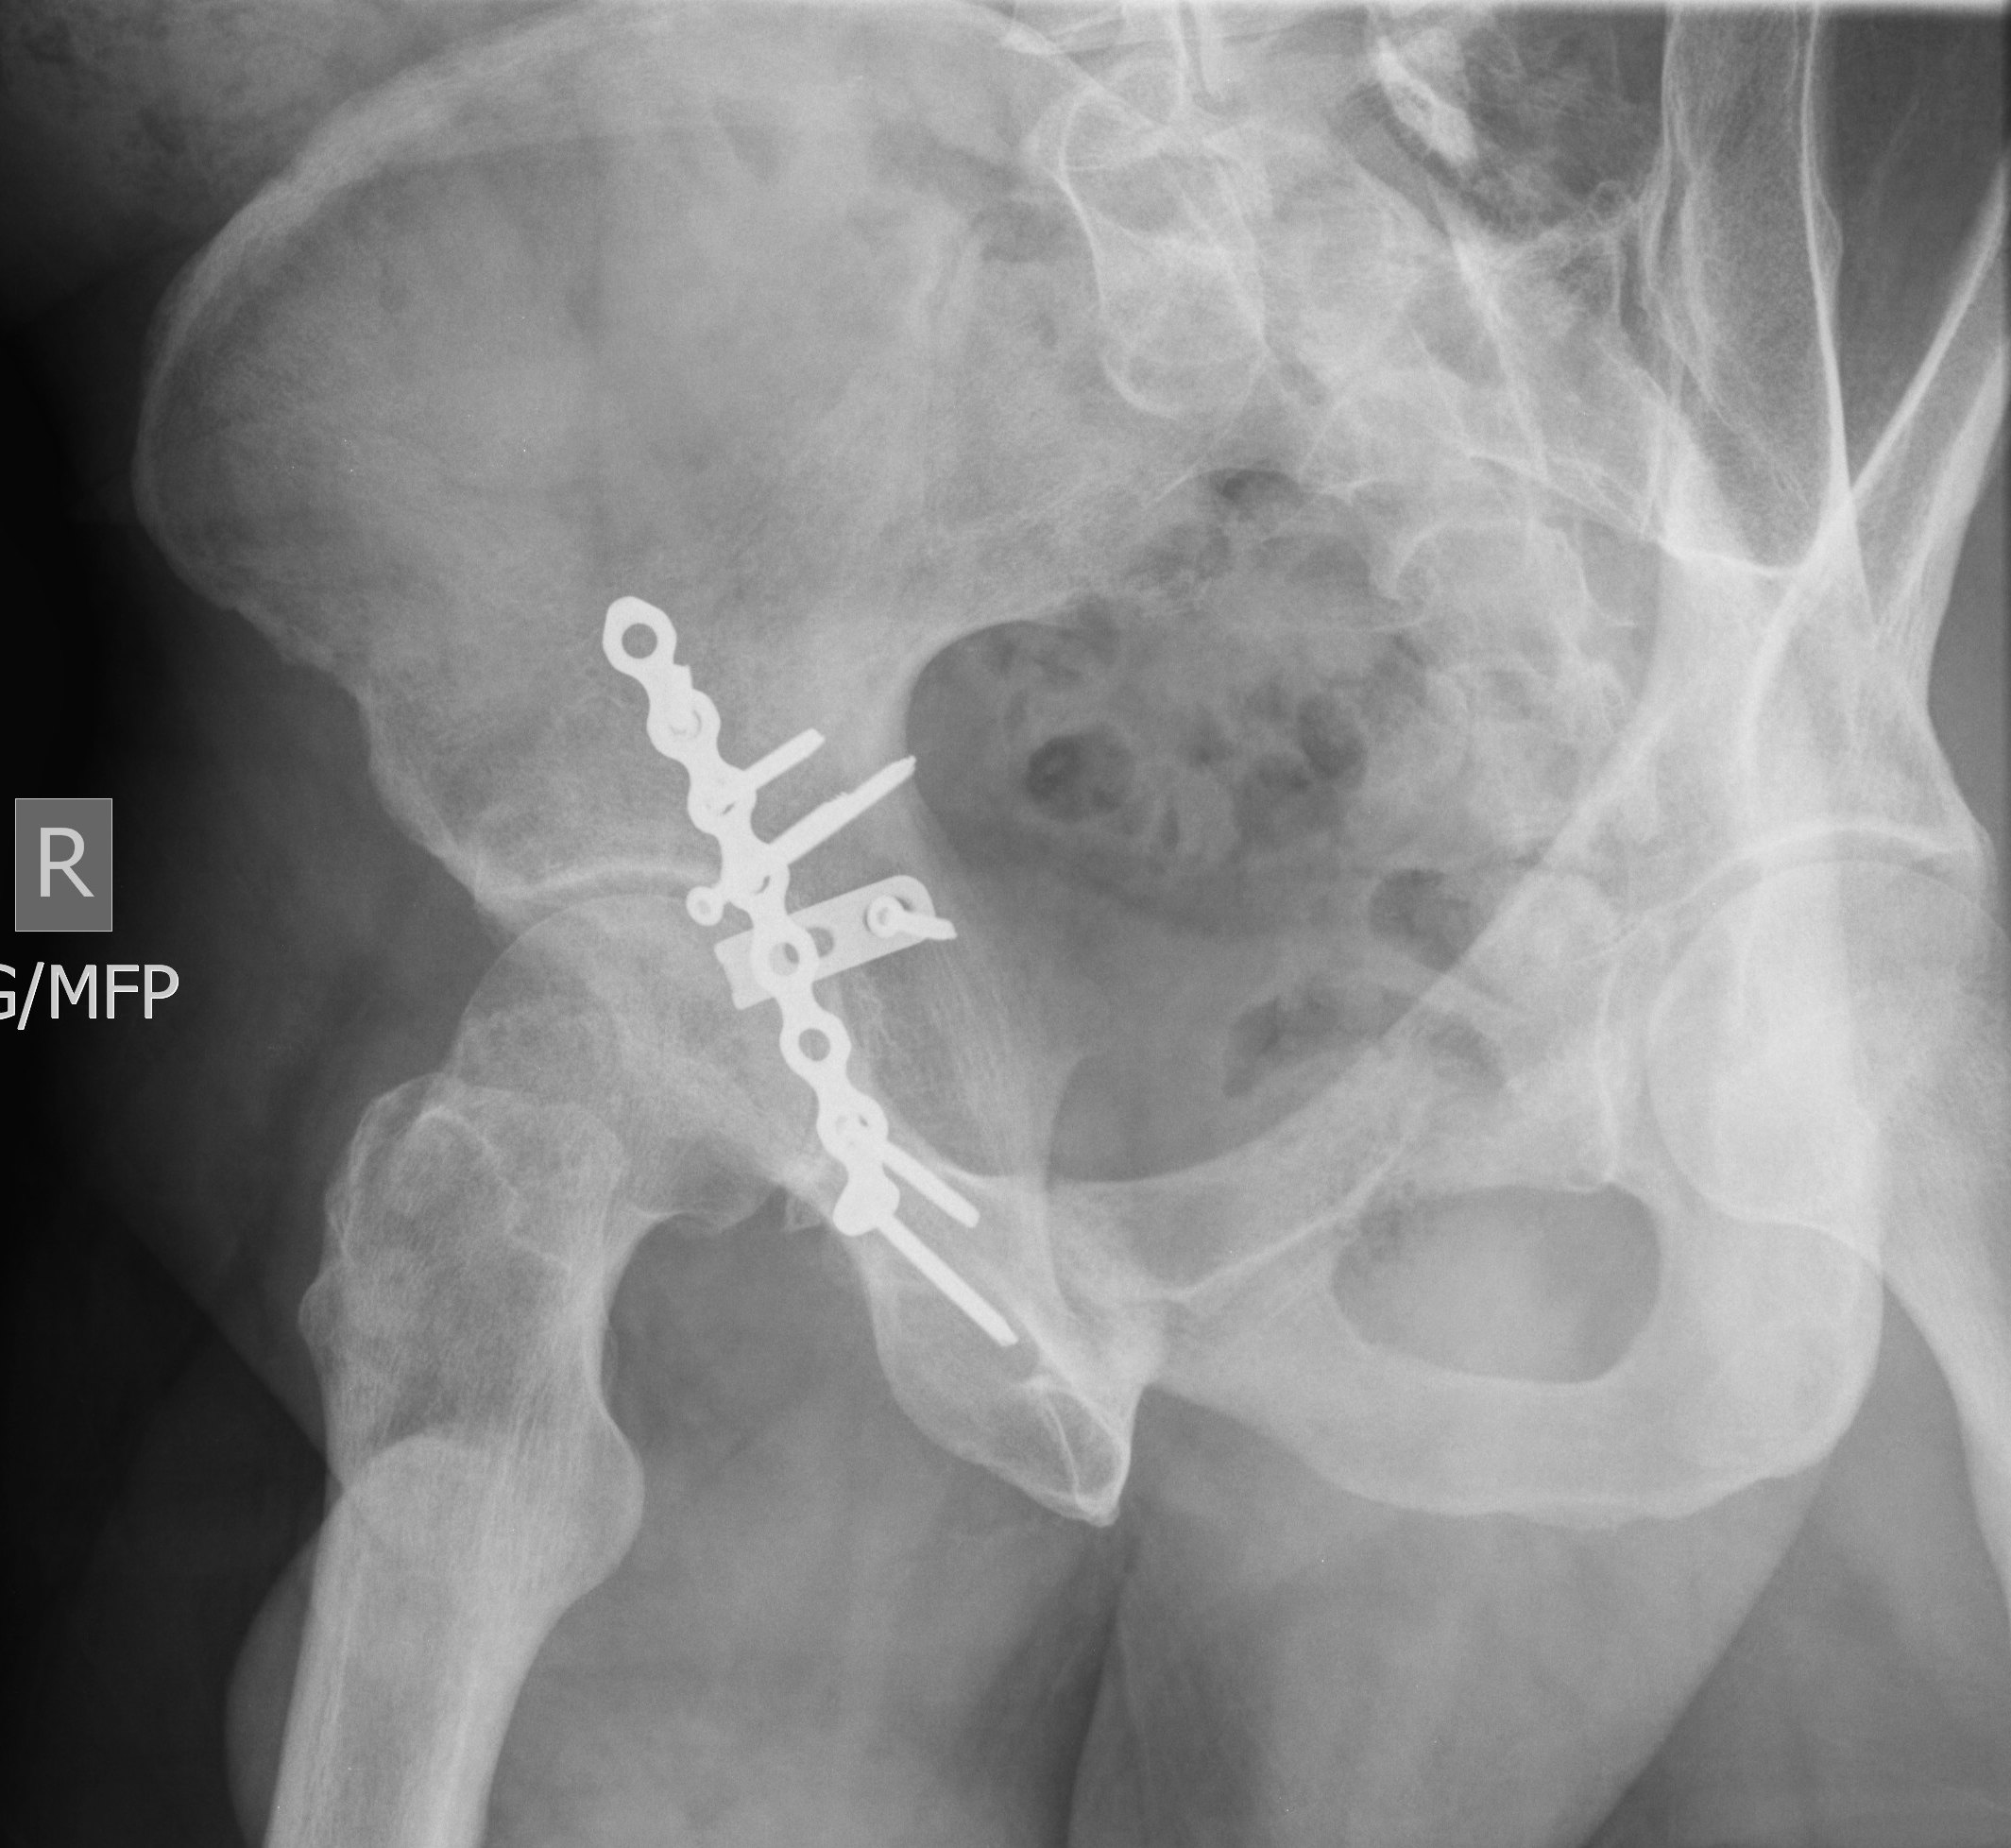
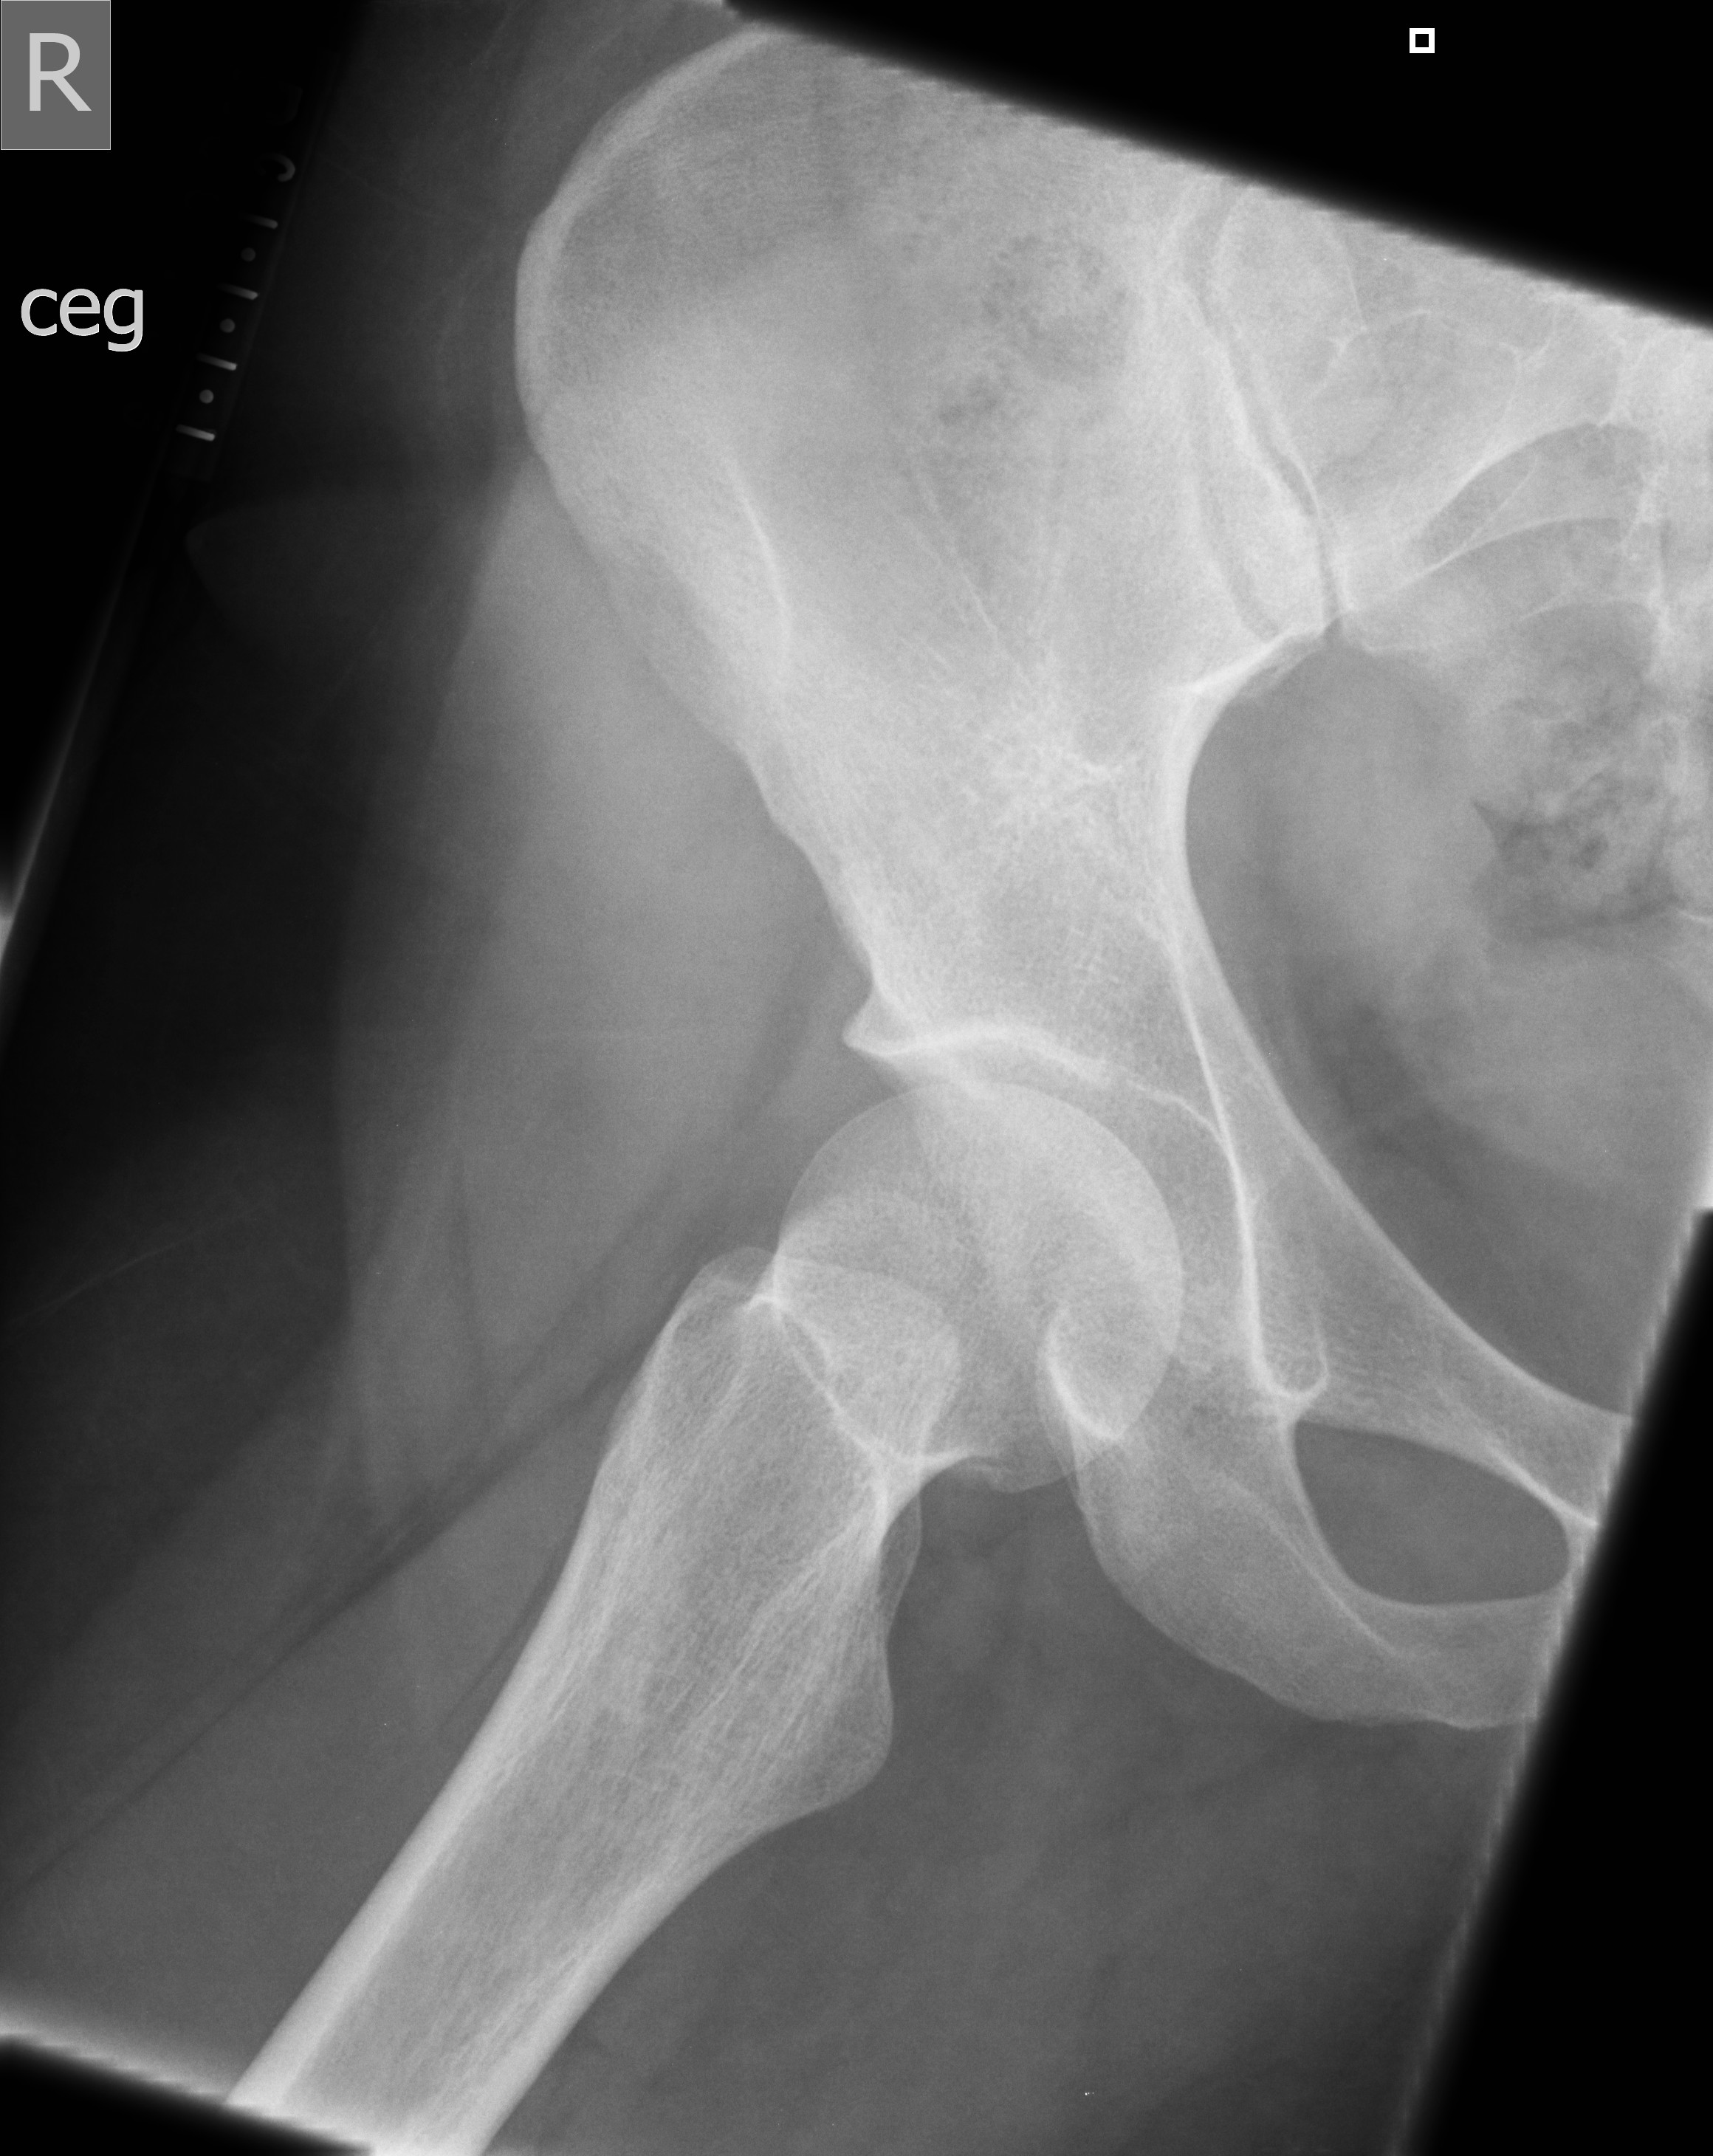
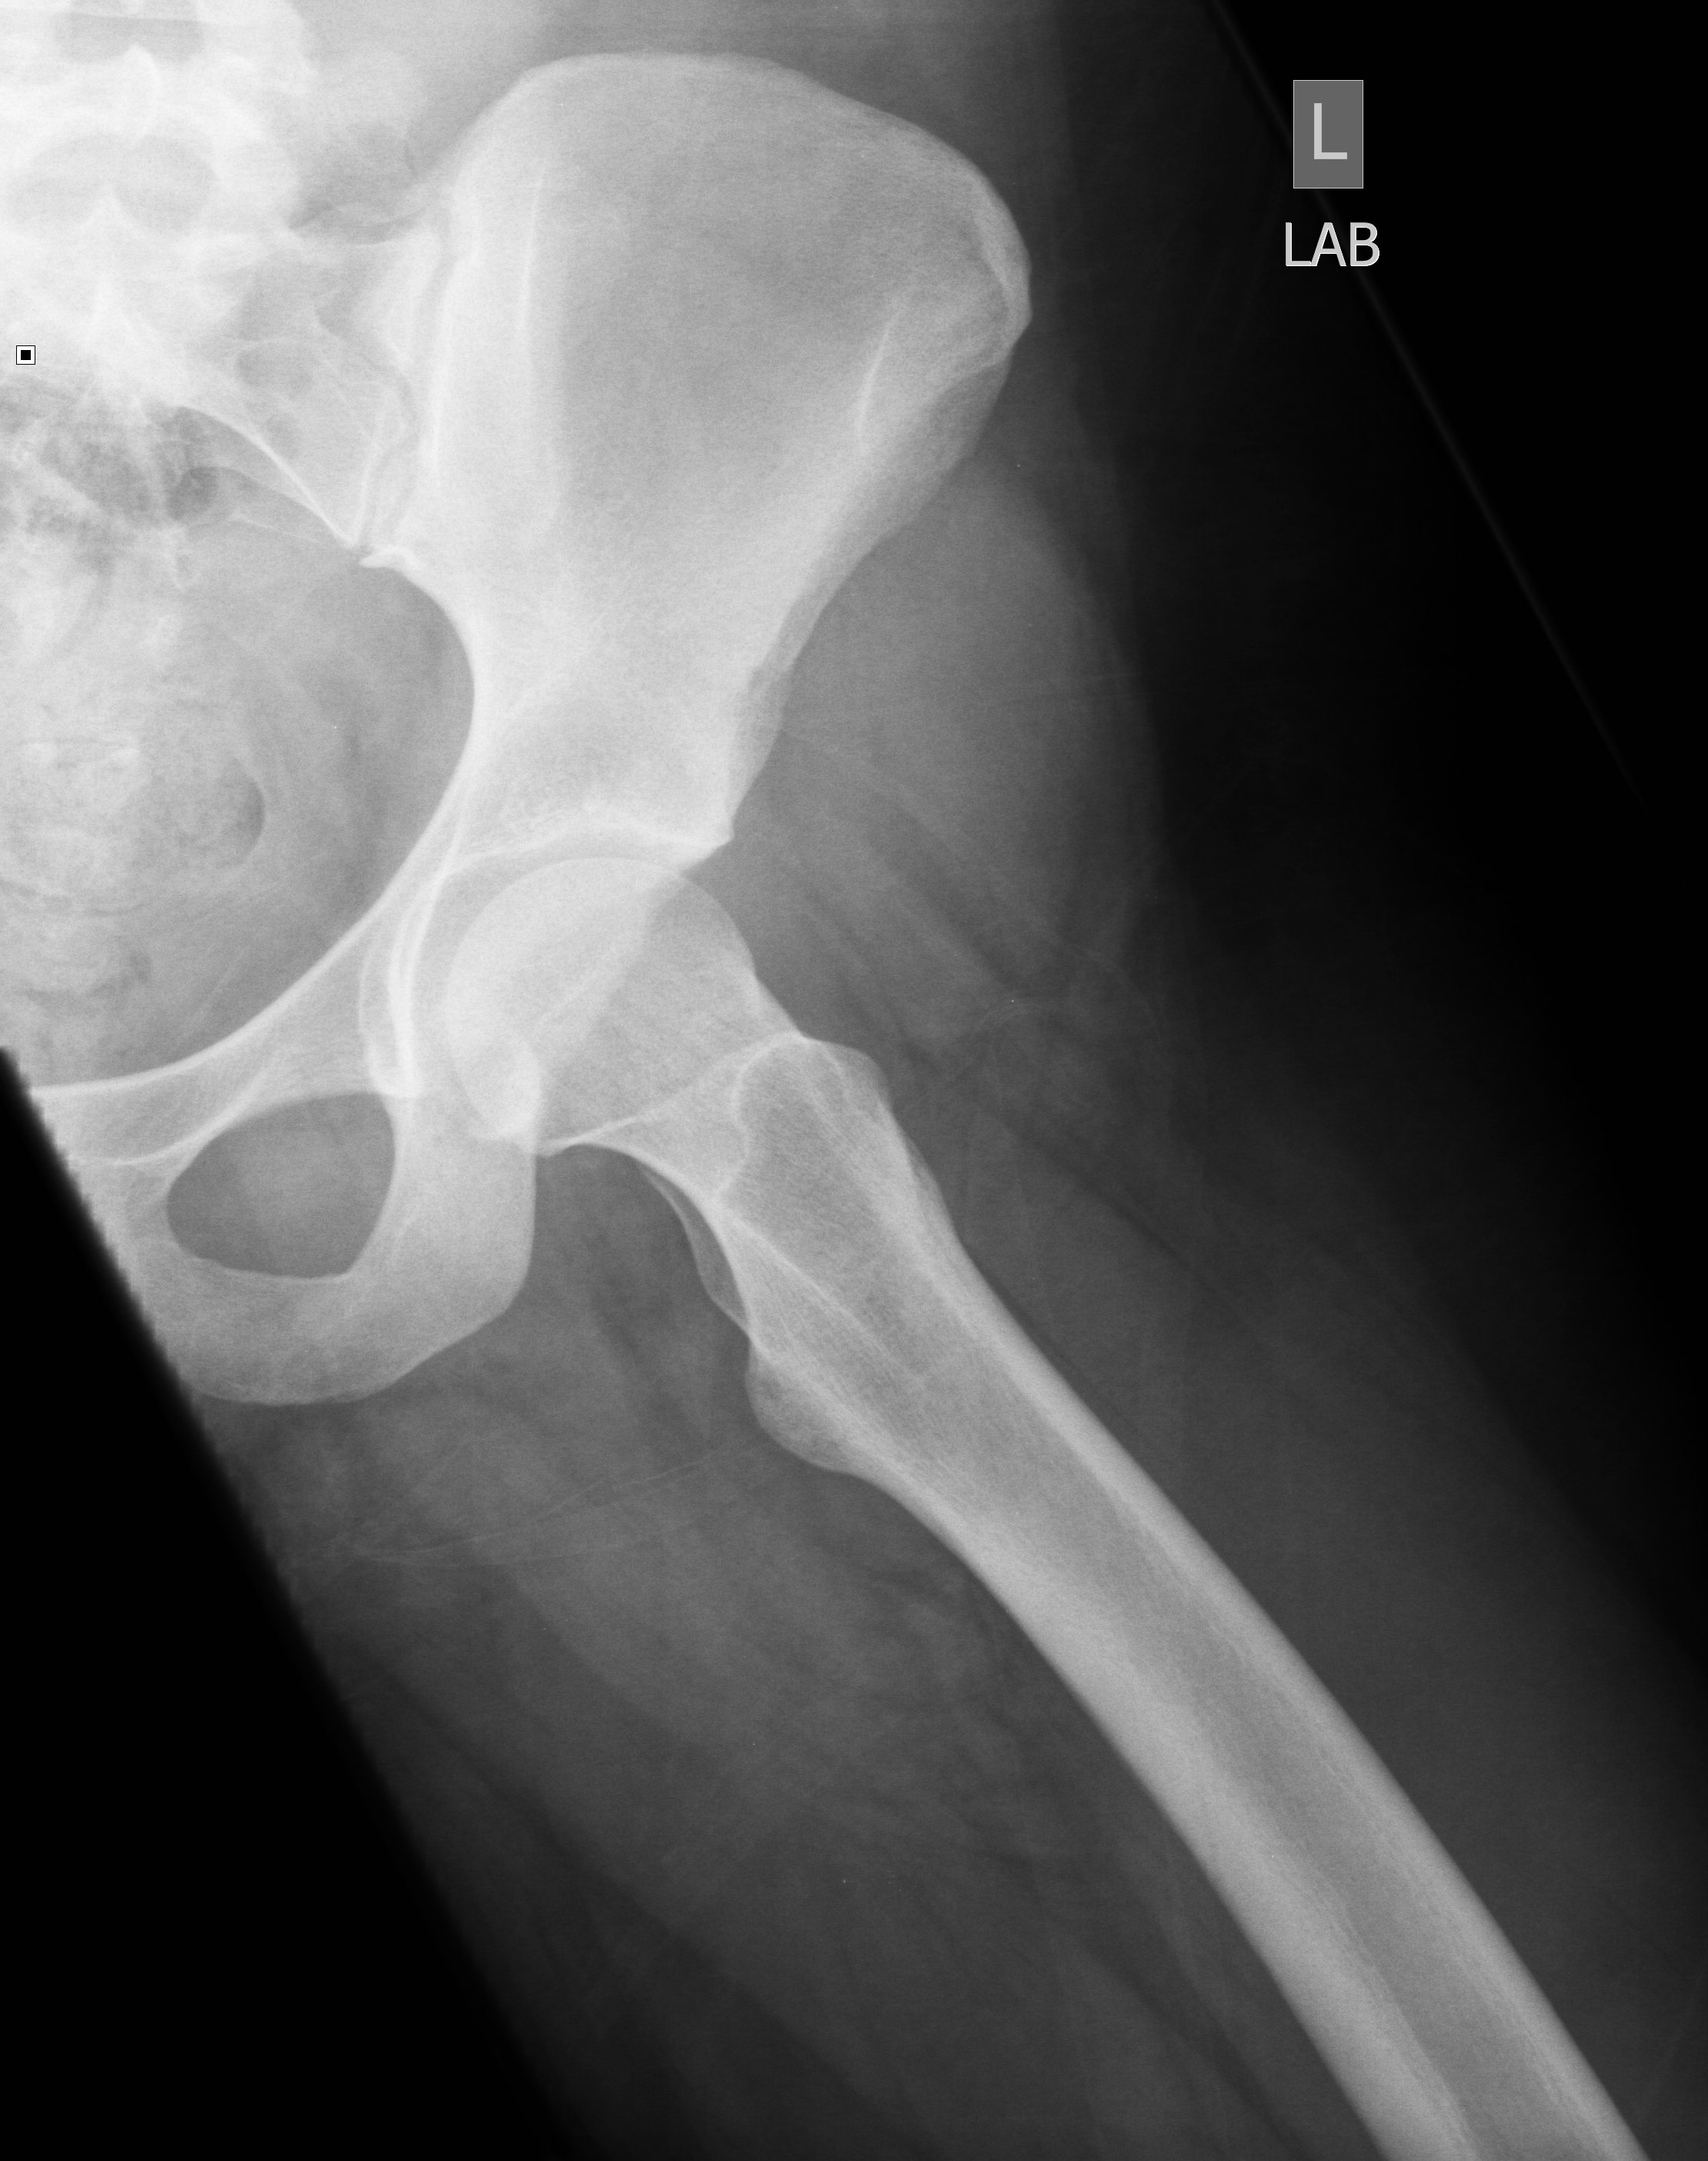
2. Frog-leg lateral of affected hip |
10x12 LW or 11x14 LW to include prothesis |
Patient supine with knee flexed and knee fully abducted. For older patients, you may oblique body slightly toward side of interest. |
CR perpendicular to femoral neck |
|
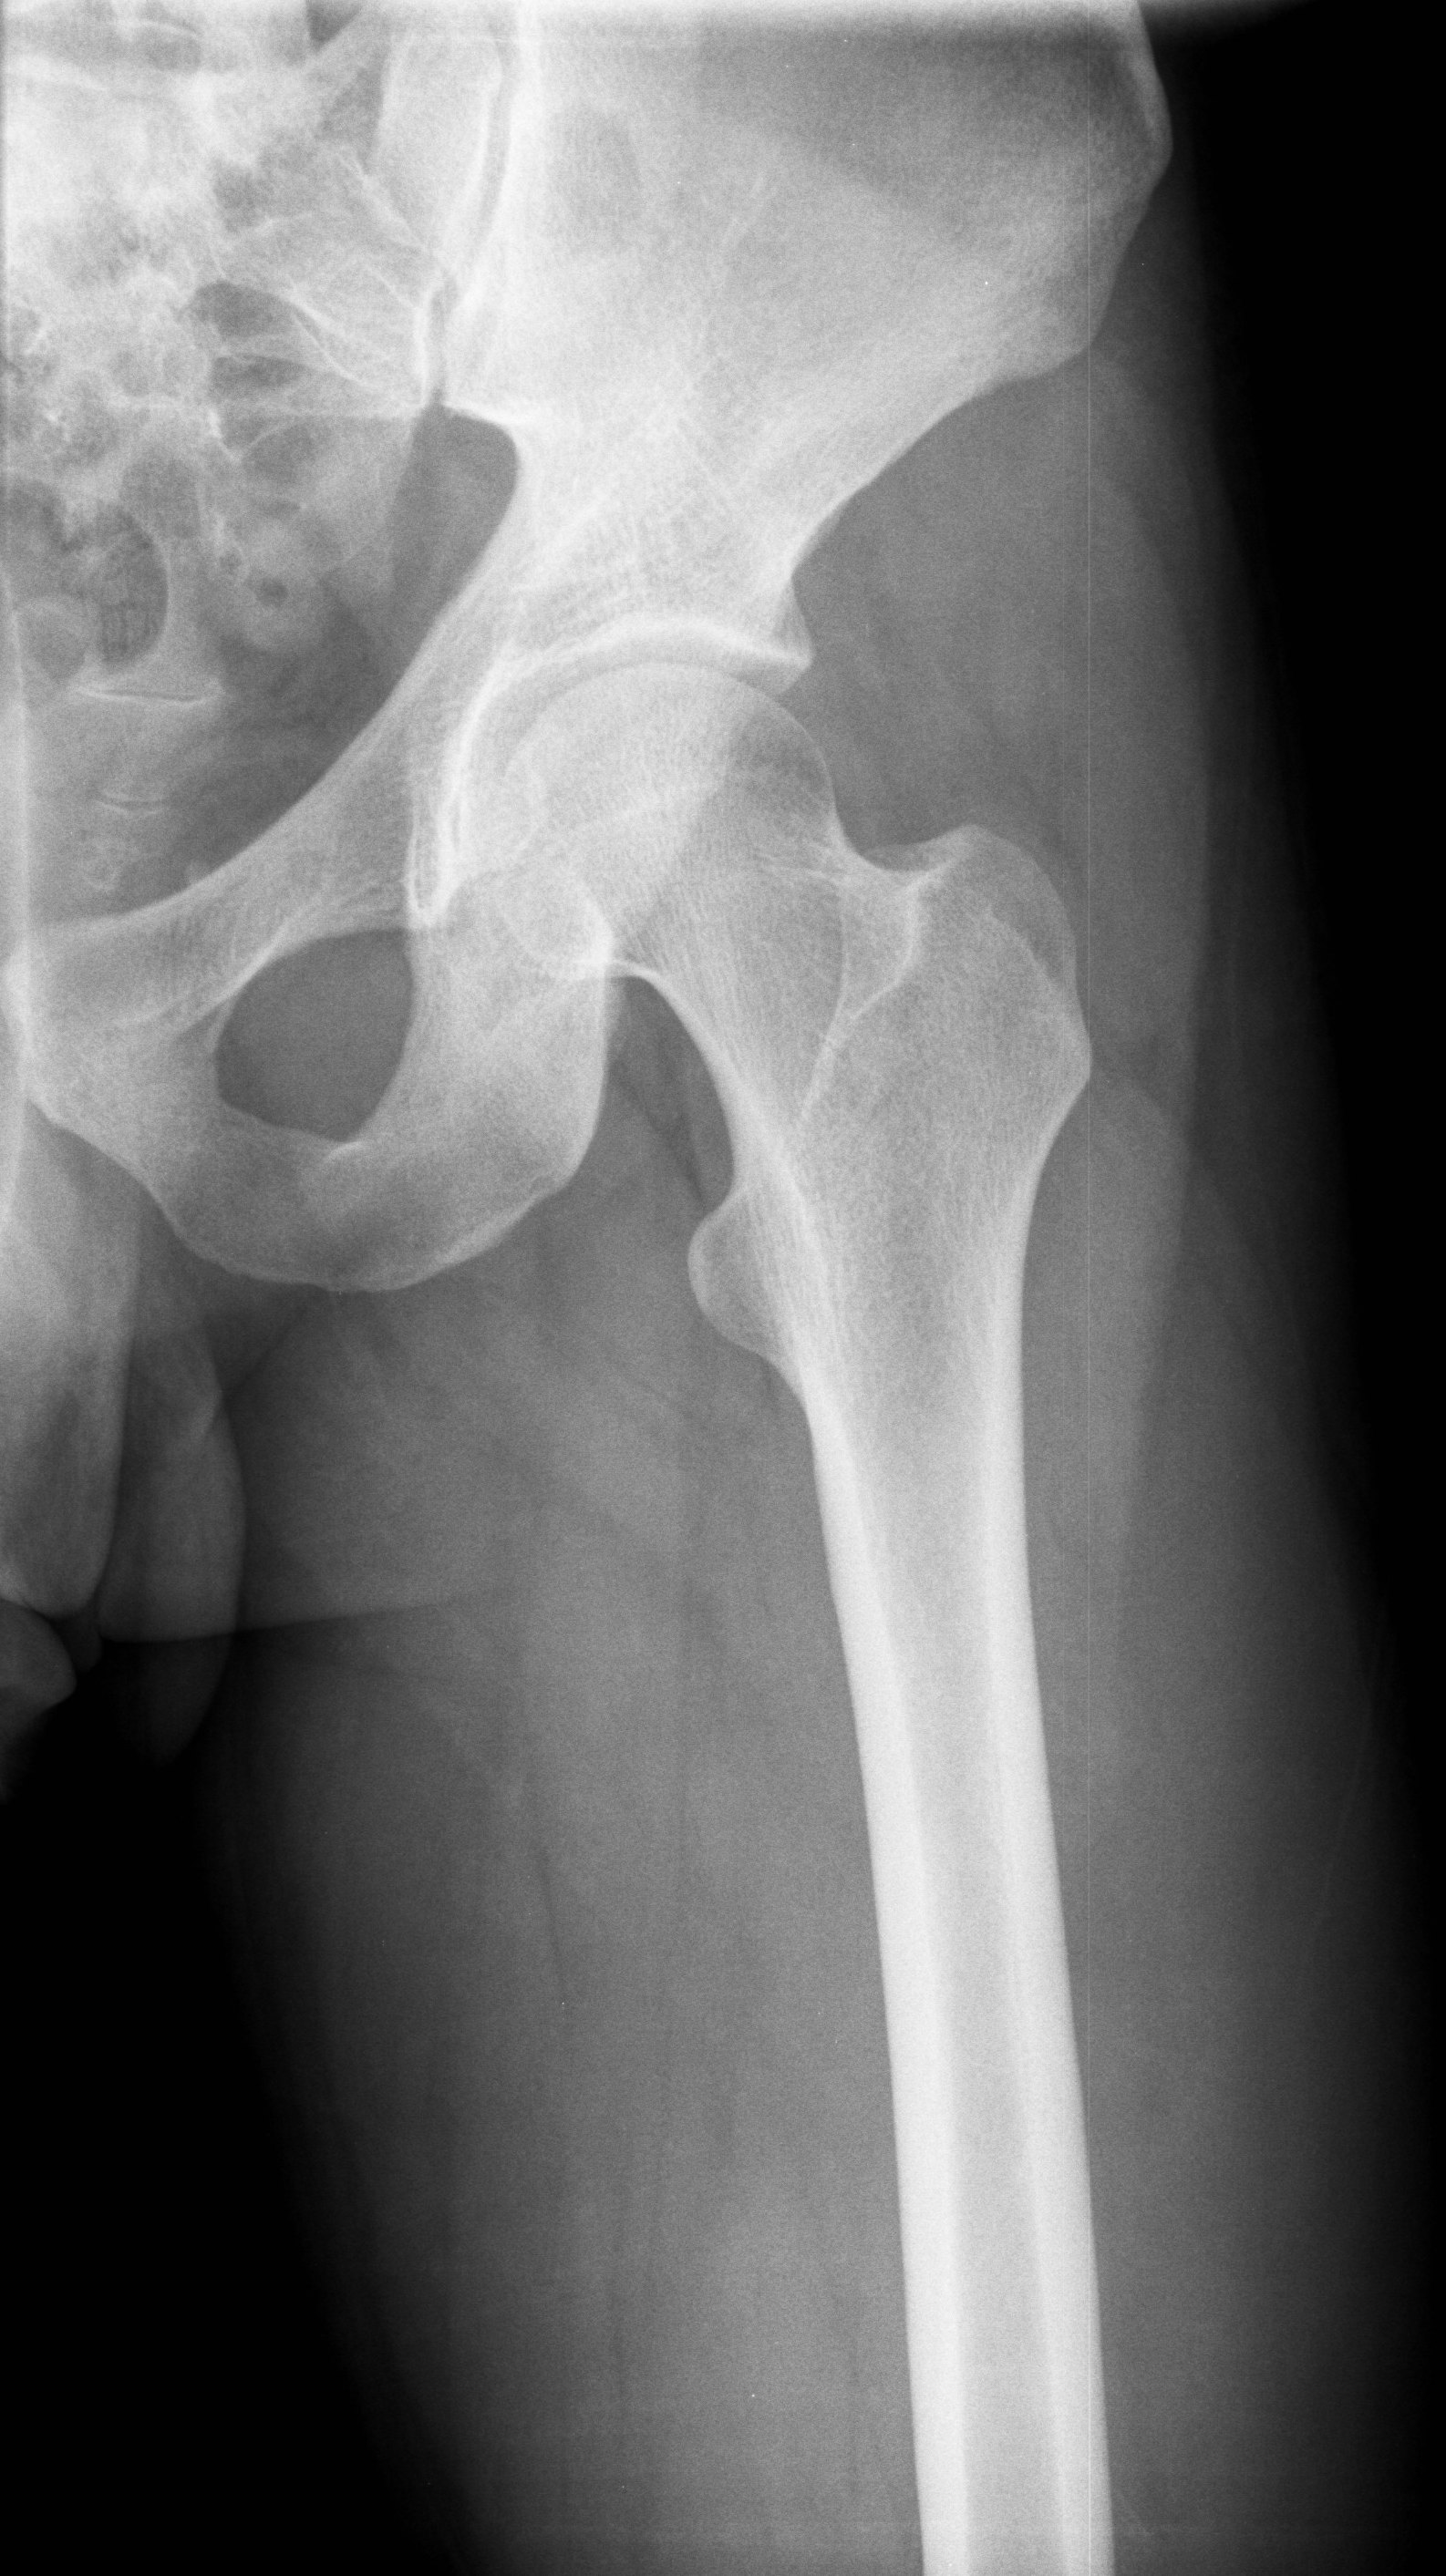
1. AP Pelvis |
14x17 CW |
Follow positioning protocol above for AP pelvis. |
Same as above AP pelvis |
|
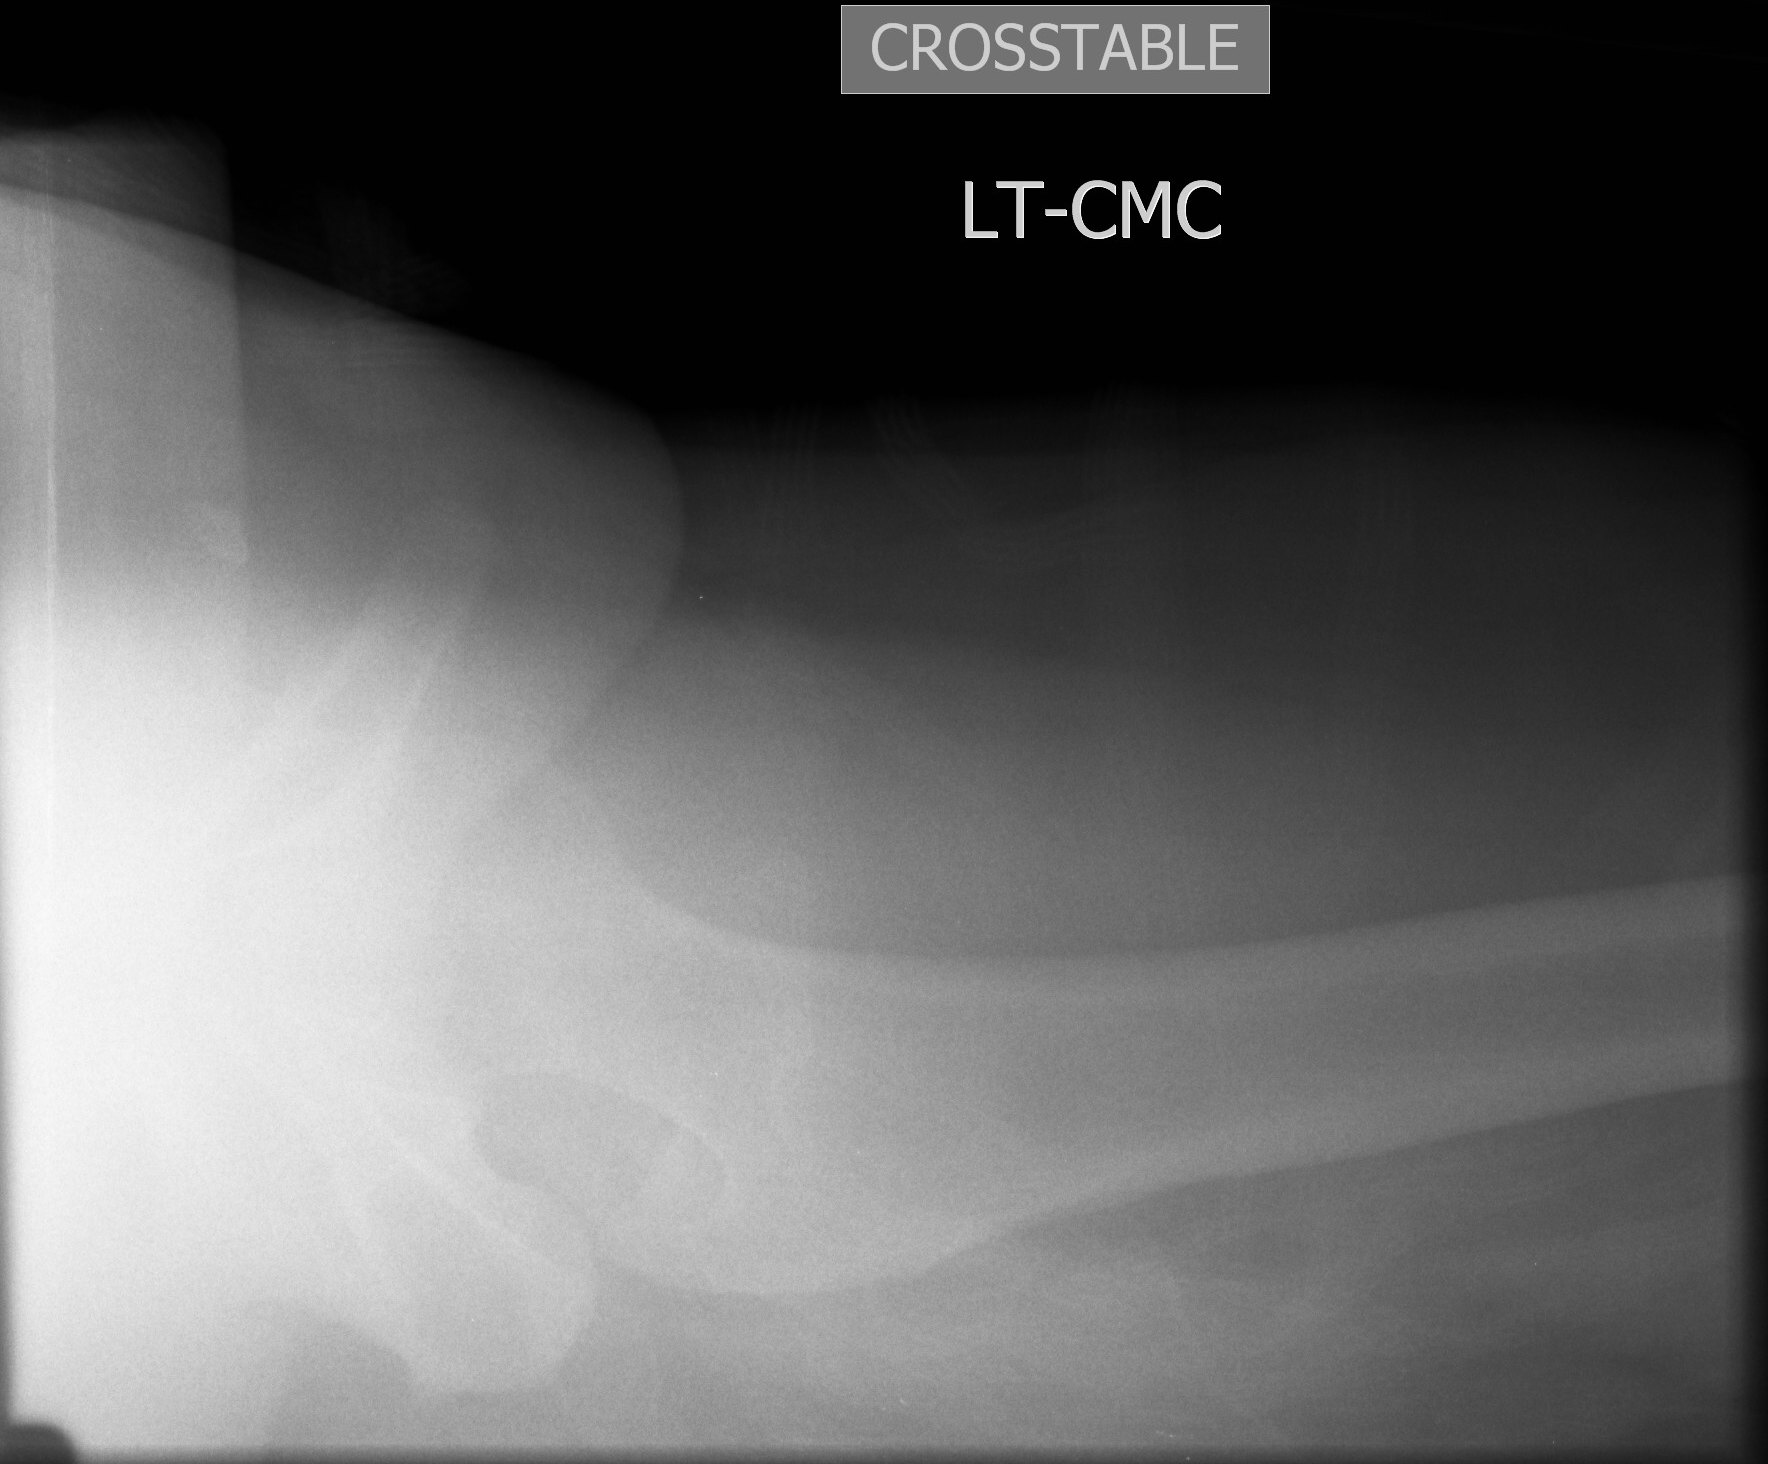
2. Translateral lateral of affected hip |
10x12 CW or 11x14 CW |
Flex and elevate unaffected leg, place cassette vertically on table lateral to affected hip. Place cassette high enough to include femoral head. |
Horizontal CR perpendicular to femoral neck |
|
1. AP Pelvis |
14x17 CW |
Follow positioning protocol above for AP pelvis. |
Same as above AP pelvis |
|
2. AP axial |
10x12 LW |
Patient in AP position. |
CR angled 20E cephalic to mid sacrum |
|
ACETABULUM (JUDET VIEWS) - include iliac crest to ischial tuberosities, collimate to affected side only |
|||
|
1. AP Pelvis - if not taken previously for current injury |
14x17 CW |
Follow filming protocol for AP pelvis above |
|
|
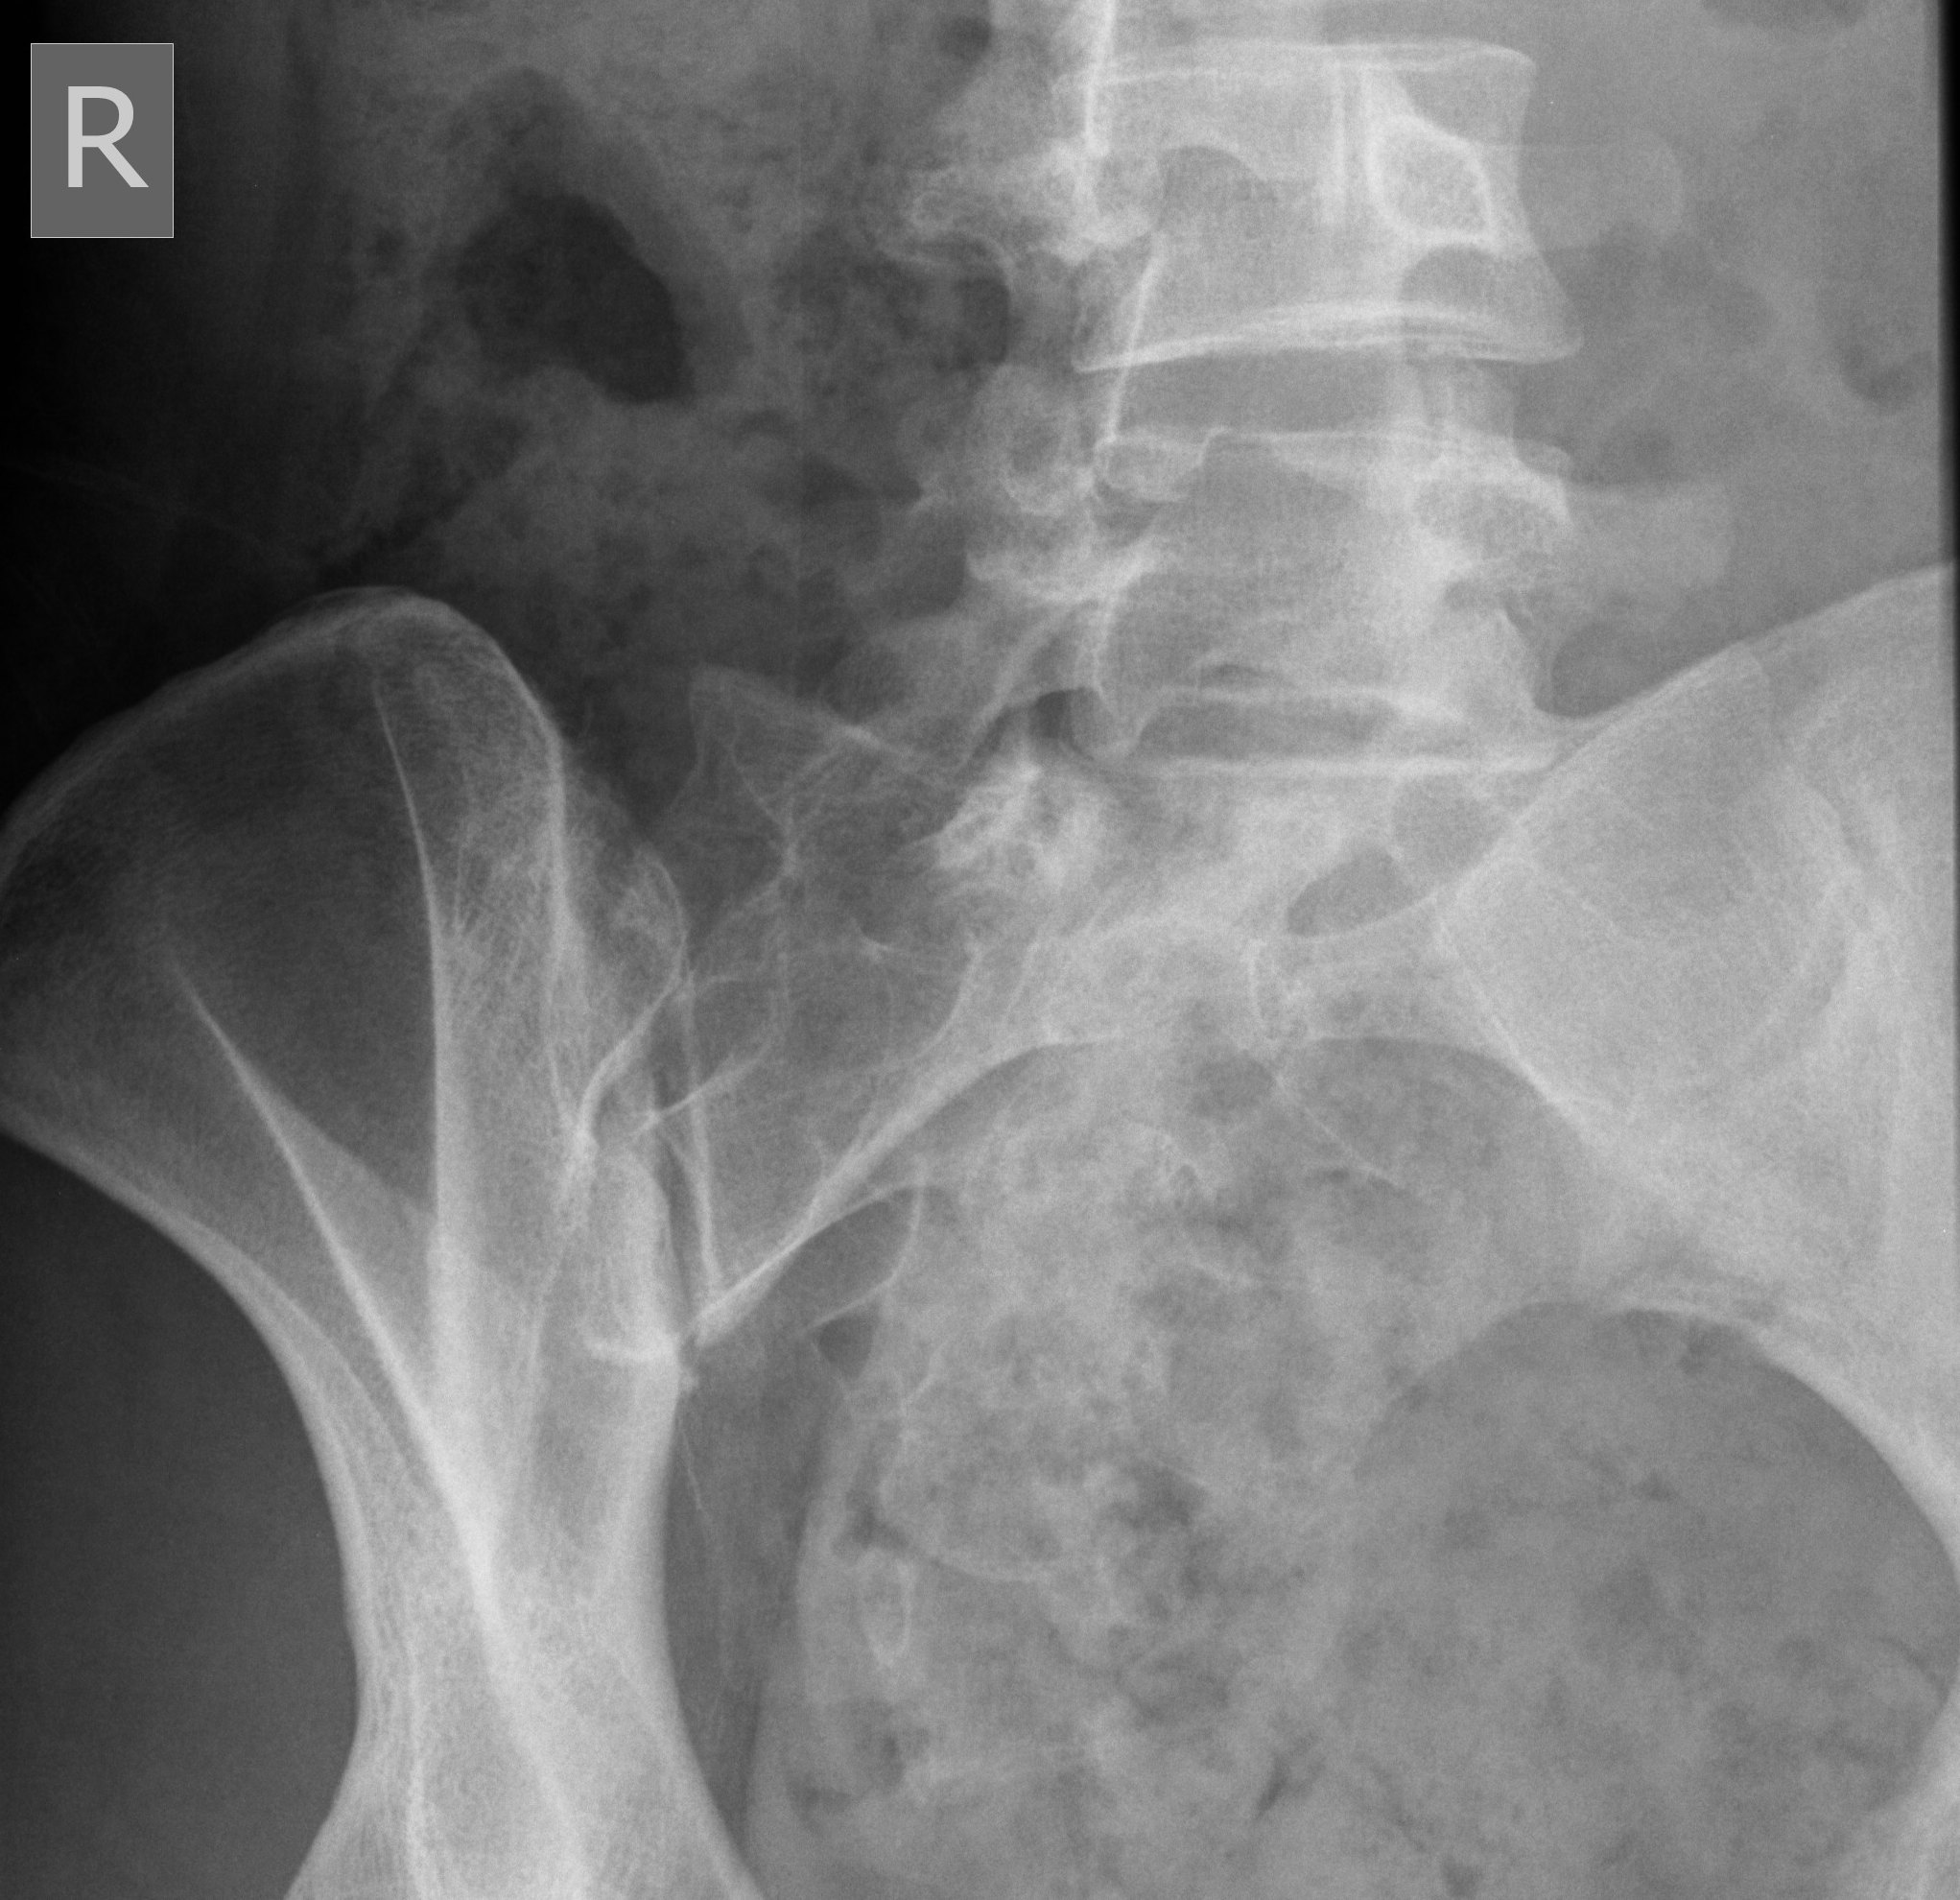
2. Right Posterior Oblique |
11x14 LW |
Rotate body into 45E RPO, include iliac crest and ishial tuberosities on film |
CR perpendicular to affected hip joint |
|
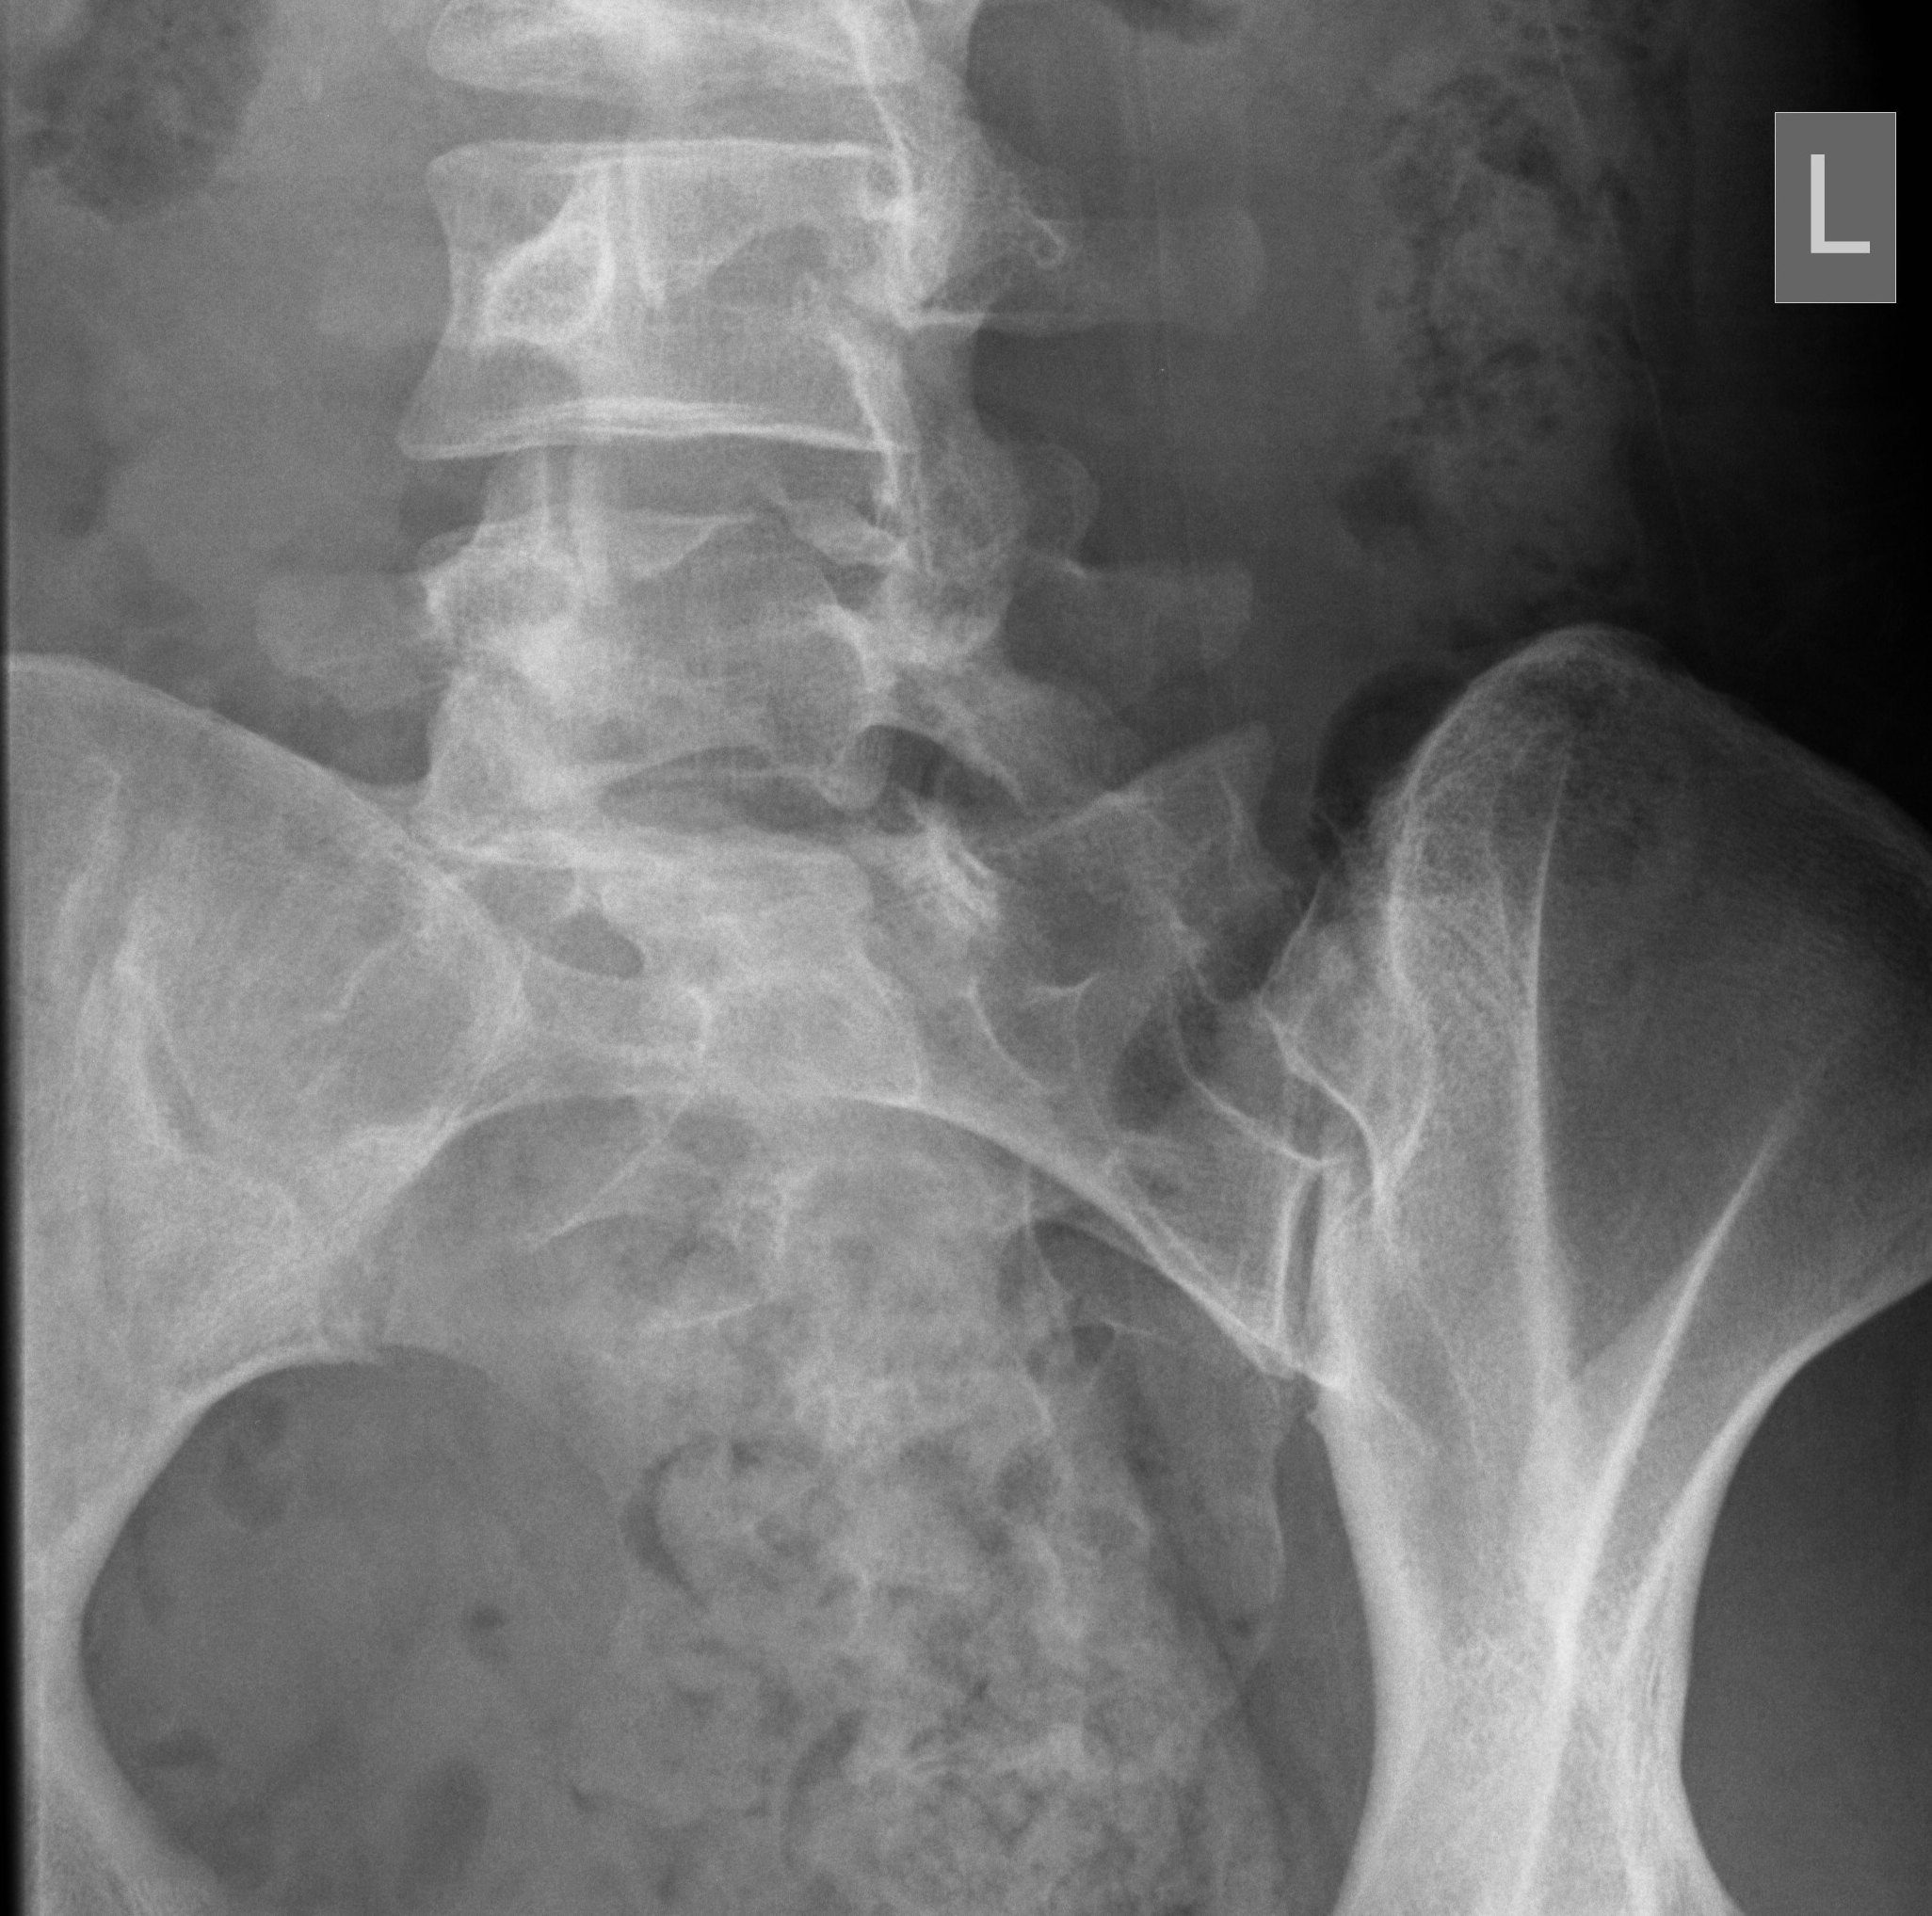
3. Left Posterior Oblique (LPO) |
11x14 LW |
Rotate body into 45E LPO, include iliac crest and ishial tuberosities on film |
CR perpendicular to affected hip joint |
|
PELVIS - include Inlet/Outlet views only if requested |
|||
|
1. AP Pelvis |
14X17 LW |
Follow AP pelvis protocol above |
|
|
2. AP axial outlet view |
14x17 LW |
Patient supine in AP pelvis position, include iliac crest and ischial tuberosities on film |
Male: CR angled 20E-30E cephalic to 2 cm superior to symphysis pubis Female: CR angled 30E to 45E cephalic |
|
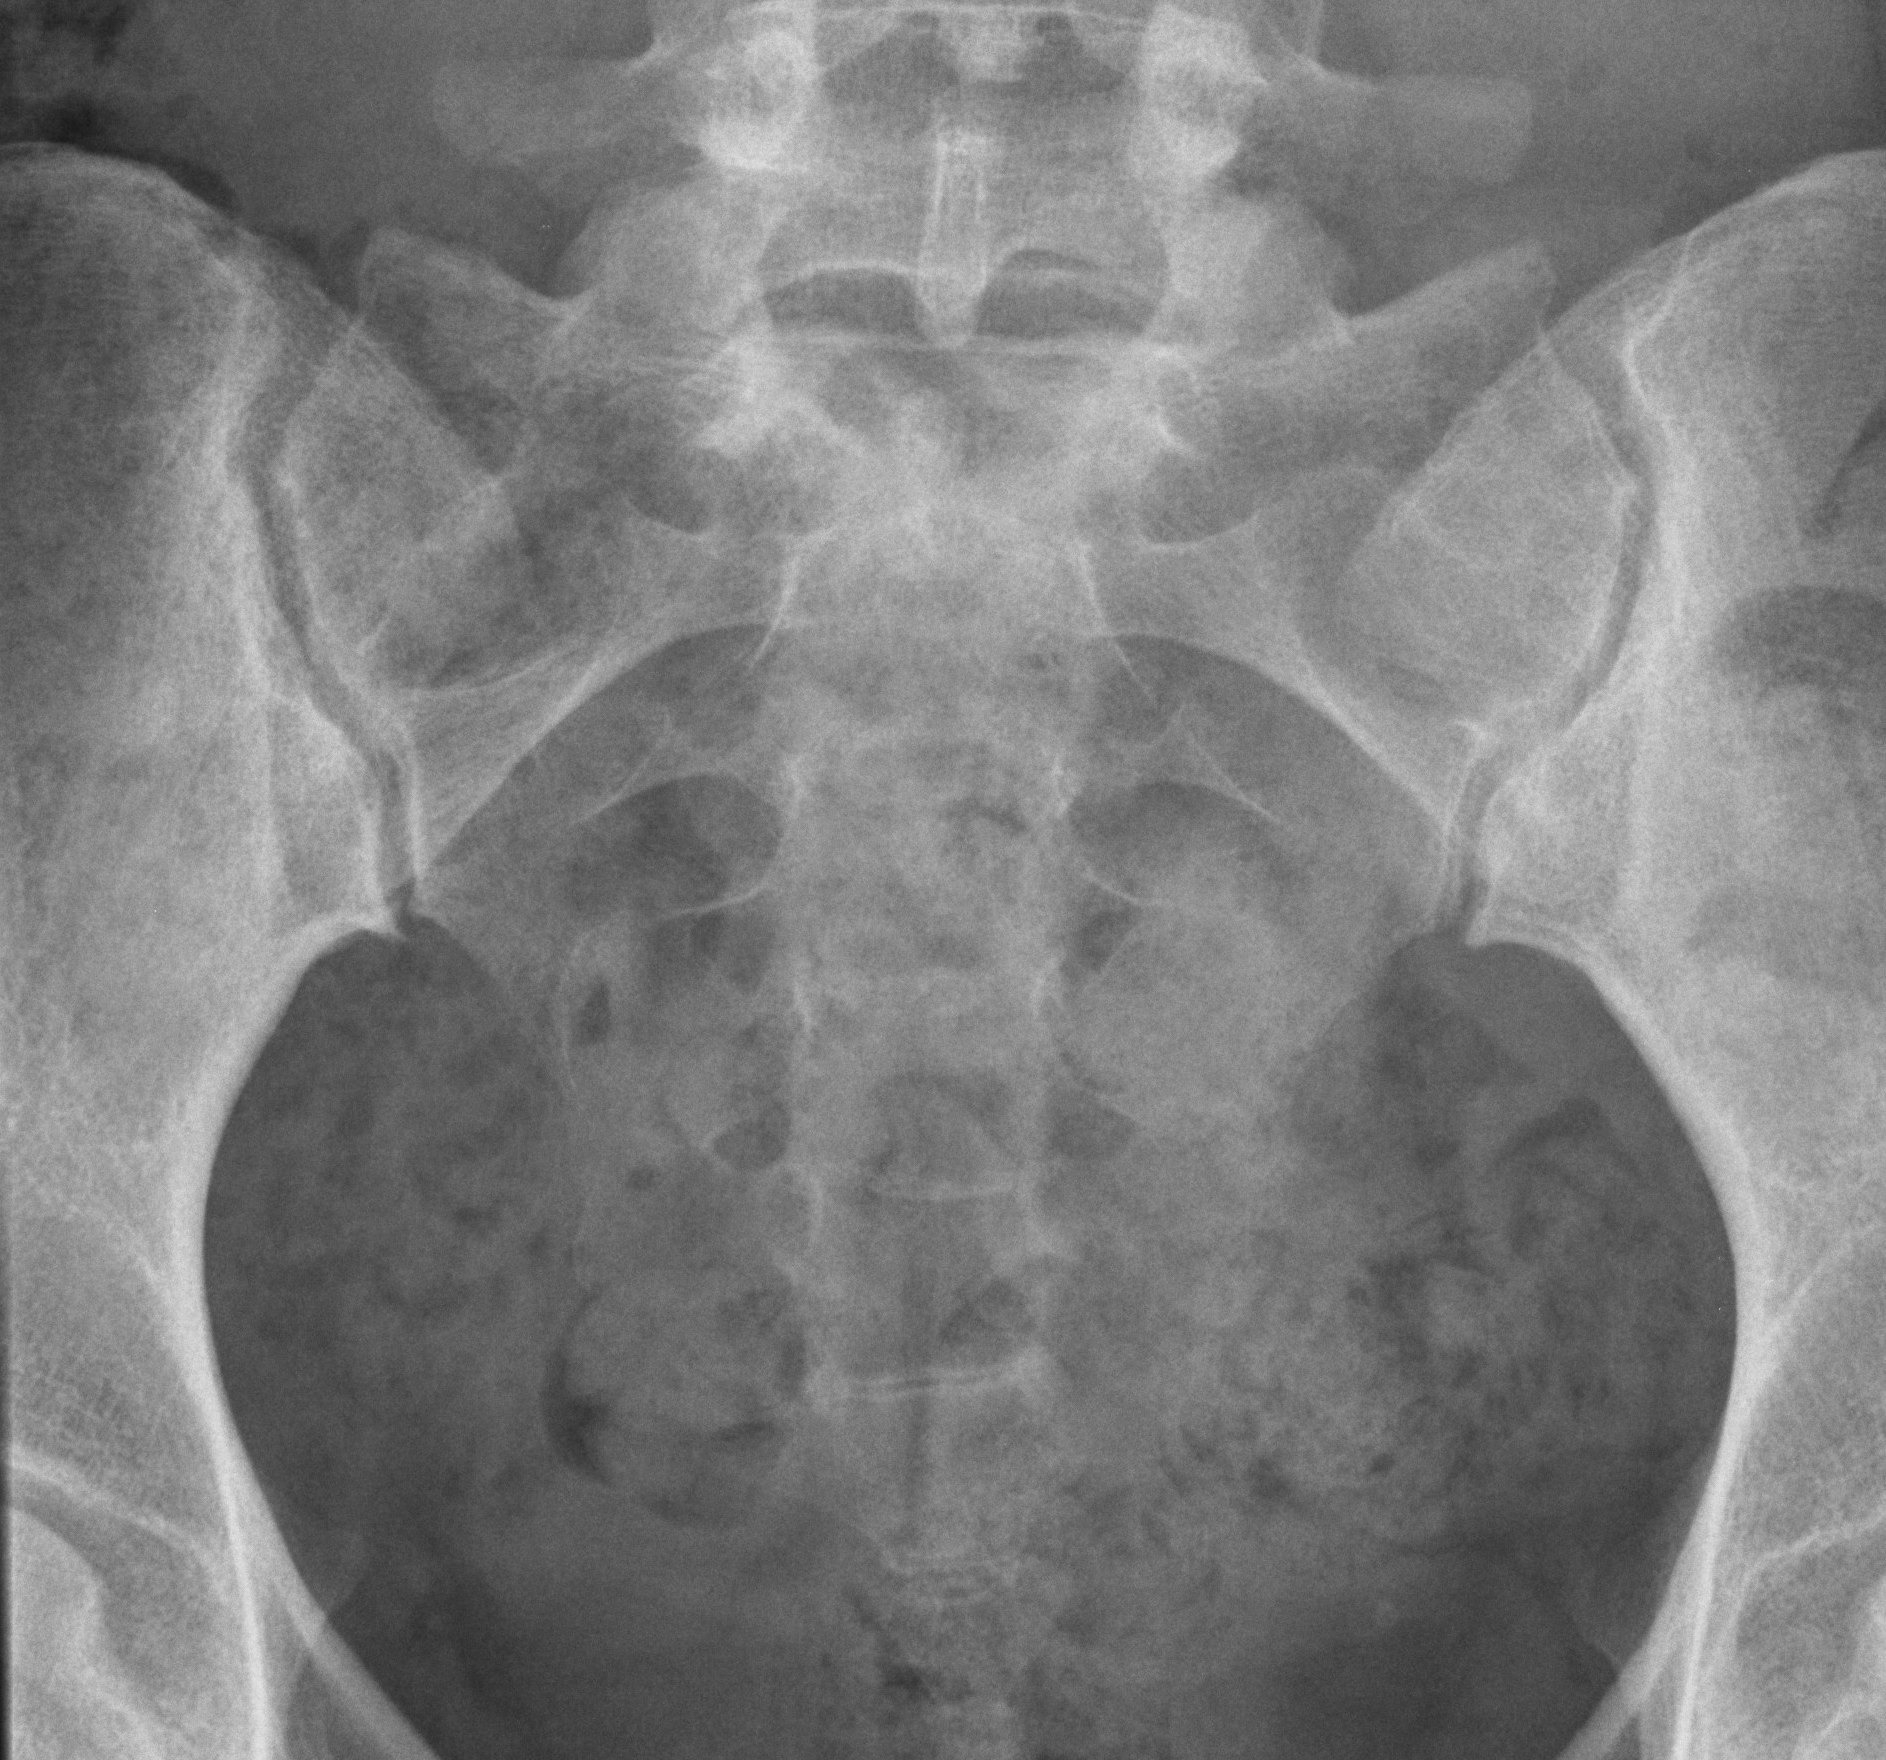
3. AP axial inlet view |
14x17 LW |
Patient supine in AP pelvis position, include iliac crest and ischial tuberosities on film |
Male: CR angled 20E-30E caudal to ASIS Female: CR angled 30E to 45E caudal |
|
MISCELLANEOUS BONE STUDIES |
||||||
|
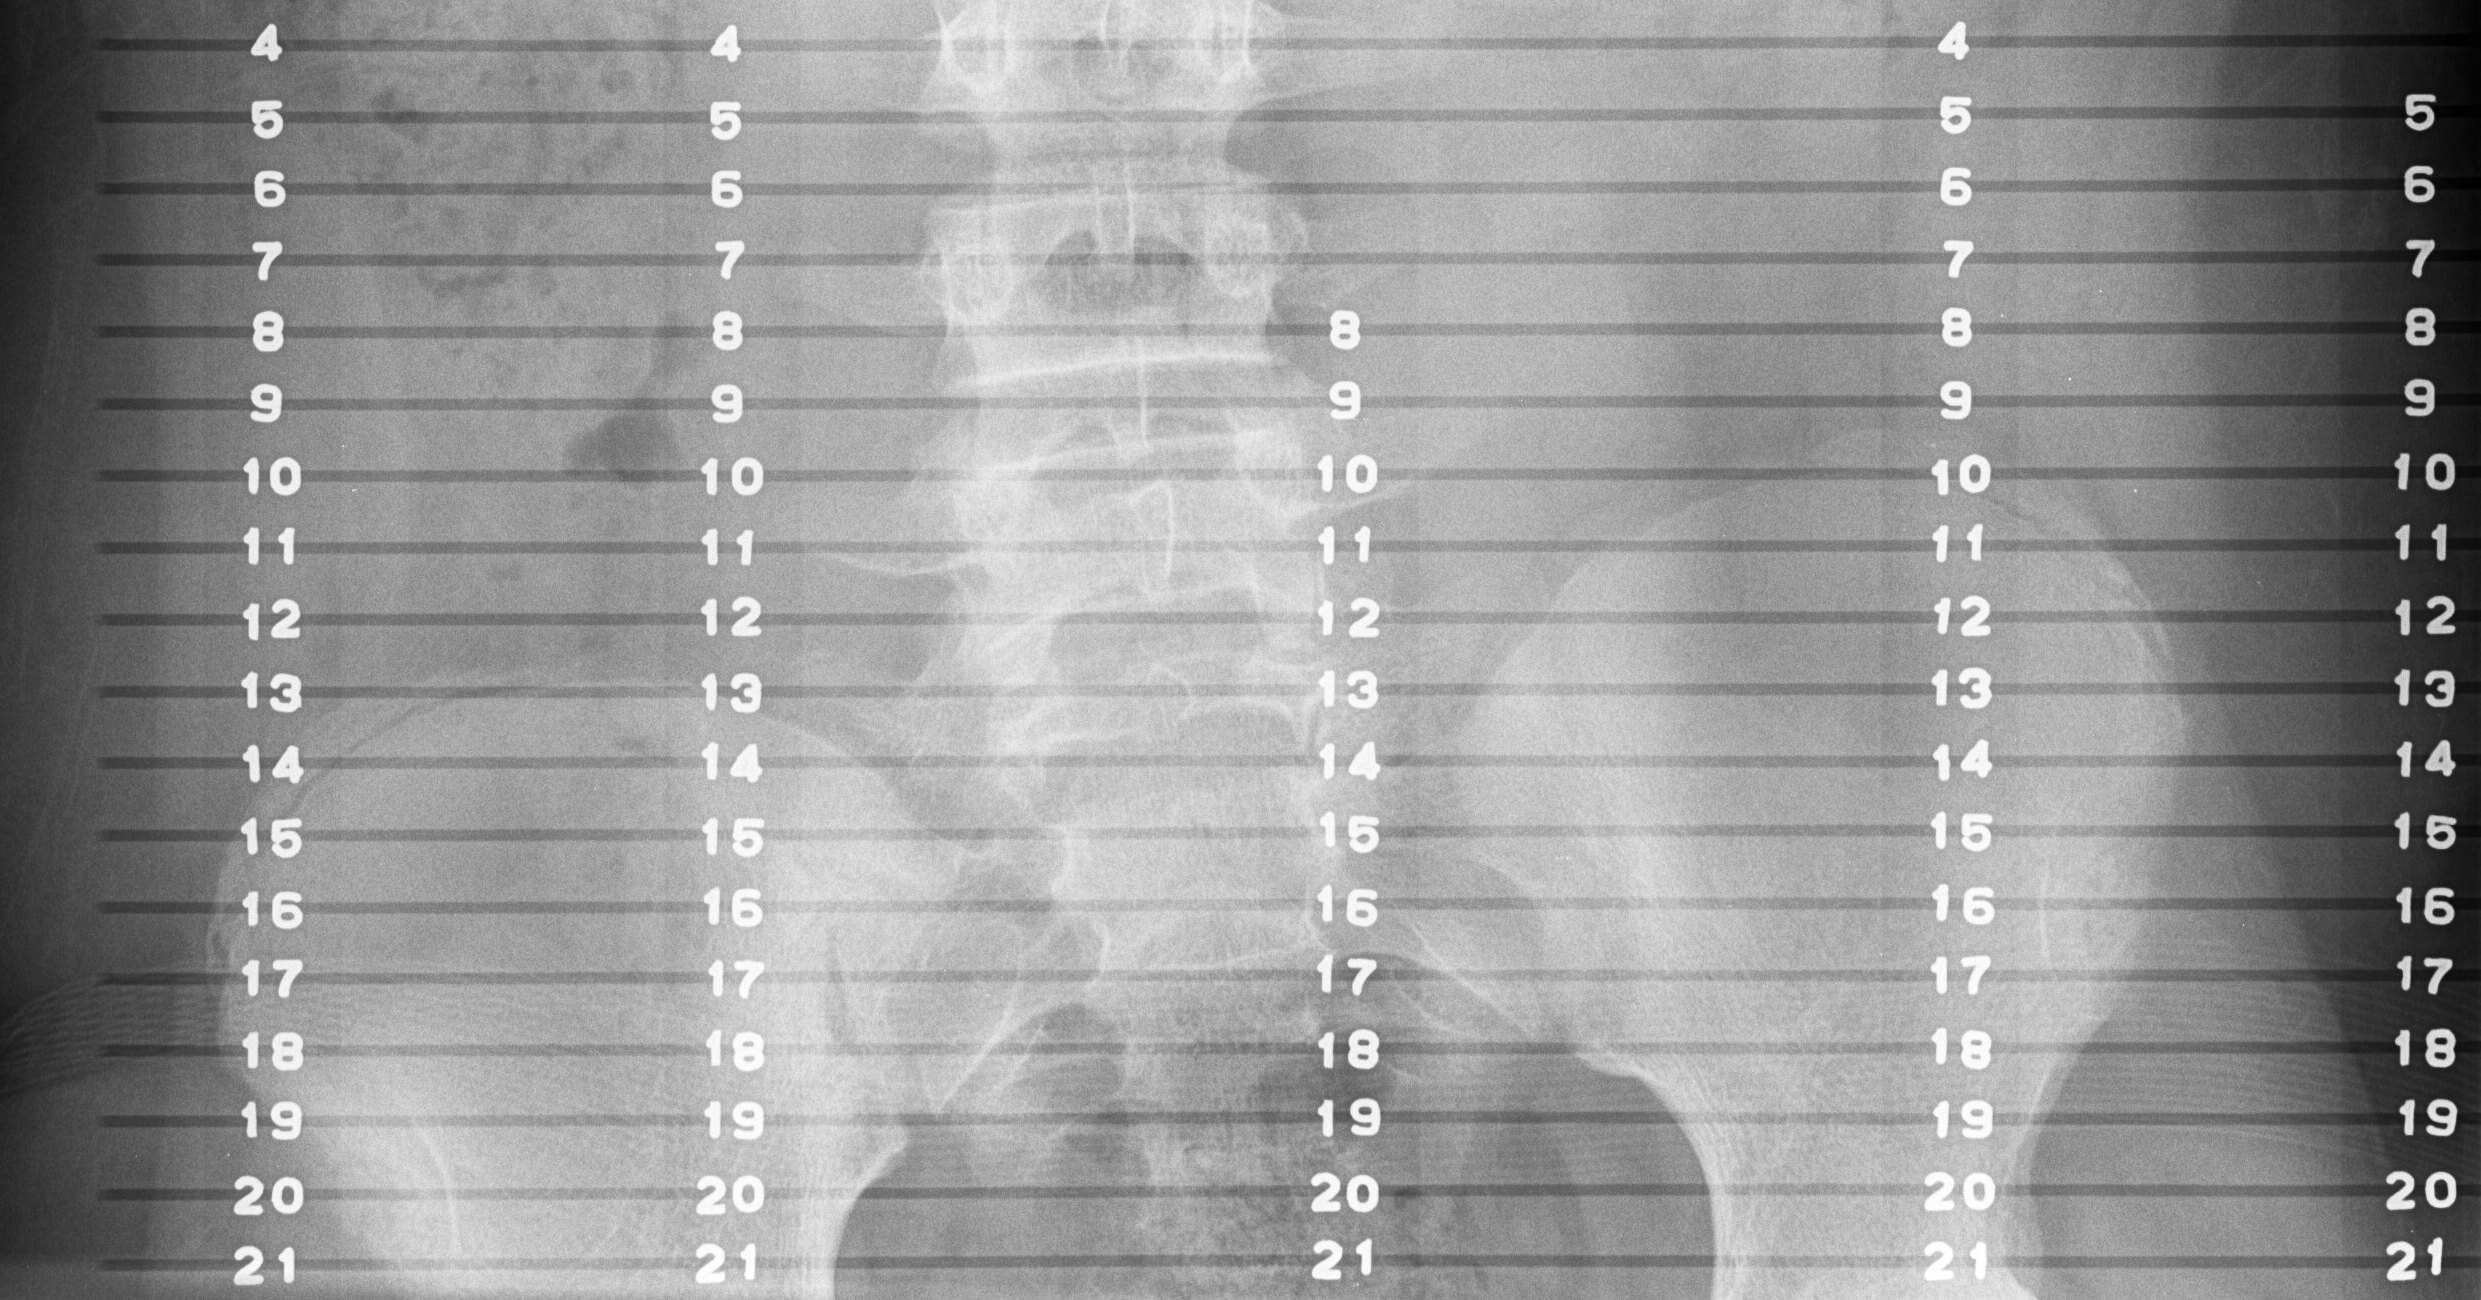
SCAN-O-GRAM: Place and tape scanogram ruler under patient before positioning. Must include ruler markings from iliac crest to ankle! Use two (2) 14x17 cassettes. DO NOT MOVE PATIENT ON THE RULER ONCE YOU HAVE BEGUN FILMING! Show both right and left joint spaces. In some cases, the joint spaces may not be in the same transverse plane. In these cases, center between the two joints. |
||||||
|
1. AP - wing of pelvis |
½ of 14x17 CW |
Patient supine, legs fully extended in AP position |
CR perpendicular to iliac crest |
|||
|
2. AP - hip joint |
½ of 14x17 CW |
Same as above |
CR perpendicular to hip joint |
|||
|
3. AP - knee joints |
½ of 14x17 CW |
Same as above |
CR perpendicular to knees |
|||
|
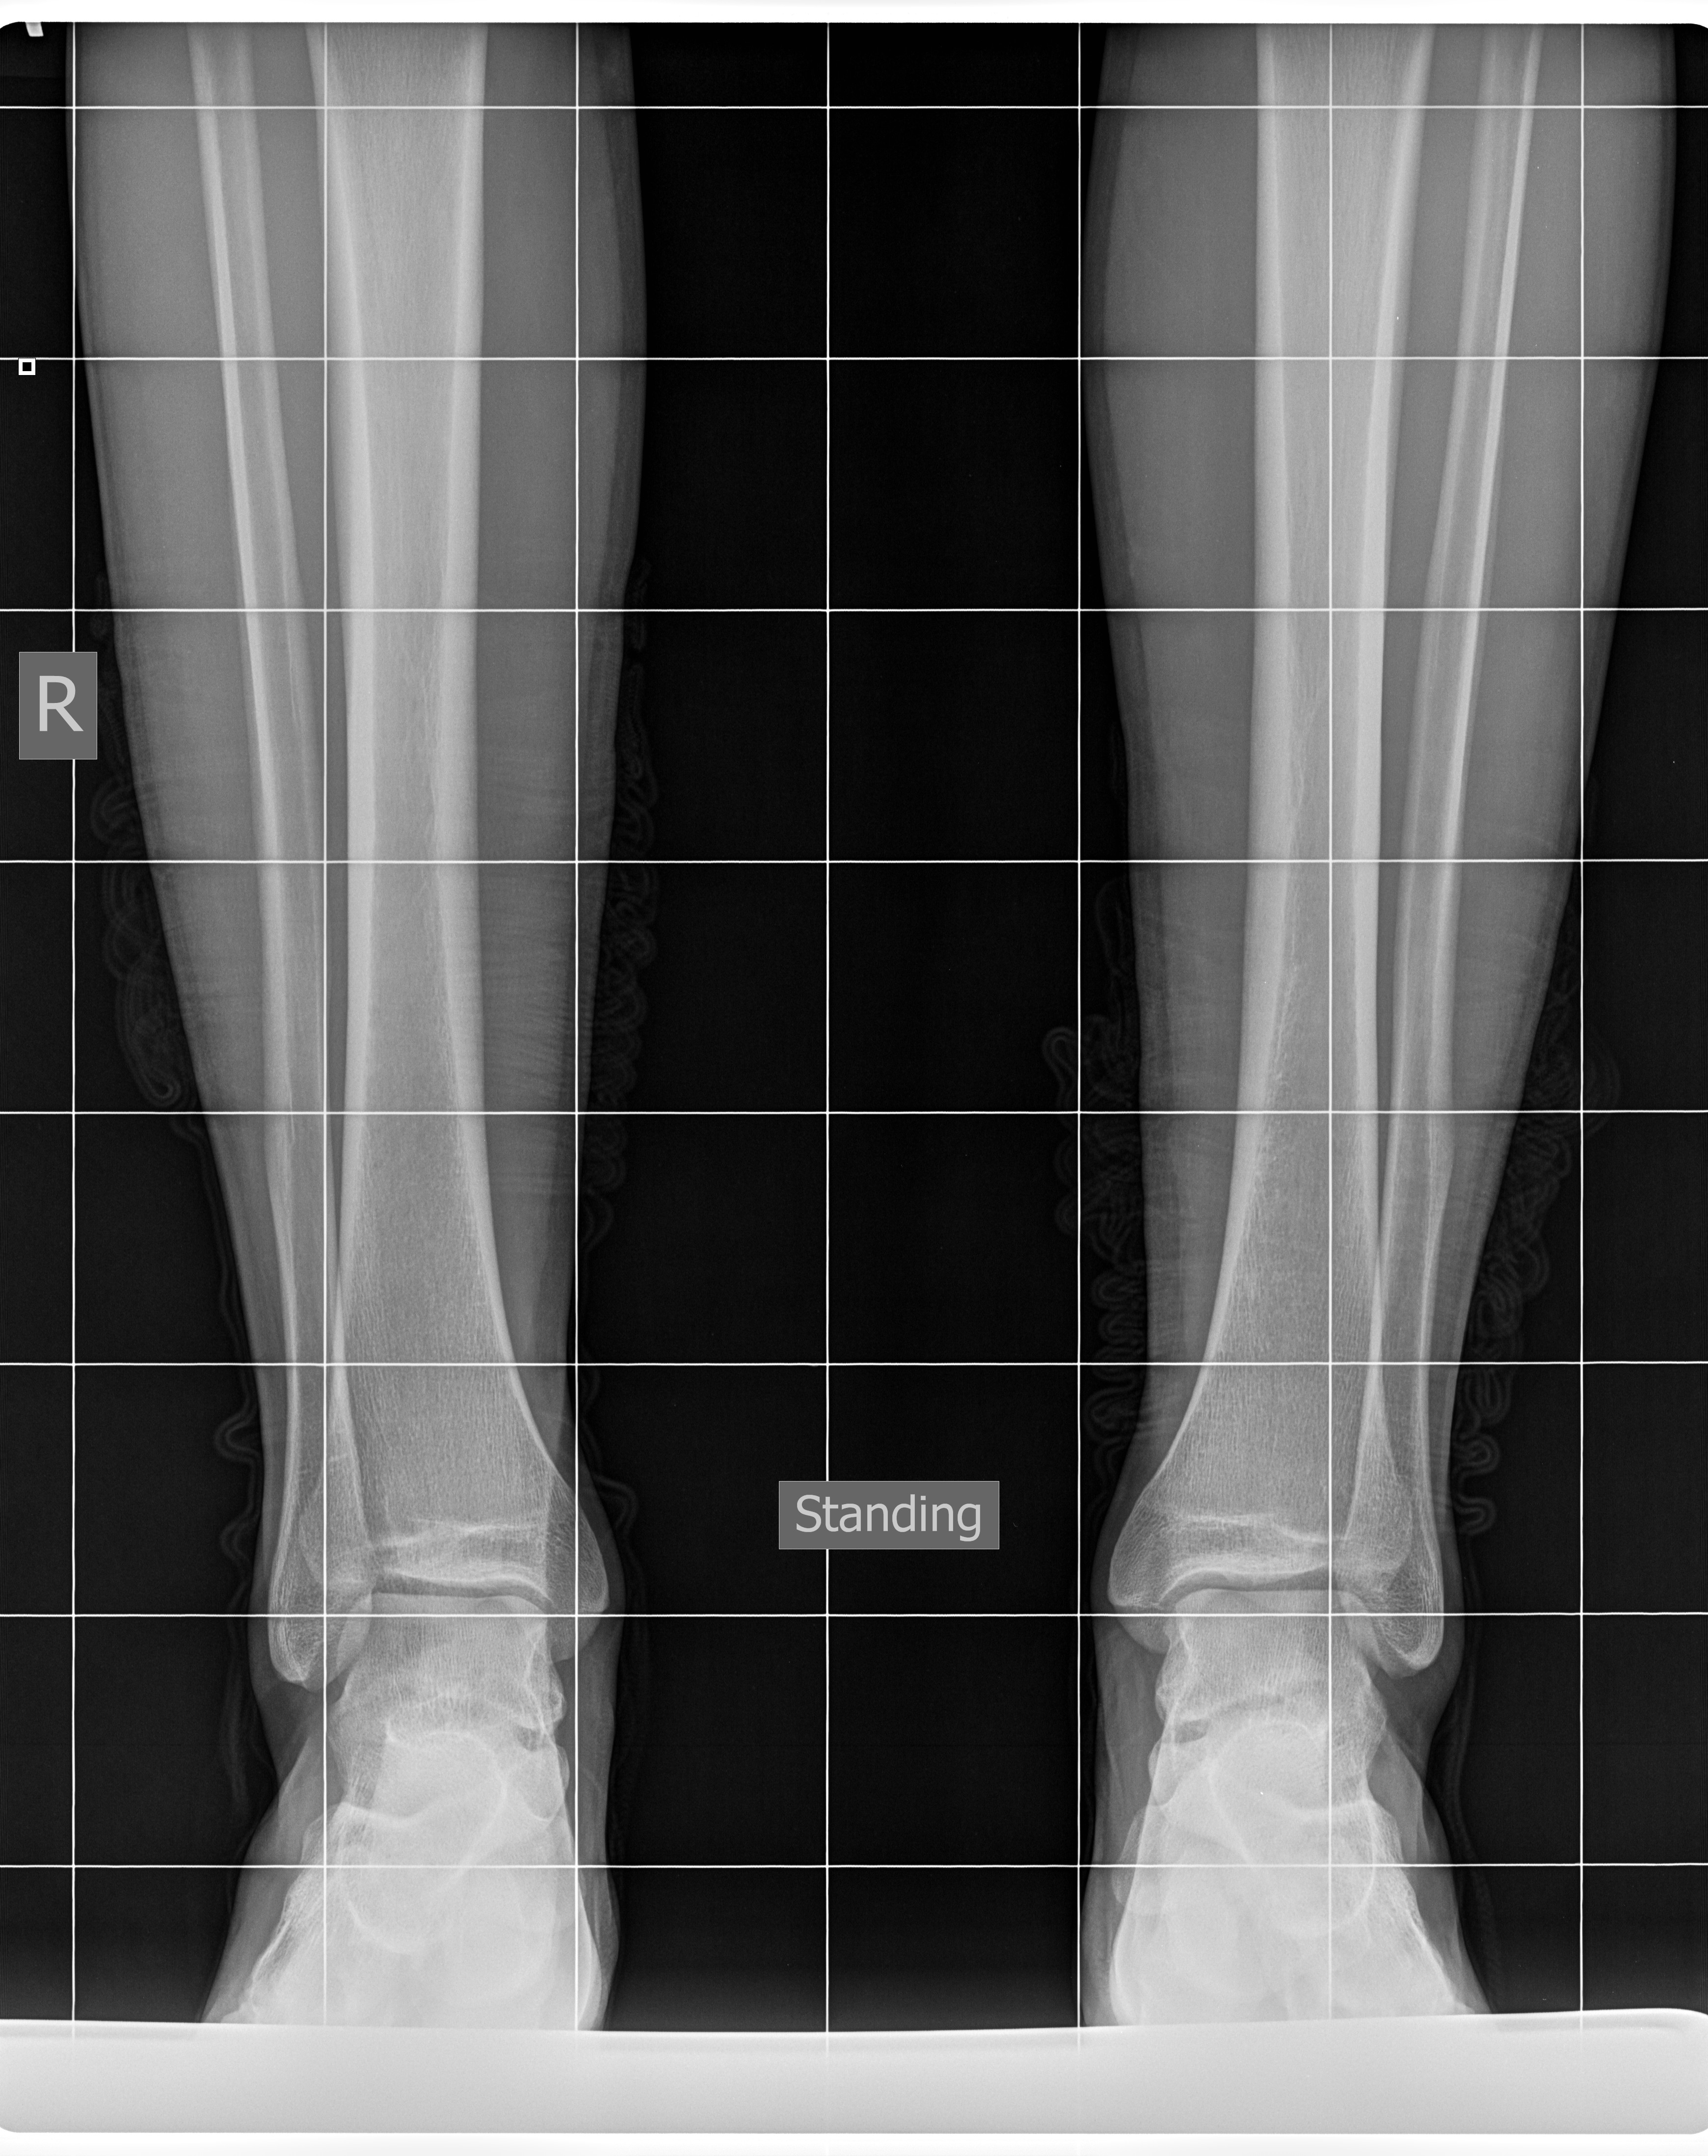
4. AP - ankle joints |
½ of 14x17 CW |
Same as above |
CR perpendicular to ankles |
|||
|
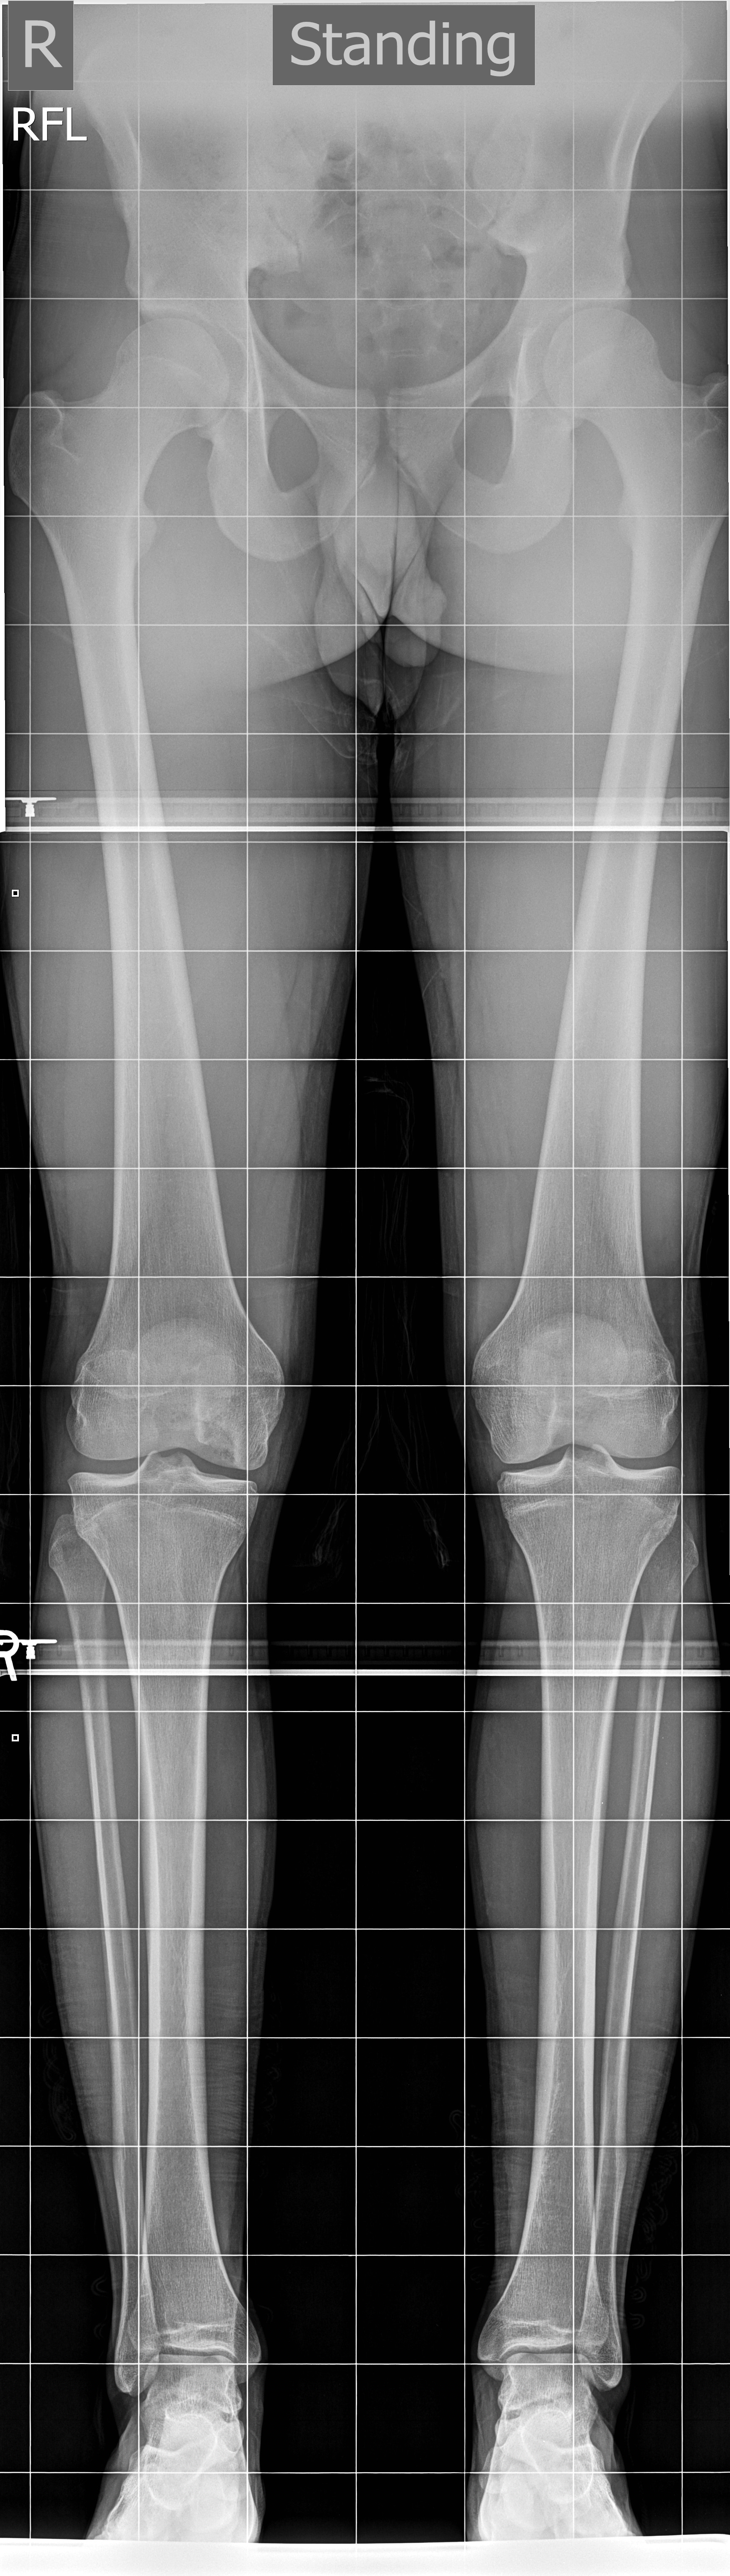
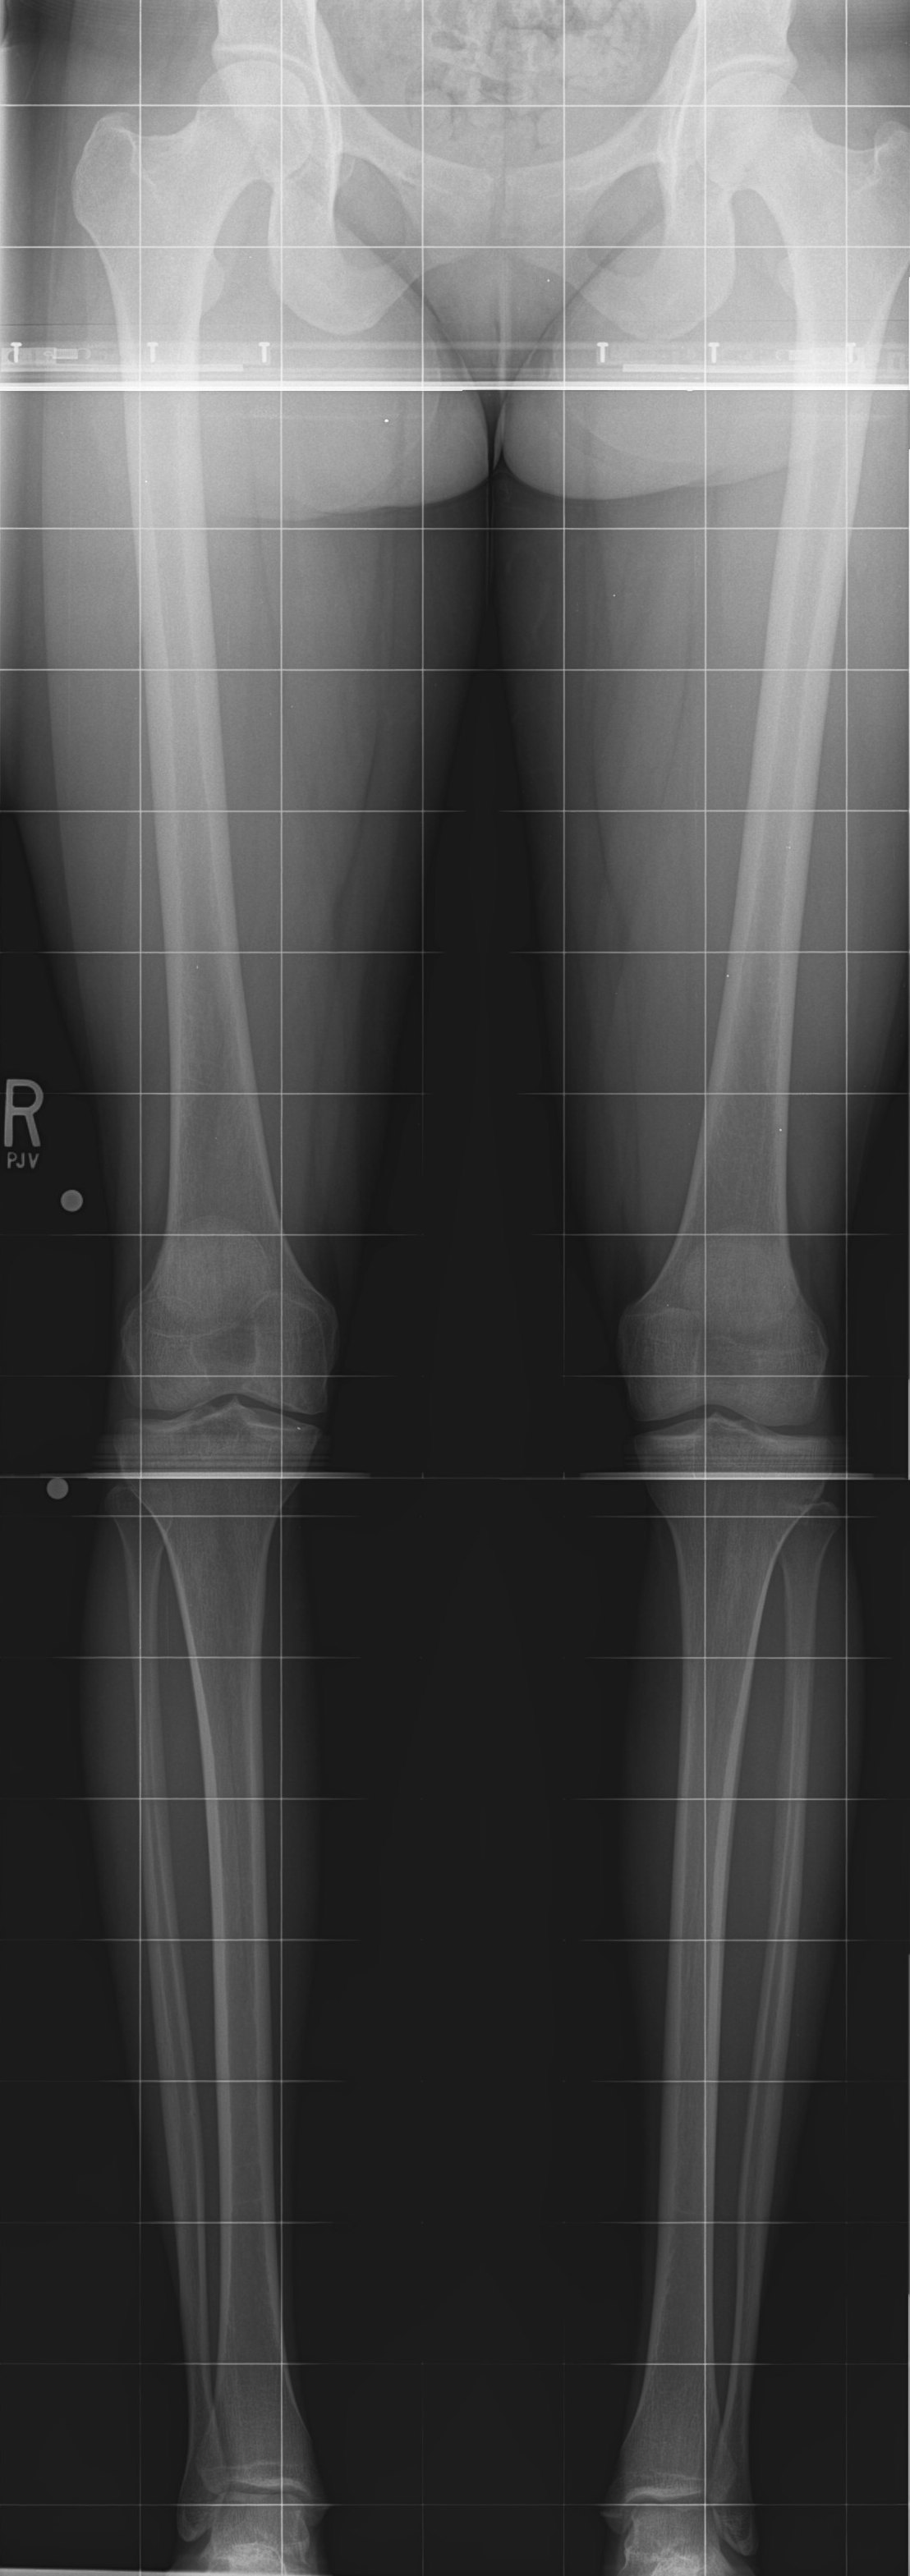
LEG ALIGNMENT - include joints from hip to ankle |
||||
|
AP only (72" SID) |
14x56 LW |
Patient supine or upright, equal weight in each foot |
CR perpendicular to include hip to ankle joints |
|
|
ARTHRITIS JOINT SURVEY - Review each request with Bone radiologist for filming. See previous sections for positioning criteria. |
||||
|
1. AP/Lateral C-spine |
2. AP/Lateral T-spine |
3. AP/Lateral L-spine |
4. AP bilateral shoulders |
5. AP/Lateral bilateral knees |
|
5. AP/Lateral bilateral knees |
6. AP pelvis |
6. AP/Lateral bilateral ankles (include heel on lateral views) |
7. AP/Oblique/Lateral bilateral hands (to include wrists) |
8. AP/Oblique bilateral feet |
|
METASTATIC BONE SURVEY - Review each request with Bone radiologist for filming. |
||||
|
1. Left lateral skull |
3. AP/Lateral C-spine |
5. AP/Lateral L-spine |
7. AP/Lateral bilateral humerus (to include shoulders) |
9. AP/Lateral bilateral forearms |
|
2. AP ribs, bilaterally |
4. AP/Lateral T-spine |
6. AP pelvis |
8. AP/Lateral bilateral femurs |
10. AP/Lateral bilateral tibia/fibulas |
|
CHONDROCALCINOSIS - Recurrent arthritis survey (pseudogout). Review each request with Bone radiologist for filming. |
||||
|
1. AP/Lateral bilateral hands to include wrists |
2. AP pelvis |
3. AP/Lateral bilateral knees |
Knees are the most affected joints in pseudogout. |
|
|
BONY THORAX |
|||
|
Exams/Views to be done |
Cassette size, type and orientation |
Patient position relative to film |
Central ray (CR) direction |
|
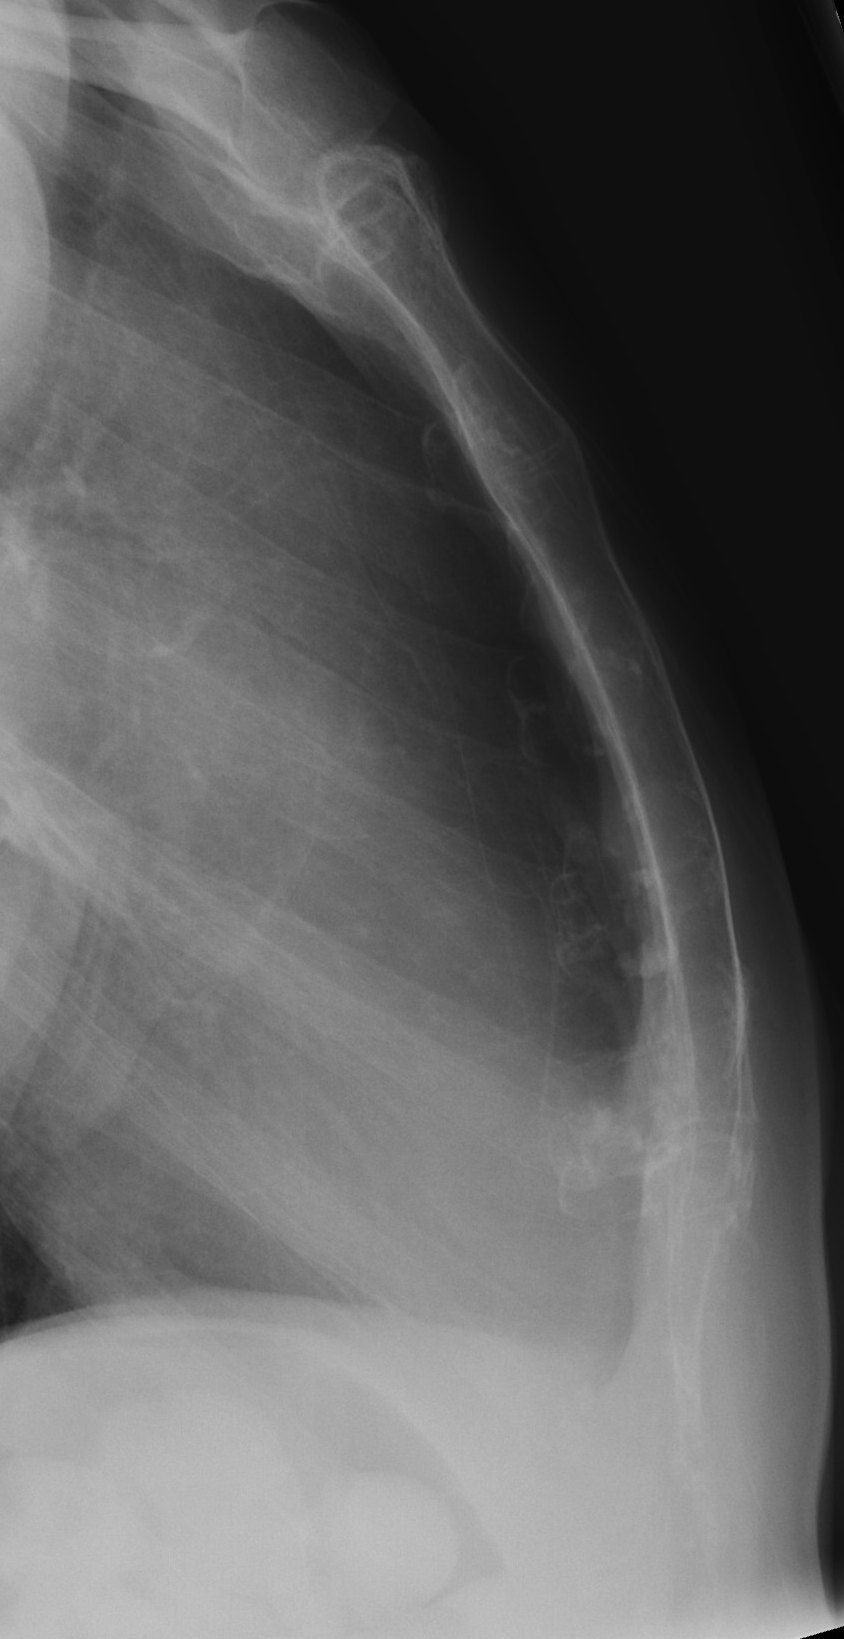
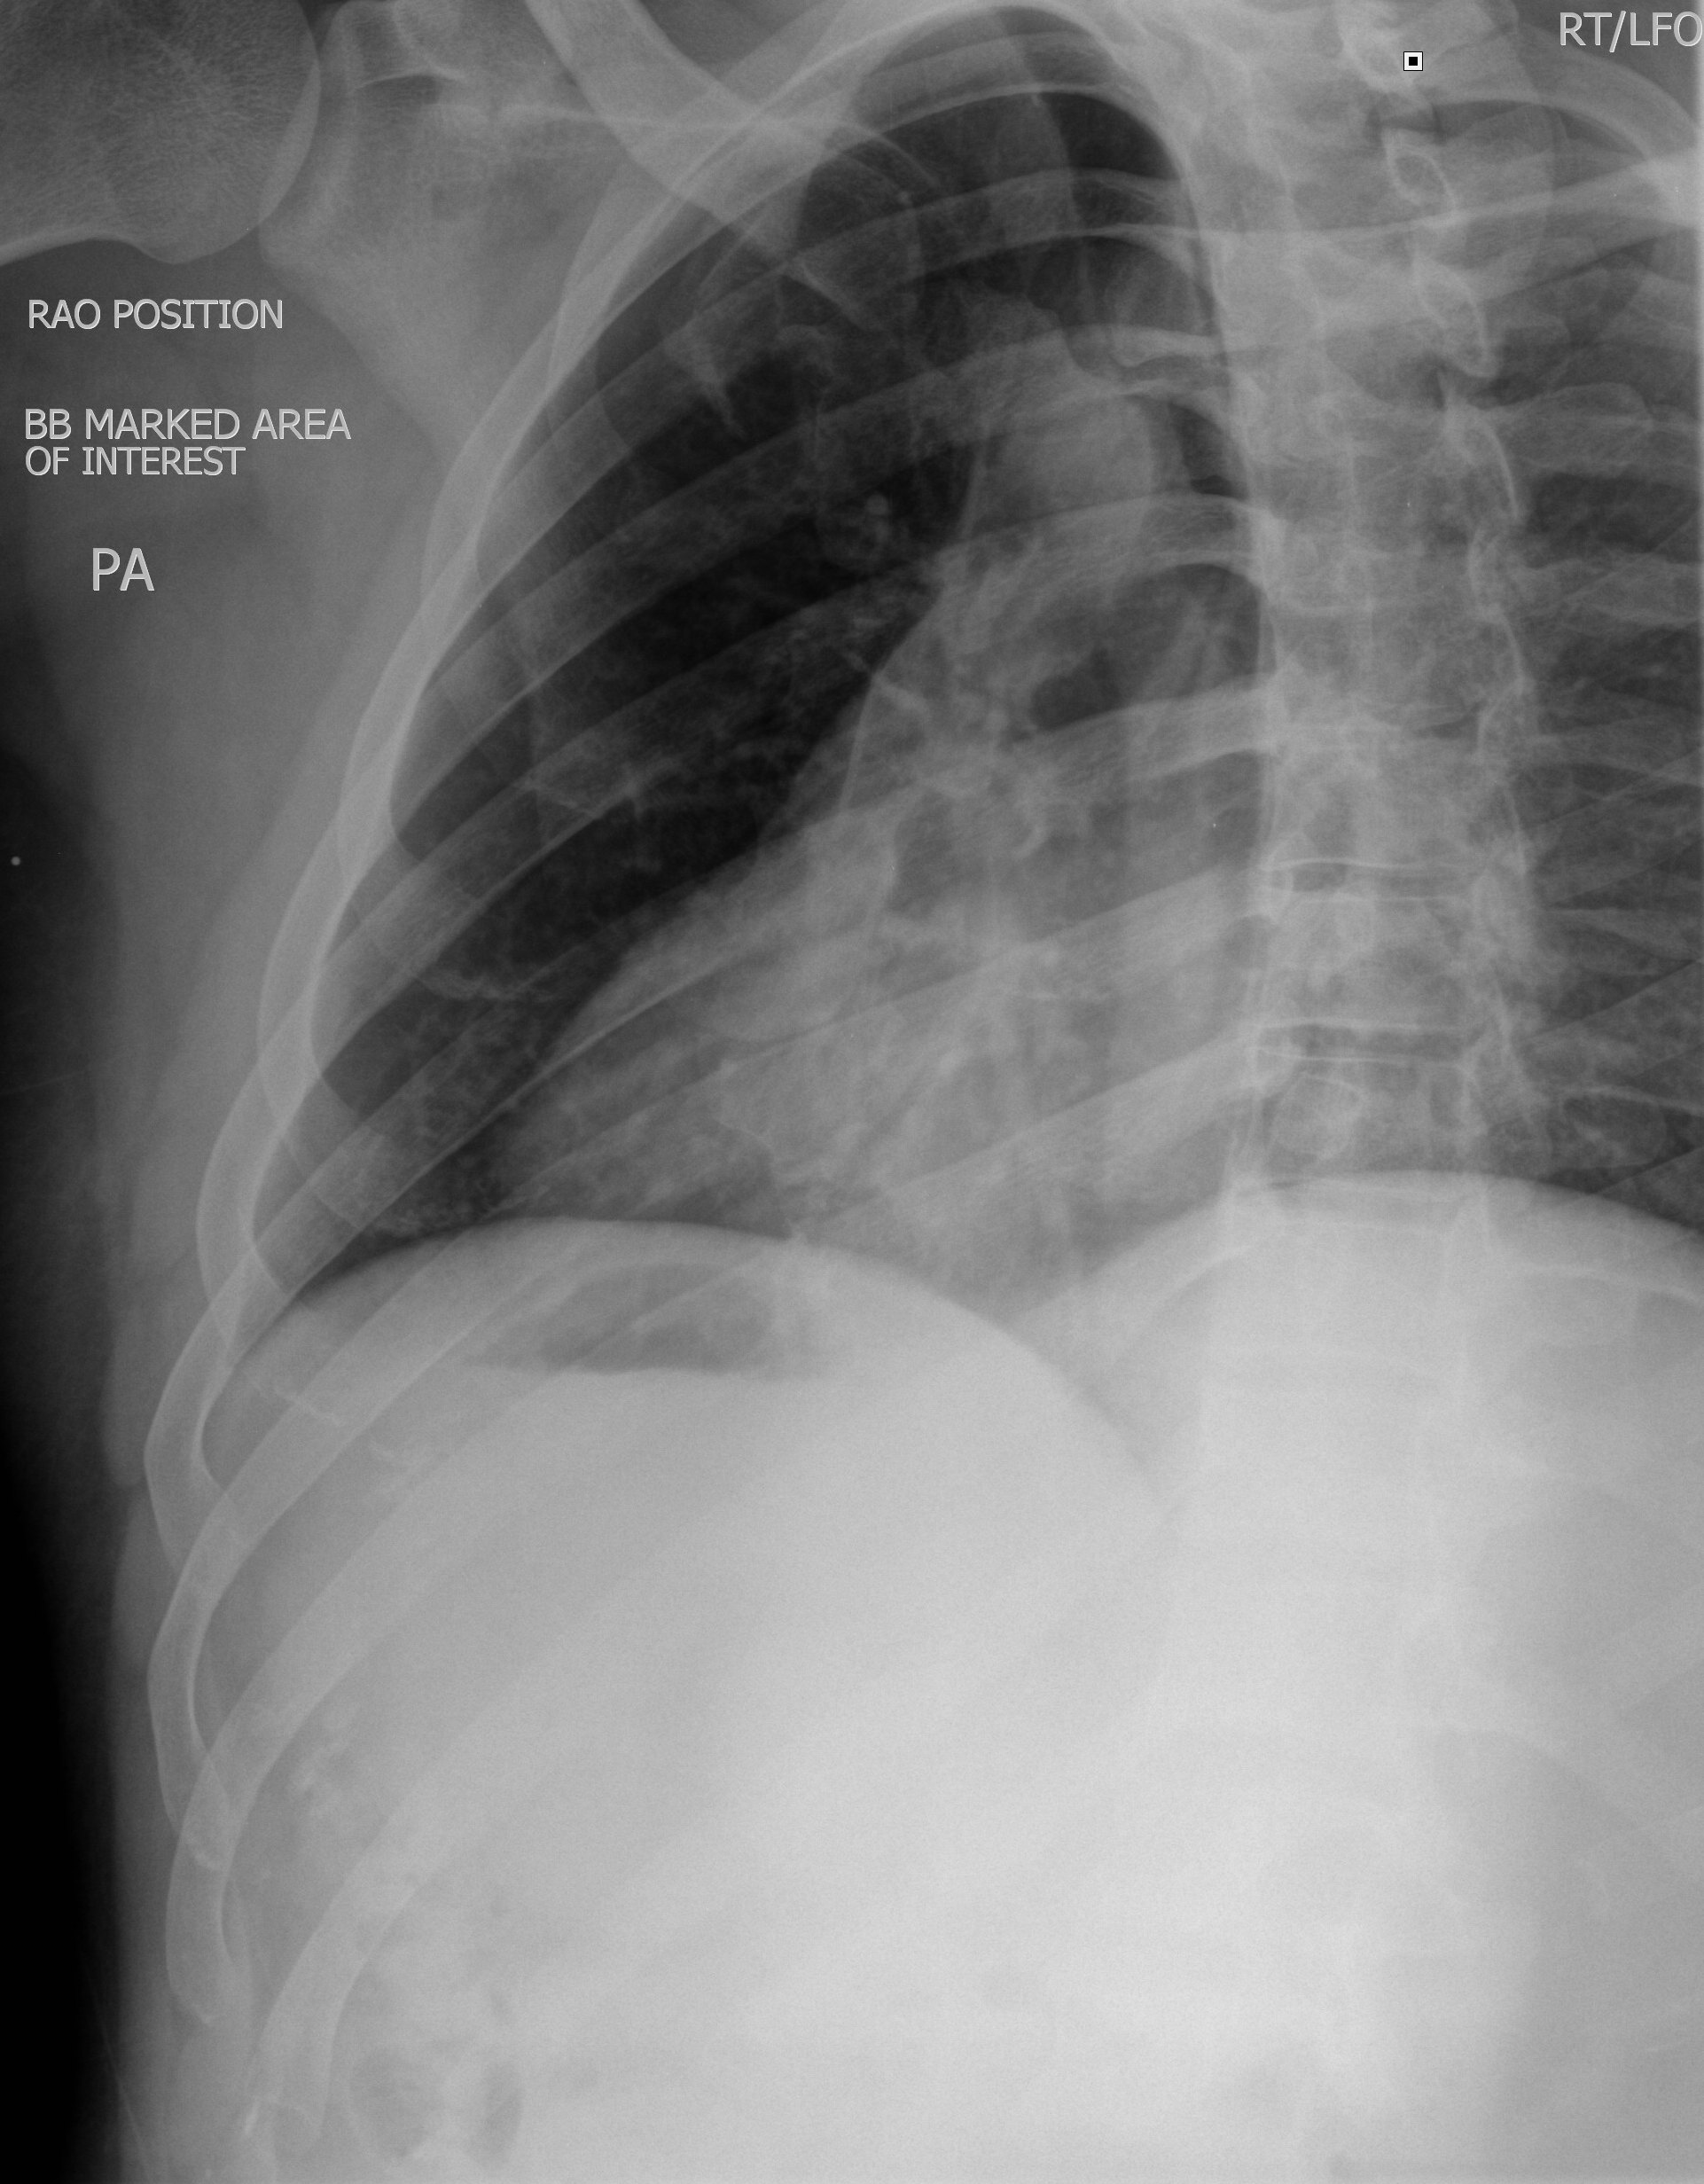
1. Right anterior oblique |
10x12 LW |
Patient prone in 15E - 20E RAO to superimpose sternum on heart shadow, breathing technique |
CR perpendicular to mid-sternum |
|
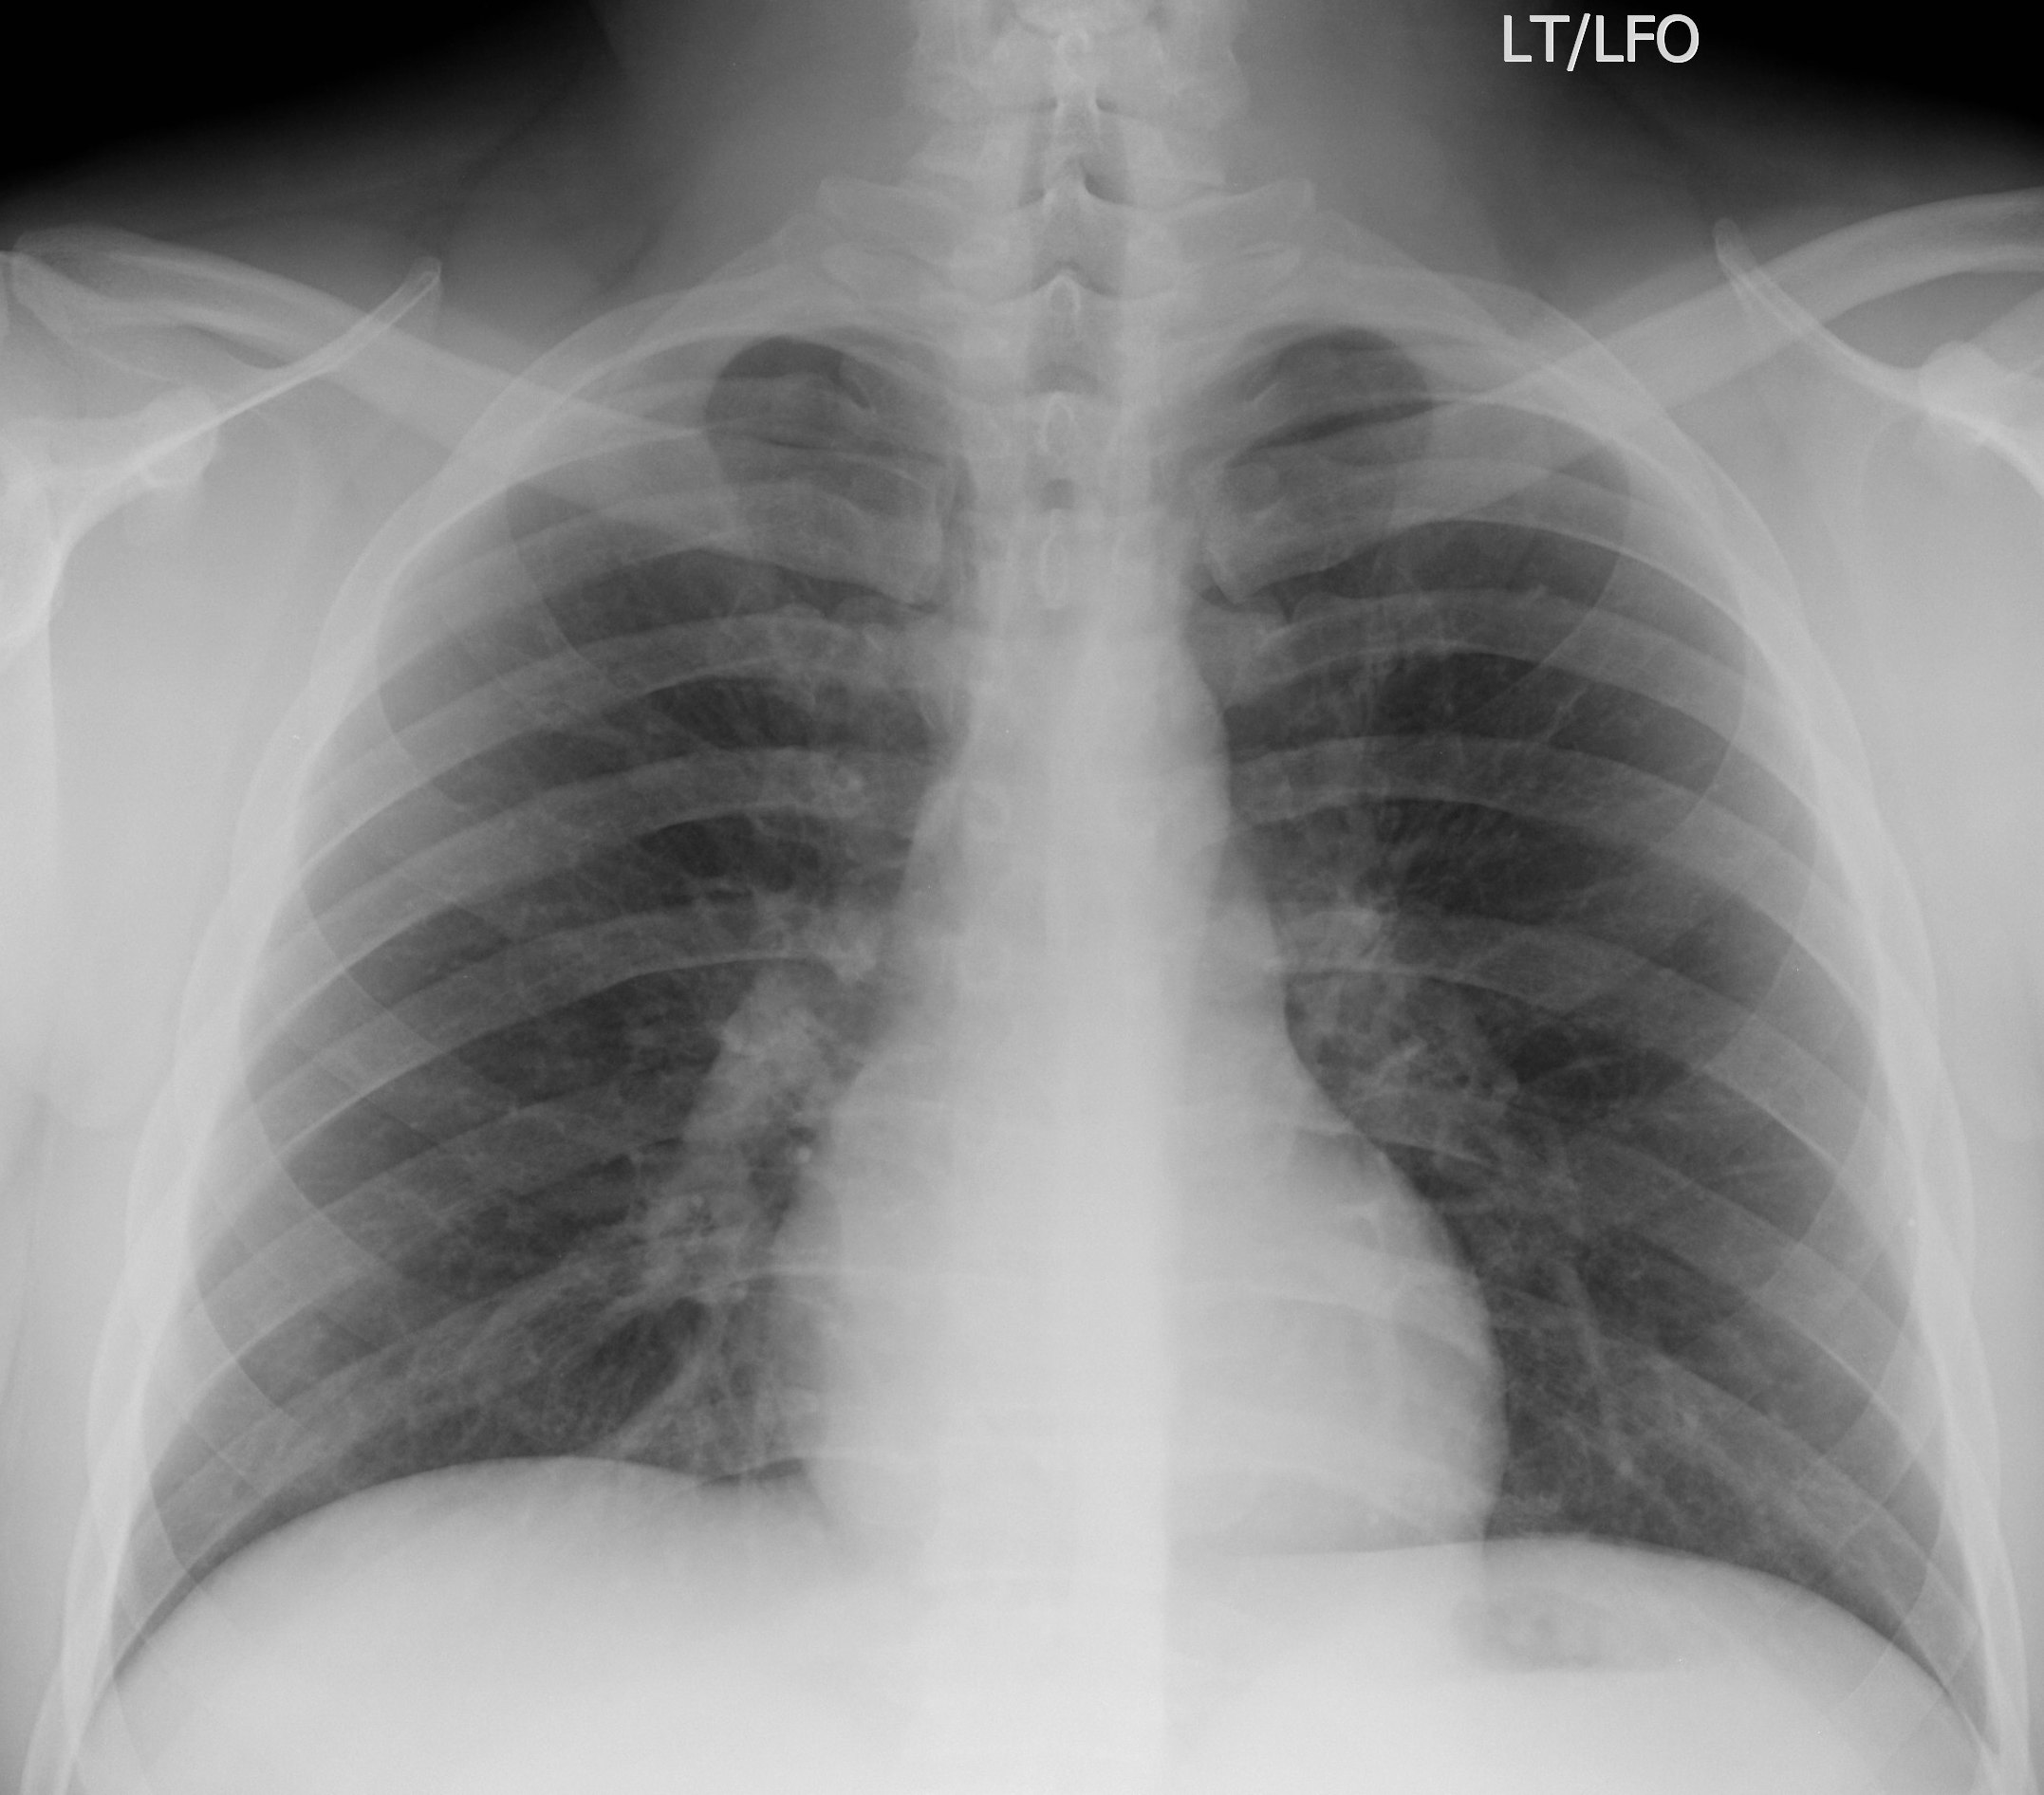
2. Lateral |
10x12 LW |
Patient upright in lateral position if possible, filmed on inspiration |
CR perpendicular to mid-sternum |
|
STERNO-CLAVICULAR JOINTS - Study of choice is CT. Consult Radiology Bone Fellow for protocol |
|||
|
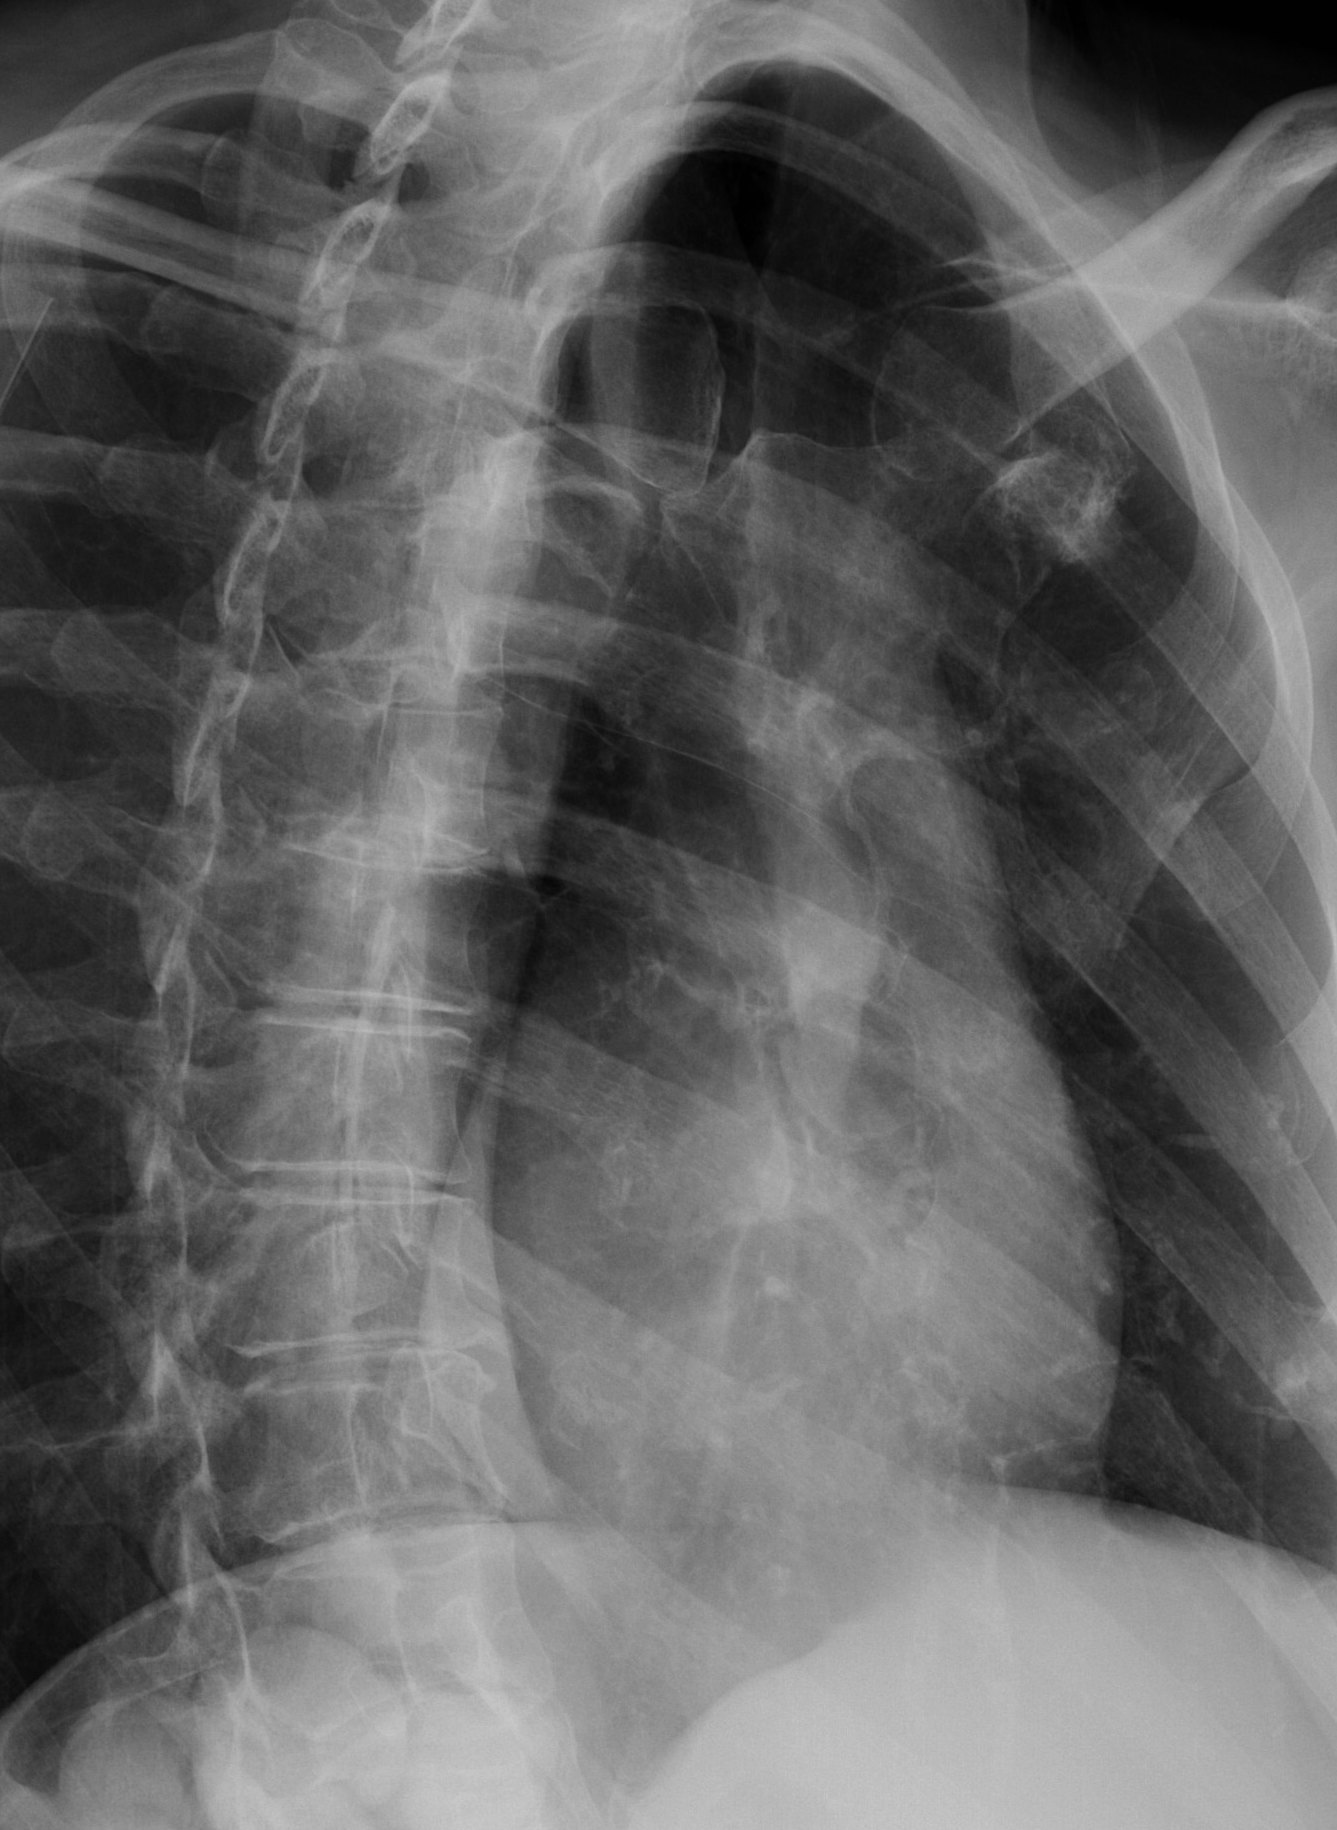
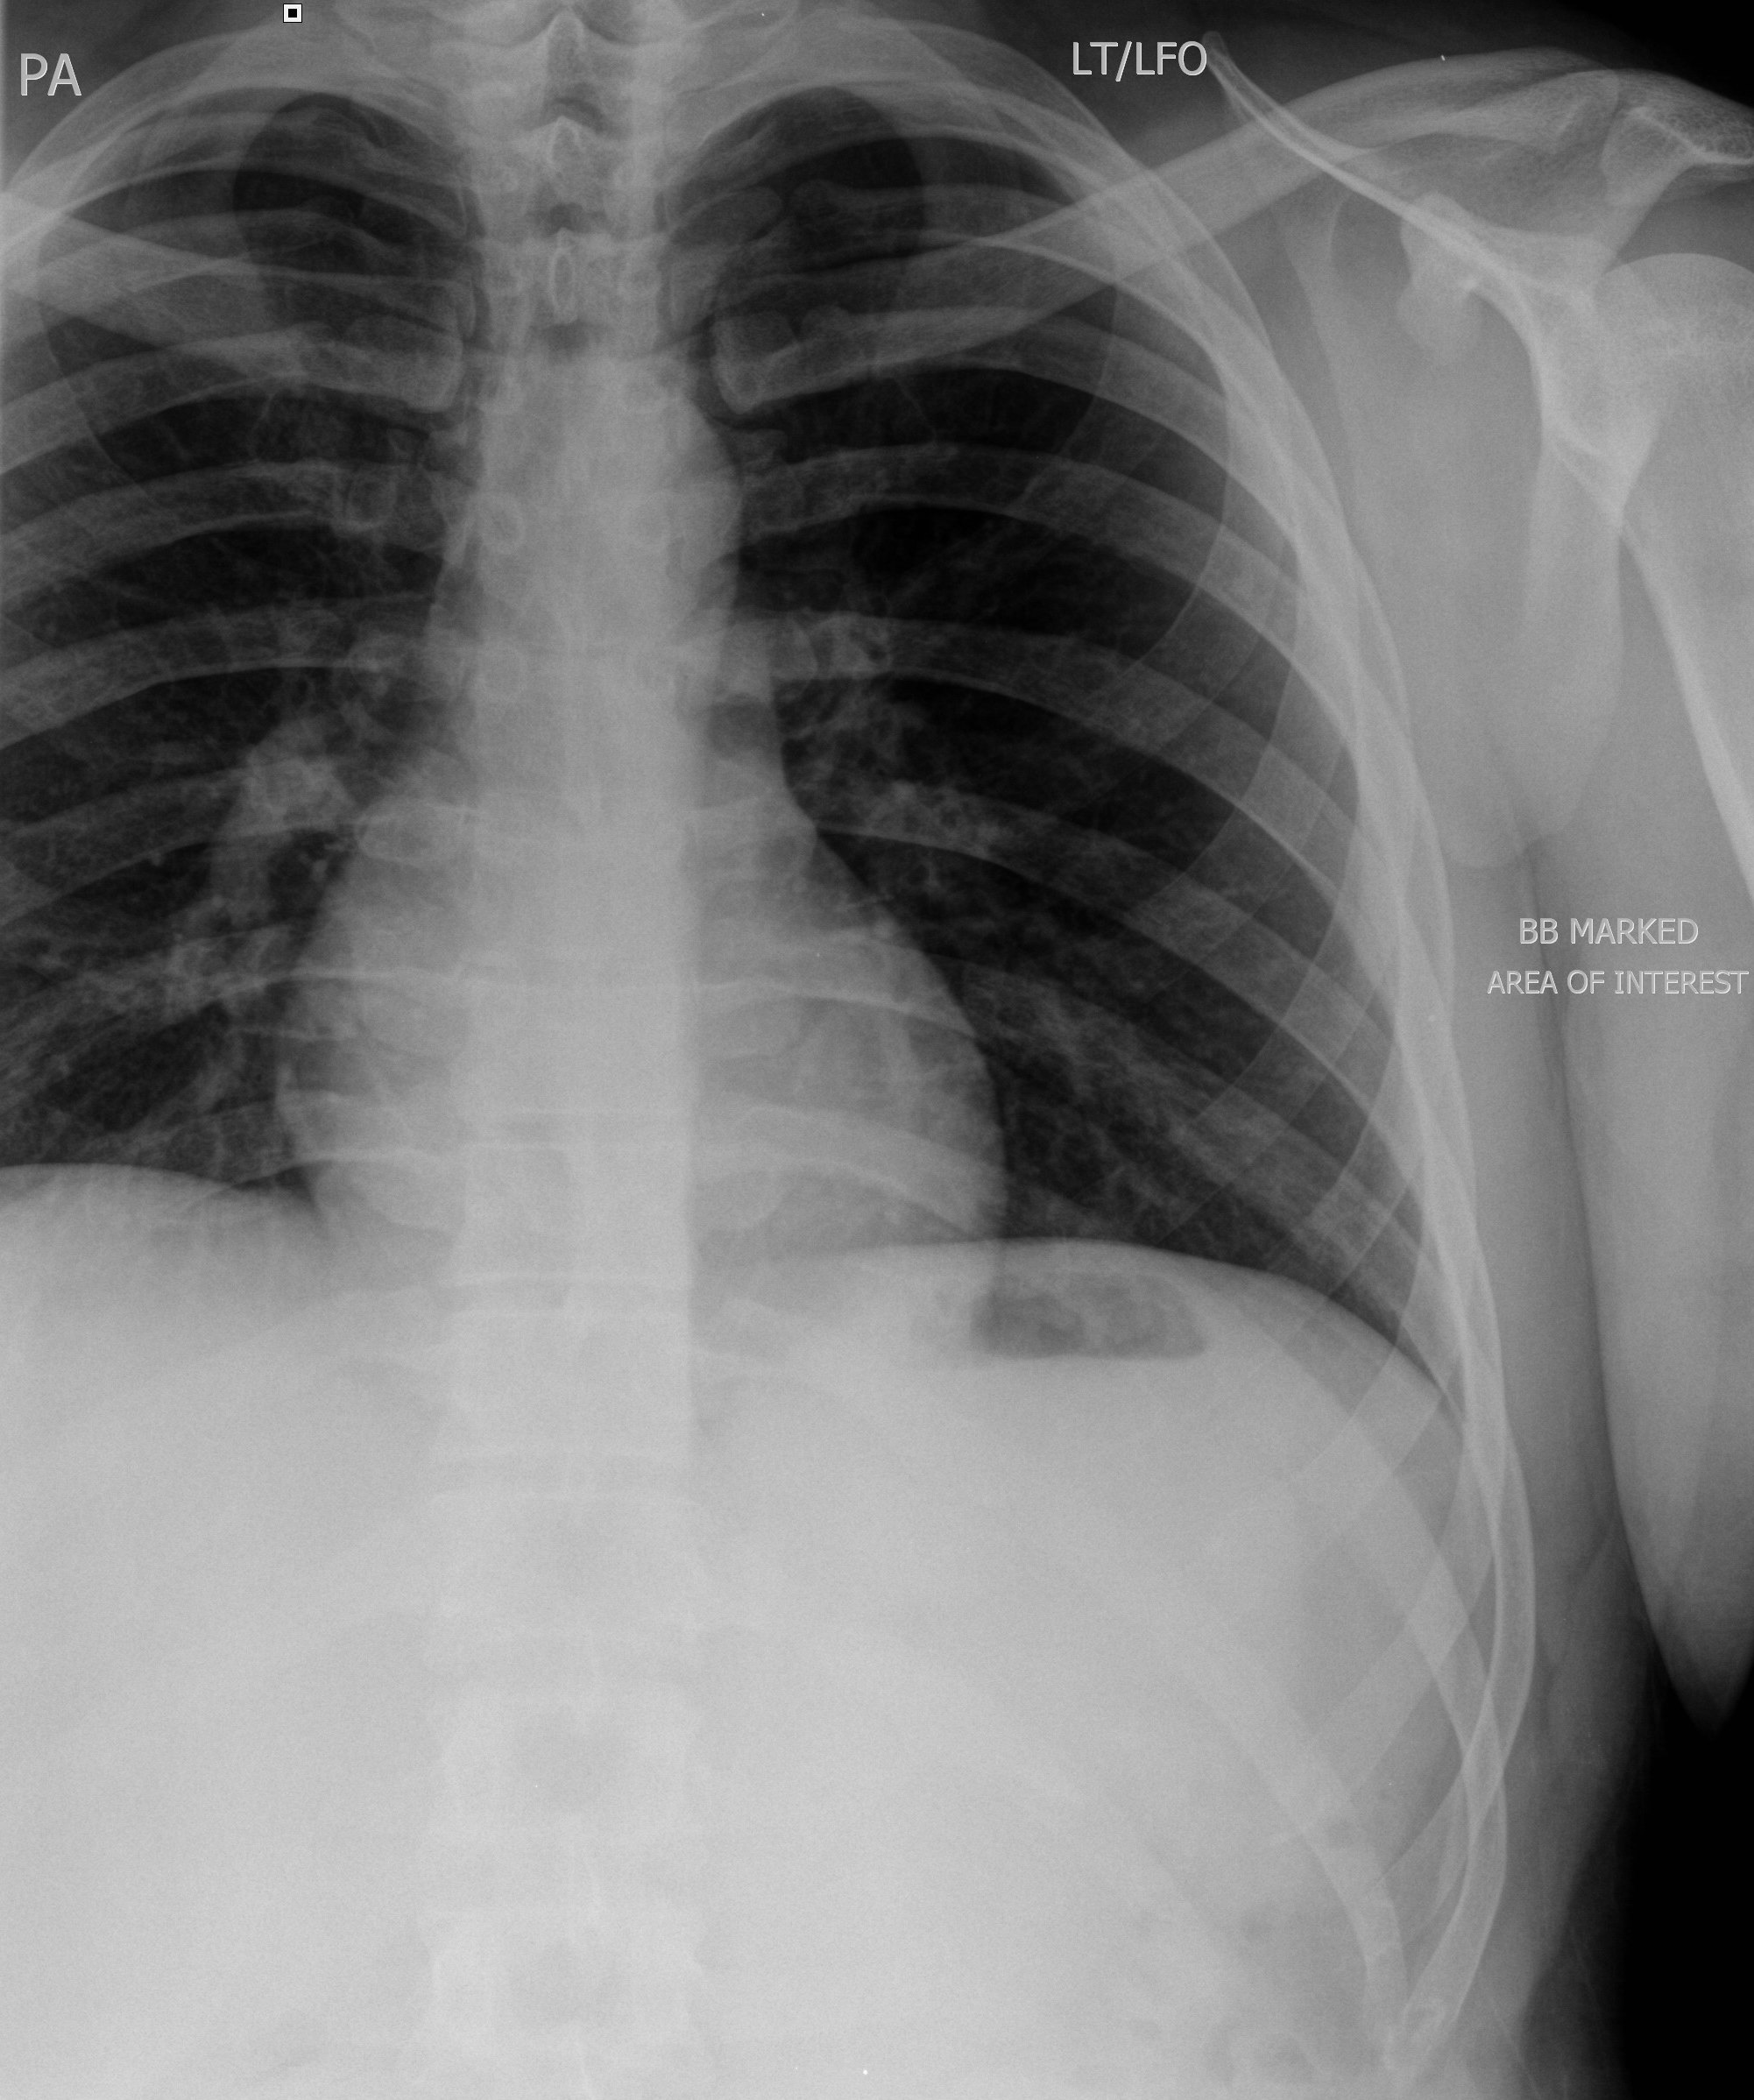
RIBS: Trauma, acute injury (PA chest film usually done to evaluate for pneumothorax. Review each request with chest radiologist.) |
|||
|
1. AP or PA. |
Above diaphragm: 11x14LW or 14x17LW Below diaphragm: 14x17 CW |
Patient erect if possible, place patient to have affected side toward film (anterior vs posterior). Above diaphragm, film taken on inspiration; below diaphragm, film taken on expiration |
Above and below diaphragm: CR perpendicular to affected rib(s) |
|
2. Oblique |
As stated above |
From AP, rotate body 45E toward the site of injury. From PA, rotate body 45E away from site of injury |
Same as above. The distance between the spine and lateral rib margin on the affected side should be two times larger than the unaffected side. |
|
RIBS - Non-trauma, chronic injury or to evaluate metastases (Usually done after bone scan of affected area.) |
||||
|
1. AP - above and below diaphragm |
Same as above. |
Follow positioning above. |
Follow above protocol. |
|
|
2. Oblique - above and below diaphragm |
Same as above. |
Follow positioning above. |
Follow above protocol. |
|
|
CERVICAL SPINE - always include all views on new patients or following new injury. |
||||
|
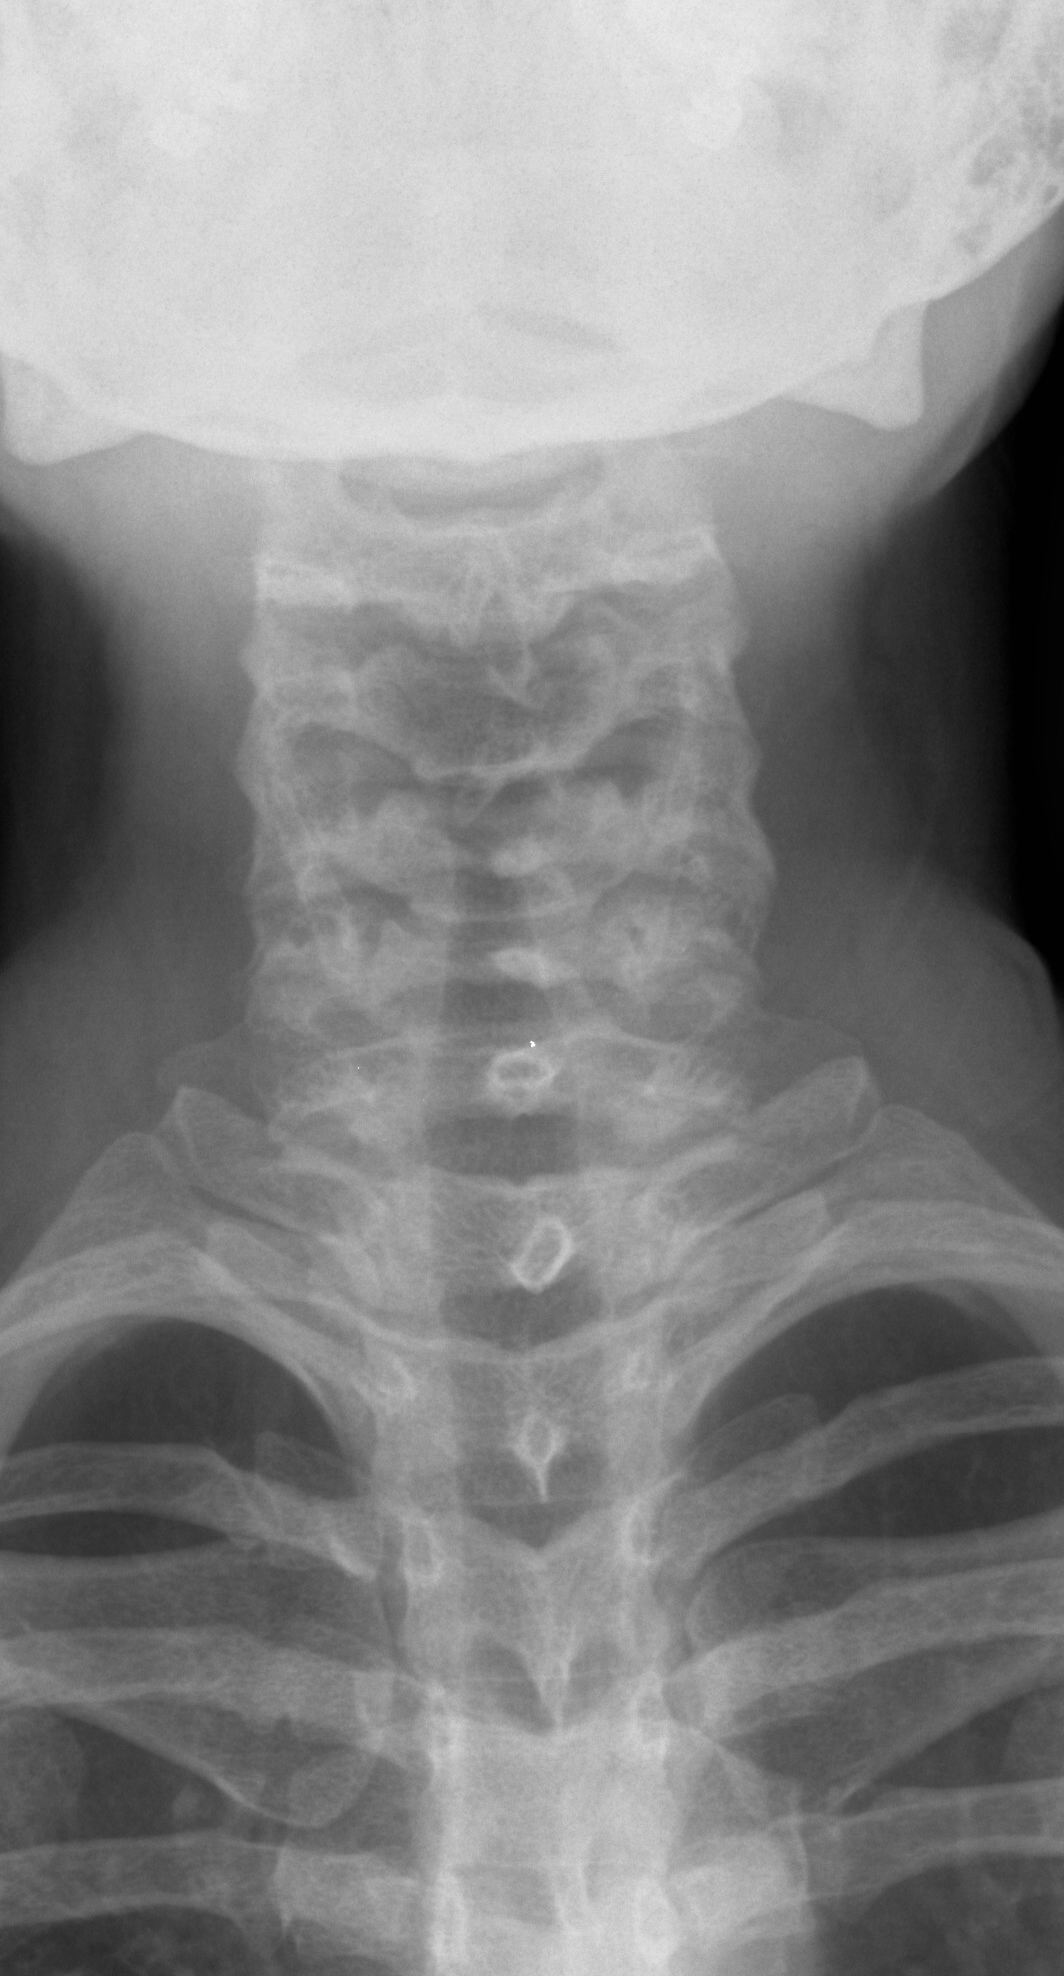
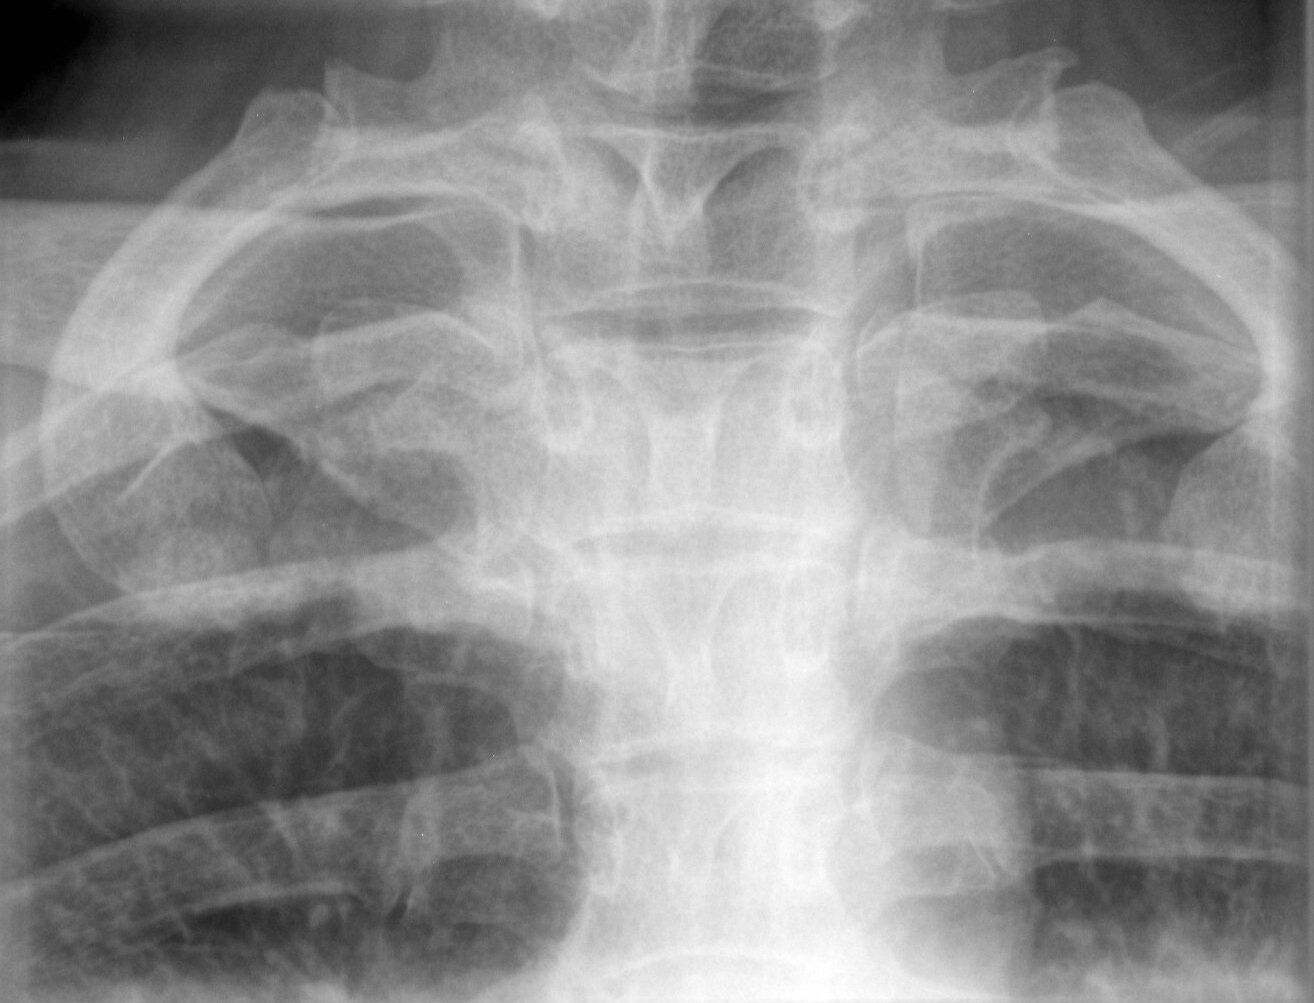
1. AP |
10x12 LW |
Patient supine or upright, neck slightly extended with no rotation. Mastoid tip should be superimposed on the gonion. |
CR angled 10E cephalic to C-4 |
|
|
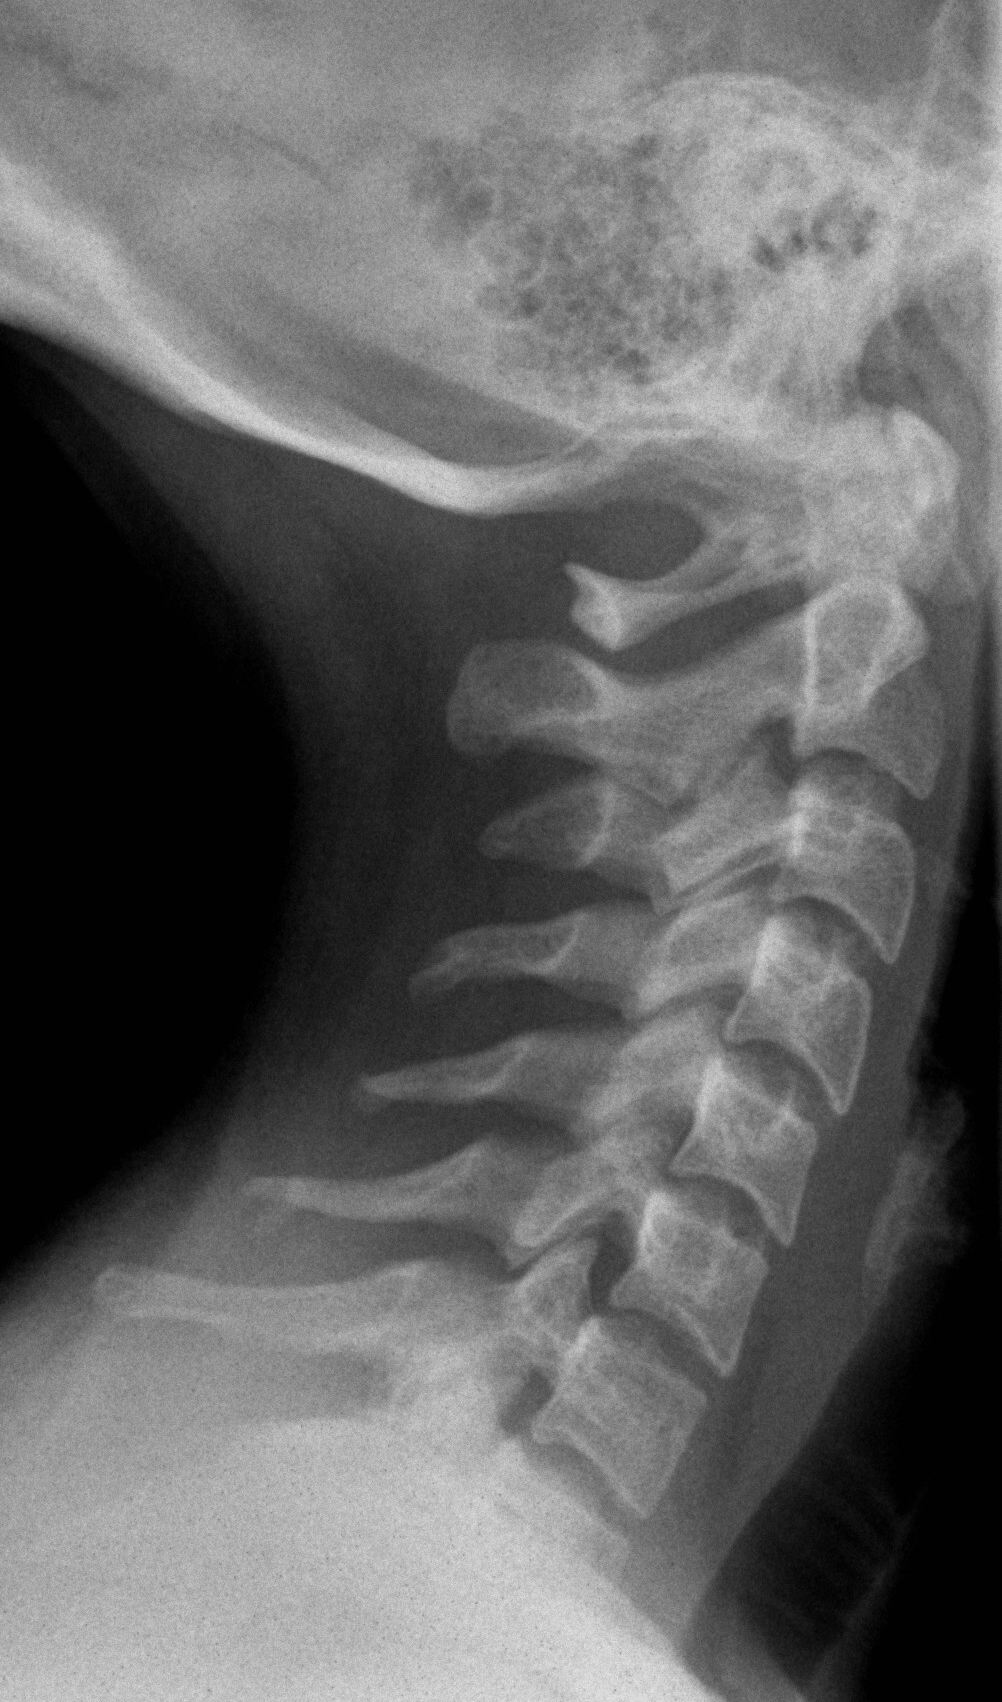
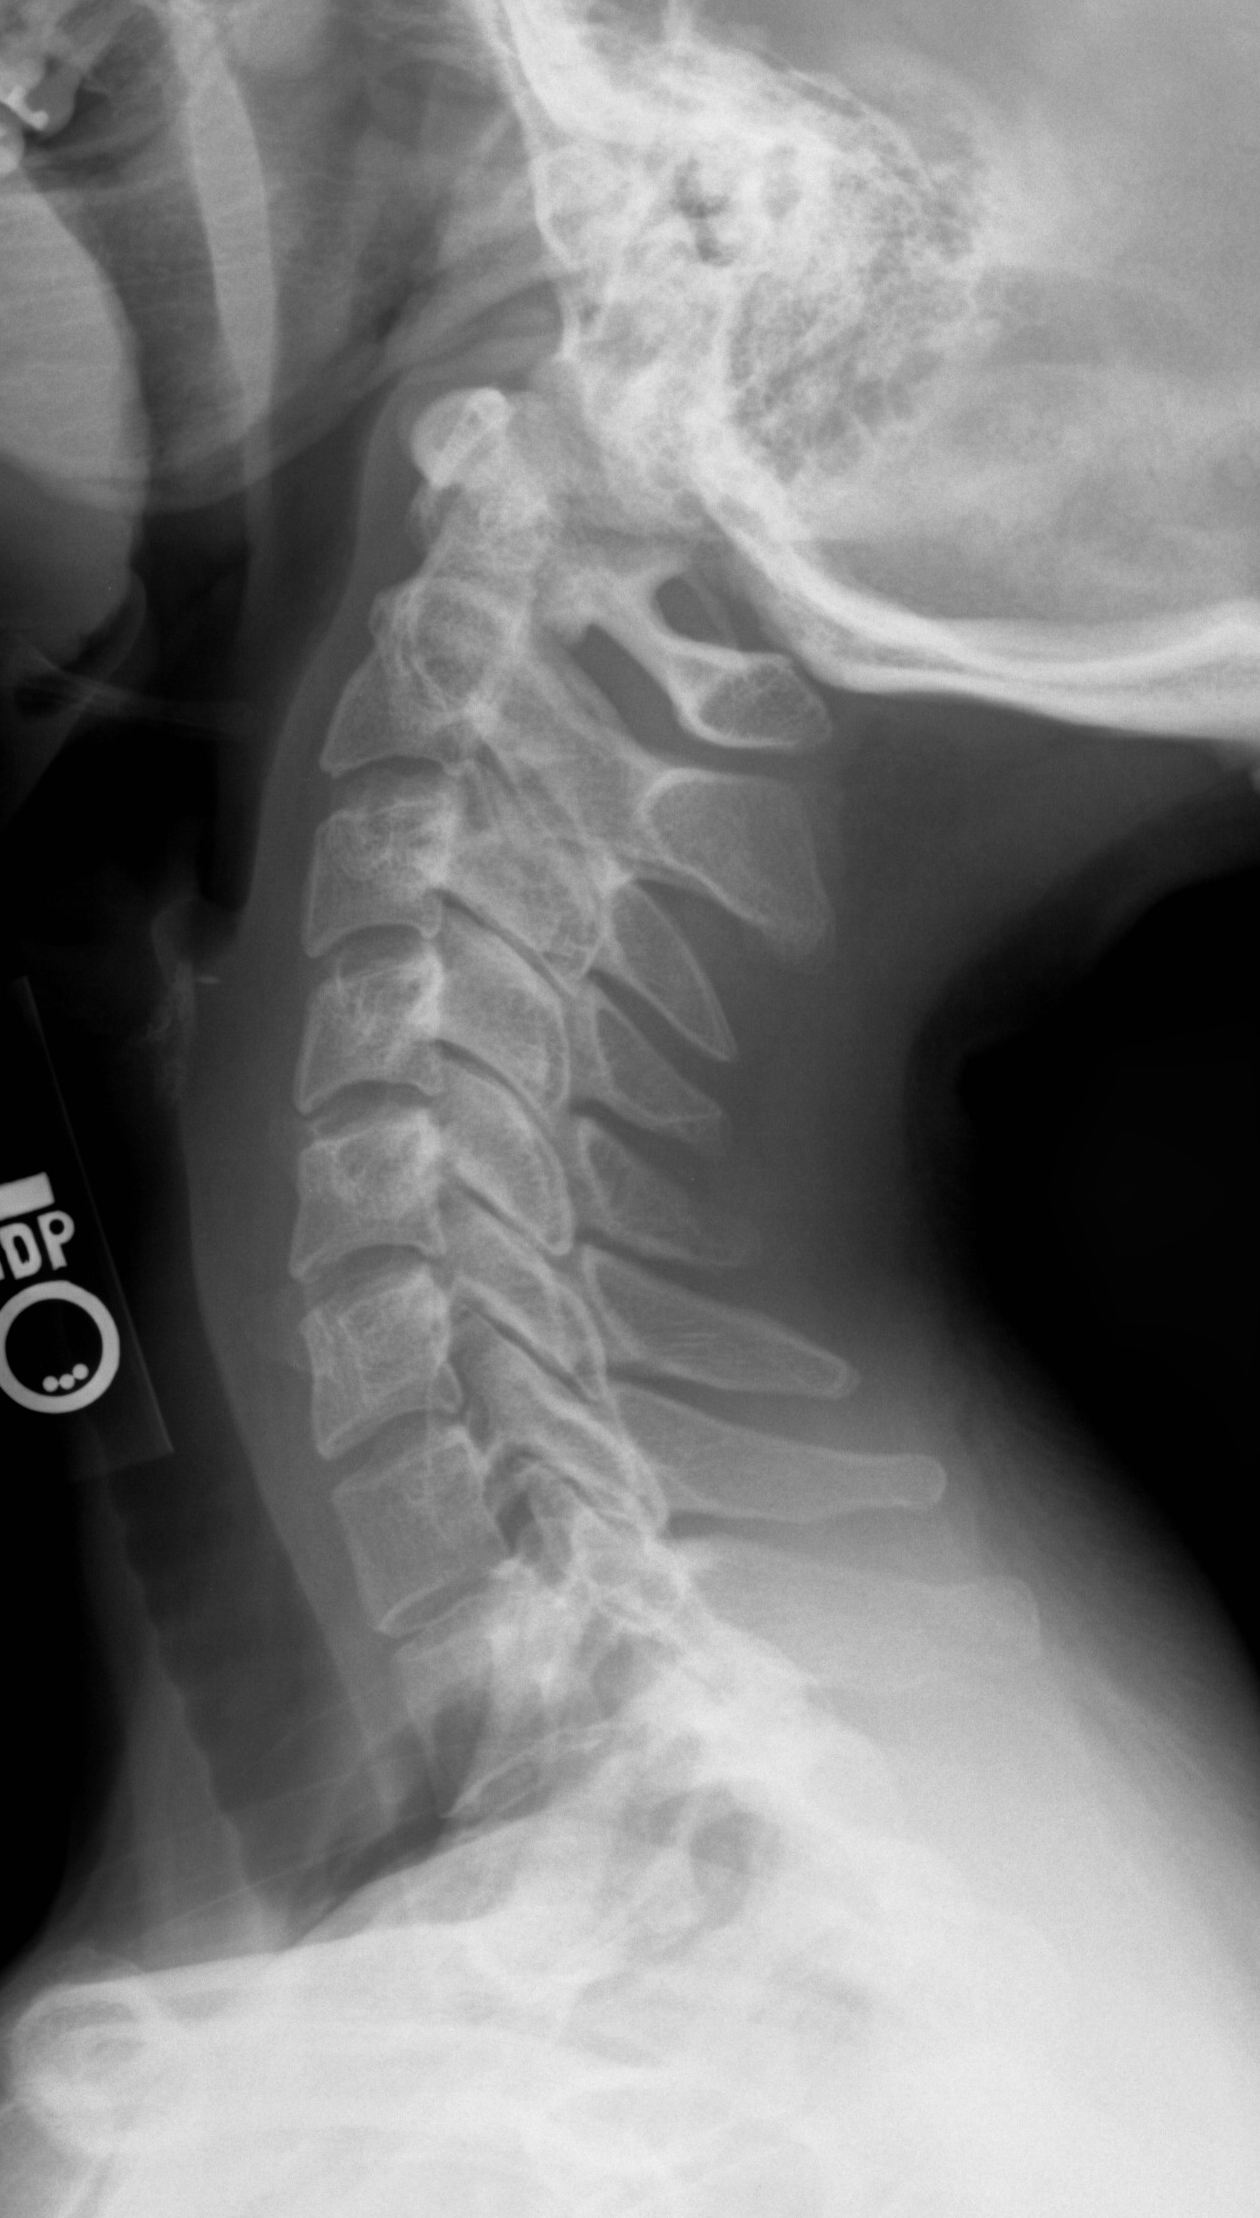
2. Lateral (Use 72" SID whenever possible) |
10x12 LW |
Patient supine or upright, film taken on expiration, shoulders relaxed to lower humeral heads |
CR perpendicular to C4, include C1- T1 on film |
|
|
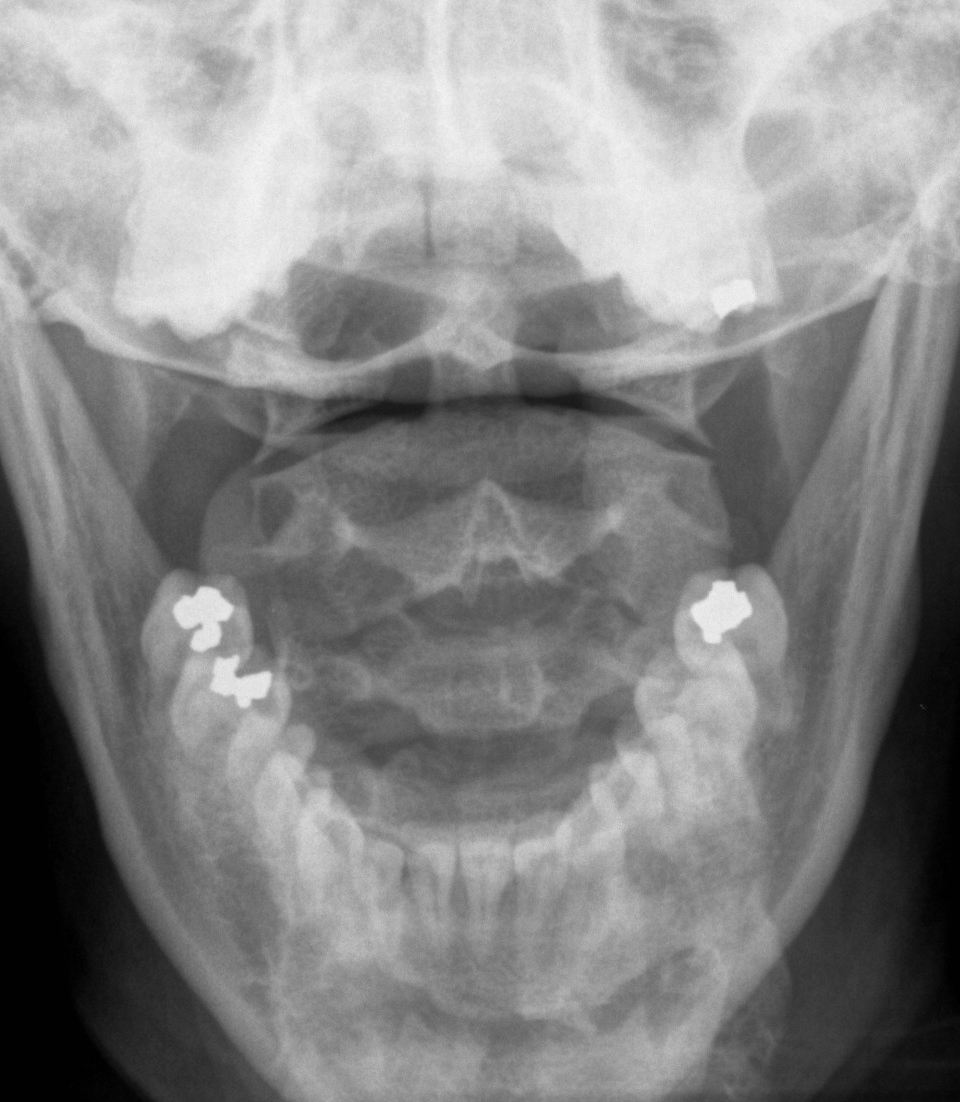
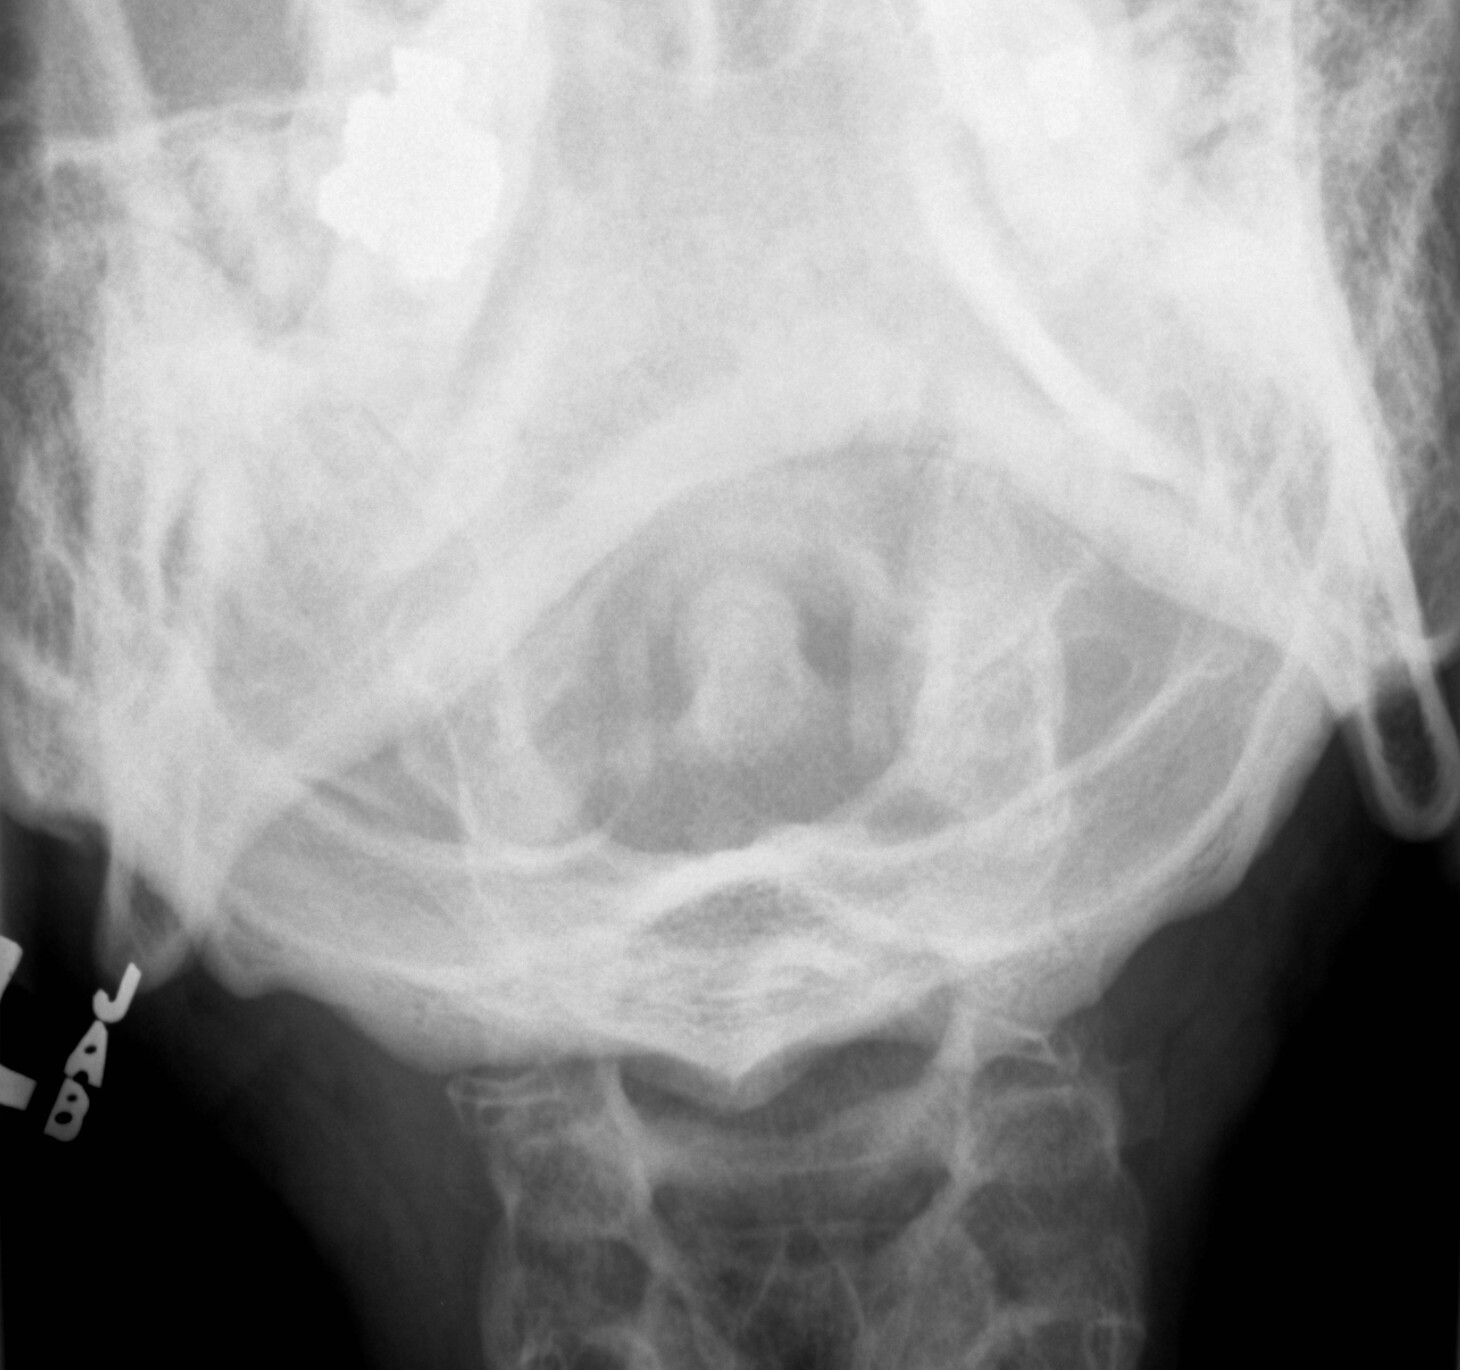
3. AP odontoid (open mouth) |
8x10 LW |
Patient supine or upright, open mouth, flex neck to have line from upper teeth to skull base perpendicular to table |
CR parallel to the line from the teeth to skull base |
|
|
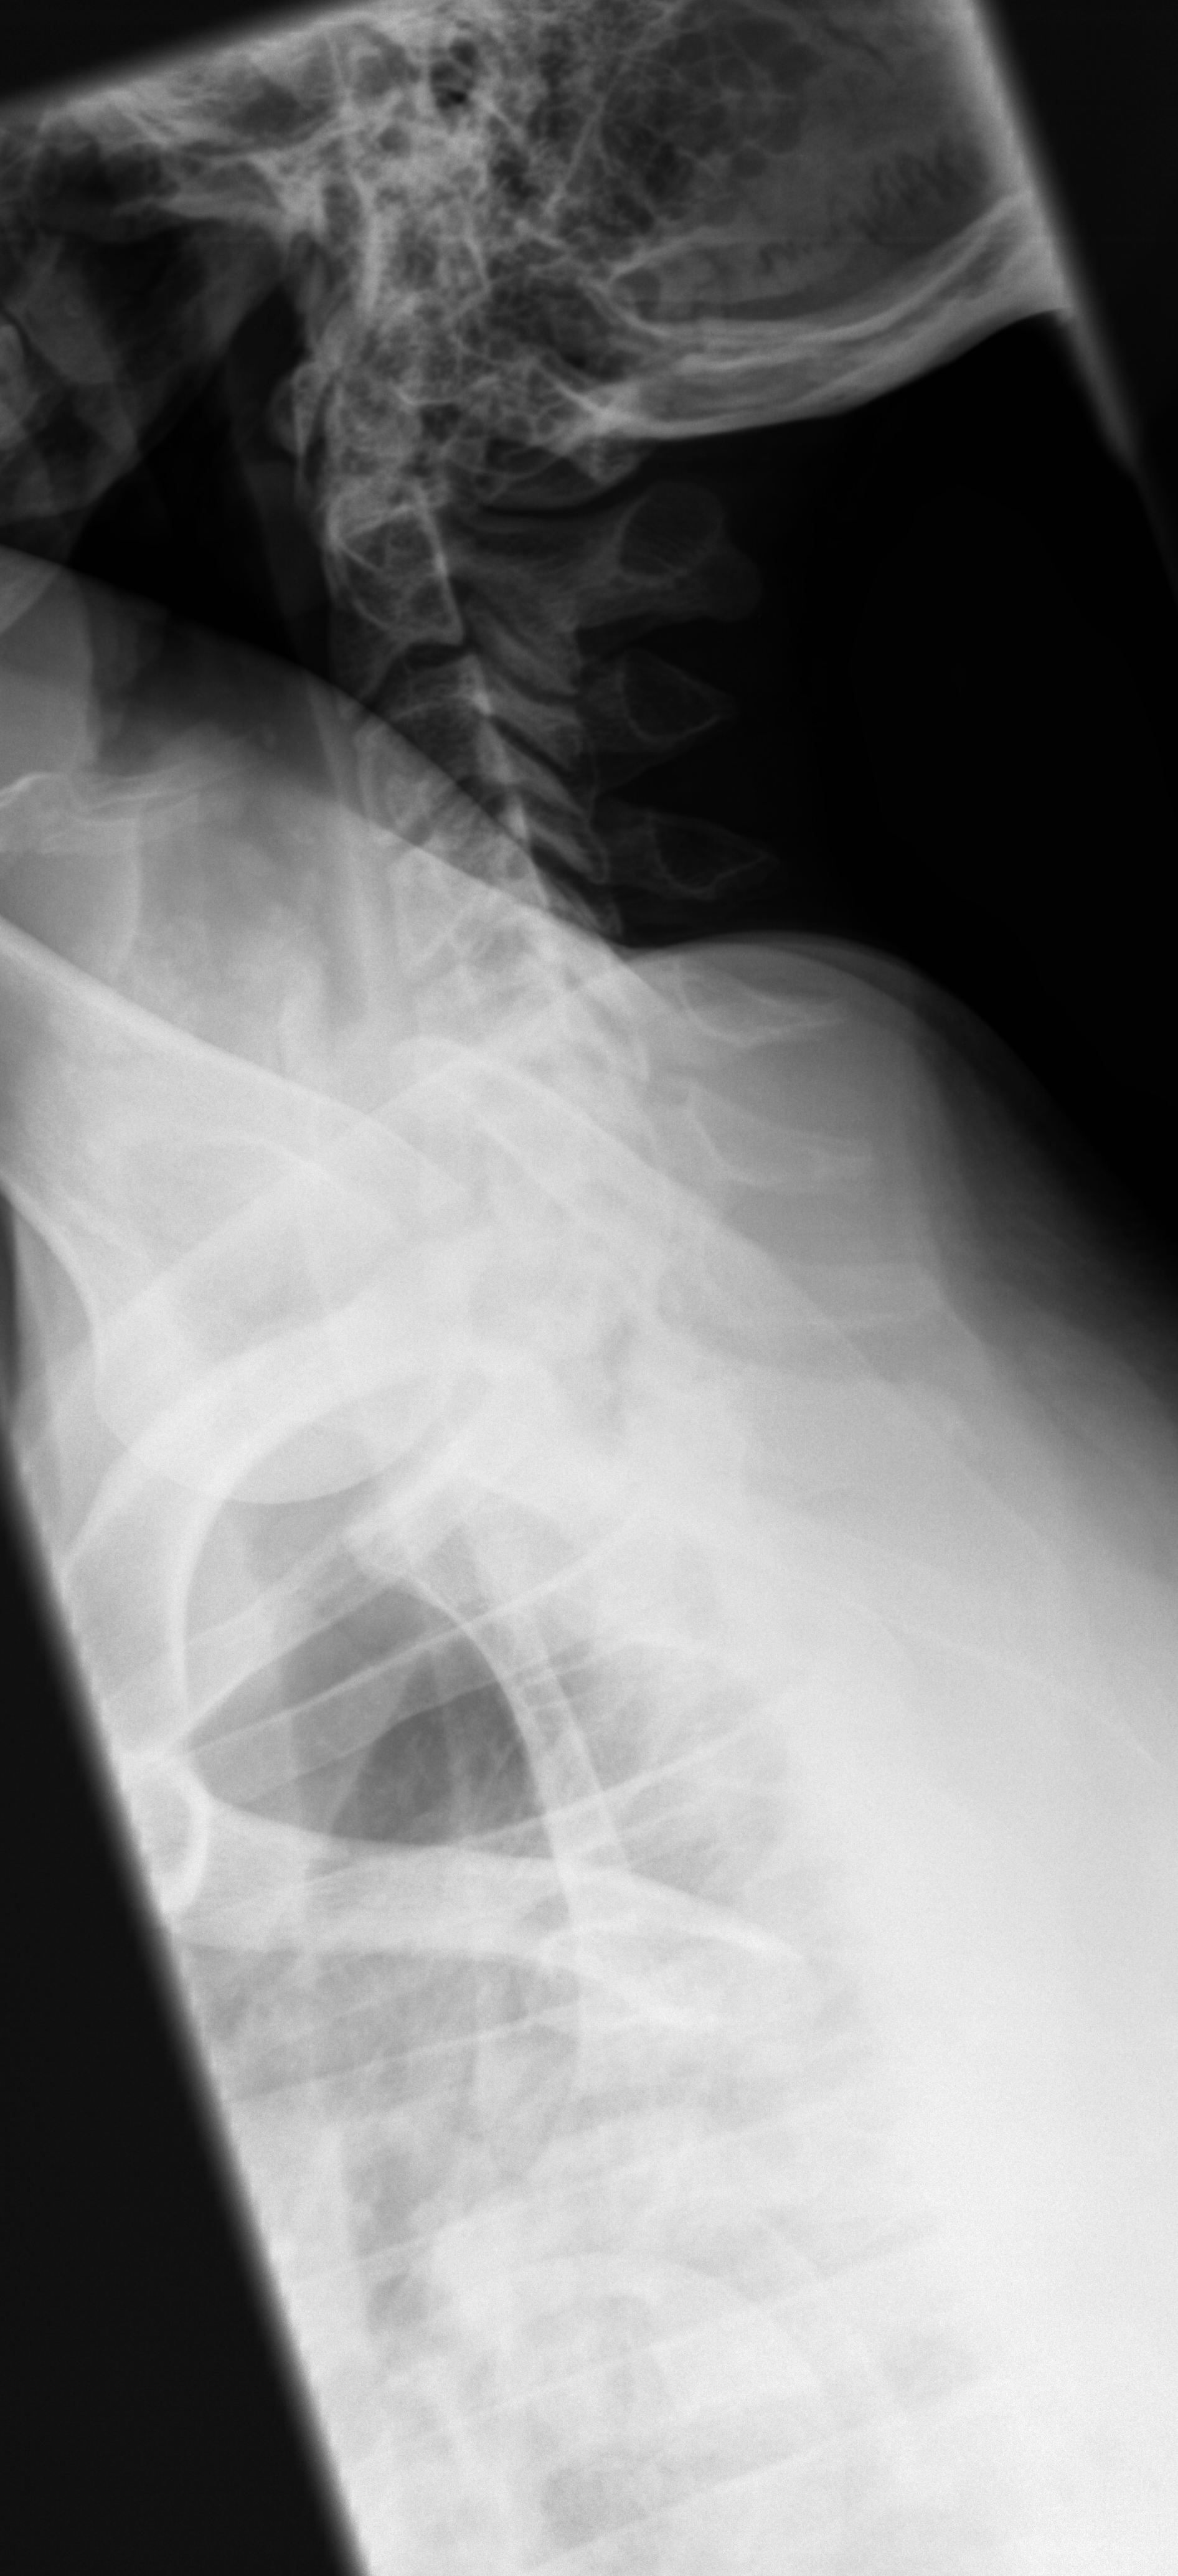
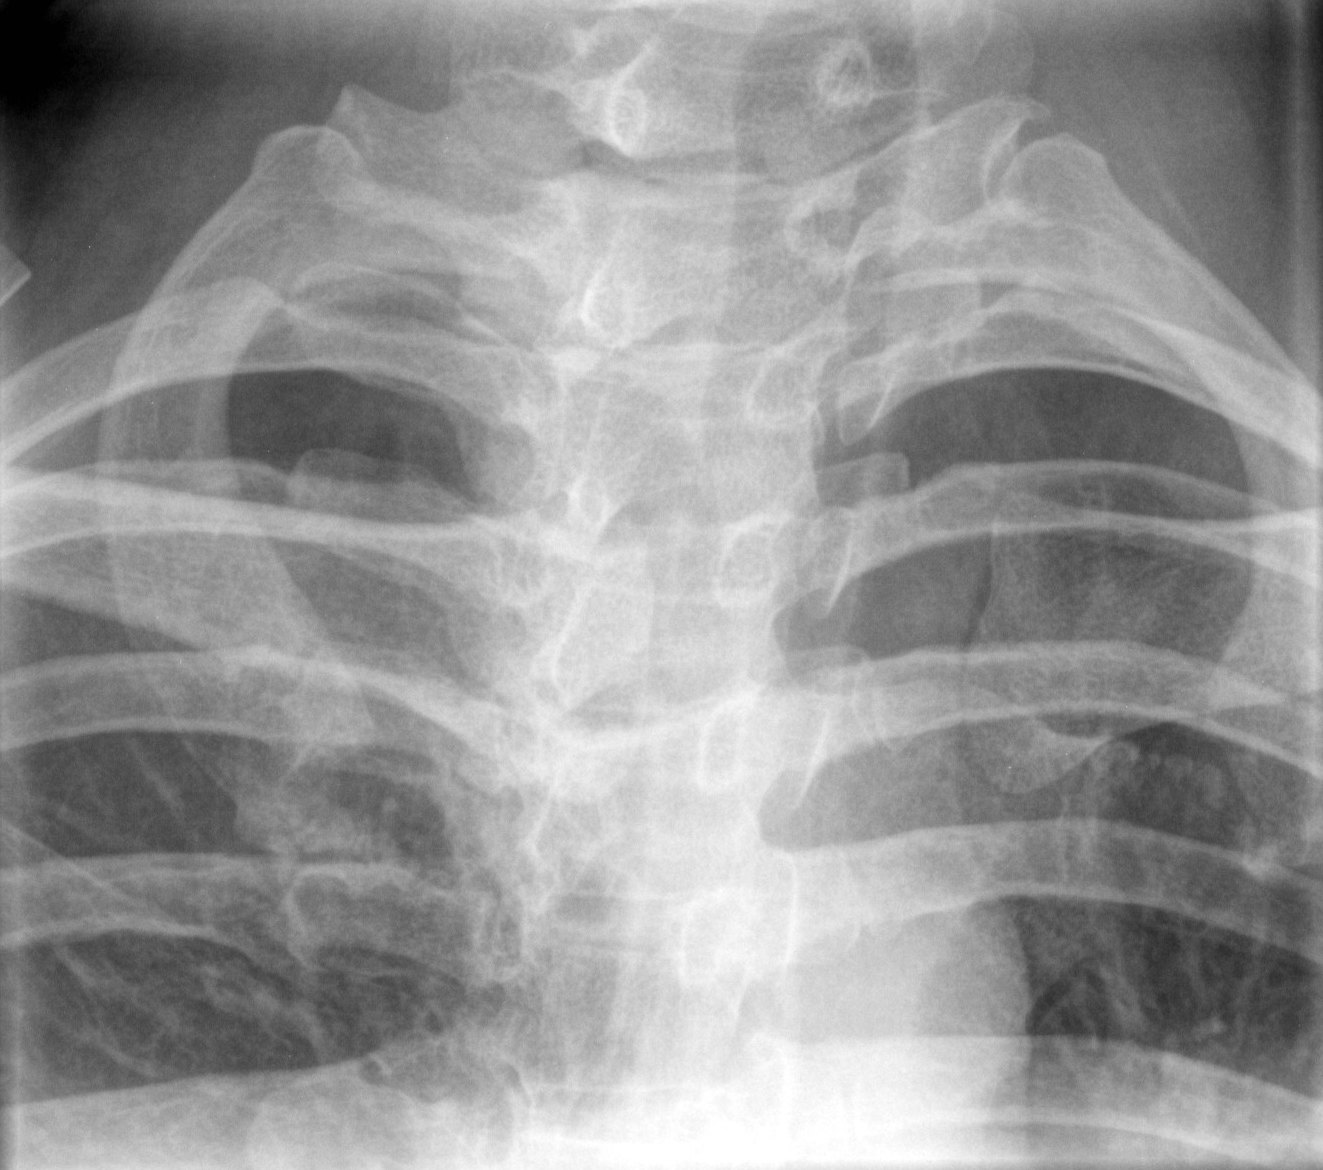
4. Swimmer's view - to visualize C7-T1 |
10x12 LW |
Patient supine or upright, place left side against film, vertically raise left arm and relax right arm to side of the body. |
CR perpendicular to C4 (An angle of 5E caudal may be needed to separate shoulders) |
|
|
CERVICAL SPINE - Additional views - to be done on approval of bone radiologist |
|||
|
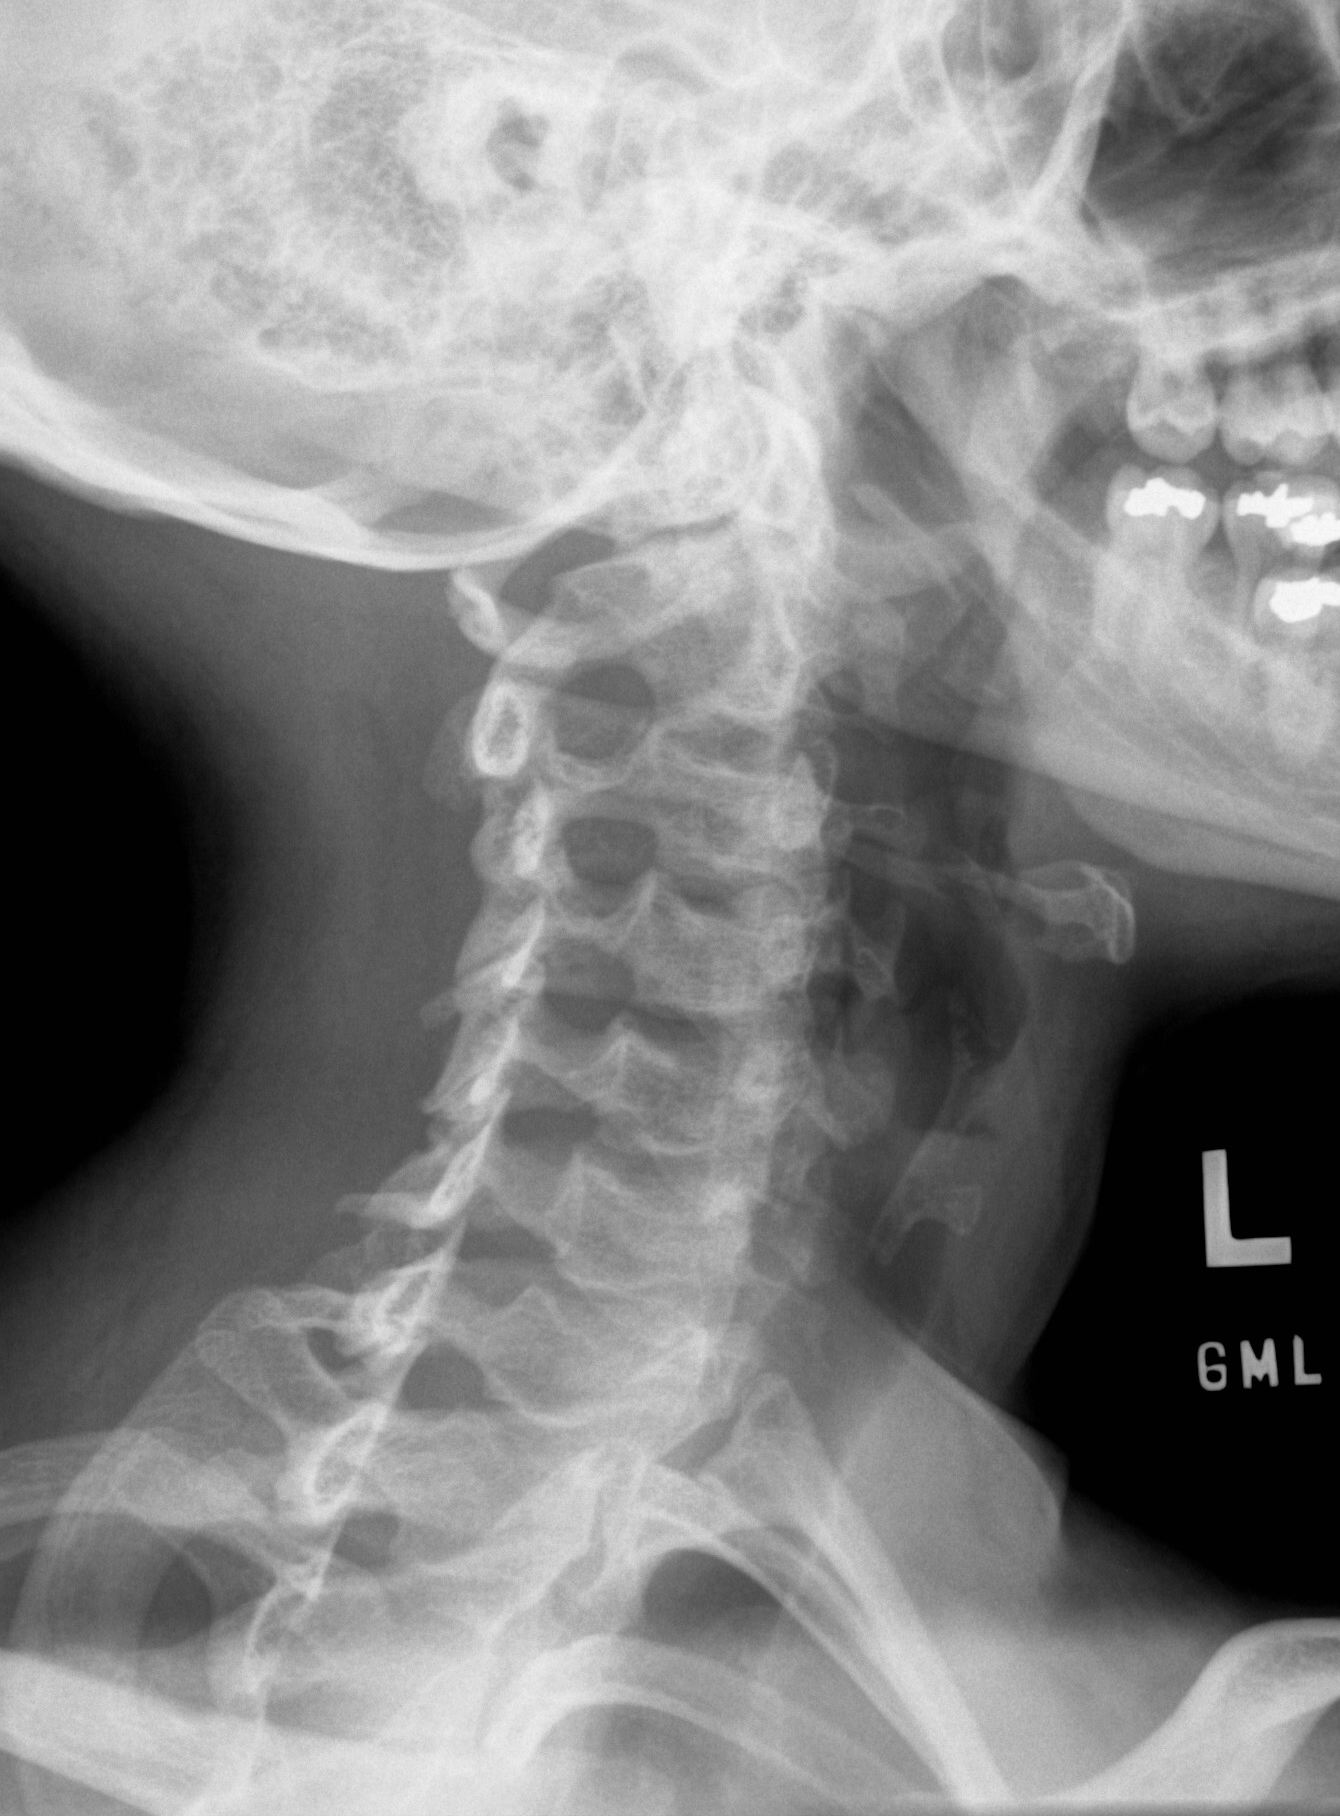
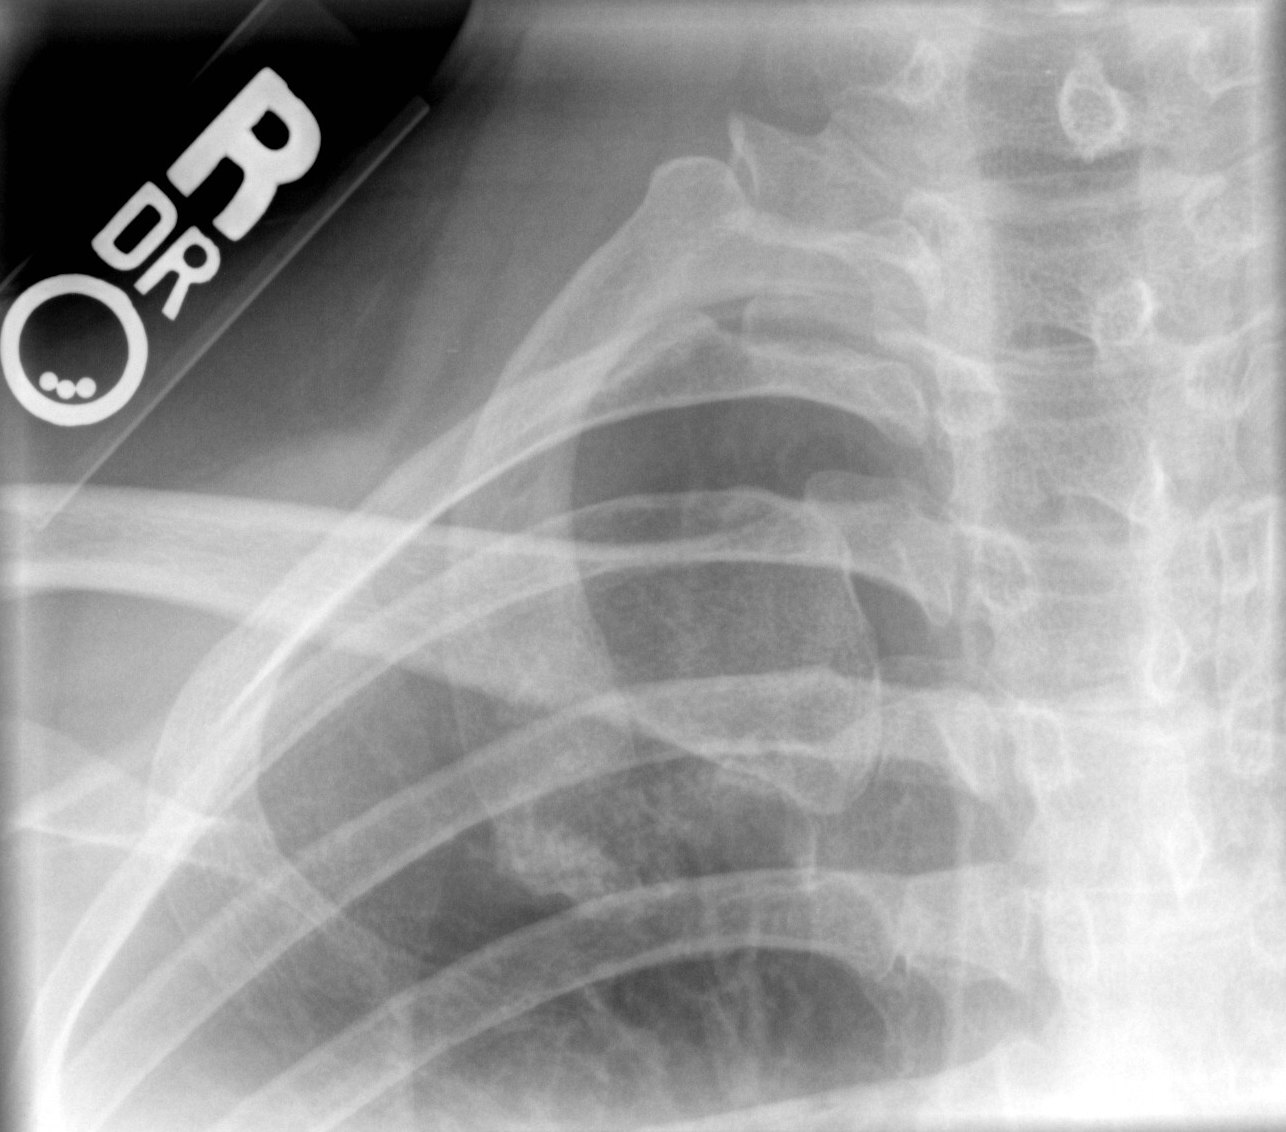
1. Right anterior oblique |
10x12 LW |
Place patient into 45E RAO |
CR angled 10E -15E caudal to C-4 |
|
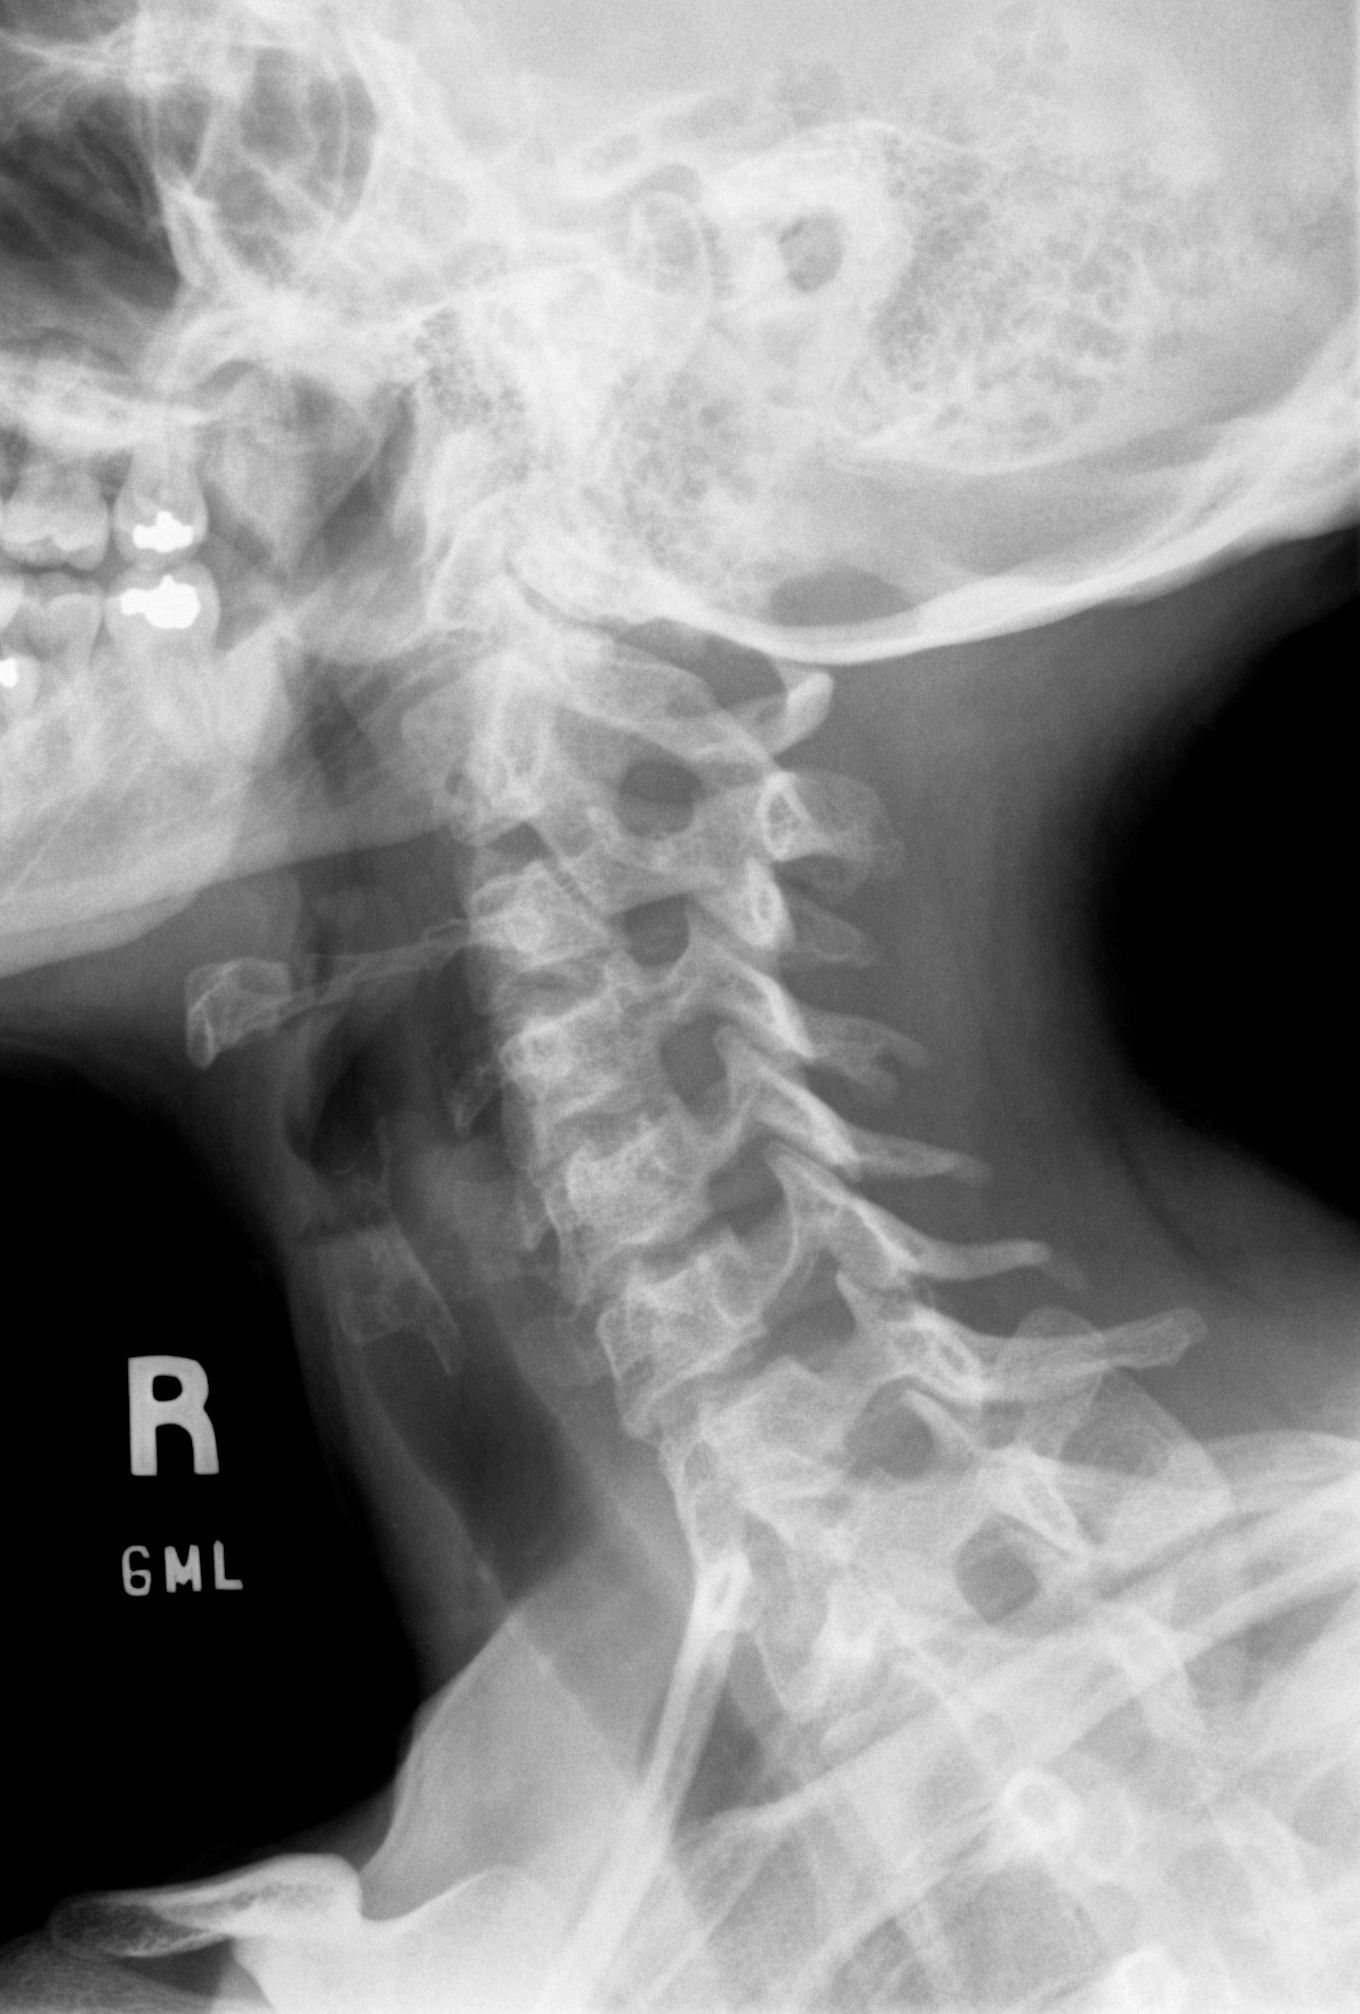
2. Left anterior oblique |
10x12 LW |
Place patient into 45E LAO |
CR angled 10E -15E caudal to C-4 |
|
3. X-table Lateral. Show film to radiologist prior to moving patient |
10x12 CW |
Follow positioning protocol above. |
Horizontal CR perpendicular to C4. |
|
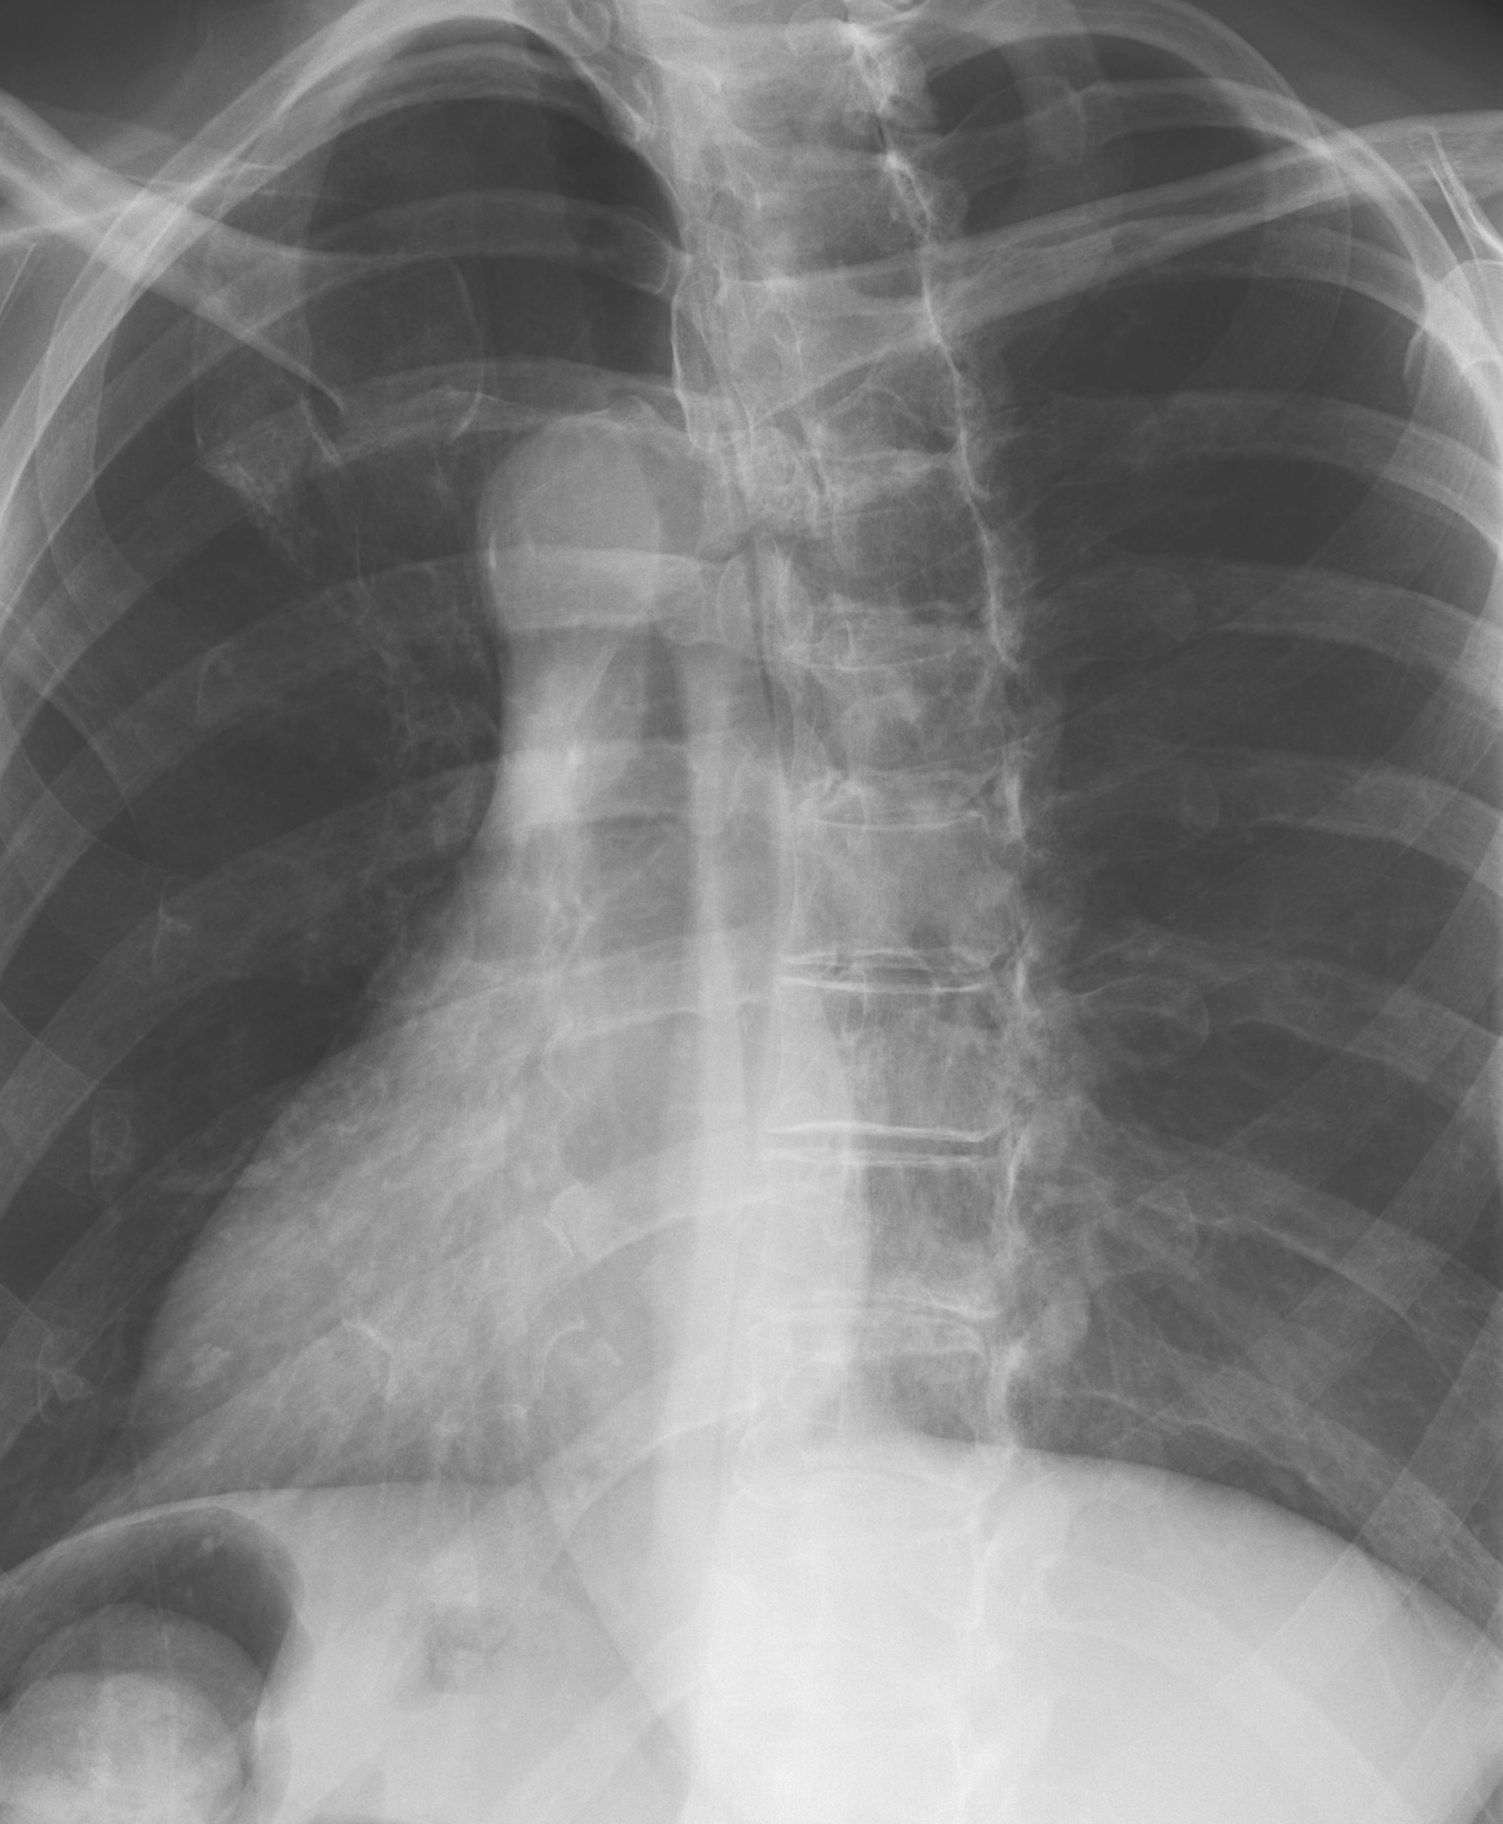
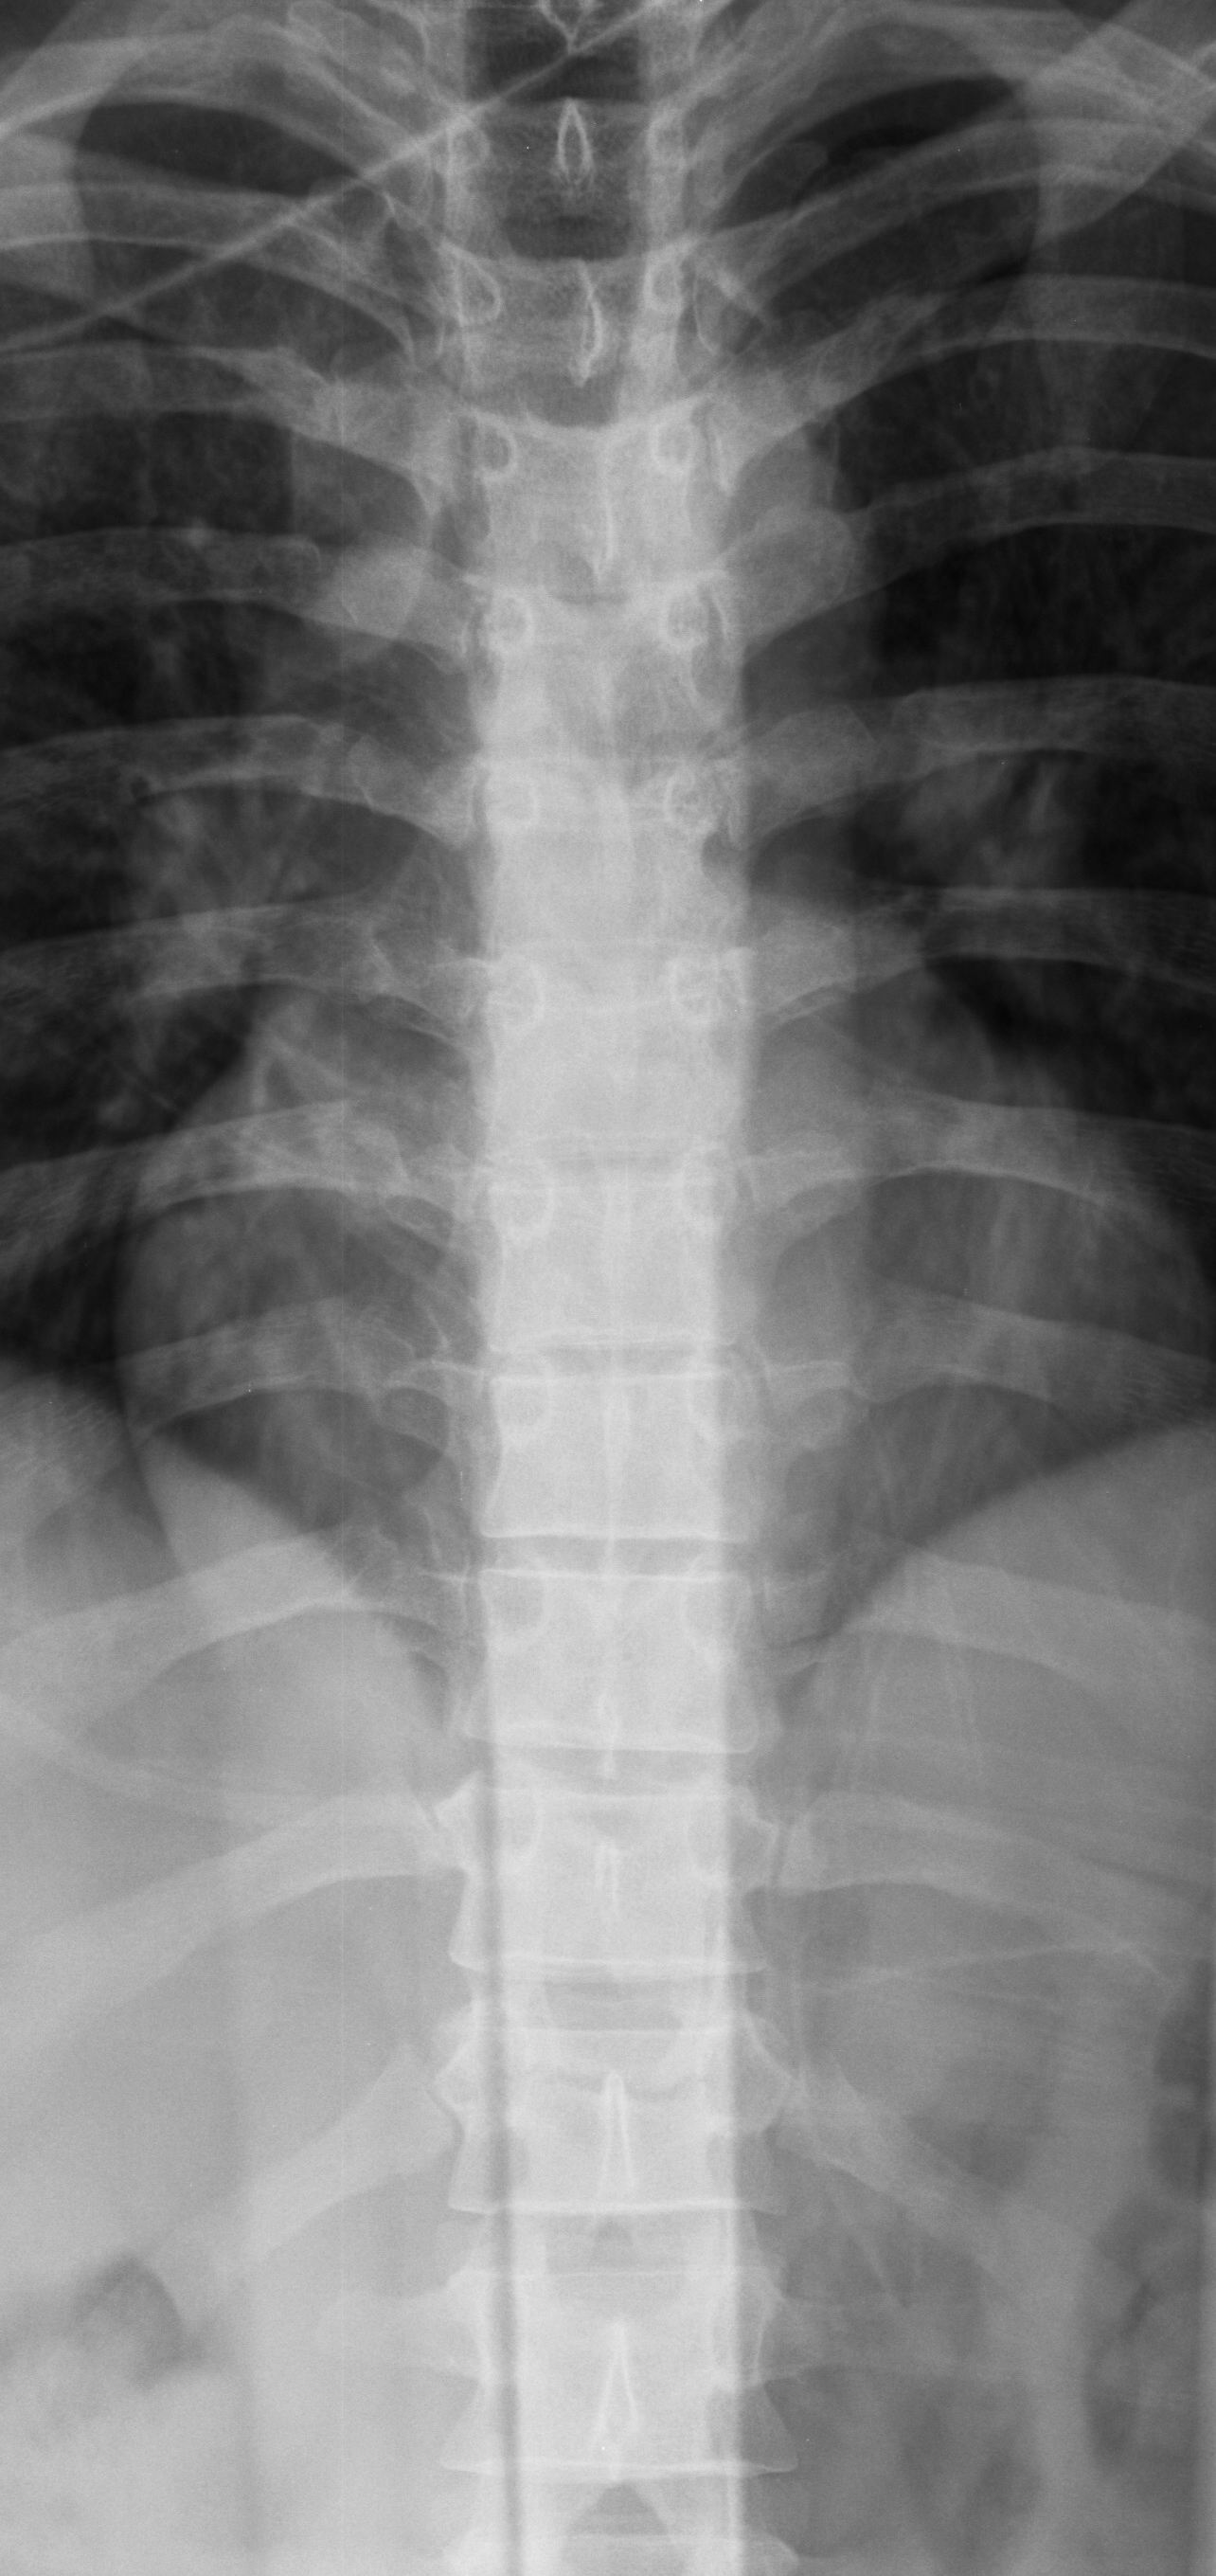
1. AP |
14x17 LW |
Patient supine or upright, film taken on inspiration |
CR perpendicular to T7, 3"(7.5cm) below sternal angle |
|
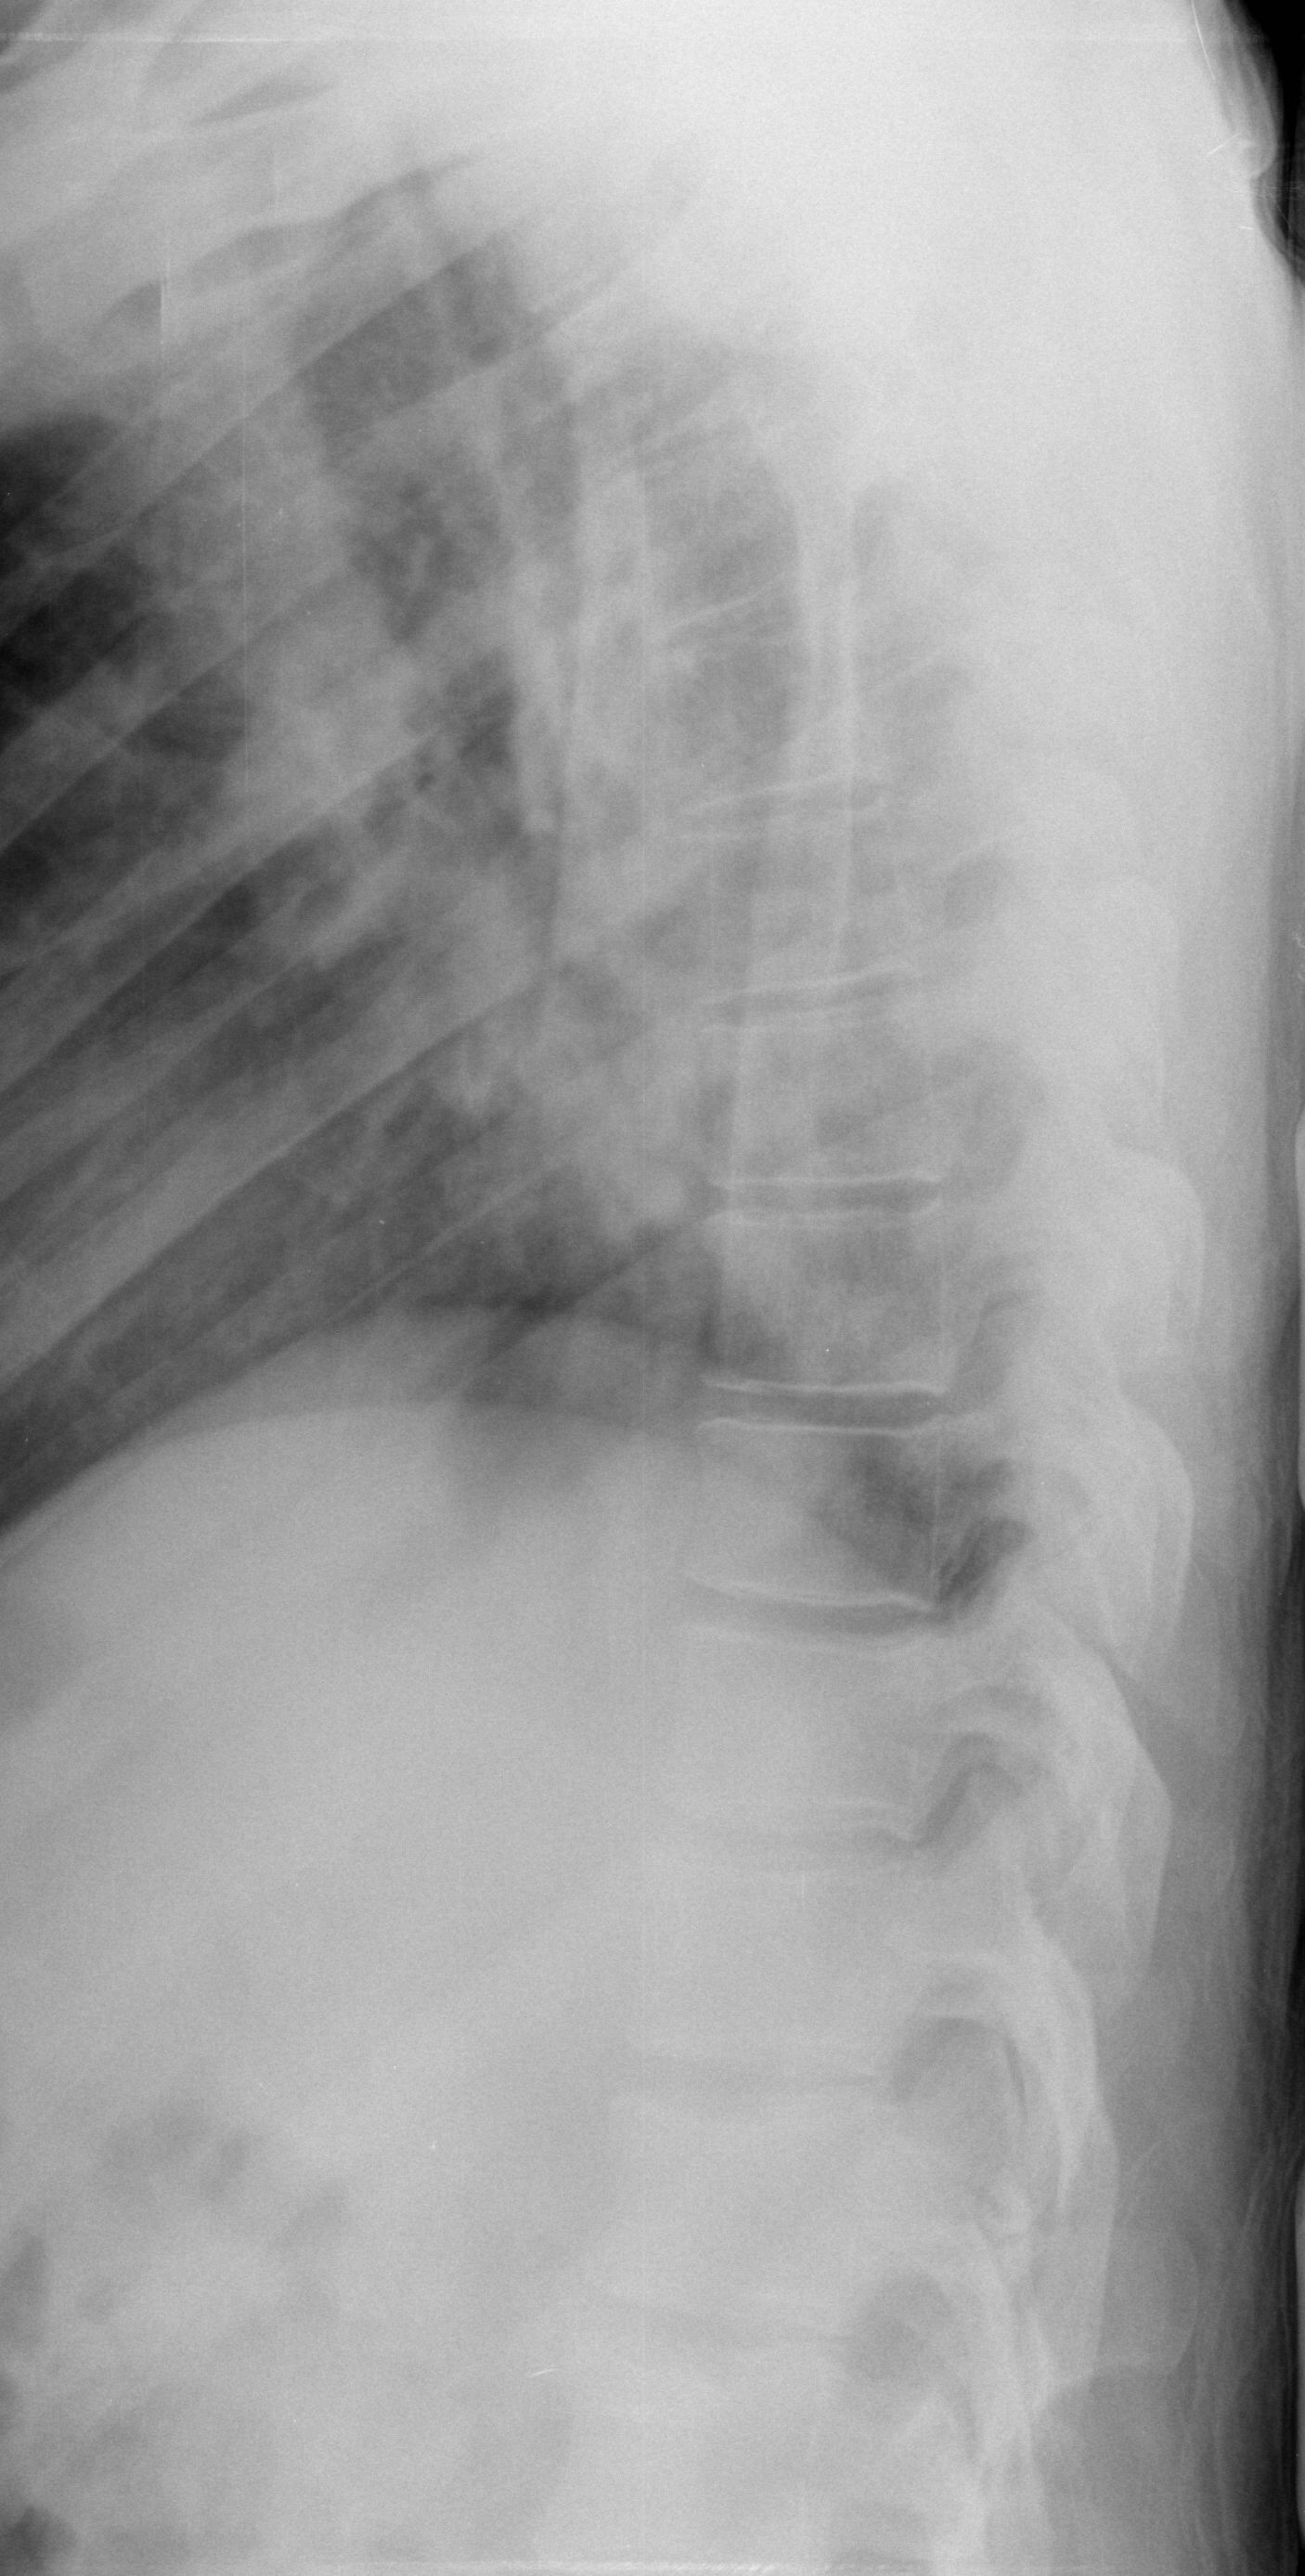
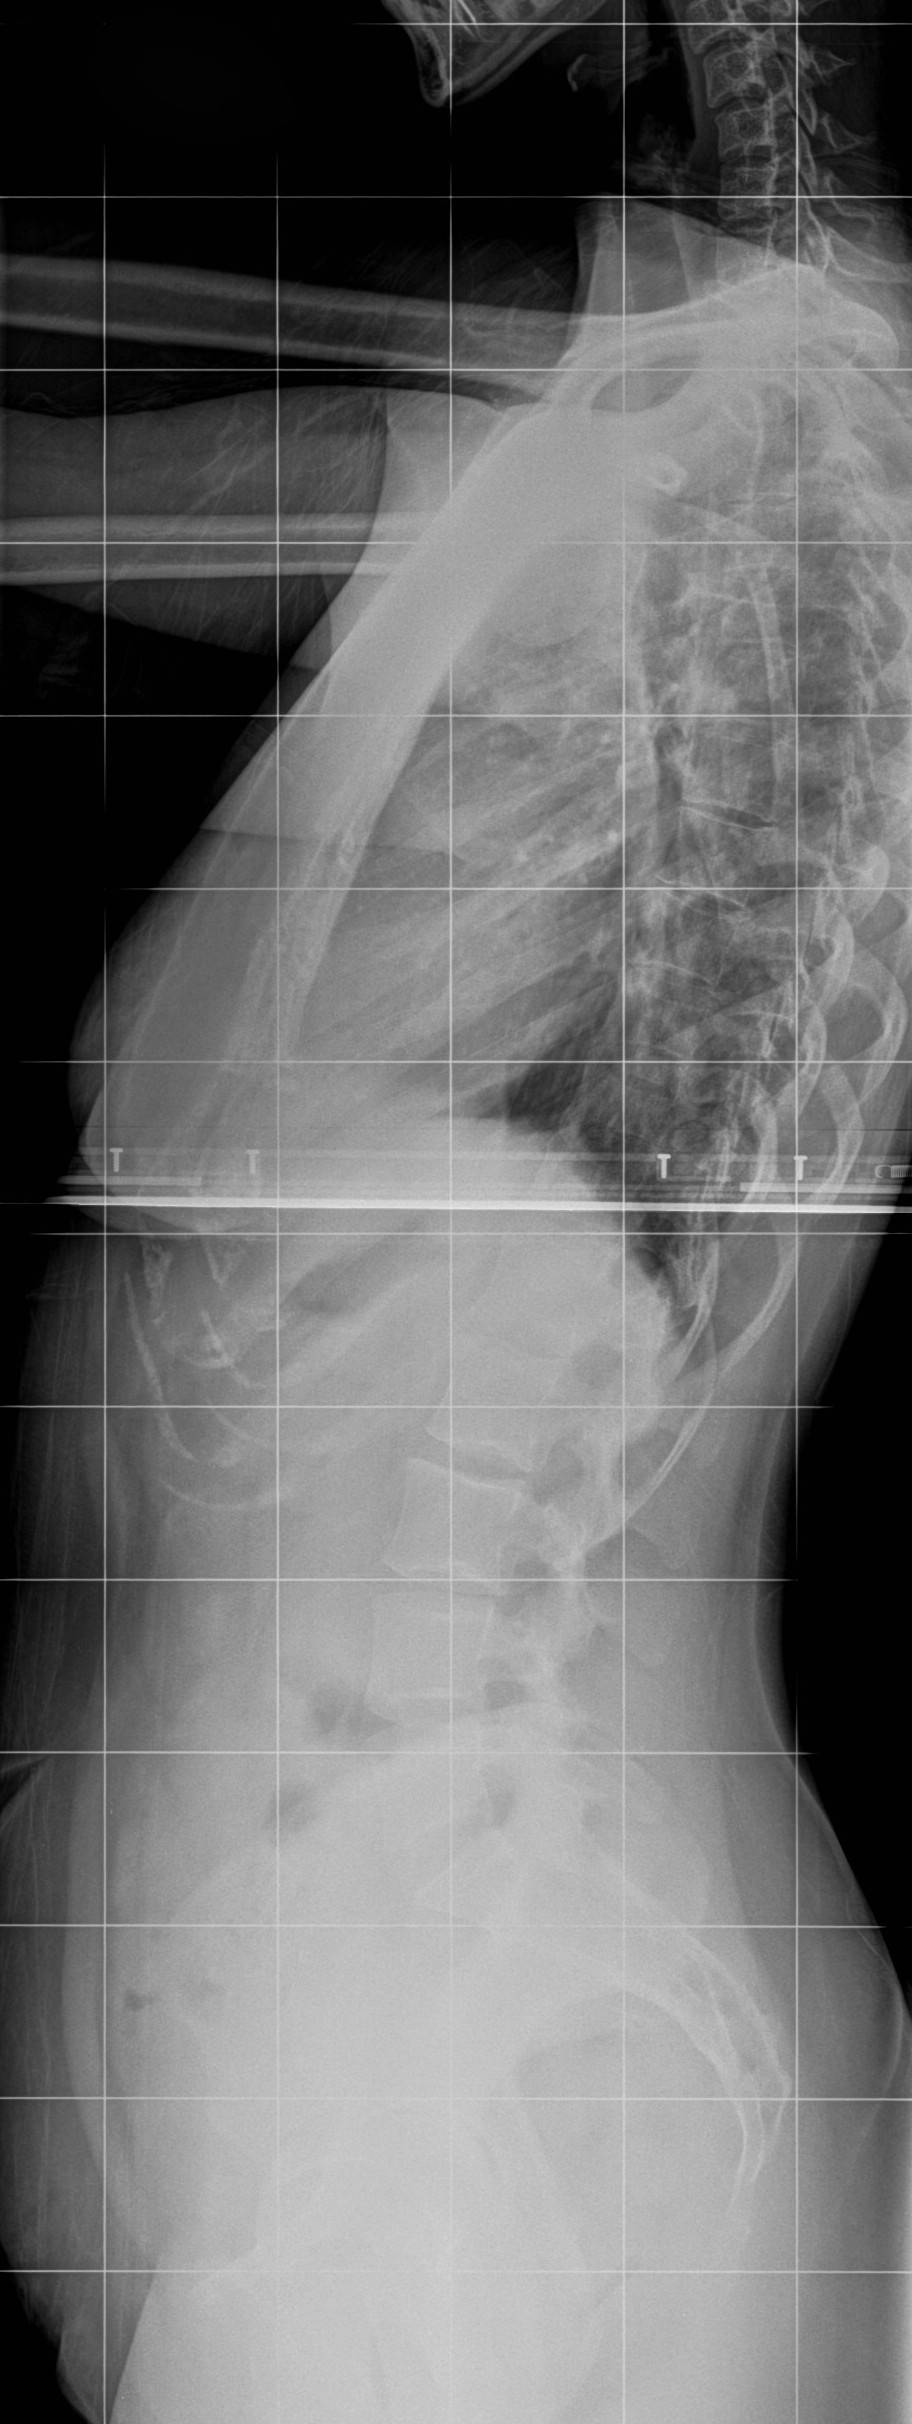
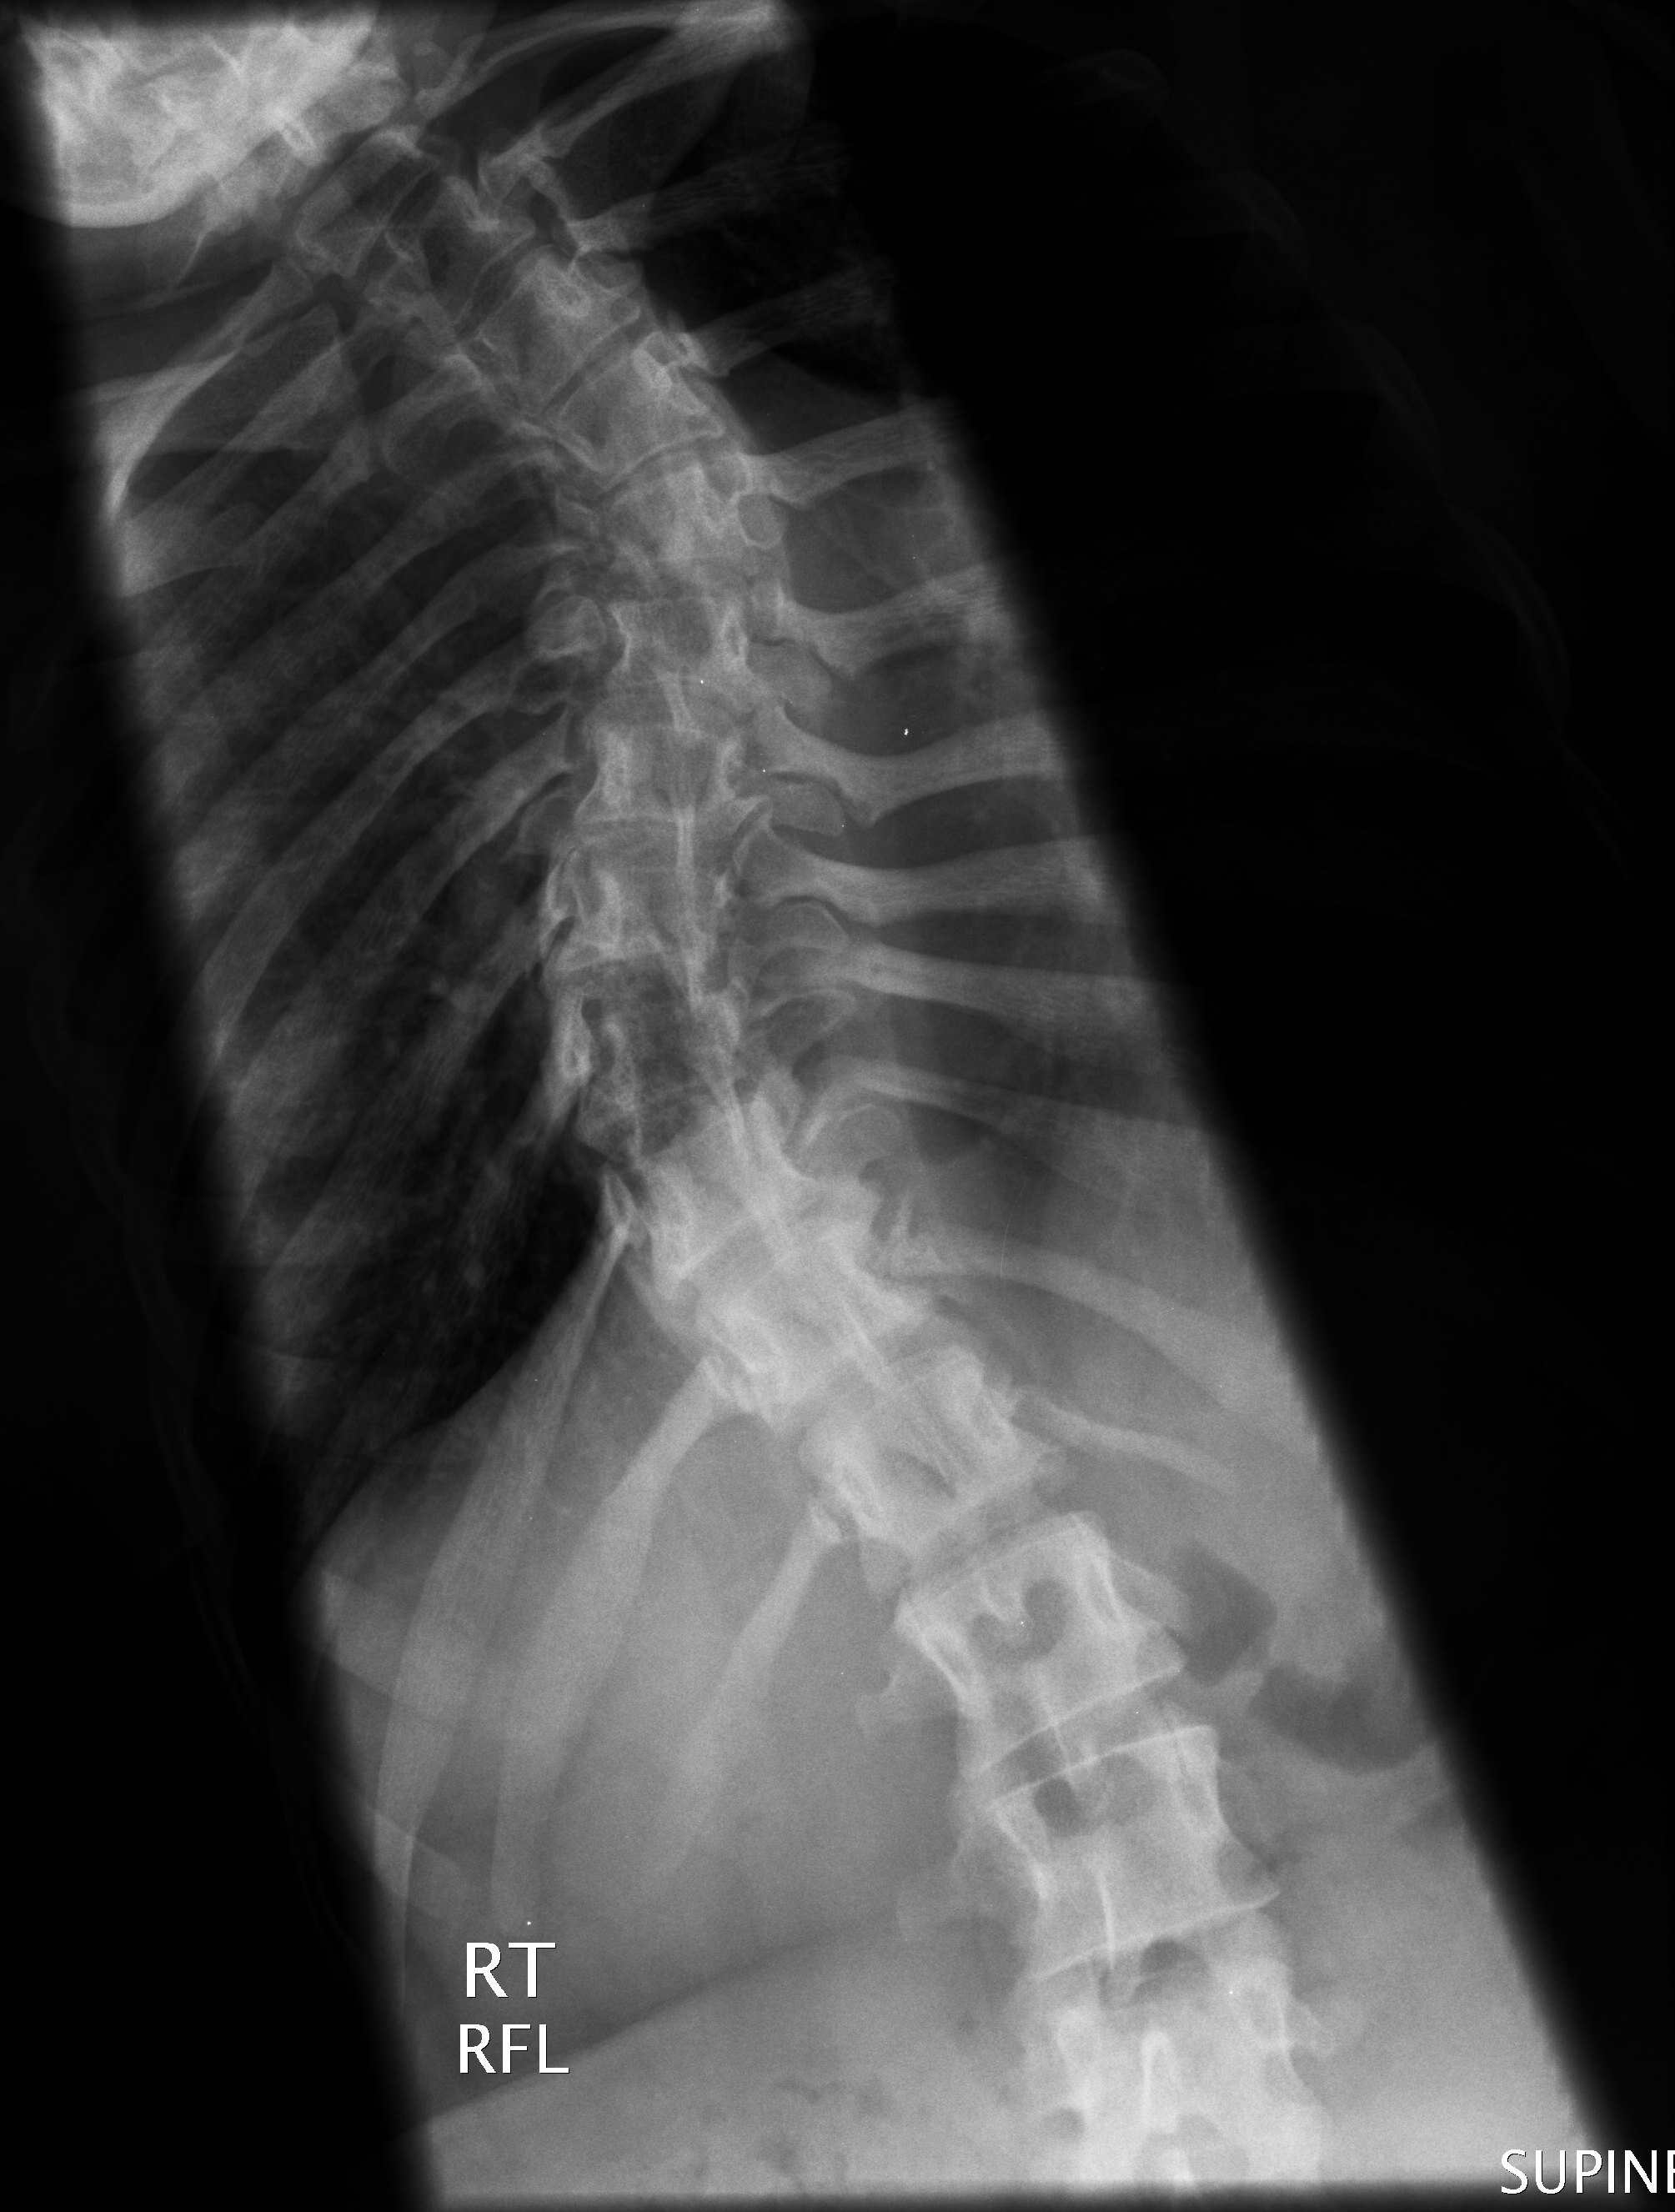
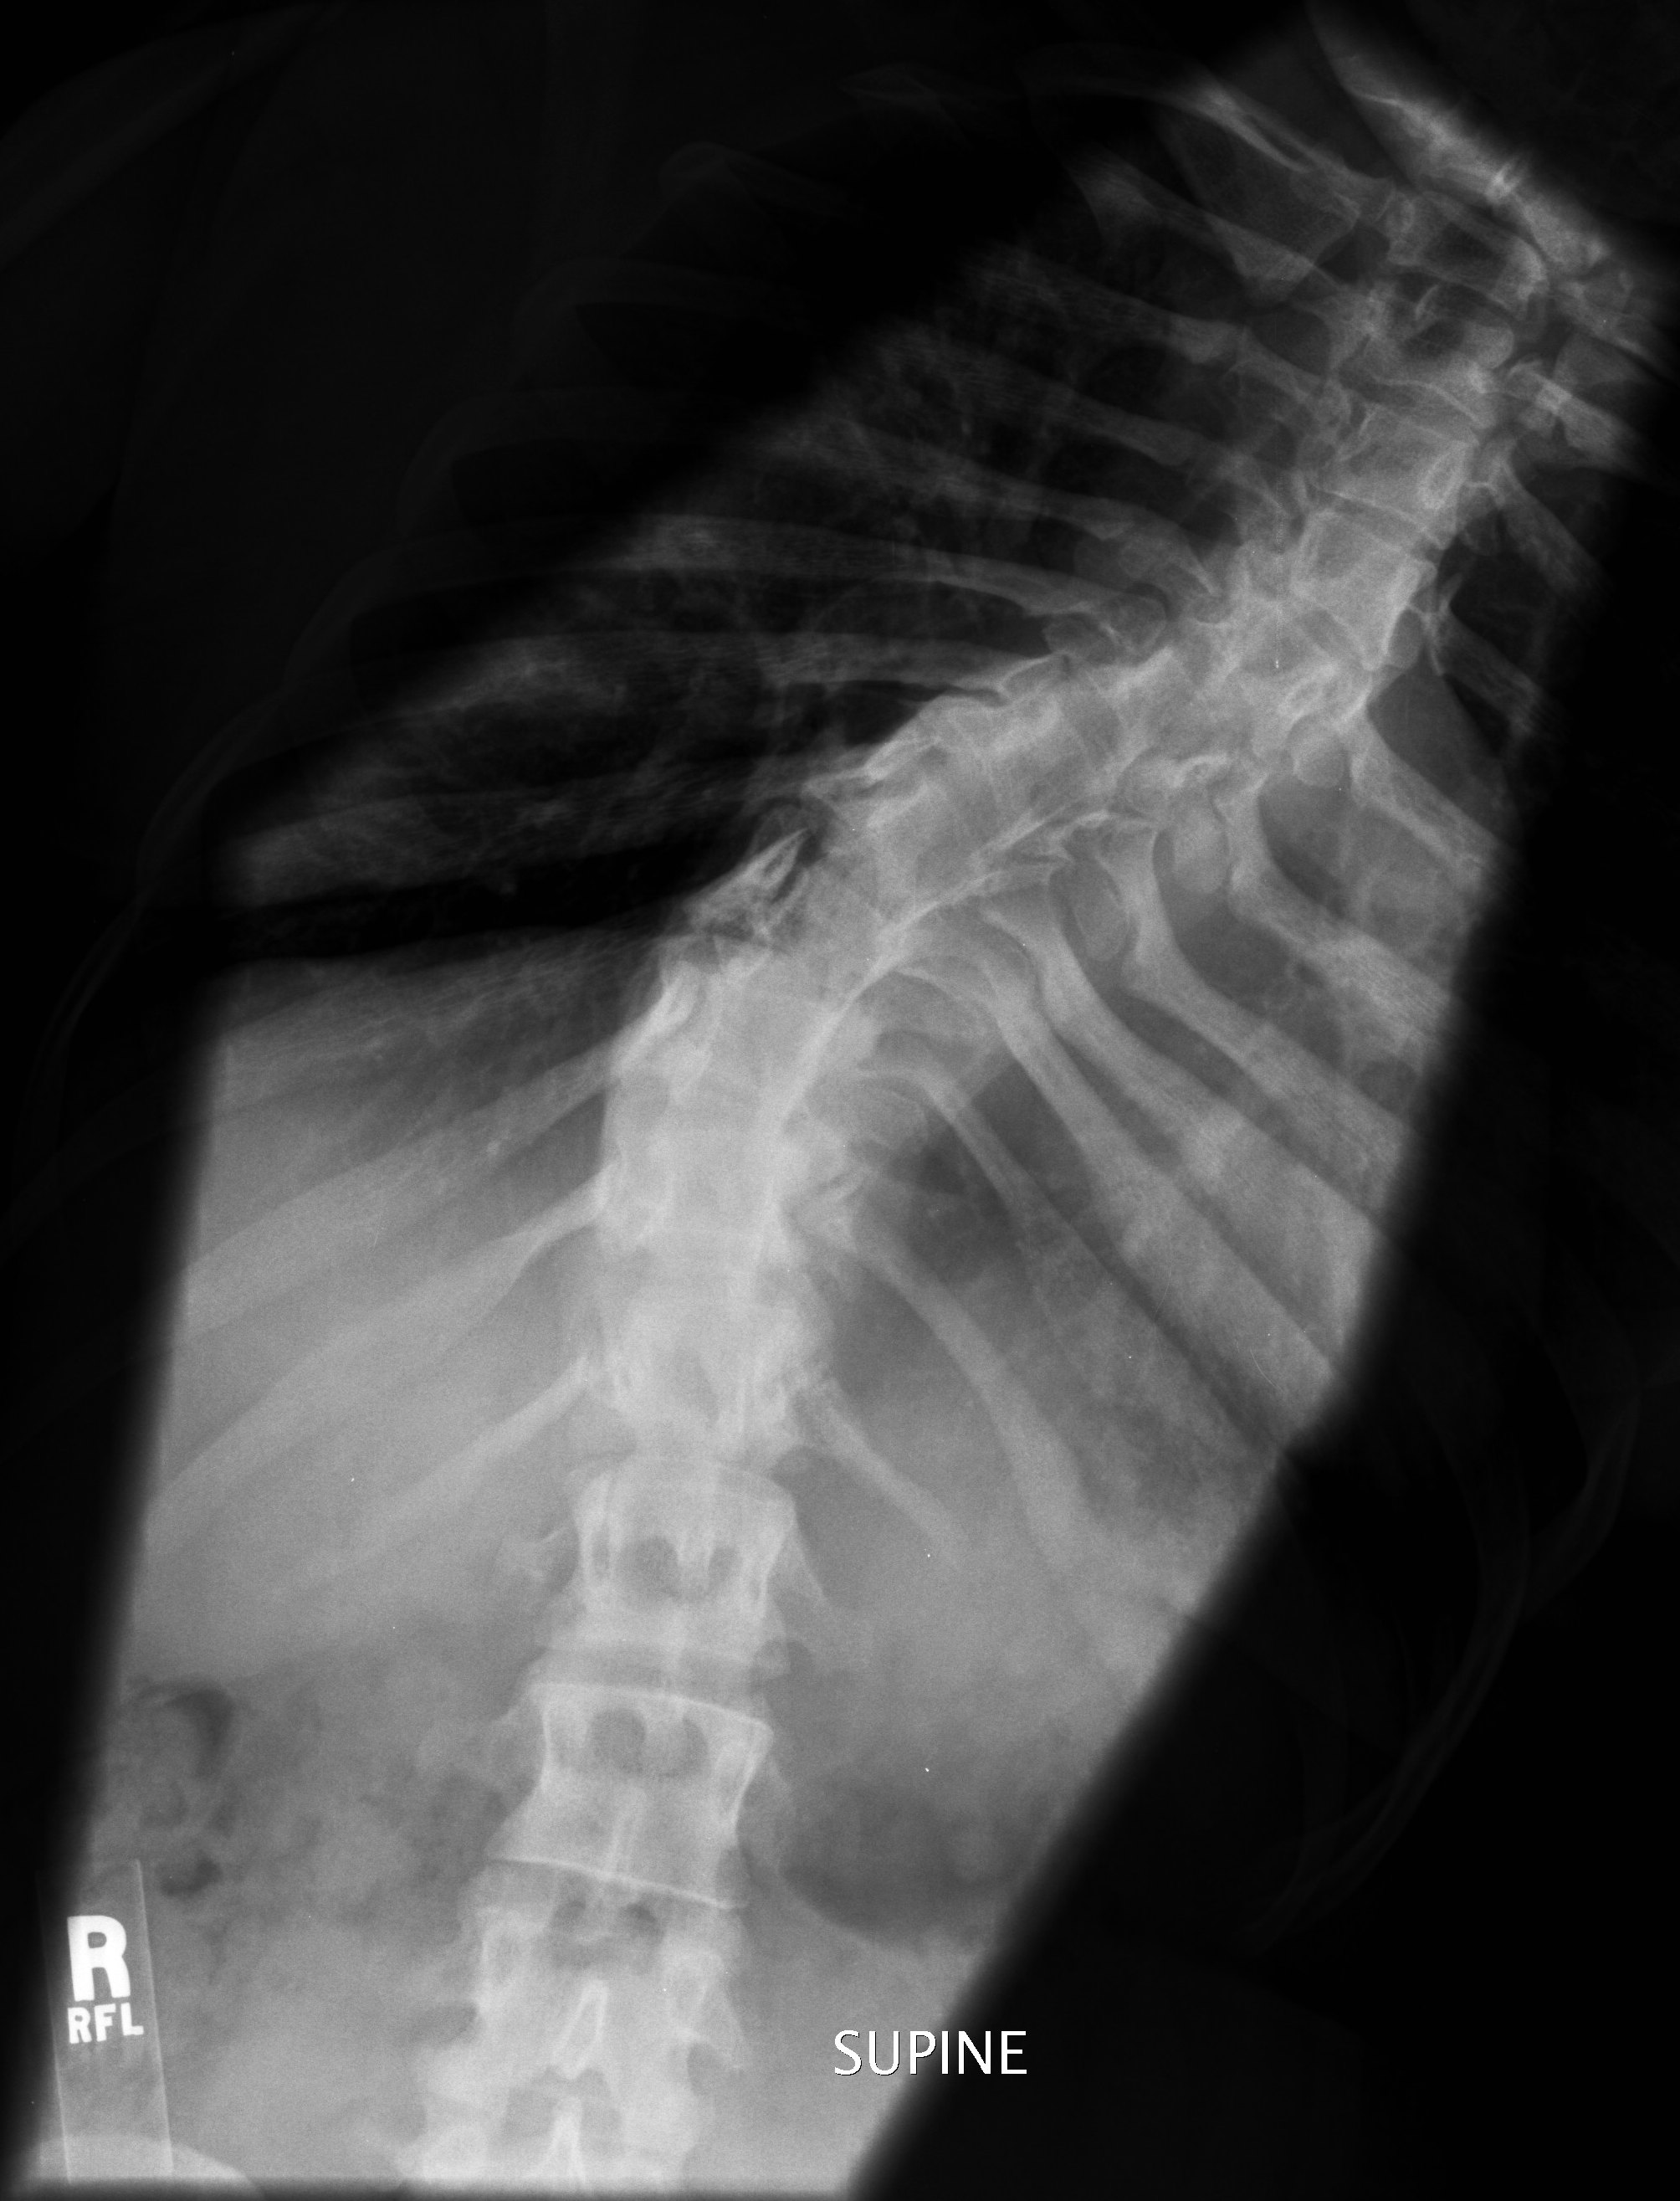
2. Lateral |
14x17 LW |
Patient in left lateral, erect or recumbent, breathing technique preferred, otherwise on inspiration. |
CR perpendicular to T7 |
|
1. Swimmer's (If area of interest is T1-T4.) |
10x12 LW |
Follow positioning protocol for Swimmers described in cervical spine section |
Follow protocol for cervical swimmers view EXCEPT central ray to C7.. |
|
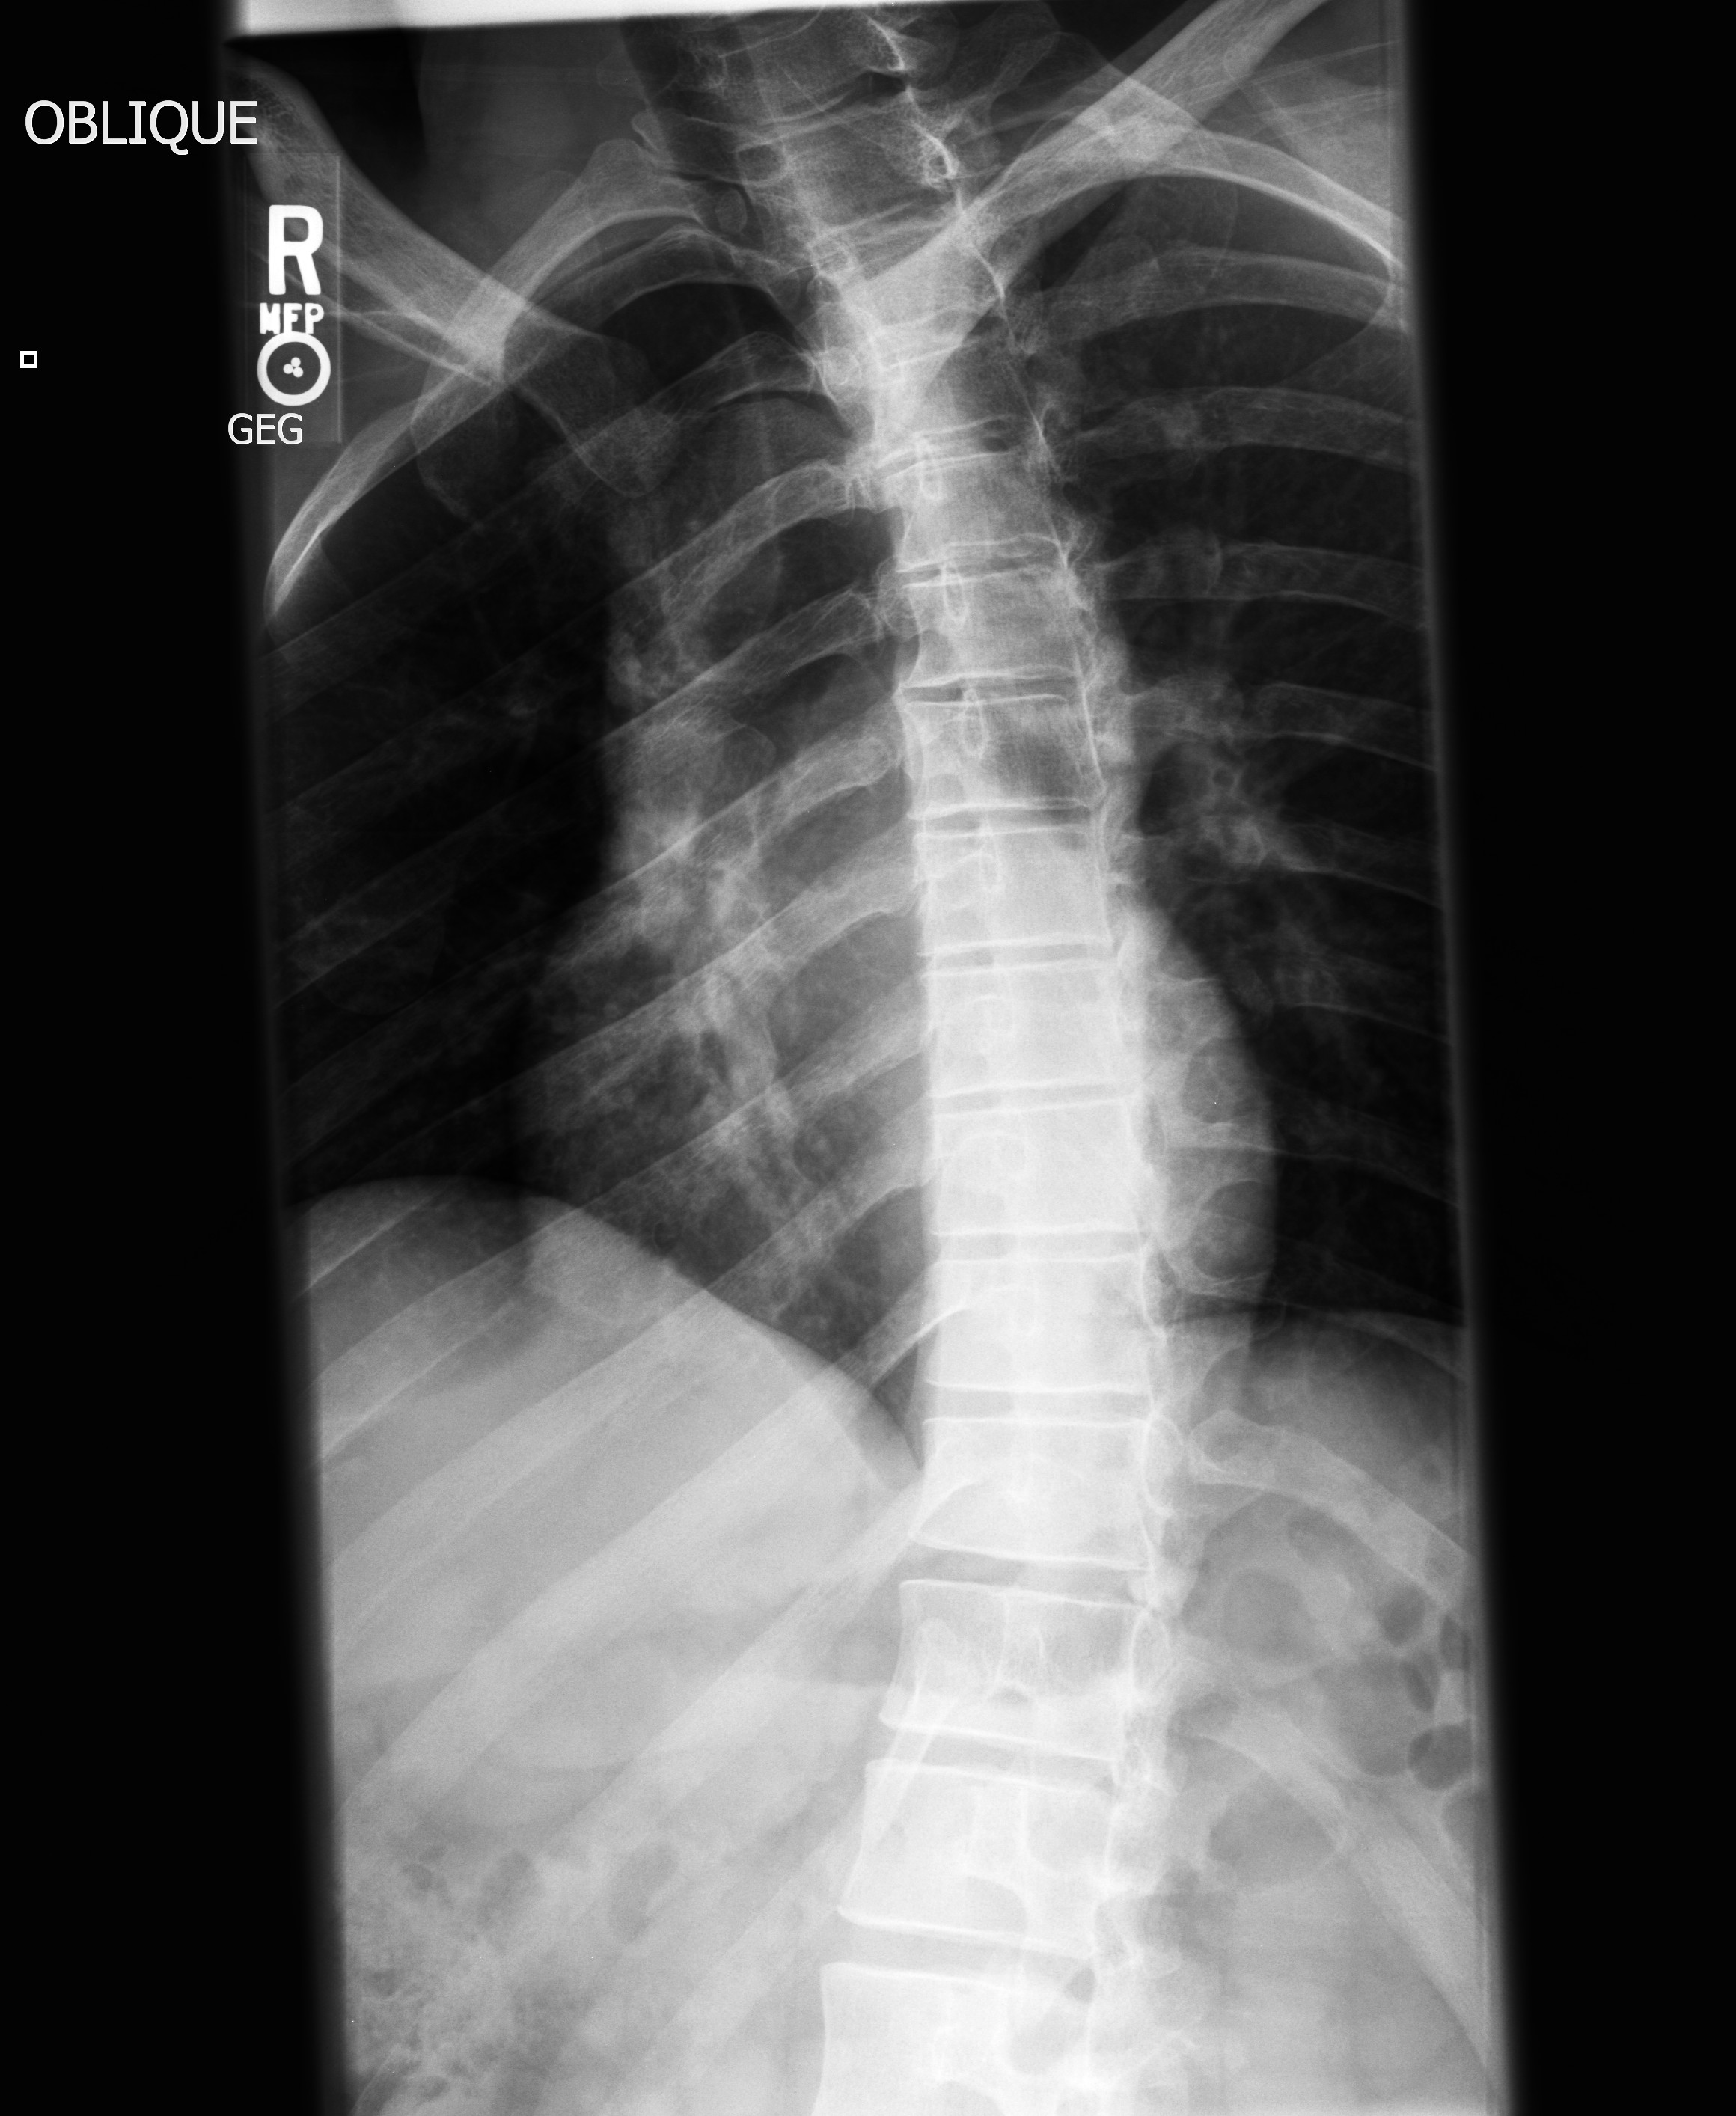
2. Right Posterior Oblique |
14x17 LW |
From AP position, rotate right side up from film 70E |
CR perpendicular to T7 |
|
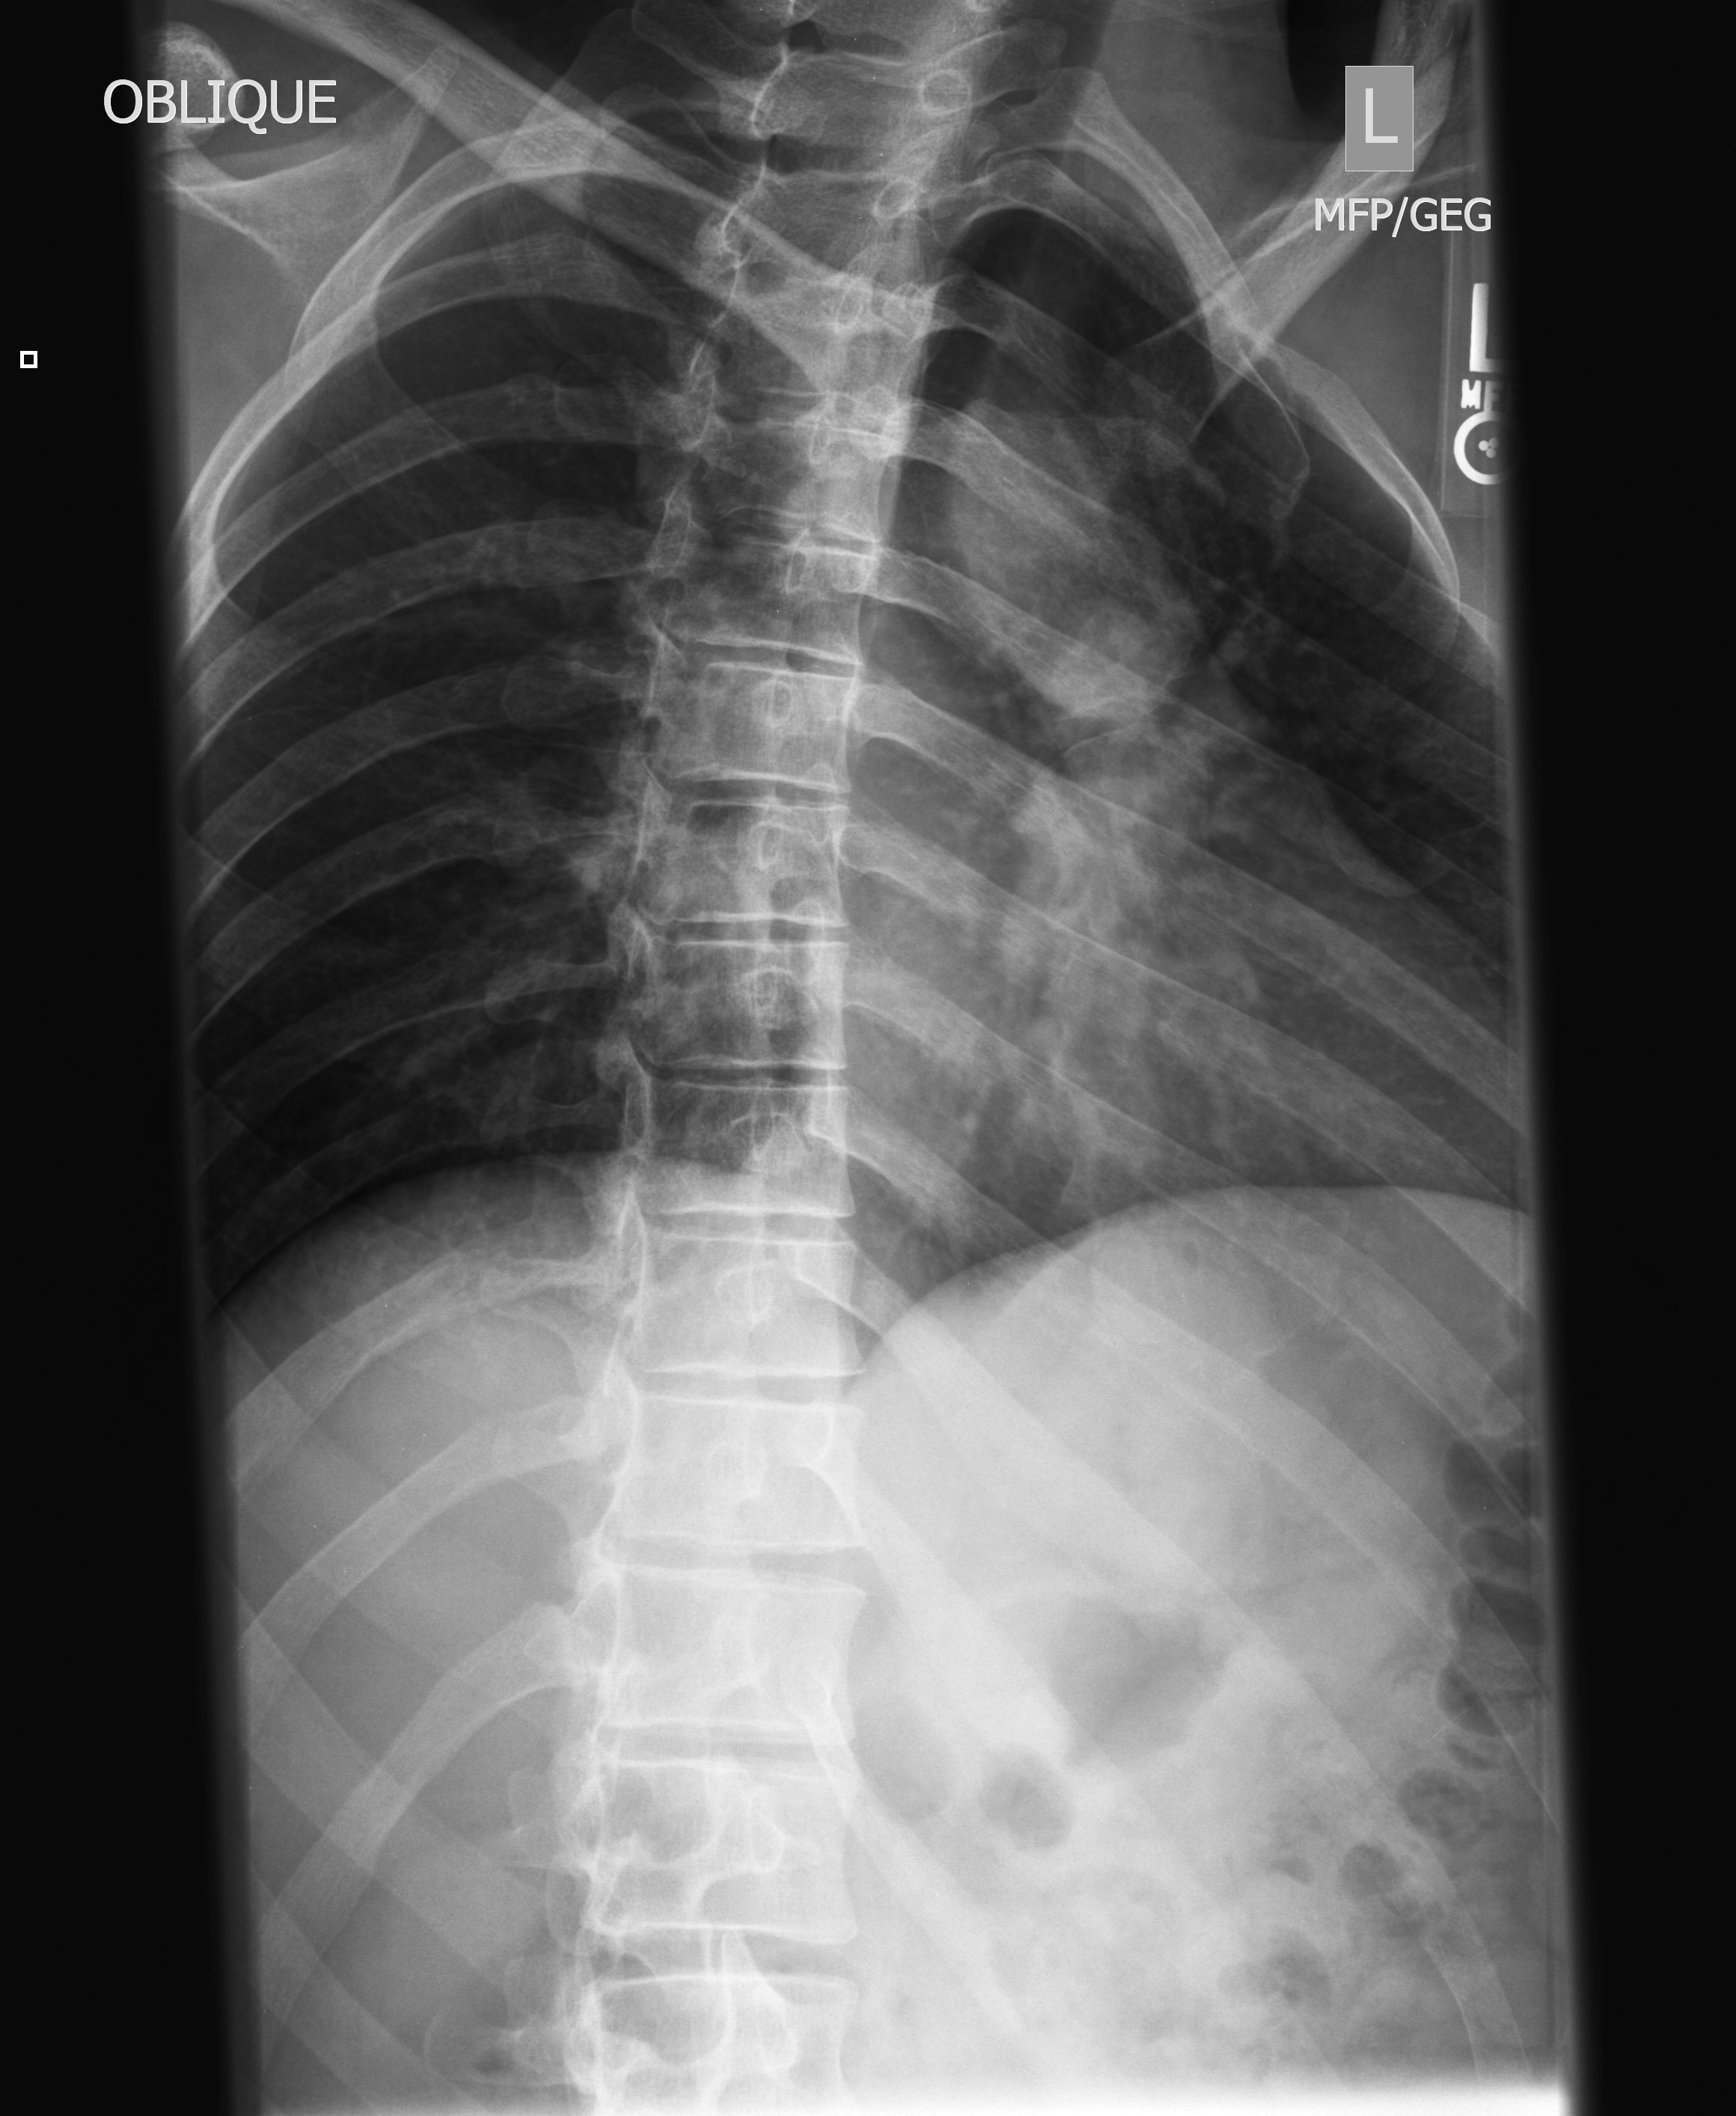
3. Left Posterior Oblique |
14x17 LW |
From AP position, rotate left side up from film 70E |
CR perpendicular to T7 |
|
LUMBAR SPINE - Include AP pelvis if patient has not had a pelvis within the last three months. Schedule and bill patient for single view pelvis. |
|||
|
1. AP pelvis |
14x17 CW |
Follow positioning protocol for AP pelvis previously described |
Follow protocol previously described |
|
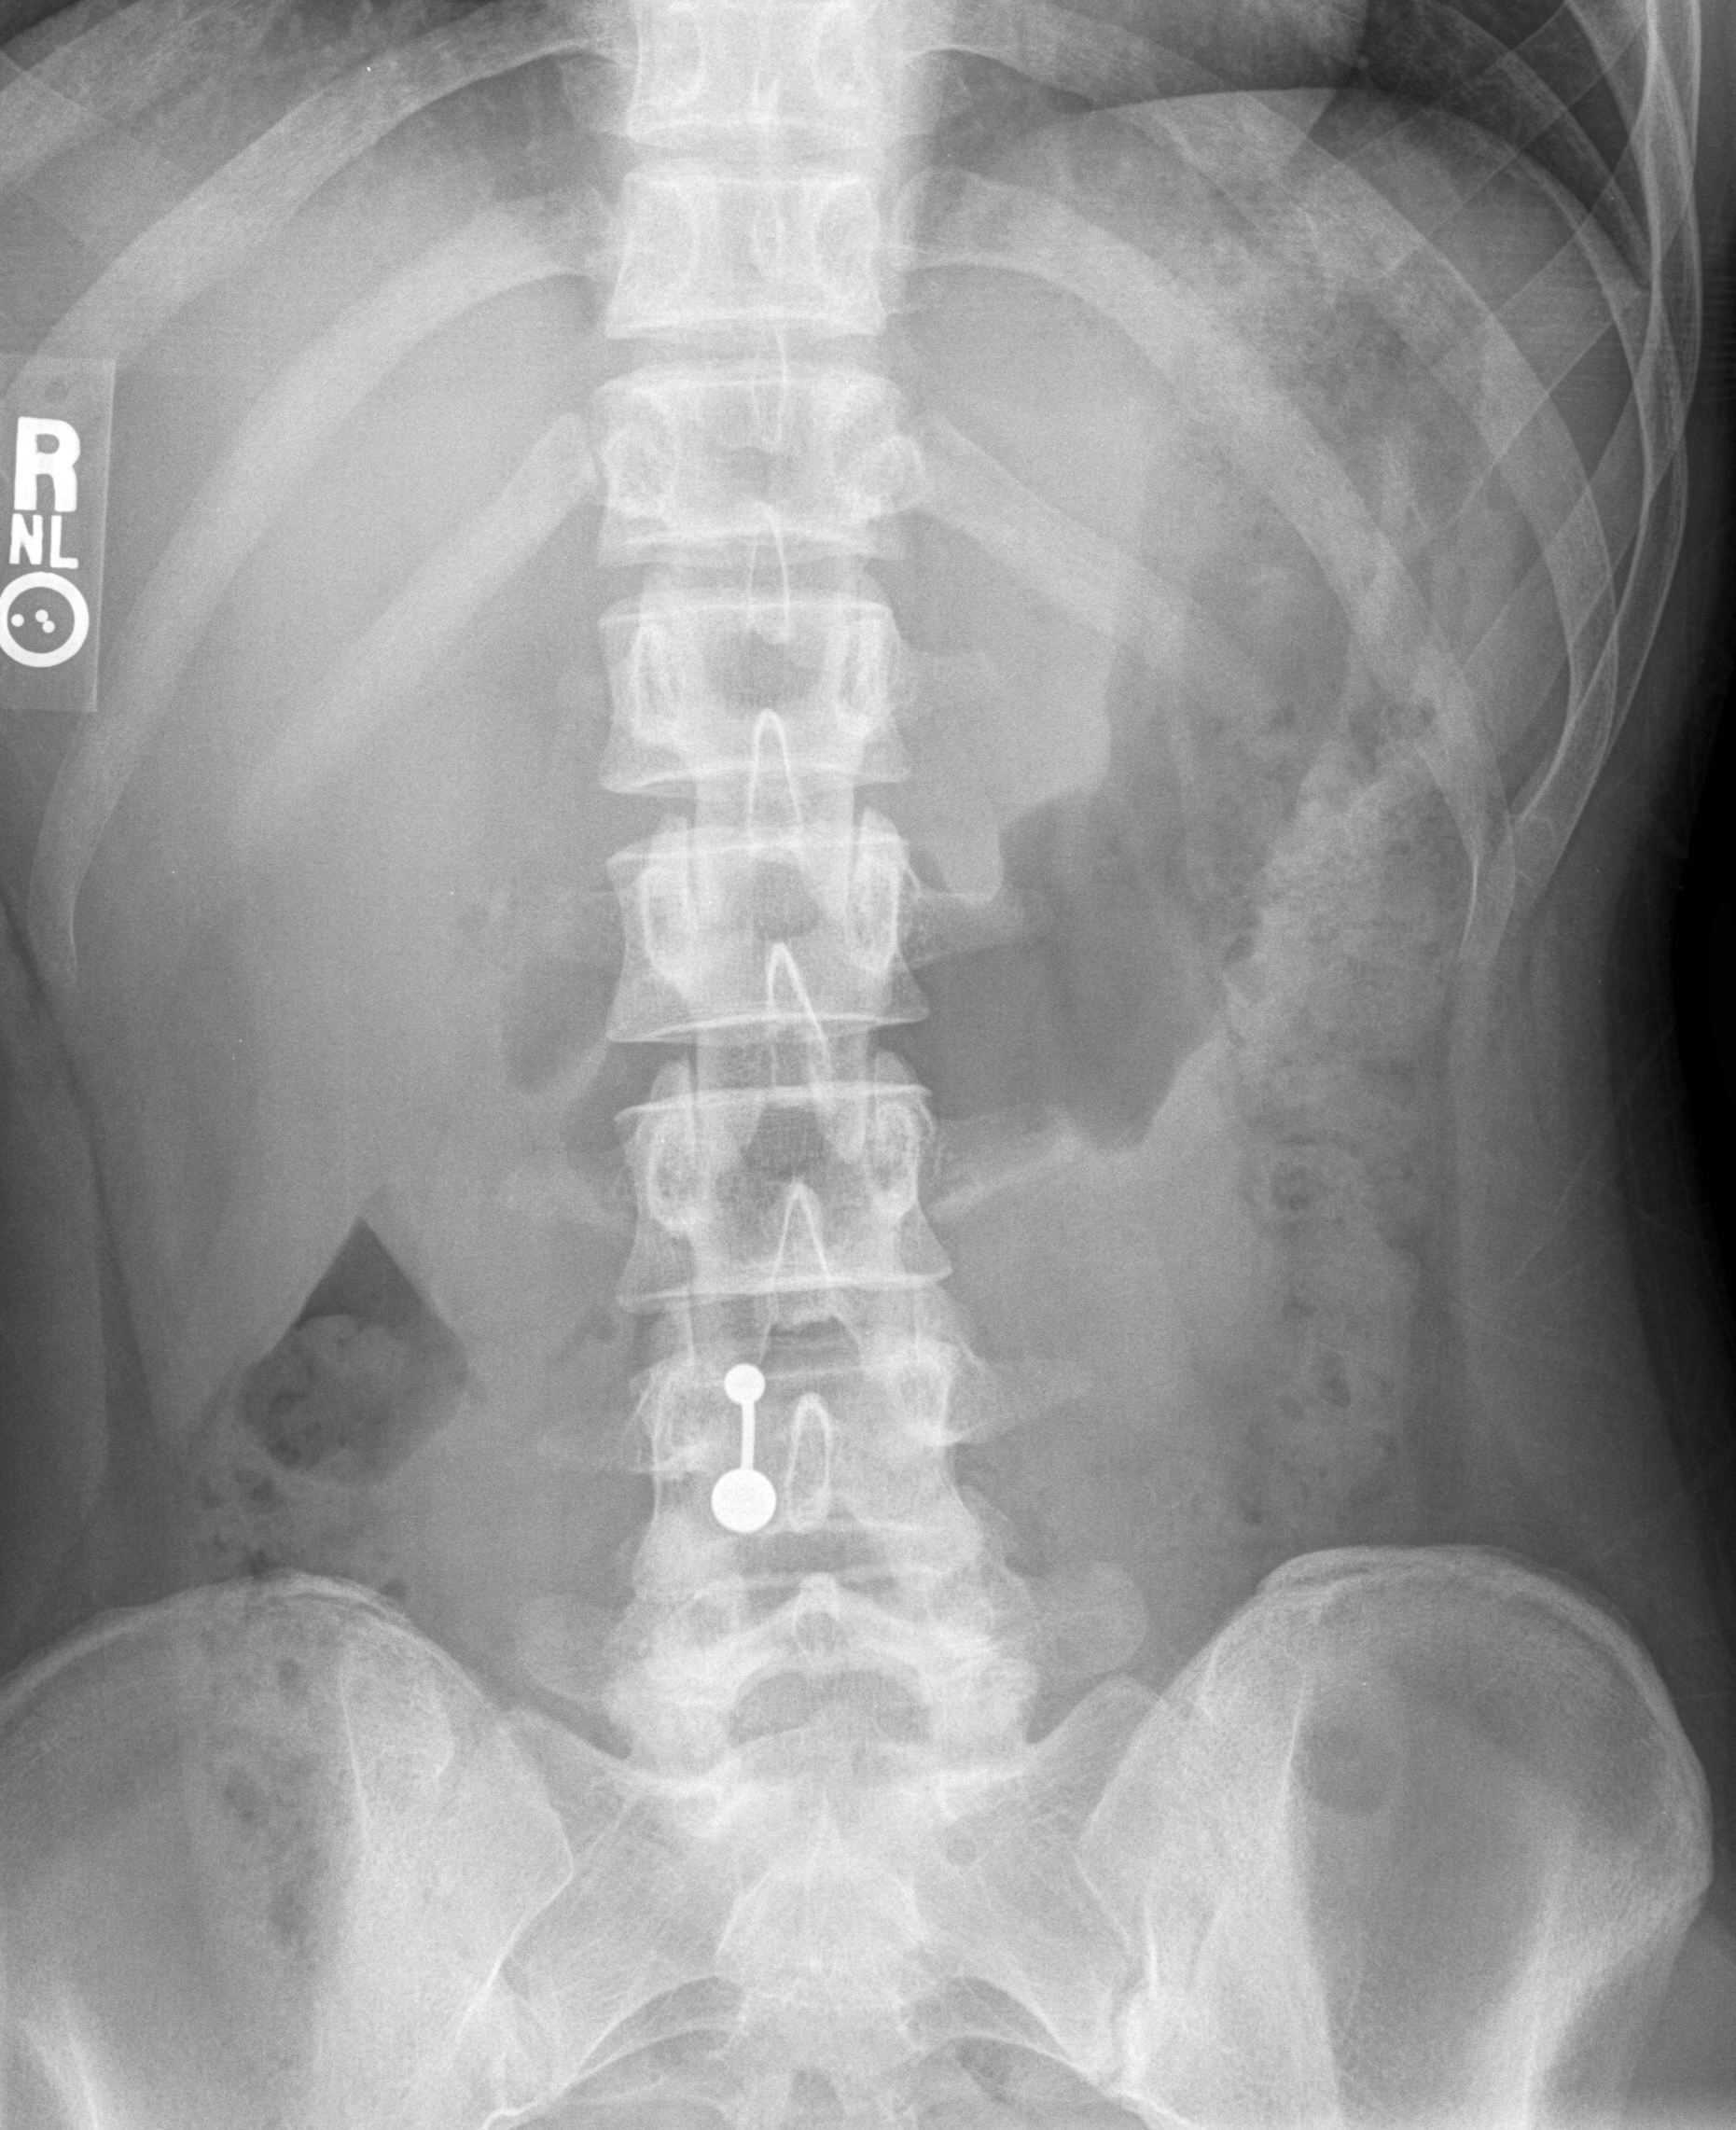
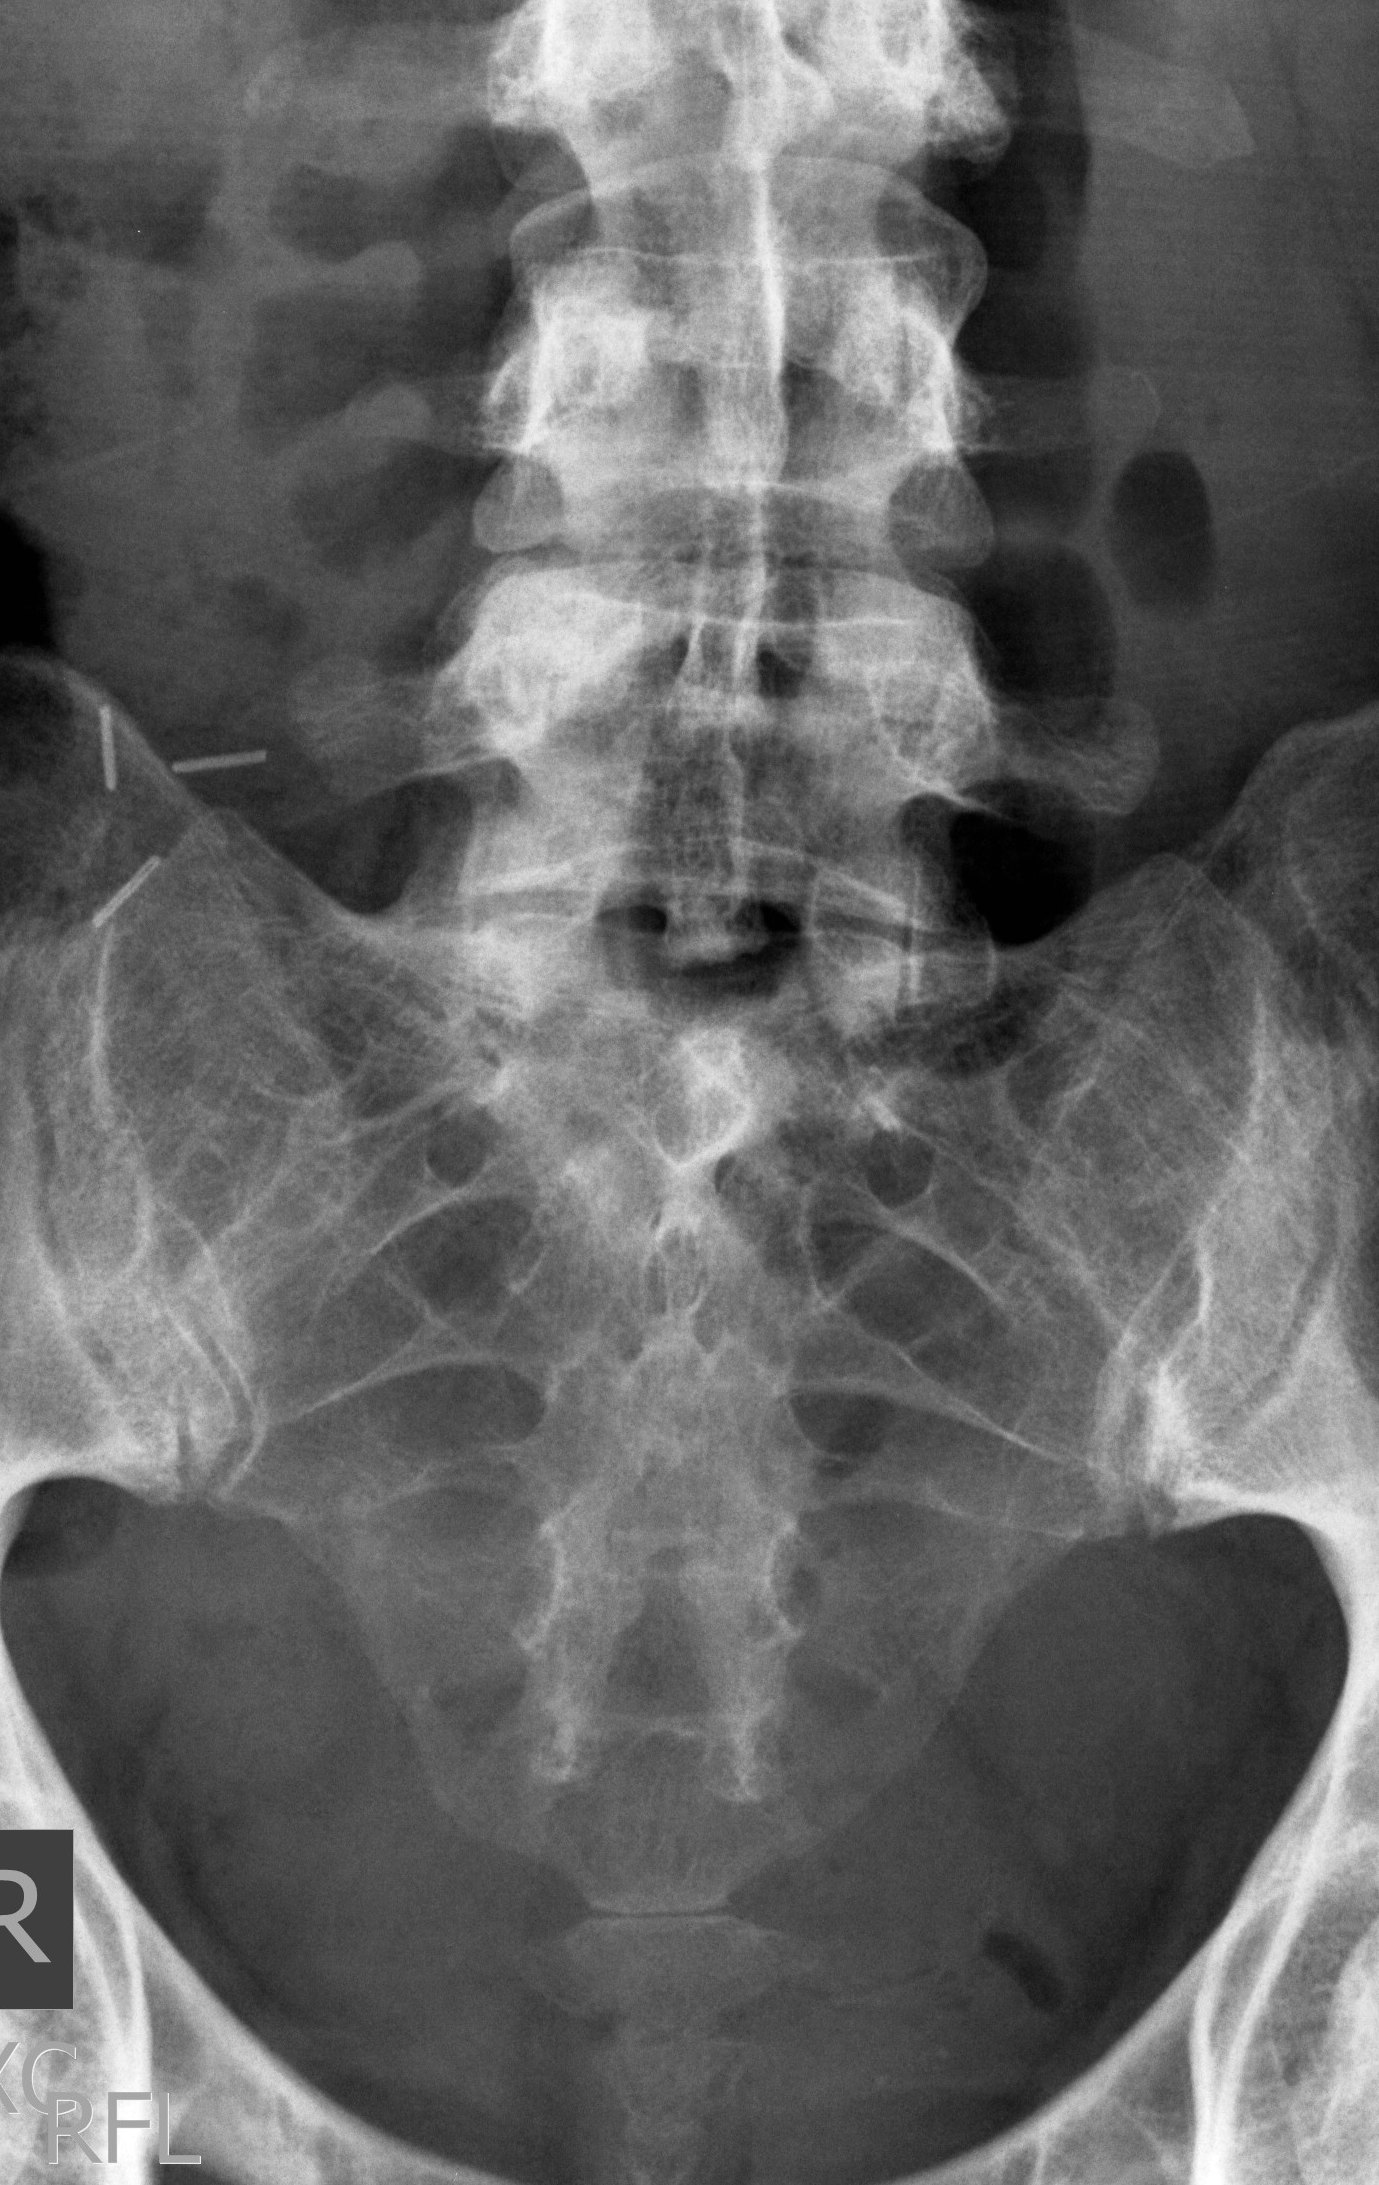
2. AP L-spine |
11x14 LW |
Patient supine with hips and knees flexed |
CR perpendicular to L2, 3 cm superior to iliac crest |
|
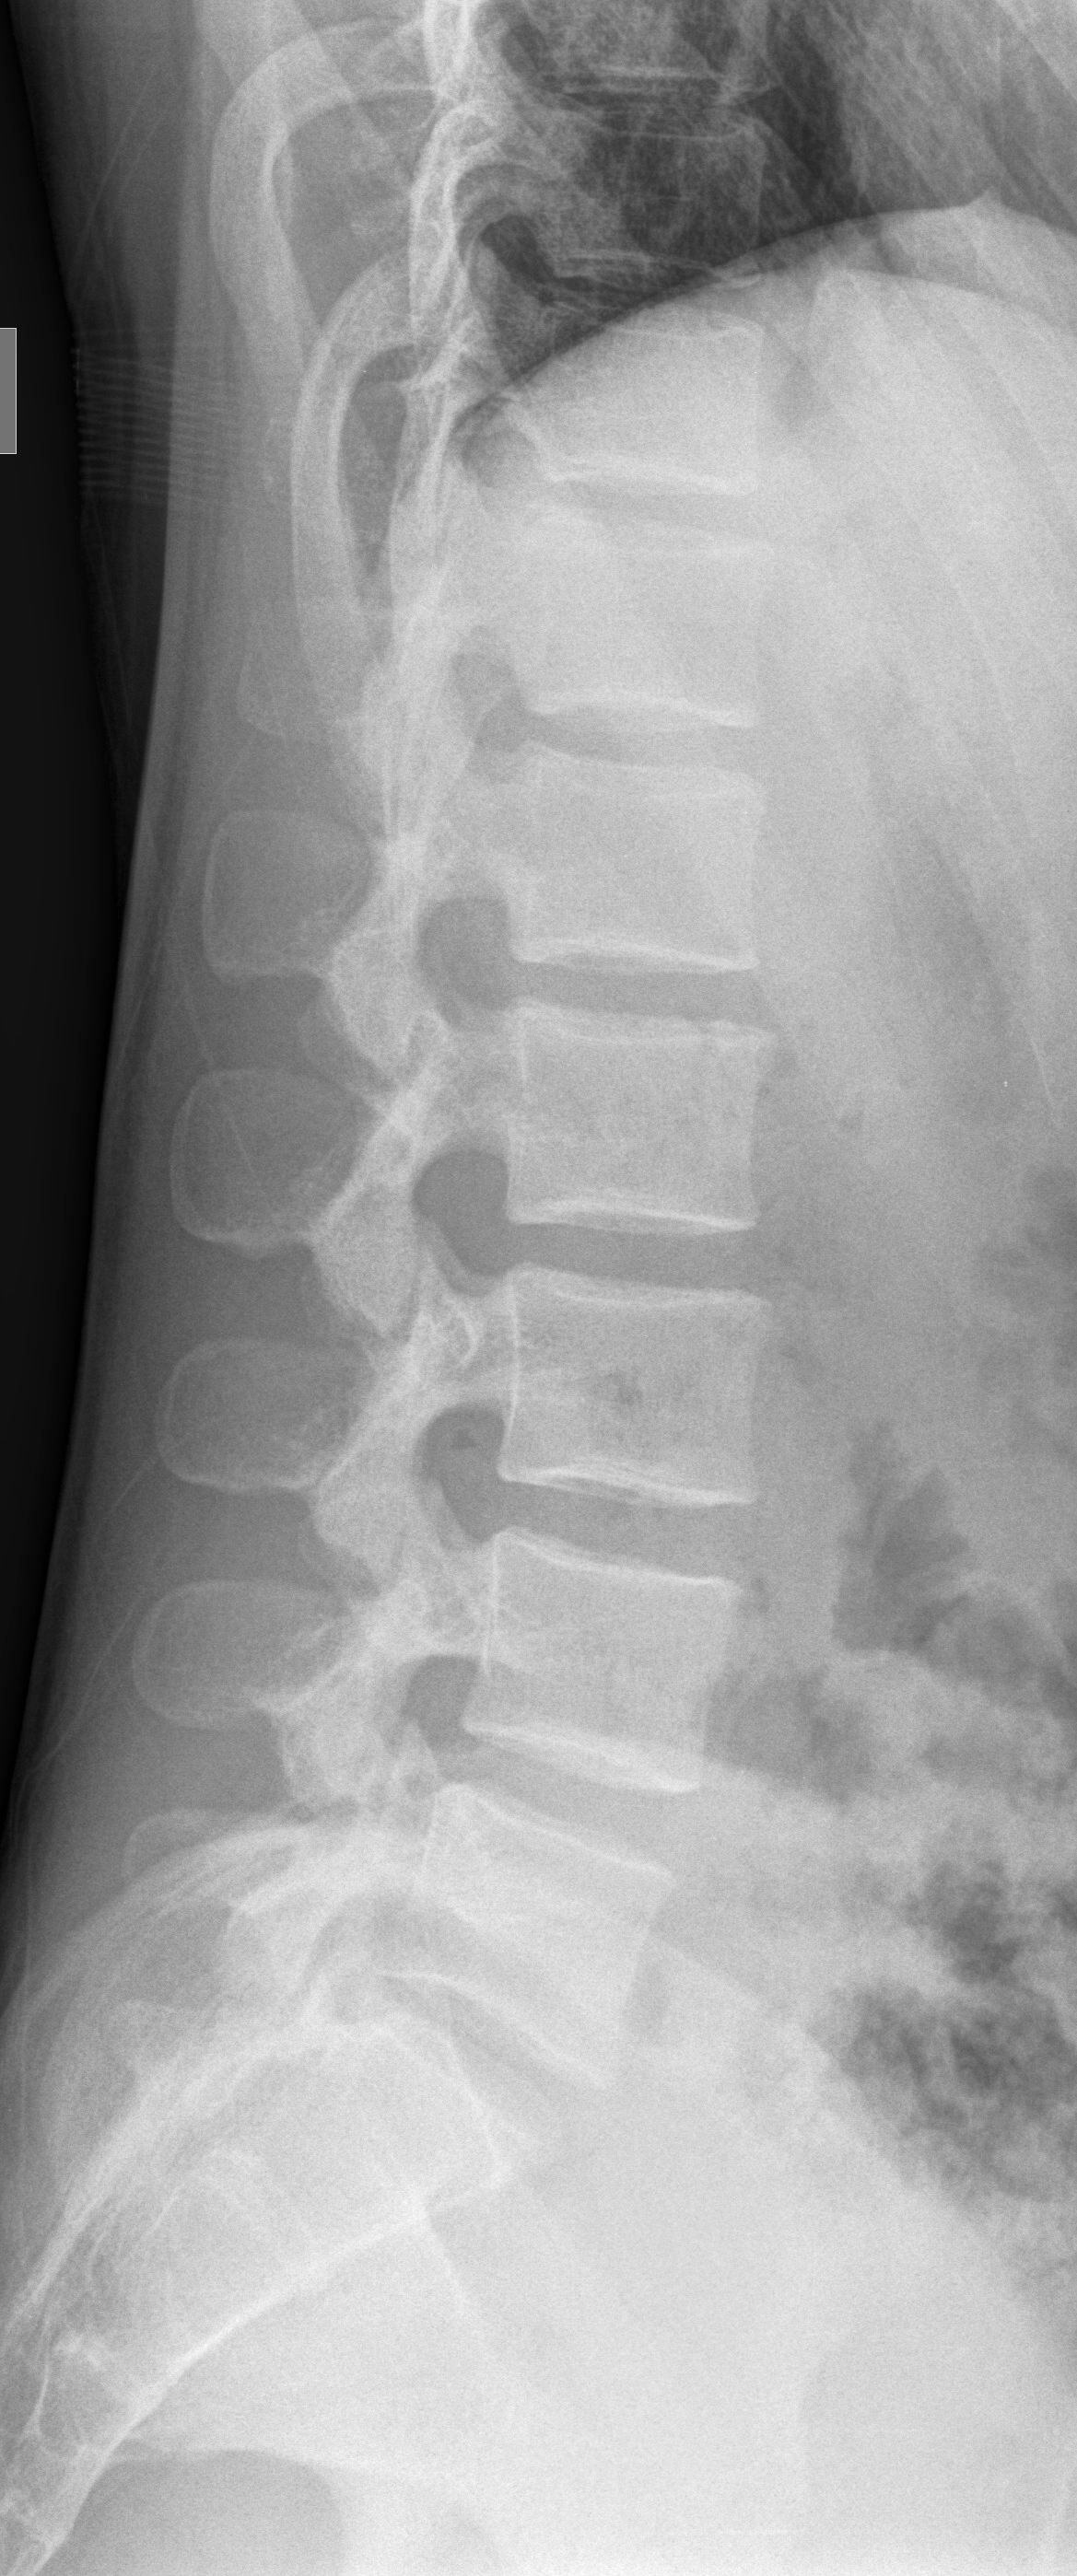
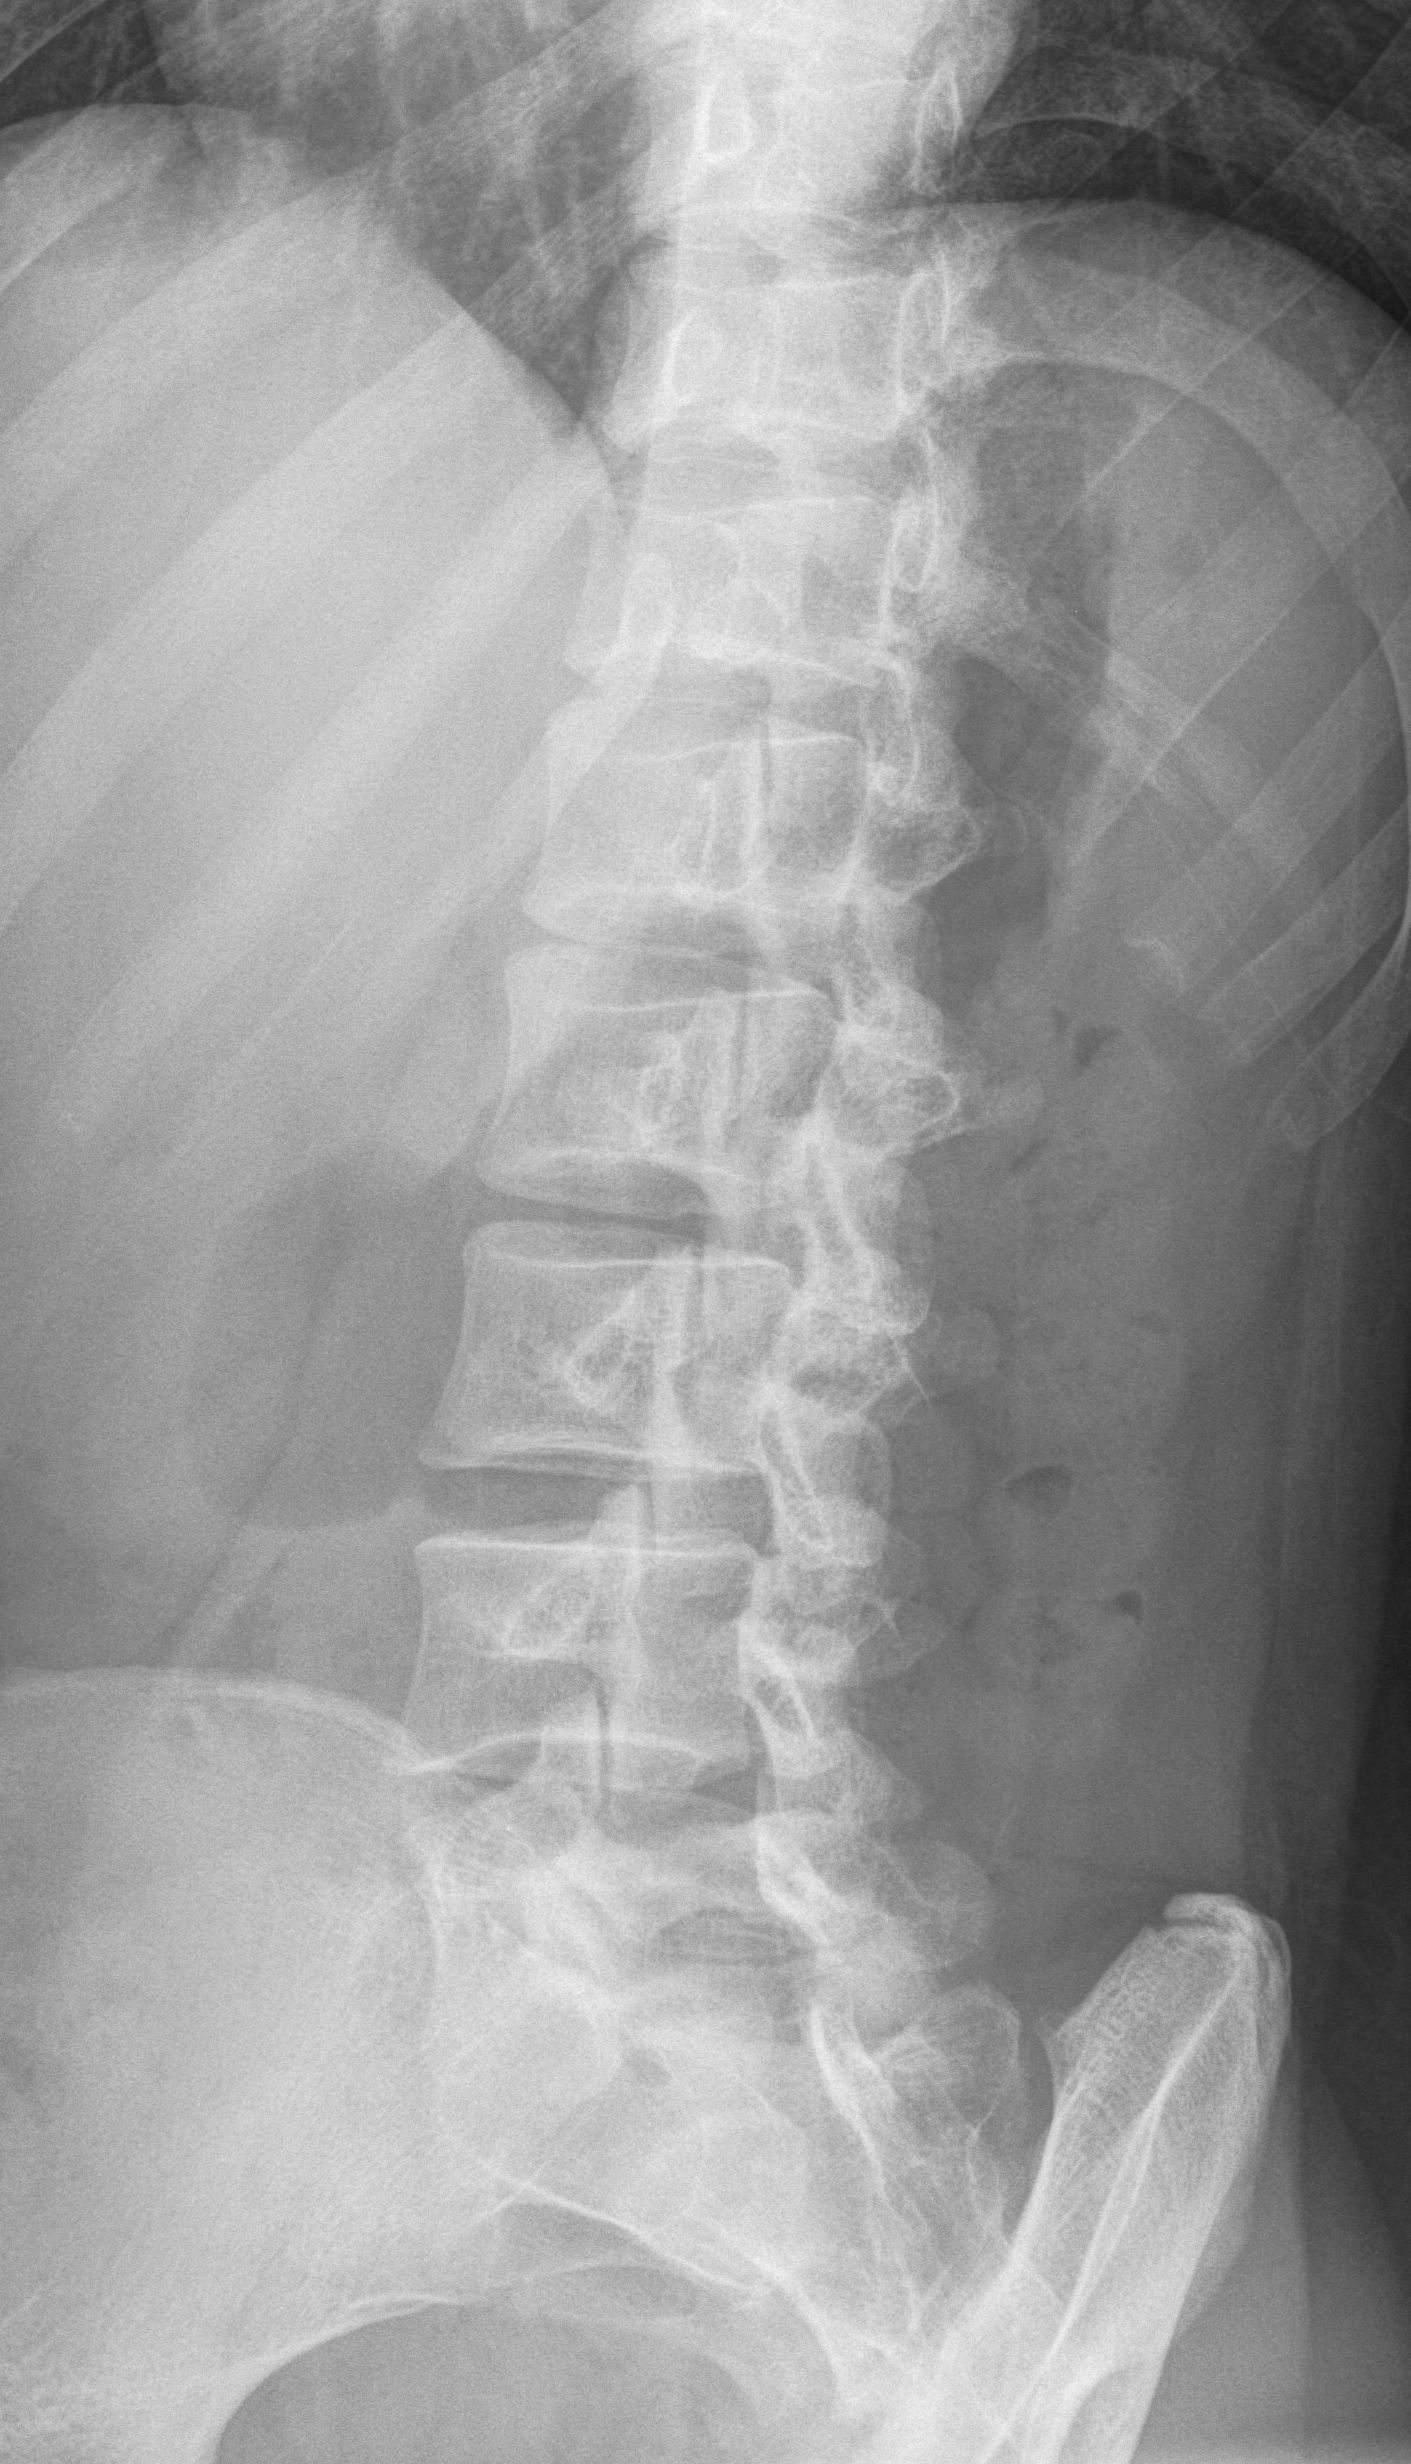
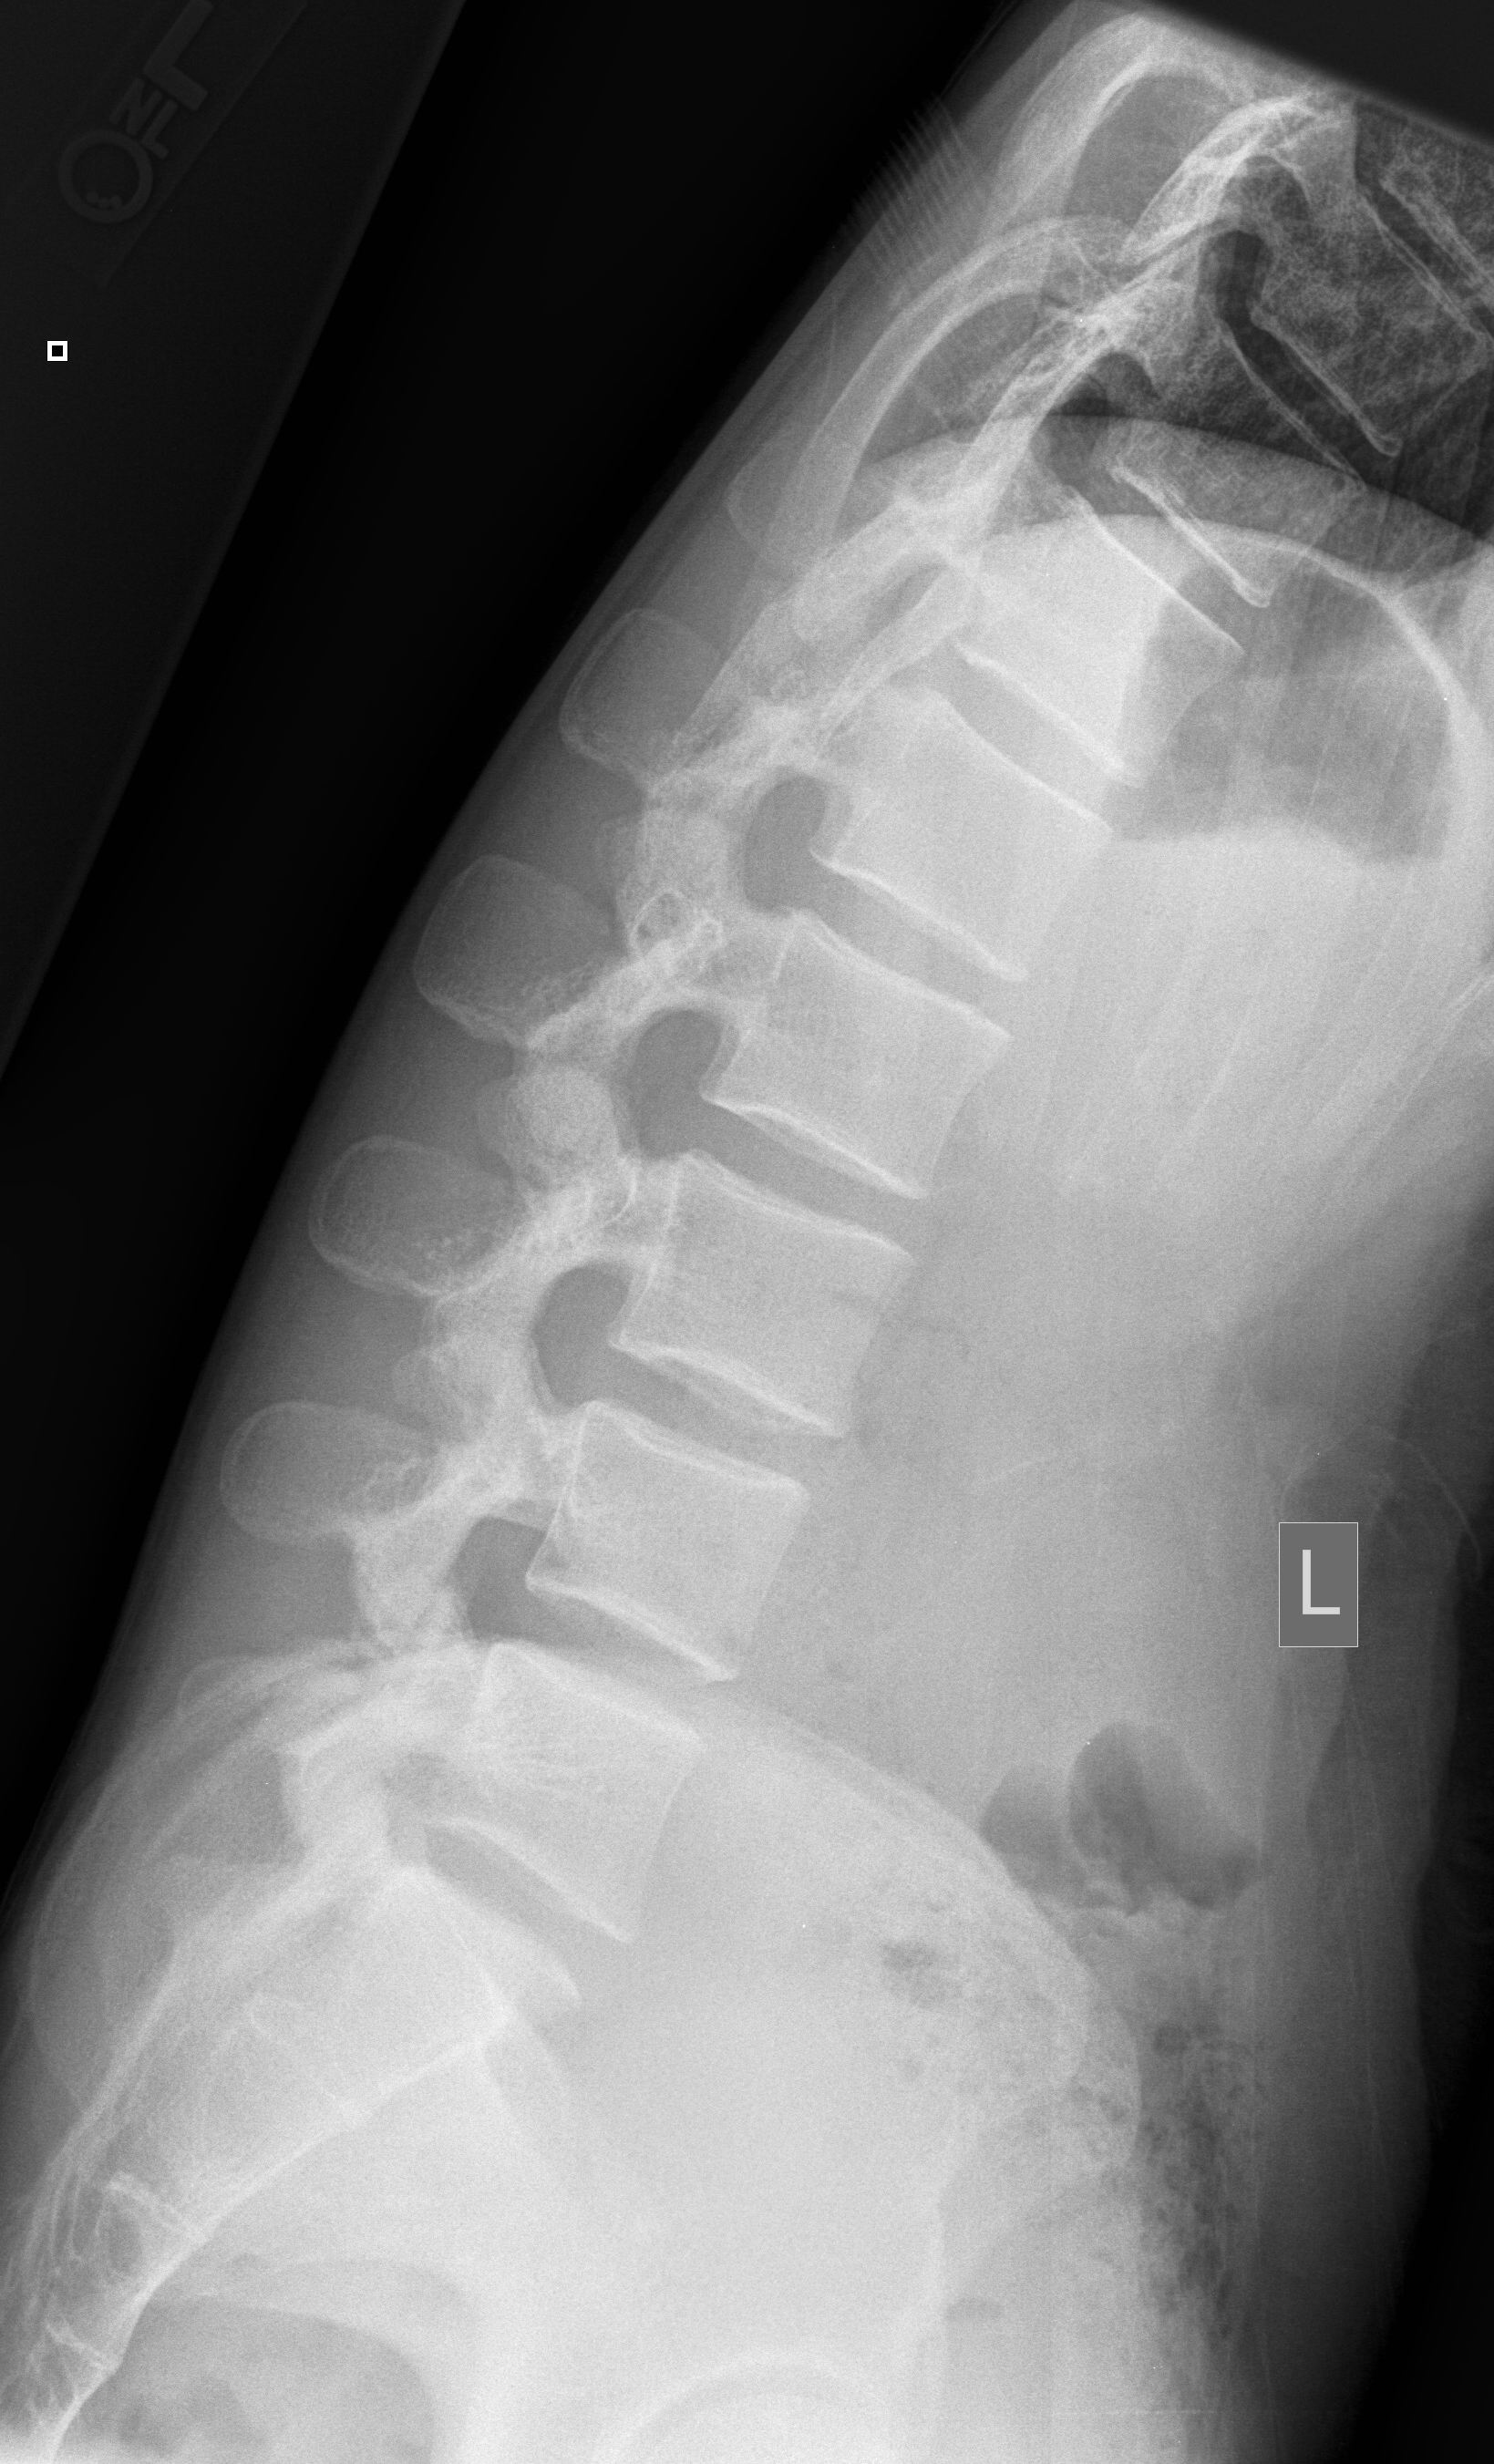
3. Lateral L-spine |
11x14 LW |
Patient in left lateral position, knees flexed, use supports to place spine parallel to table |
CR perpendicular to iliac crest |
|
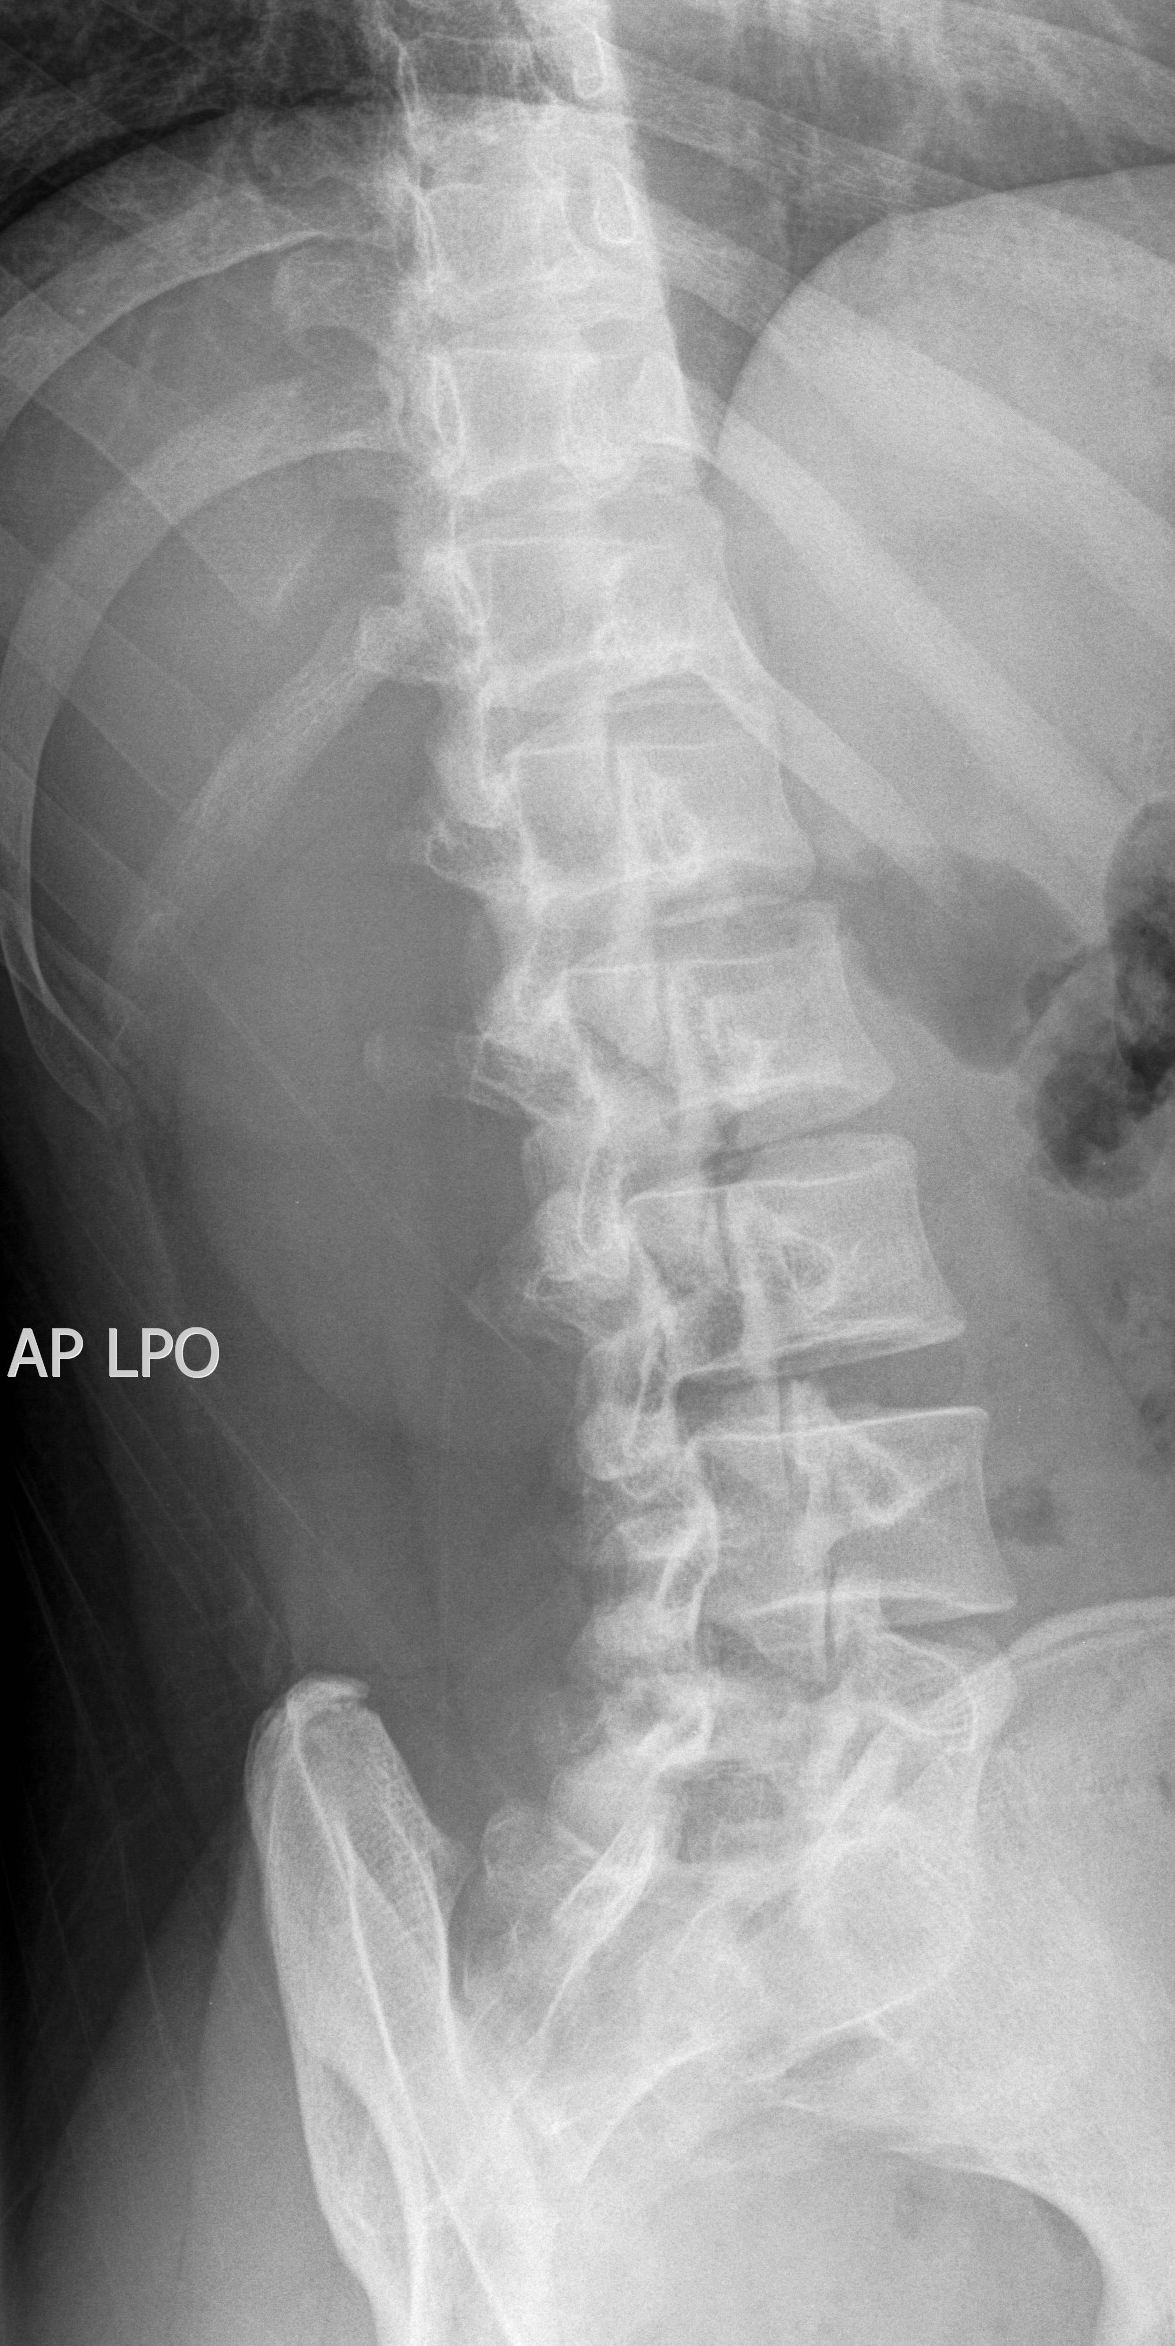
1. Right Posterior Oblique L-spine |
11x14 LW |
From AP position, rotate body to the right 45E |
CR perpendicular to iliac crest, 2" (5cm) medial to ASIS |
|
2. Left Posterior Oblique L-spine |
11x14 LW |
From AP position, rotate body to the left 45E |
CR perpendicular to iliac crest, 2" (5cm) medial to ASIS |
|
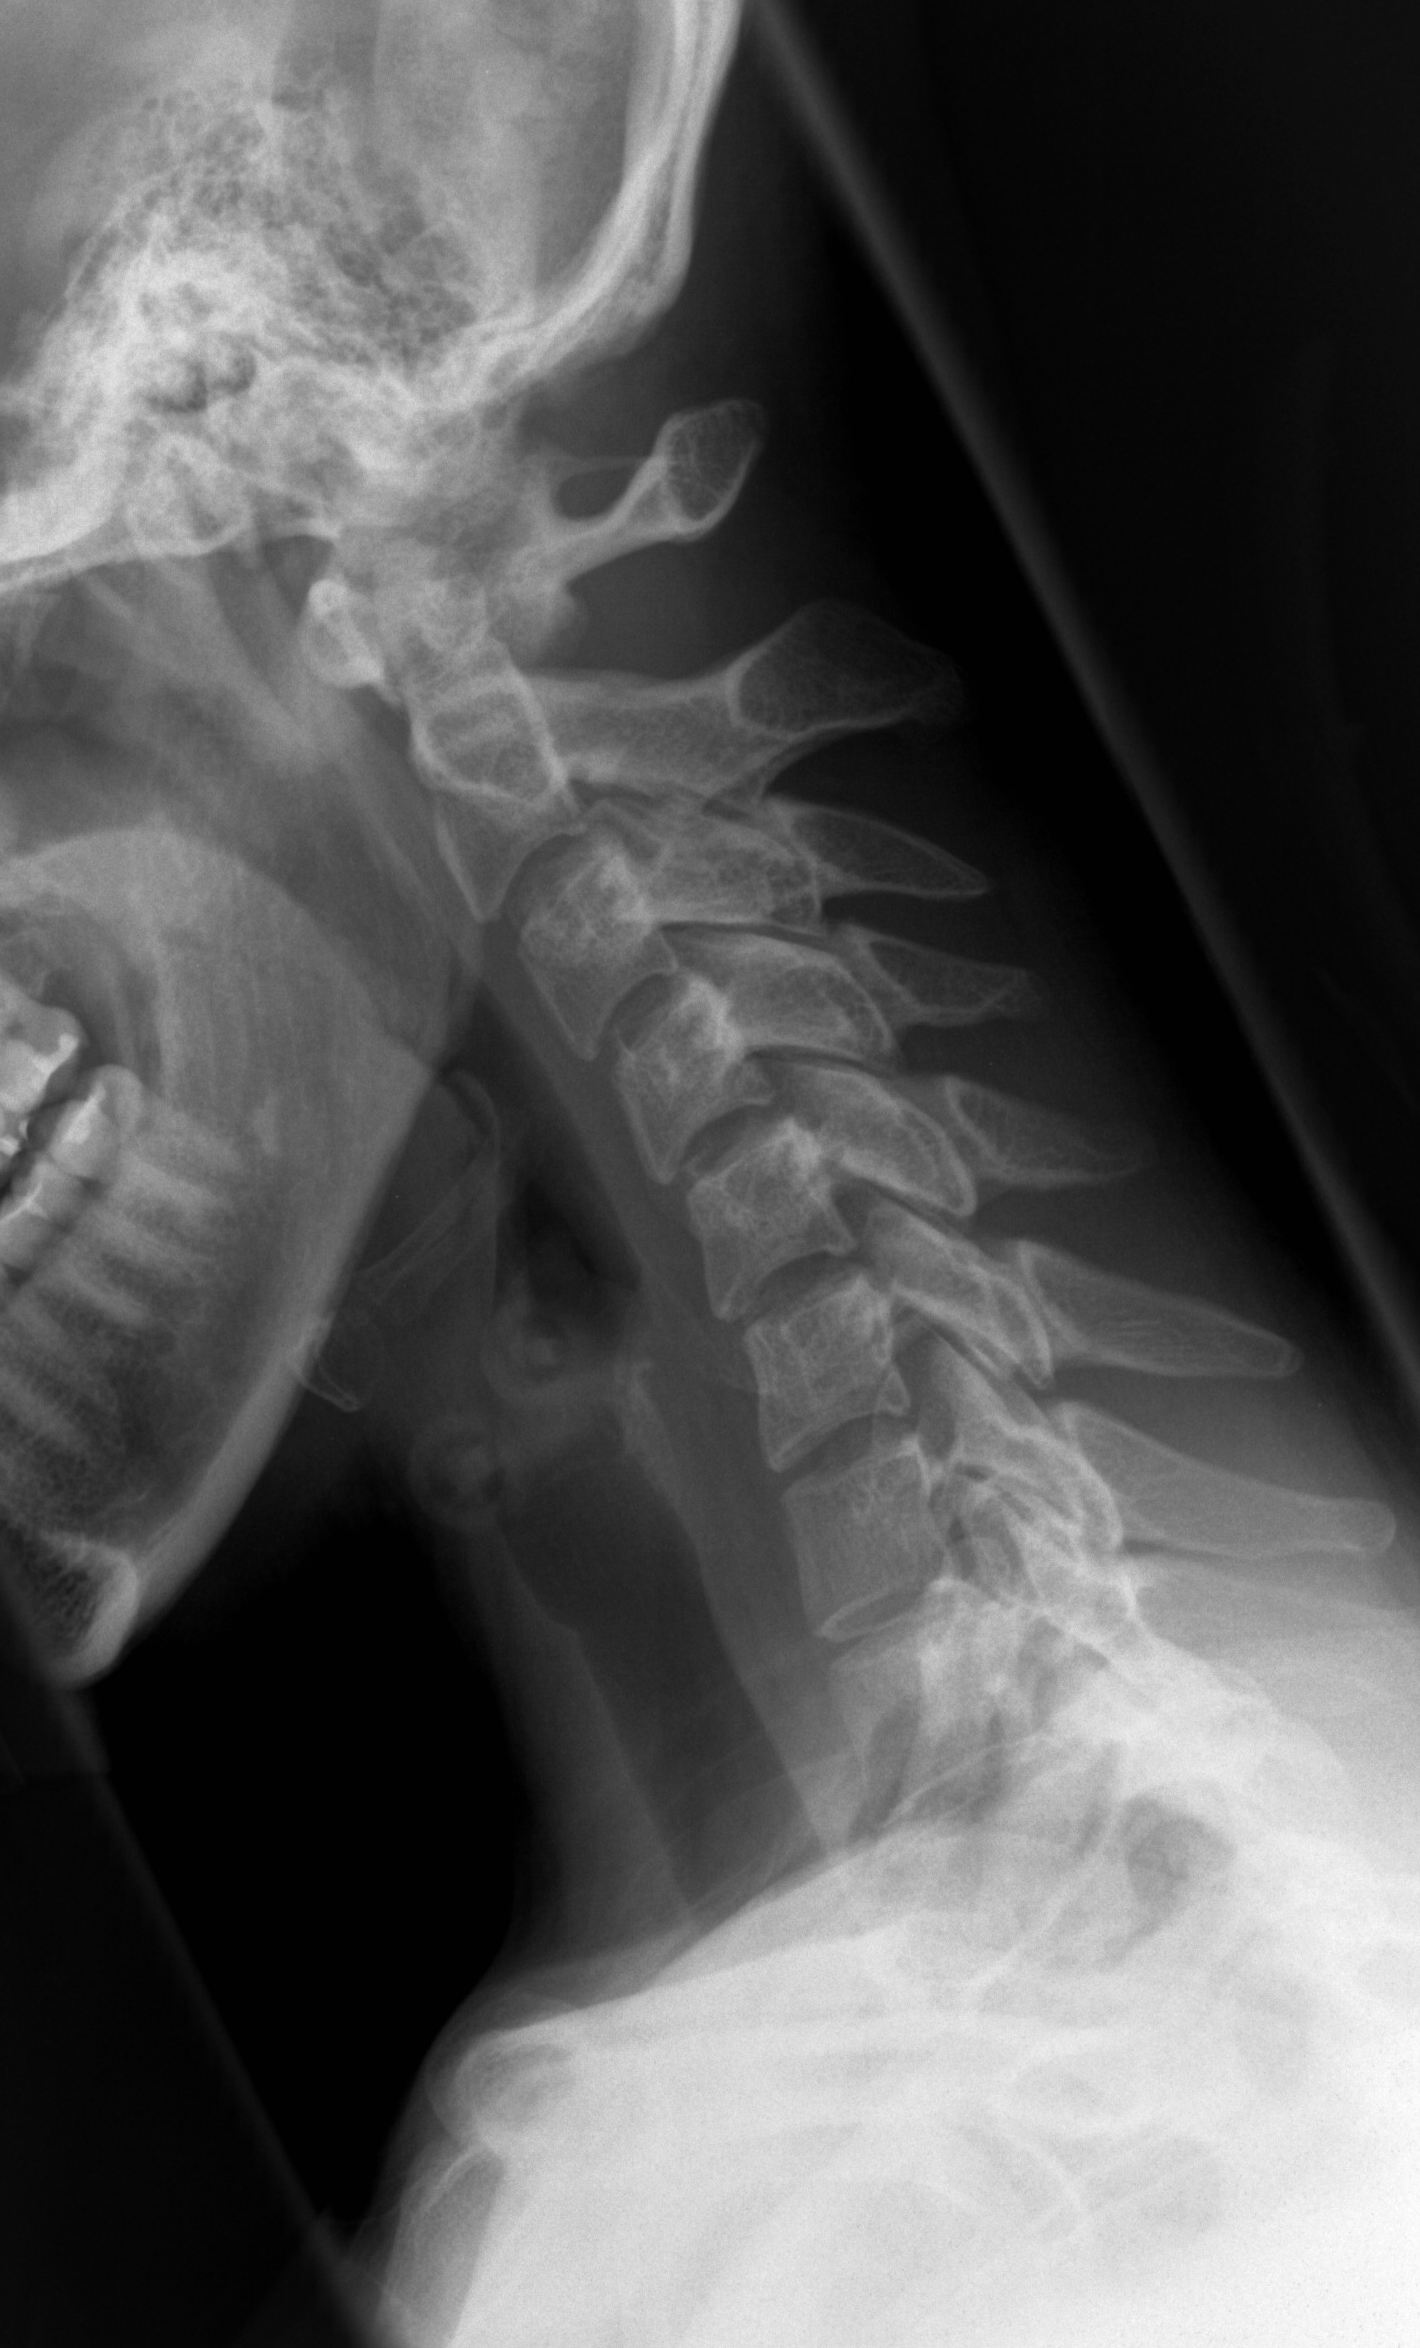
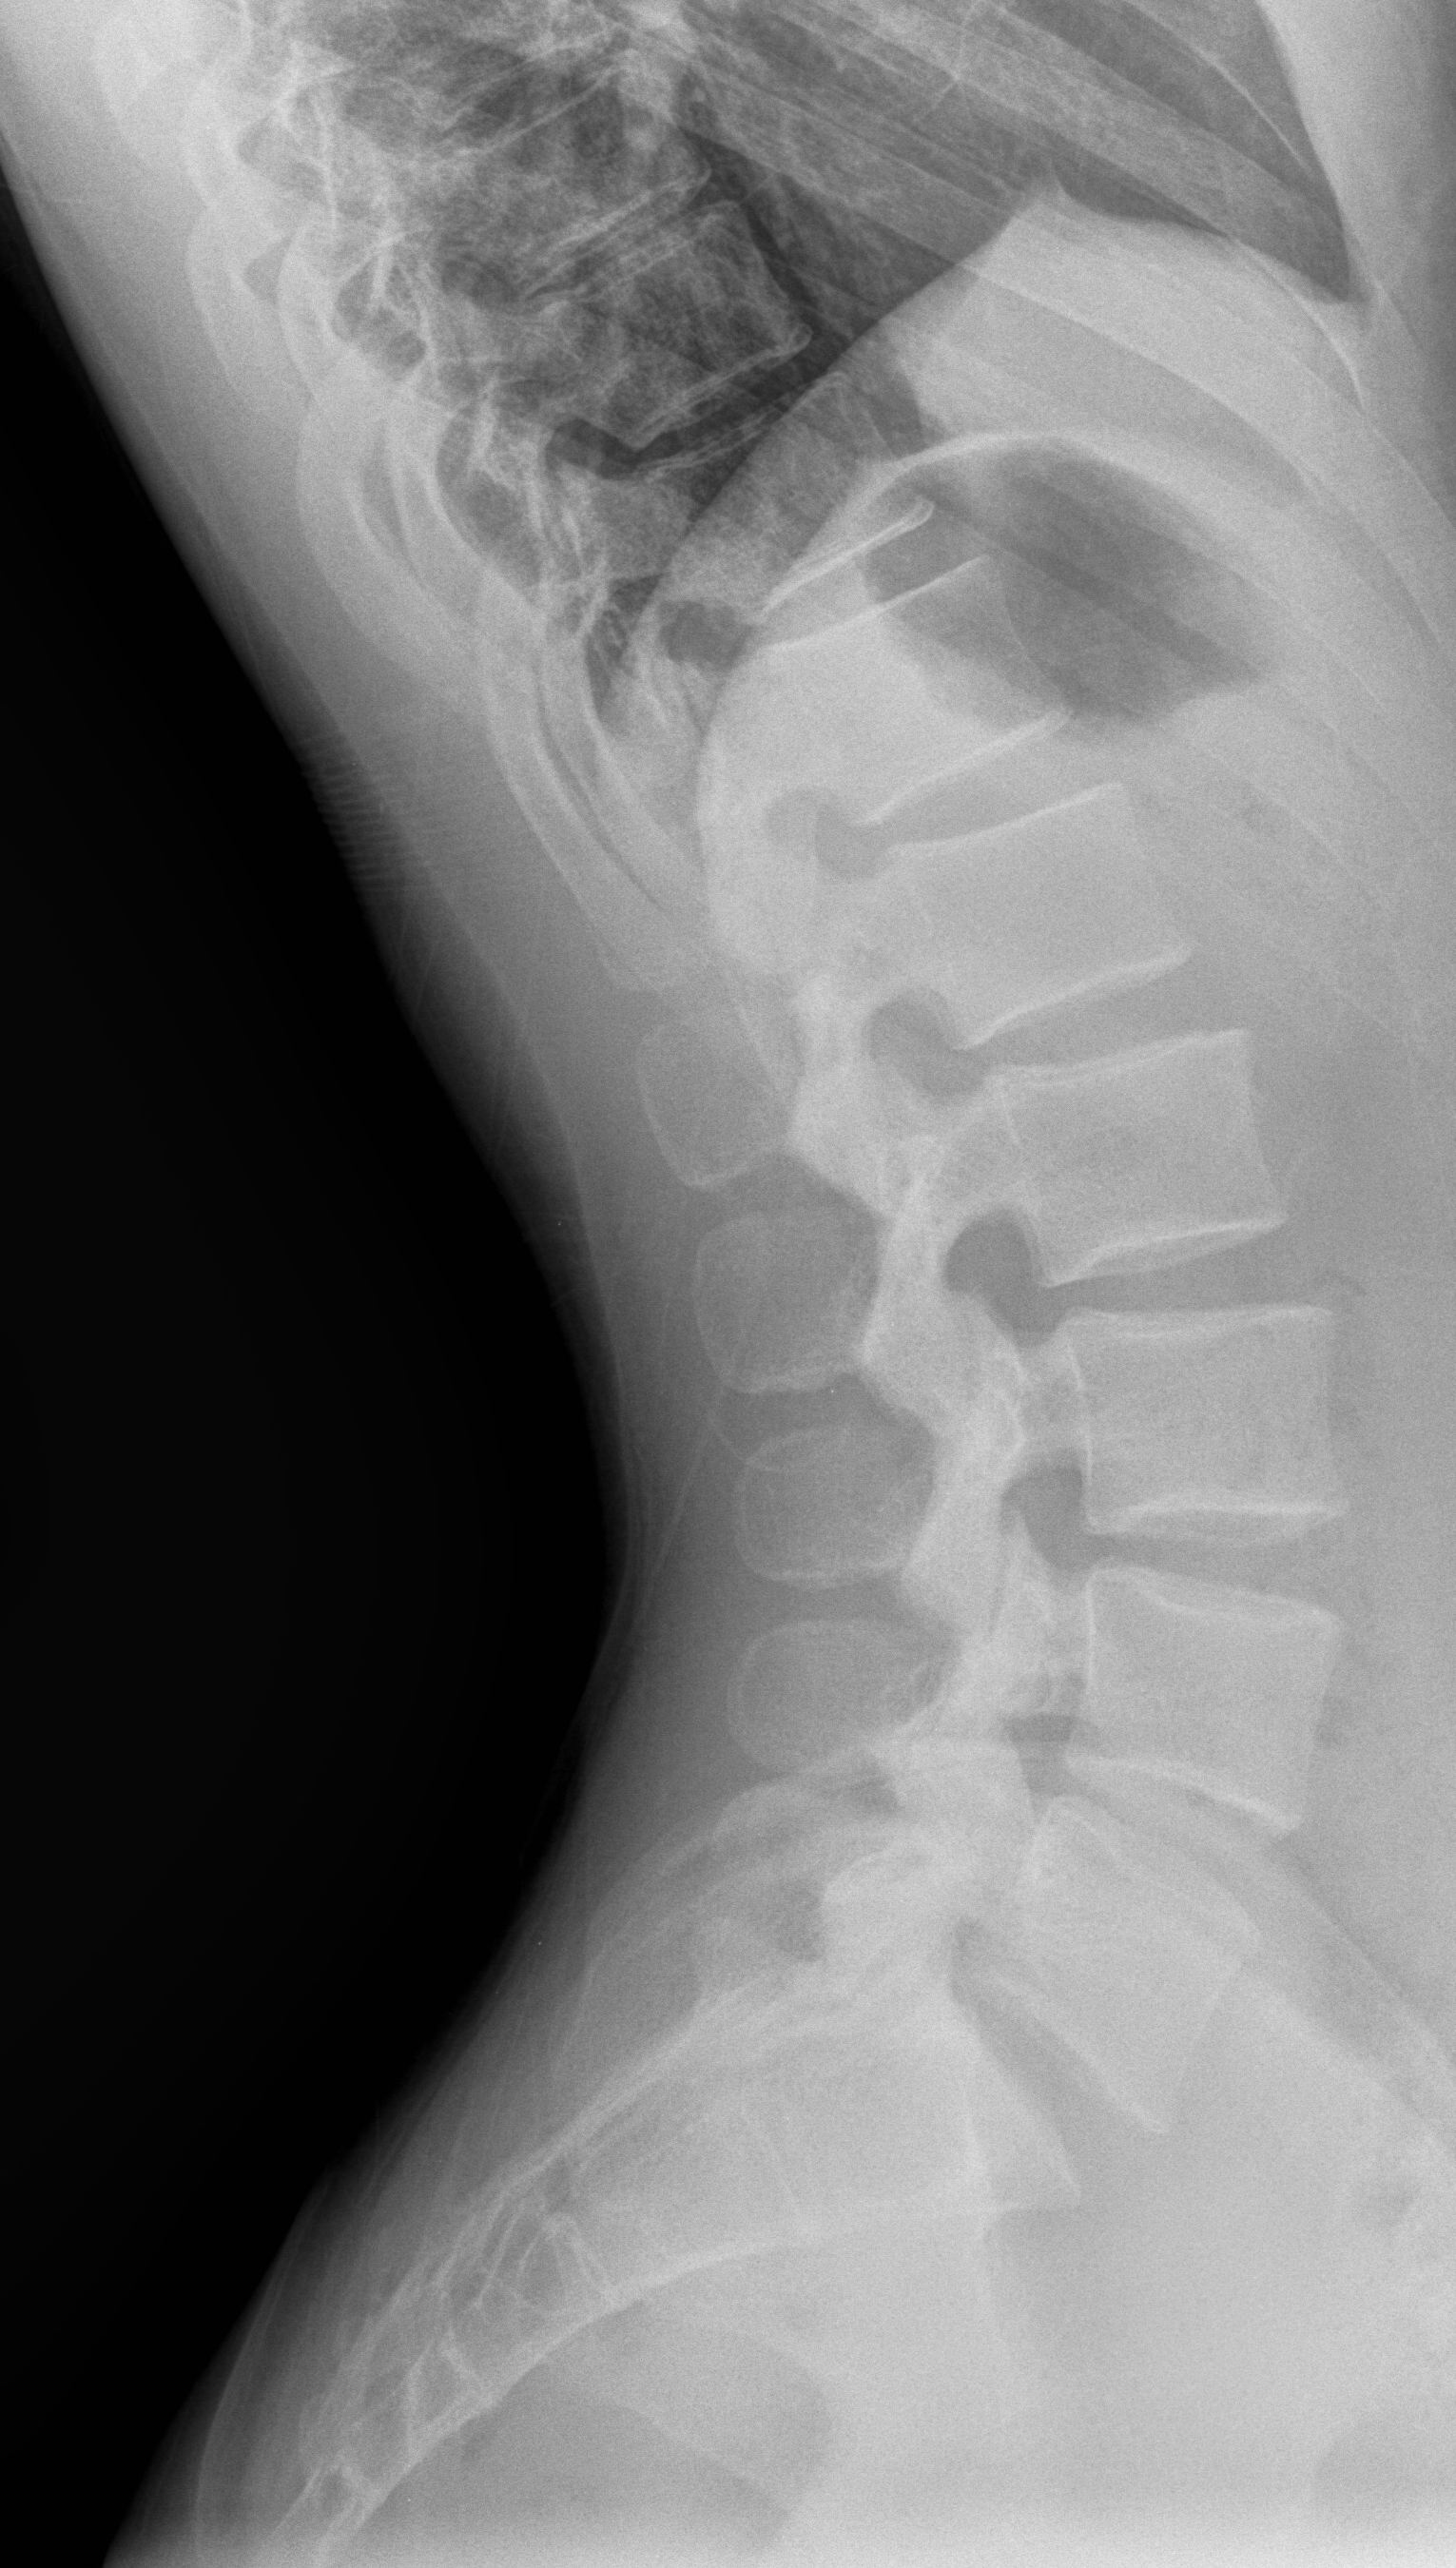
3. Flexion Lateral L-spine |
11x14 LW |
Patient in lateral position, maximum patient flexion |
CR perpendicular to iliac crest |
|
4. Extension Lateral L-spine |
11x14 LW |
Patient in lateral position, maximum patient extension |
CR perpendicular to iliac crest |
|
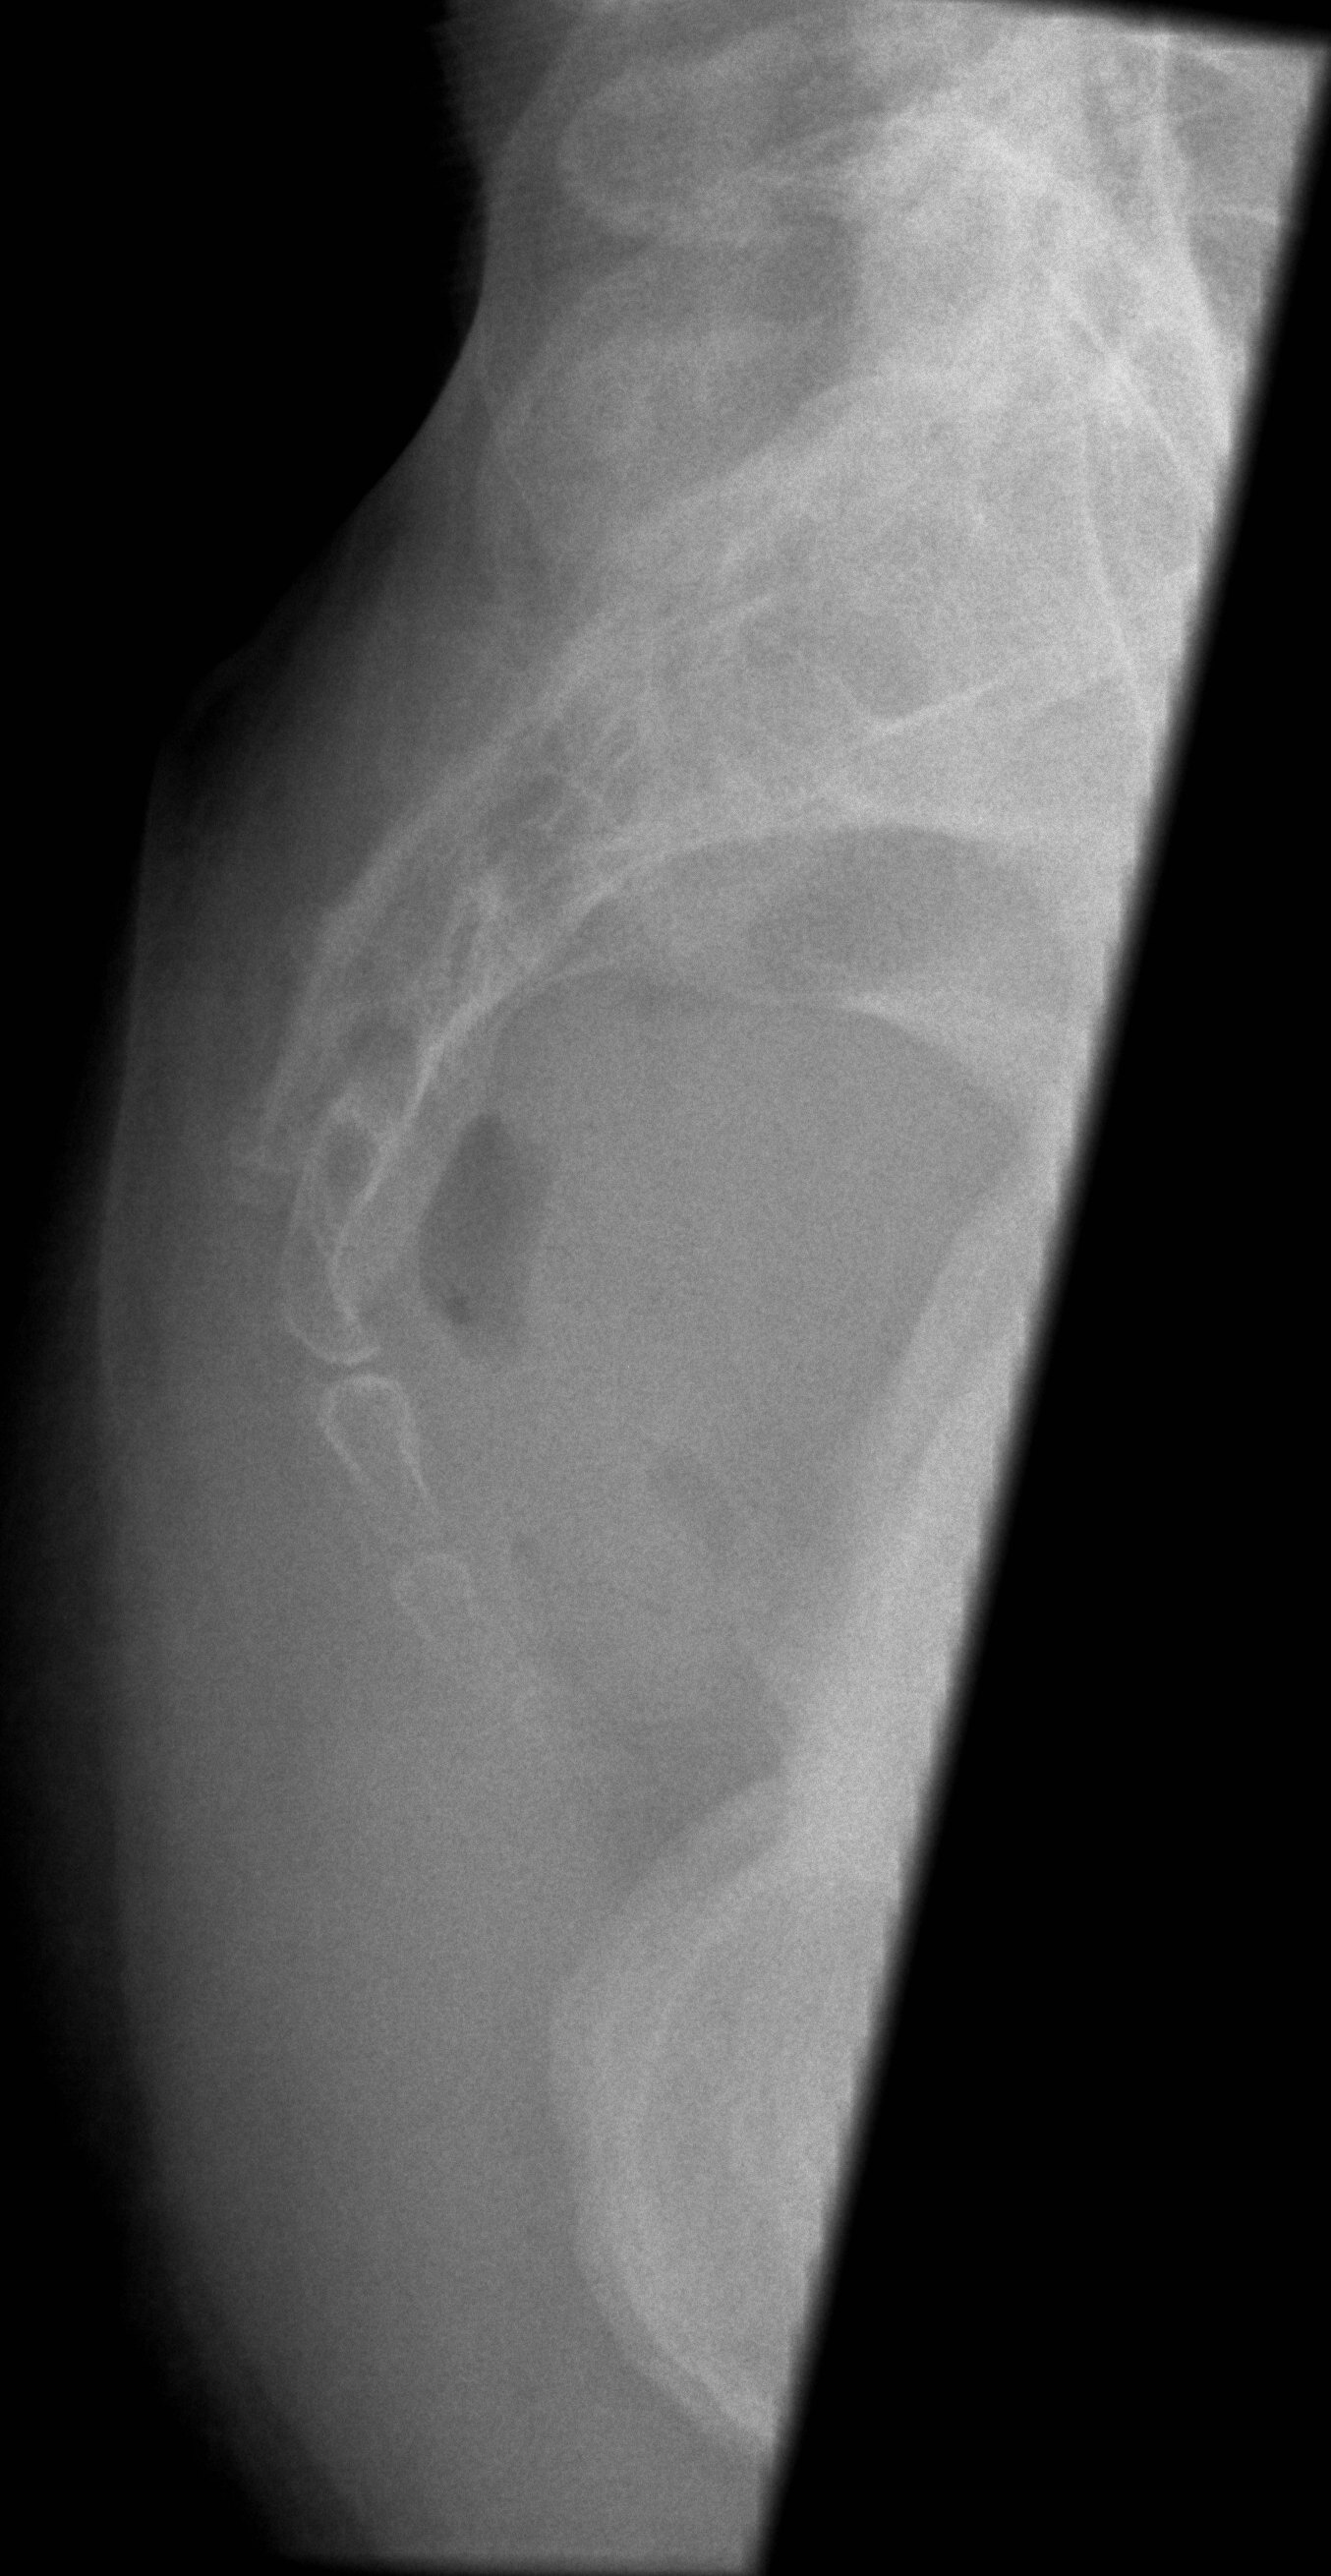
5. L5-S1 Lateral |
10x12 LW |
Patient in lateral position |
CR perpendicular to L5-S1 3cm inferior to iliac crest |
|
1. AP |
10x12 LW |
Patient supine, hips and knees flexed |
CR angled 20E cephalic to MSP midway between ASIS and symphysis pubis |
|
2. Lateral |
10x12 LW |
Patient in left lateral position, knees flexed |
CR perpendicular to ASIS and mid-sacrum |
|
1. AP |
8x10 LW |
Patient supine with hips and knees flexed |
CR angled 10E caudal to 2" (5cm) superior to symphysis pubis |
|
2. Lateral |
8x10 LW |
Patient in left lateral position |
CR perpendicular to ½" (1cm) superior to coccyx tip |
|
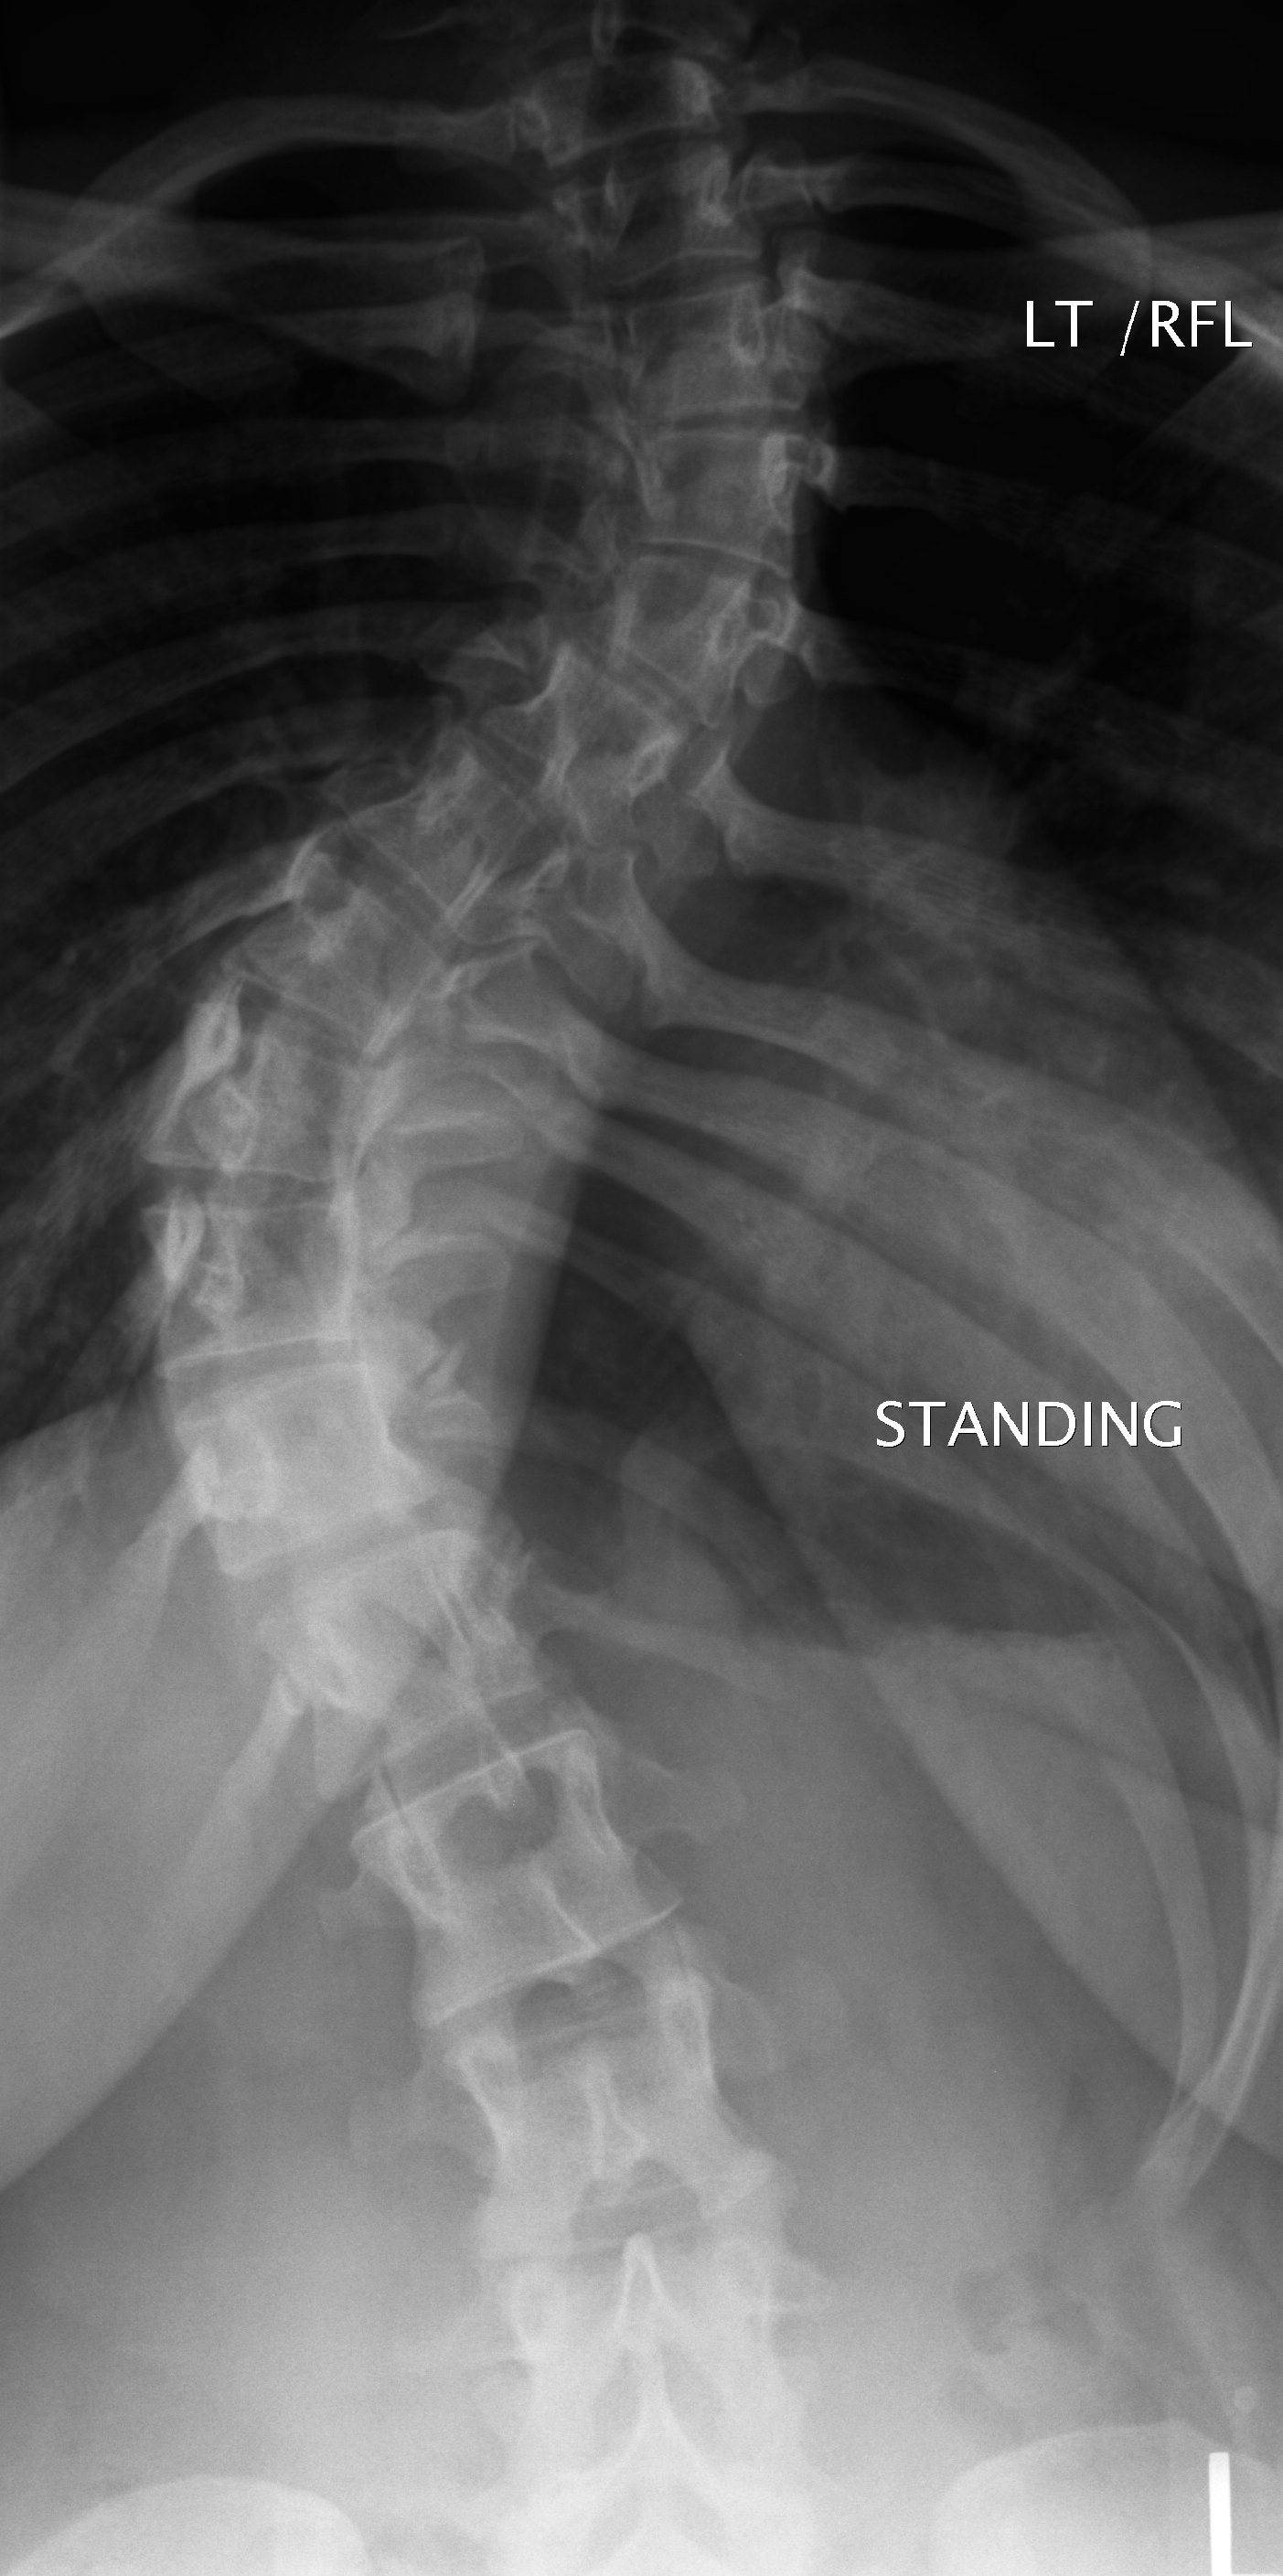
SCOLIOSIS - Use compensating filter and breast shields when possible, refer to patent's personal technique reference card. Include C7-S1. |
|||
|
1. PA (Use 72" SID) |
14x36 LW |
Patient erect or prone |
CR perpendicular to include C7-S1 on film |
|
2. Lateral (Use 72" SID) |
14x36 LW |
Patient in left lateral position, elevate both arms to right angles to trunk |
CR perpendicular to include C7-S1 on film |
|
3. AP best bend, right |
14x36 LW |
Patient supine or upright with maximum spine flexion laterally to the right |
CR perpendicular to include C7-S1 |
|
4. AP best bend, left |
14x36 LW |
Patient supine or upright with maximum spine flexion laterally to the left |
CR perpendicular to include C7-S1 |